“How do I felt body parts onto my needle felted animal? How can I make them stay secure and not easily pull off?”
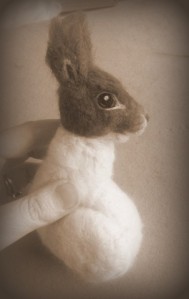
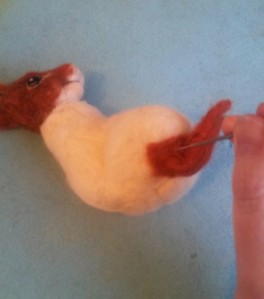
Today I want to show you some more basics of needle felting animals. In my other tutorials you will see how to make various animal parts e.g a badger head, bunny ears as well as the various stages of felting a full guinea pig, bunny etc. However one of my followers commented that it would be good to do a tutorial showing how to felt the head and limbs onto your animal. It is not so easy to demonstrate with photos but I have done my best by using the shots I took along the way when sculpting Chestnut; the little red squirrel I made.
There are many ways of felting one piece to another so you may have already found the best way for you. The method I will show you is just one way and was the easiest for my squirrel at the time. 🙂
Please note that the following tutorial will assume you know a little bit about needle felting already. See basics here.
Adding the head
At this point I have felted the head more or less to completion. The body has its shape but no fur yet…
I have sometimes only got as far as the shape of the head when joining it to the body but I quite often find that it’s the head of an animal that gives its unique soulful character (especially once it has eyes).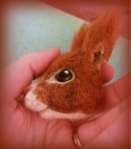
I often don’t decide on exactly how the body will look until I have the head sorted. Being delighted by the cute nature of the face (as is what happened with Chestnut) often inspires me to continue on with the rest of the body.
1) To join two felted objects together leave enough loose fibre on at least one of the objects where the join will be so that it can be felted into the other.
It is a lot harder and perhaps impossible to join them if the wool is felted too firmly and the fibres cannot mix and bind with the fibres on the other object when you stab with your needle.
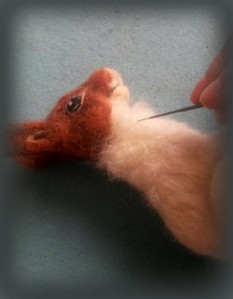
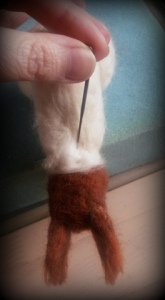
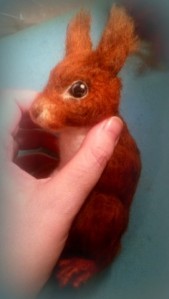
As you can see, the neck at the top of Chestnut’s torso has been left loose and soft. The base of the head is soft to medium felted rather than firm to allow plenty of further stabbing..
2) Fluff the fibres up a bit before putting the head into the position you would like it to be.
3) Stab at the wool from a 45 degree angle under the chin of the animal. In effect what you are doing is poking the loose wool from the neck into the head. Insert the needle as deep as it can go and on all sides of the neck. This helps to anchor the head to the body. Remember (particularly at this stage when the head will just fall off the body if you try any other way) to lay your animal on a felting pad/brush and stab away from your fingers!
To join body parts I use a medium width barbed needle (I find these are stronger than the finer ones for this purpose but do try out various ones to see what you are comfortable with and what works best for the wool and size of animal you are felting). If possible use one with many barbs along the length to help bind the fibres and as the needle will be inserted quite deep.
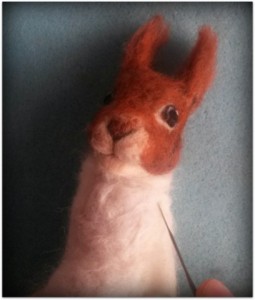
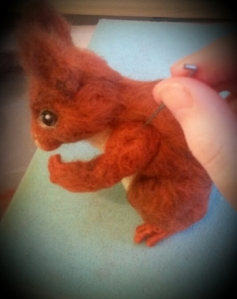
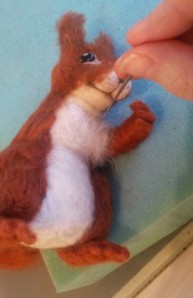
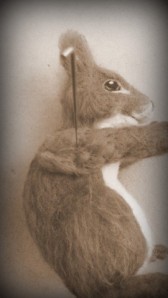
4) Once it feels like the wool fibres have attached so much so that the head no longer topples away, you can try felting at other angles at various depths. Here I laid Chestnut’s head over the edge of the felting pad as it made it easier to get the angle I wanted and also prevented me from squishing her carefully felted nose 🙂
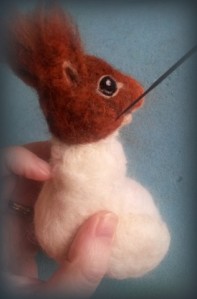
5) Carefully stab a few times from the top of the head to ensure it is firmly secure. NB this is easier if the head has no fur yet but if you have (like I have) you just have to take care not to leave stab marks in the face (as you are using a slightly thicker needle).
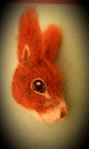
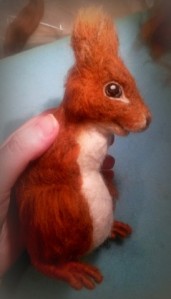
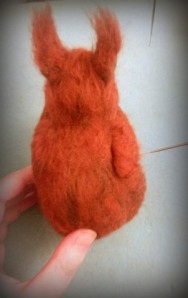
…and there we go, head on …looking more squirrel-like although much like a shawn sheep at the moment with lack of fur 🙂
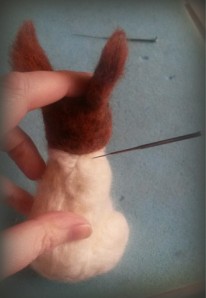
Adding limbs
This is achieved in much the same way as joining the head in that you need to stab deeply in all directions to ensure all the fibres bind to each other.
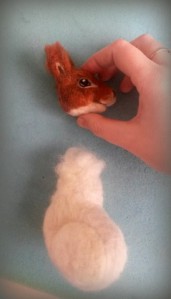
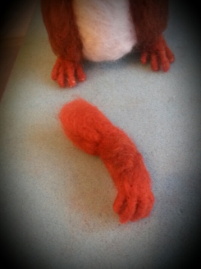
For Chestnut I started with the hind legs so that it would be easier to see how her forelegs would be positioned once she was sat upright. Note the thigh part of the leg for my squirrel has already been sculpted as part of her body shape which ends up in a sitting pose. So when I refer to adding the hind leg, it is in fact the section below her thigh bone.
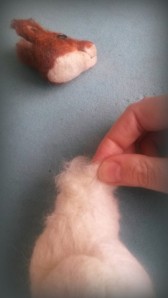
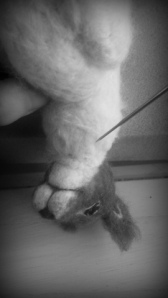
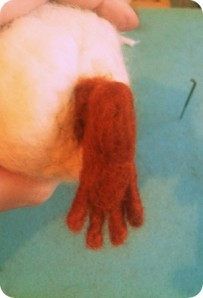
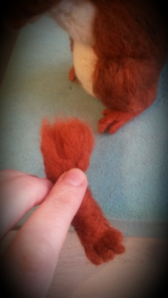
1) Needle felt each leg onto the body by stabbing the wool at the fluffed up end of the leg into the body.
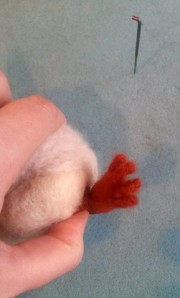
For Chestnut I had formed her feet using wool wrapped and felted over wire (see my tutorial on tiny feet and toes here) so I had to take extra care not to break my needle by hitting the wire when stabbing.
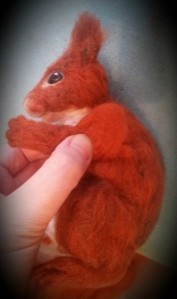
2) Continue at all angles for both legs until firmly and securely in position.
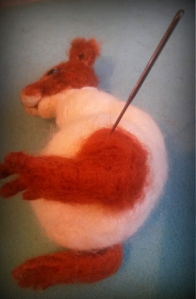

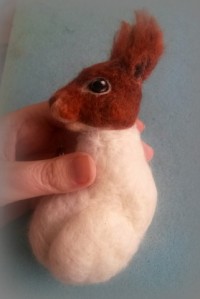
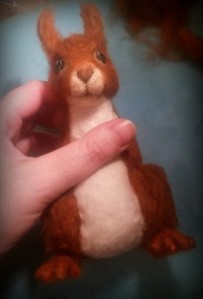
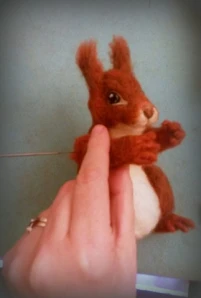
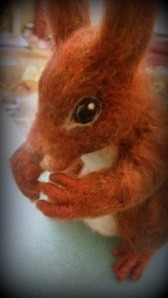
Once in place I added more wool round the joins as fur and then decided to felt some of Chestnut’s back-fur too. Aw she is looking very happy and mischievous already!
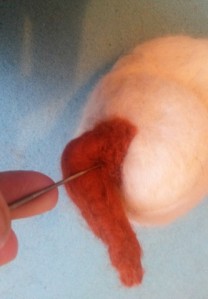
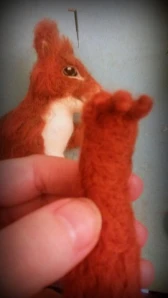
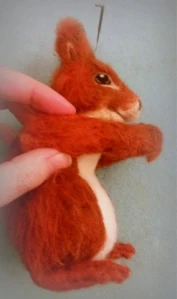
3) Then do the same for the forelegs.
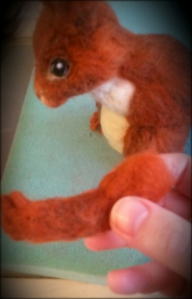
As the shoulder part needs to be attached along the side of the torso it is not sufficient to merely stab from the outer side at the shoulder blade to keep the limb in place.
To felt at an angle under the ‘armpit’ and also to ensure the leg cannot pull away at the join, stuff some extra(fluffed up) wool into the join and stab it securely into place (not too deep to push the lighter coloured wool through to the other side of the shoulder).
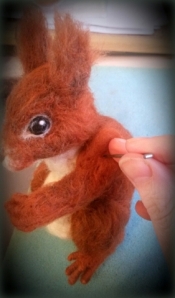
Tip: To get the correct positioning and symmetry when adding the second foreleg(as quite often you will want to play around with this until you get it right) you may find it easier to stab the second leg into place only a tiny bit at first; enough to hold the leg in place but not so much that you can’t alter the position if you need to. You can then step away to view your animal from a distance, then adjust until happy with it.
….then secure into place.

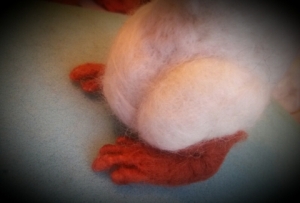
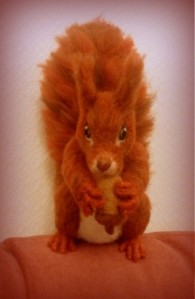
Once all limbs are joined onto your animal you can then felt over the joins with fur. You wouldn’t even know your animal started out as separate appendages.
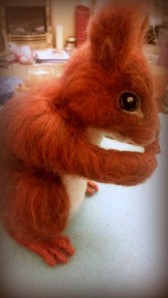
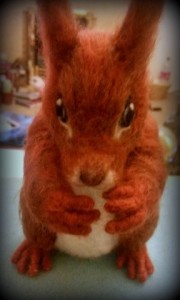
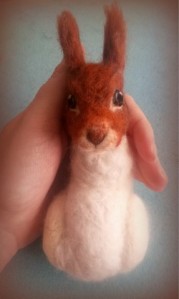
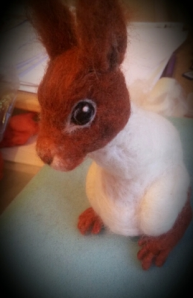
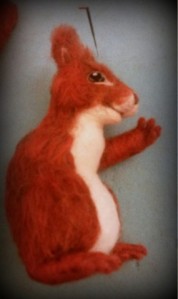
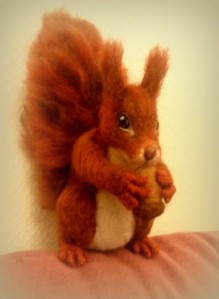
Here is Chestnut as she looks now! 🙂


Bedankt voor je duidelijke uitleg veel nieuwe tips geleerd.
LikeLiked by 1 person
Thank you you for a great tutorial.Your squirrel looks great.
LikeLike
Thank you Tracy. Did you make a squirrel yourself?
LikeLike
Thank you for the excellent tutorial, Amanda. Your red squirrel is lovely and the detailed explanation with good photos along the way gives me hope I can learn from you.
Please keep showing your beautiful creations.
Kind regards
Jane
LikeLike
Thankyou great tutorials I’m a newbie to this craft and have found this excellent.
LikeLike
Hi Ann. Such a great art form isn’t it. Glad you find the tutorials helpful. 🙂
LikeLike
Your tutorials are first rate – I’m in awe! If you haven’t written one already, a book would be terrific ! The photos are so well done too. I am very grateful for your kind spirited gift of this information.
LikeLike
Thank you so much for generously sharing your expertise and posting these clear tutorials with photographs. Your animals/creatures are absolutely AMAZING!! The attention to detail really sets your creations apart! My son attends a Waldorf elementary school and I got “volunteered” to create a polar bear for a school raffle. I’ve never needle felted in 3 dimensions before, so I’m a bit panicked and will be studying your blog thoroughly!
LikeLike
So pleased to find such an informative tutorial on this subject! Thank you. I want to try felting and this help makes it less daunting. Wonderful workmanship!
LikeLike
Glad to help Ginny. It is a bit daunting when you first start but we all have to start somewhere and you will be pleasantly surprised how much you probably know already and can do. All the best on your project when you get started 🙂 let me know how it goes.
LikeLike
genial ….muy bien explicado
LikeLike
Great tips and beautiful animals.
LikeLike
Thanks very much Edwina
LikeLike
Very well done tutorial with clear text and photos. Also, your squirrel is so darling and well done.
LikeLike
Thank you Sheryl. Do let me know if there is anything that could be clearer. I really value the feedback. 🙂
LikeLike
“Stab away from your fingers” – it doesn’t matter how long I’ve been needle felting, I’ll never get this part right 🙂
LikeLike
Haha Leonor I know. Kind of a reminder to myself too 🙂
LikeLike
Someone put a link to your tutorial and I am so happy that I found your blog. I just tried my first thing, a simple bird that I messed up, but it was fun trying. I really wanted to try a rabbit, so I am going to try your tutorial and hopefully mine will come out good enough to know it is a rabbit, lol. I am doing it for fun and would like to make them for friends when and if I get good enough. Thank you for the wonderful tutorials.
Debbie
LikeLike
Hi Debbie, just looked at your bird on your blog. It doesn’t look messed up at all, I think it is really sweet and you are way past me – I haven’t tried a bird yet. As you say just have lots of fun, it is supposed to relax not stress you out 🙂 I am sure as you continue you will gain more confidence as you go. You learn as you go as that is what happened to me. Let me know how the rabbit turns out. Hope the tutorials help. Take care x
LikeLike