
Thinking of needle felting an owl and need some ideas on where to start? Not sure how to make a feather effect from wool?
This was one of my most challenging project , but also extremely enjoyable and rewarding! Owls are beautiful birds with so much character and you can really express this in your sculpture, so I encourage you to get stabbing and have a go!
So why did I choose to make an owl? Well to be honest an owl was on my to do list for ages as I am a big fan of owls but it just so happened that the Manager at ‘Found’ (my favourite charity shop in Harrow which supports the needs of the local community) asked me if I could make an owl to overlook their new library. Of course I flew at the chance!!
But why a tawny owl? I noticed a number of gorgeous needle felted barn owls out there (which I will likely make at some point) but hardly any tawny owls and for me the tawny is an iconic woodland owl from the story books (remember the owls in Winnie the Pooh and The animals of Farthing wood?) This owl looks very wise but has the cutest expression, plump rounded body when its feathers are fluffed up and I just love the medley of browns and creams in its colouring! Such an owl would be perfect at the library!
Wow from photos of real tawny owls they look so detailed – where do I begin? Yes it can look daunting when you first look at the feathered detail. Even if you felted a single feather every day for the next year you would probably never finish it so the idea is to show detail with lots of layers but still keep it fairly simple. It will take some hours and this is probably not a project for you to start with if you have no felting experience at all but if you do want a challenge then go for it!
By making one section at a time – starting from the core wool base shape and then adding facial features, then tummy feathers, wings, then tail, then head feathers and talons to finish- you too can sculpt an owl of your very own.
As with most of my creations I took some photos along the way to show you the various stages and a few techniques to give you that inspiration you need. Please do contact me if you are unsure of how I did something! Also you may find my other tutorials useful.
What will I need?
- Somewhere to work- most of the time this is indoors for me but on the odd occasion I manage to work outside in my garden 🙂 just make sure your back is supported!
- Foam pad /felting brush/wool pad (so not to stab yourself and to provide a firm base to work on)
- Barbed needles of various sizes; thicker for initial shaping and finer for detail (I buy from Heidifeathers who sell a wide range of good quality needles)
- A needle holder; this is optional but for making basic shapes it saves time to use 2 or 3 needles at the same time. In the pictures you will see I used the 3 needle holder pen by Clover -one of my favourite tools!
- Wool to felt with; I love using natural undyed wool, either a corriedale, Norwegian or Jacob carded wool or tops to make the core of my owl as I find this type of wool felts quickly and ends up nice and firm. I then used merino wools over the top for feathers as they are soft and come in some lovely colours. This pack of 6 ‘beautiful browns‘ is perfect for this project.
- Small pair of scissors to cut lengths of wool for feather making, plus also to trim any loose strands to finish off. I use my old faithful curved nail scissors but you could also buy some cute stork shaped embroidery ones.
- Pipe cleaners (I used two 30cm length pipe cleaners – it’s worth buying a large pack to use in other future projects) on which to wrap wool over for the talons
- A small pair of pliers to twist wire ‘claws’ into shape. These are great quality long lasting ones at a low price.
- Photos or art work of tawny owls, some time, some love and lots of imagination!!
I have included links for where to source needle felting tools and materials. Please see Links disclaimer in the right side panel for more details.
1) Building the core; head and abdomen
As with most projects where I don’t use a wire armature, the owl will start off as basic shapes made from core wool;

- Start off by needle felting two basic shapes to a medium firm consistency using your thicker needles(use the clover pen tool if you find it easier); you will need one round ball (with a flat side for the face) and an oval shape (as in above photo) for the abdomen. Join these two shapes together. If needle felting is new to you, you may wish to look at my other tutorials for some felting basics and attaching body parts.
- Sculpt a typical owl heart shape face by adding small pieces of wool and concentrate your stabbing to hollow out two disc shaped cheeks within which the eyes will go. Emphasise the brow line and the centre where its beak will go and form a ridge around the cheeks.
- Add more wool to the abdomen to enhance its cute rounded owl chest.

2) Facial features
Refer to the photos and annotated picture below…


- For the beak; roll a small piece of merino wool in your palms and felt firmly on your foam pad/brush leaving one end softer (soft end is to attach the beak to the face) and the other end felted to a point (owls have a curved beak). Attach the beak to the face.(NB read this whole tutorial before starting – you will see what I mean later on)
- Next add two blobs of dark wool as a guide to where the eyes will be located (the eyes will be finished off once the rest of the face is finished.
- Add some dark brown wool to follow the ridge around the cheeks.
- Layer some beautiful warm and light browns to form the owl’s cheeks; each piece radiates out from the eyes. the same colours are also used for the forehead but with some darker wool overlaying it.
- For the bristles on the inside of the eye, around the beak and up to the brow; use tiny cut pieces of cream/white wool fixed well at the base.
- Felt the eyes (see tutorial about eyes here); in the photos above you can see the right eye is complete and the left is under construction 🙂 I made a dark brown iris with black pupil and white dot to mimic where light would reflect. The eyes are lined with a cream wool and I stabbed an area above the eye to shape the eye lids.
3) Building up the tummy feathers
For the basics of how to add longer lengths of wool to your sculpture I suggest you first take a look at my tutorial on how to felt long fur here, as although there will be some variation in making feathers, I will be using the same techniques throughout to ensure the wool is firmly secure.
- With your scissors cut strips of wool in preparation – I used a variety of creams and browns.

- Start from the bottom and work your way up in layers, fixing each piece securely.
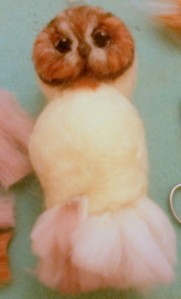


- The difference between an animal fur look (like with my badger, fox or squirrel) and a feathery look for your owl is that for the feathery look each piece should be defined and not overly blended into the neighbouring pieces. To achieve this the base of each section fixed to the core should be narrower, don’t line the pieces up in a straight line but stagger them randomly and for some sections cut the ends at an angle or in a ‘V’ shape!
- The main overall look is cream for the bottom half and rich warm browns (matching the cheeks) for the top half. Then add some more cream at the top near the neck.


- Add some thin strips of dark brown for extra flecks to finish this section off.


” OH the beak has changed!!” Yes I decided that a lighter and slightly longer beak would look better! One of the wonders of needle felting is that you can change things part way through- careful though as chopping off parts is not the best thing!
I also added some white to define the forehead.
4) Wing feathers
I chose to felt the wings for my owl in a fixed closed position with feathers laying close to the body rather than the wings being spread open. So I looked at lots of pictures of wing anatomy to see which feathers would show and how they should be positioned. I have included an annotated picture of my owl from the side to illustrate the various wing parts we will tackle next. To make layering easier we will start with the primary, then do the secondary, and finish off with an overlay of feathery wing coverts.

It is up to you how many of the feathers you make; I made 4 primary and 5 secondary feathers for each wing.
a) Primary feathers
- Flat felt each piece into shape. I used the clover pen tool for faster felting. To keep straight edges I traced an outline onto the wool with two needles in my clover pen and then folded the wool over to the middle and felted well on both sides. Make sure you felt at an angle along the edges to keep them smooth and well shaped. My tutorial on making bunny ears (second part of step 6) may help get this technique right.
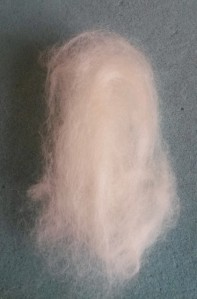


- Make each piece roughly the same width but gradually getting longer in length. You can see the longest and shortest together in this picture below. The ends should taper to a curve. The fibres at the other end should remain fluffy and loose to be fixed to your owl’s body later on.

- Ensure the pieces match the sizes of the pieces on the opposite wing. To help do this lay your piece on top of the wool and score around the edge with two needles in the clover pen.
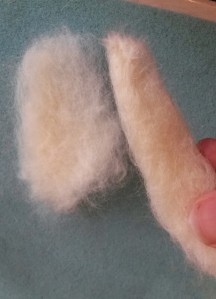

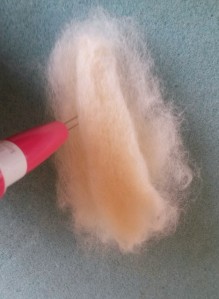

- Remove the piece and you will see an outline. Again fold the edges over and felt until you get a rough replica..


- When attaching these feathers later on they will end up positioned a bit like a concertina fan; you can test how they will look together at this point (see right photo)

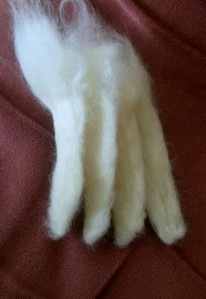
- On each feather felt alternate layers of the light and dark browns starting from the tip


- Define a central line along the length of each feather by turning the feather over and felting deeply along the centre so that the core wool goes through to the other side. Then needle it down flat.


b) Secondary feathers
- Make 5 pieces for each wing, each getting slightly wider and longer each time. These pieces should be shorter than the primary feathers (roughly half the length). This time make the ends more rounded rather than tapering to a point.
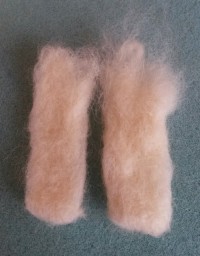


One edge will be felted to the next feather with smallest at the top (see left photo).
You can see that they look quite big compared to your owl at this stage. Once on the owl though they will felt into position (fluffy ends will felt into the body) and you will want the owl to be 3D not a flattened piece so the wings will protrude outwards.

- Felt some colour on to the edge that will be seen (I am demonstrating how this is done for the left wing). I used a base of the lighter brown and added band of darker brown. If you have time you can felt layers like you did with the primary feathers ((in hind sight I would have preferred to have done this as the finished effect looks more feather-like but decided to try out an alternative method).

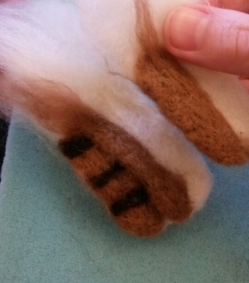
- Felt the pieces together by stabbing all the way along the edge.
- Continue to add as much detail into the feathers as you like; I added a tiny strip of cream underneath the dark brown bands and a line down the centre of the top feather.
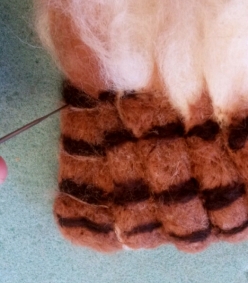

Here you can see the feathers all layed out for what will be the right wing.

- Trim the fluffy ends so they are of equal length, then turn over and pull down some of the strands so they stand out at the back of the feathers ready to felt to your owl.


It doesn’t matter about how messy the back of the feathers ends up as you won’t see this side once fixed to the owl. 🙂
c) Attaching the primary and secondary feathers
- Starting with the primary feathers, fix each feather at the base (longest at the outer edge nearest to tummy, sshortest toward what would be the back bone). Attach each feather over the previous as per the photo earlier that showed the feathers as a concertina fan.
- Then attach the secondary feather section over the primary feathers where the shoulder blade would be.
- For help with attaching body parts see my tutorial here.

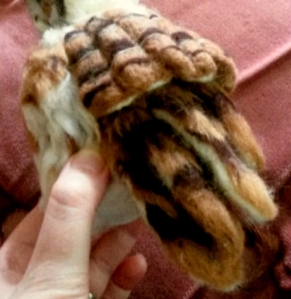


- Attach the right wing in the same way using the left as a guide to ensure you fix the feathers symmetrically (mirroring the opposite side)
d) Wing Coverts
You could now felt even more individual feathers but to give the illusion of small feathers I simply added more tufts of wool much like with the tummy feathers.
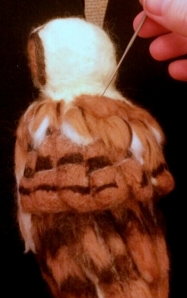
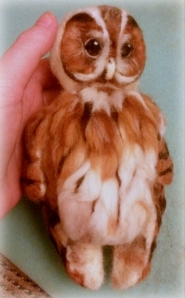
- Cut and fix small pieces starting from the bottom (just at the top of the secondary feathers) and working in layers towards the neck. The bottom row should overhang the secondary feathers. Try to keep the overall shape as a ‘V’. I also added a few random white tufts which you will see if you look at pictures of real tawny owls.
- Add a fine strip of dark brown wool along the centre of each of brown wool pieces.



5) Tail
- Felt a larger feather for the tail in much the same way as you layered the colours for the primary feathers. The tail should be roughly twice the width of the primary feathers but with a rounded end.
- Optional – add more light brown over the top of the banded pattern to make a slightly mottled effect.
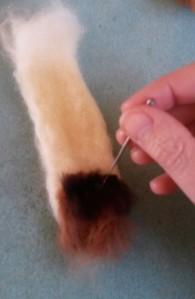

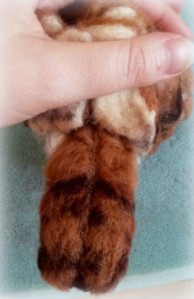
- Attach the tail firmly to the owl, then add some light brown wool around the base so you can’t see any of the core wool showing.
- You may find you need to squeeze the two wings into the centre to mould to the shape you need them to be in. .



6) Head Feathers
- Alternating various shades of light browns, layer tiny pieces of wool from the back of the head up towards the face.
- Use the annotated picture as a guide- the feathers should follow the red lines which radiate from the back of the head to the cheek ridges. I found that it helped to felt the centre line first.

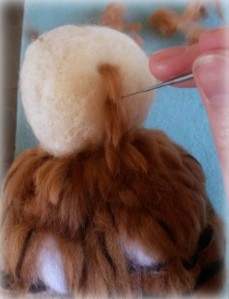
- To give a feather look – twizzle the ends with your fingers as you go.


- Add thin flecks of dark brown wool randomly to finish as seen above (bottom right) and below.


Take a moment to say ‘squee!!’ Well done you are almost there!


7) Talons
Owls have four toes on each foot and when standing on a flat surface three will usually be at the front and one at the back but when clinging onto a branch they have the amazing ability for one toe to move to the back. So you will need to decide on how your owl will sit. My owl is to be sat perched on some wood with its tail and primary feathers hanging down so I will position the toes with two at the front and two at the back for each foot.
There are many ways to make talons but I will show how to make simple talons from just two cotton coated pipe-cleaners (one for each foot) and wool. Bare wire (kept blunt – don’t worry) will form the claws.
Fold a pipe-cleaner in half then in half again in quarters. The bends will serve as a guide to where the next fold will take place.


Straighten out the piece slightly (you will still see the bends from where you folded) Starting at one end, fold the end up to your first quarter bend. Once folded twist the segment along its length.


Then pull the remaining pipe-cleaner at the next bend towards your previous quarter. Think of it a bit like how you may make a flower with four petals.. twisting as you go…
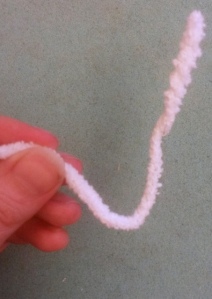
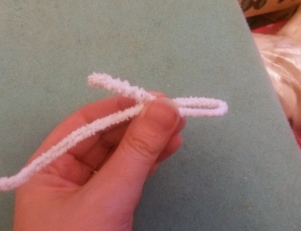
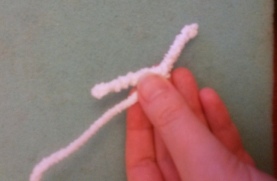
Continue with your other quarters, bending towards the middle…and twisting the middle too to make a crisscross shape (looks like a kiss?or perhaps an x chromosome? 🙂 )


Then do the other foot in the same way.


If you wanted 3 toes at the front you can easily make this shape at this stage too.

You can keep the toes as they are or define the claws. To do this cut the bend on each toe so that the ends become two pieces. Then pluck away the pipe cleaner material to reveal bare wire. Mind your fingers as these can be sharp!
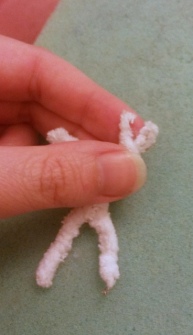

Then using pliers, twist the two wires together and bend the end(so not sharp to touch)


This will take a little while, but do this on all toes. Trim the cotton on the pipe-cleaners to make a nice shape. You can see they are now looking more like owl talons..


For skinny toes you could leave these as they are but for this owl I wanted to pad them out a bit.
Take a thin length of merino wool and wrap from the middle of each the foot out to each toe and back to the center again. You may need several of these lengths. Watch that your wool doesn’t get stuck over the claw. Each toe should taper to a thinner end near to the claw and be bulkier in the middle of the toe and towards the main foot. Achieve this by wrapping only once near to the claw and twice round for the rest of the toe. The tighter you wrap the less felting will be needed.


Secure the wool into place all over and sculpt into shape with a fine needle taking care not to break the needle by hitting the wire. Once felted, bend the foot into shape.


Add a slightly darker shade of wool (I used a mink colour) to the underneath of the foot.

Scrunch a small handful of wool and felt onto the top of each foot (this will be used to anchor the foot onto the owl’s body. Then thicken up the foot around this with some more wool to make the foot look fluffy.


Use a thicker stronger needle to fix your feet to your owl. Felt deep into the owl at all angles until well secure.
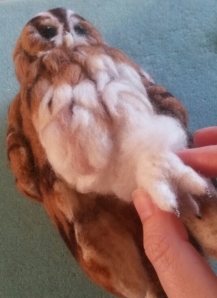

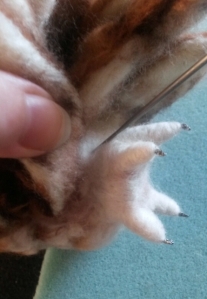

To finish off I added a few layers of wool feathers in the cream and mink round the feet 🙂


After a bit of tidying up and a trip to the park…….:-)
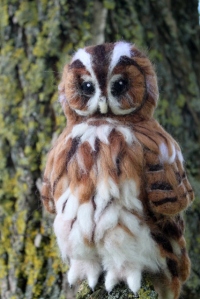

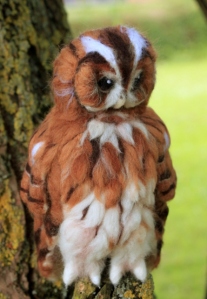
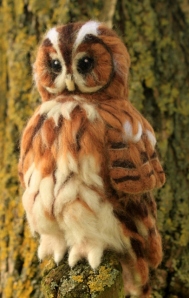


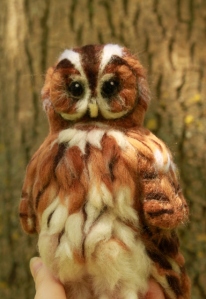
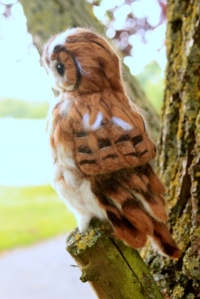
It was so lovely to see this little owl meet his new owner in his forever home at the charity shop library!!
Did you find this tutorial helpful? What would you like to learn about next? Please leave comments. Why not post a photo of your own creations?
For more tutorials like this please visit my Tutorials, tips and ideas page.
Don’t ever miss out on my latest tutorials! Insert your email address and click the ‘Follow’ button on the right hand panel to receive notifications of when the next post is up..:-)
Don’t have time to make one but would love a one of a kind needle felted animal by Fit to be loved for yourself or for that special someone? Visit my Etsy shop today to see my latest creations. Or like my facebook page to see what I am making next.


Gorgeous owl – and thanks for generously sharing your techniques!
LikeLike
Thanks Sally. I hope you find it useful.
LikeLike
Pingback: Sowiarnia się rozrasta - mały puszczyk! :D - Speckled Fawn DIY, blog o dekorowaniu wnętrz, ogrodach i rękodziele. Pomysły na DIY, zrób to sam, filcowanie.
Nothing else to say but just beautiful!
LikeLike
Love your tutorial, thank you so much! I am new at this, and needed this help, also, owls are my favorite! thanks again
LikeLike
GREAT!!!!
I never will do that, but I was curious how it could be done, so I´m really thanking you for sharing this detailed description.
How long did it take you to do it?
LikeLike
Thanks. Let’s just say many hours. To keep it being fun I don’t count.
LikeLike
Amazing tutorial, so informative and detailed. Thank you.
LikeLike
Thanks Mary
LikeLike
Lovely tutorial, thanks
LikeLike
Thanks Heather
LikeLike
Great job explaining each step. I just started needle felting … I will save this tutorial for when I am good enough to try!!!! Thank you!!!
LikeLike
Thanks Linda. Let me know how it goes when you make an owl. 😁
LikeLike
Oh my gosh! This is just amazing! I’m a huge owl lover, I have a large collection of them. I’ve always wanted to learn how to felt, but never thought felting could produce something so beautiful. Thank you for sharing!
LikeLike
Squee doesn’t even cover it…this is incredibly beautiful!!! And so helpful. Wow. I’m going to humbly try this. Sarah in Toronto, ON
LikeLike
Aw thank you Sarah. So lovely of you to say. Yes have a stab at it. I am sure you will enjoy it. Let me know how it goes and I am very happy to help in any way I can. 🙂
LikeLike
OMG, what beautiful work, you make it look so easy. I will have to give felting a try for sure. I would love to see more of your tutorials.
LikeLike
Thanks so much Karen. So pleased you like my tutorials. Happy to help. Let me know how it goes. I am sure you will really enjoy it. 🙂
LikeLike
I have just come across this craft and I am a mere beginner, well still waiting for my items to arrive so a very new not yet begun….I can only hope to progress to this point but right now I hardly doubt it. I love your owls… they are just beautiful… Thanks for sharing and being an inspiration.
LikeLike
ooops… @etsy yes I see.
LikeLike
truly incredible.. stick a few of these around the garden,, keep many unwanted visitors away,, so cool, I shared your link all over the wab…. Cool indeed,,,, sell on @etsy ????
LikeLike
Aw thanks so much, very kind of you. 🙂
LikeLike
Thank you for all your helpful tutorials. I have printed them and will save in a folder for further use.
LikeLike
This is amazing and I have to go through all your tutorial: Please come over and leave a comment 🙂 http://felting.craftgossip.com/2014/10/17/needle-felting-a-tawny-owl-photo-tutorial/
LikeLike
Pingback: Needle felting a Tawny Owl – photo tutorial – Felting
Amazing craftsmanship. Thank you for the inspiration.
LikeLike
Thank you Sandra.
LikeLike
Your owl is amazing!
Do you have one for sale?
If so how much as I would be very interested in having one for my collection. I have been collecting owls now for 39 years and have them from around the world.
LikeLike
Thank you Lyn. This one is a gift for my local charity shop to watch over their new reading area. I do sell my creations but all my pieces are commissioned one offs. So no one is the same. Cost depends on the detail as they take many hours to make. If interested in ordering from me please feel free to contact me via my Etsy shop.
LikeLike
Omg! This is a mega project. So much detail and wonderfully done. You’re a great artist!
LikeLike
Thank you for your feedback Wai. 🙂
LikeLike
Lovely work. Do you sell the owl?
LikeLike
Thanks Shirley. This one isn’t for sale as he will be a gift for my local charity shop to watch over their new reading room. I do sell my creations but all my pieces are commissioned one offs. If interested in ordering something from me please feel free to contact me via my Etsy shop.
LikeLike
do you sell what you make?
LikeLike
Hi Patty, Thanks for the message. I do sell my creations but all my pieces are commissioned one offs. If interested in ordering something from me please feel free to contact me via my Etsy shop.
LikeLike
I think you have outdone yourself on this one! It looks so excellent!! I also want to thank you for all the time I know you spend putting this on your blog, I also have a blog (nature sketching etc) and it’s a lot of time and work! I love needle felting but am just at the beginning, I hope to have more time after I move (to England!) to do more. Thanks!
LikeLike
Hi Mary, thank you so much for the kind comments 🙂 yes not just the needle felting itself but the tutorials too do take time. I love photographing my art though as I go along. This was my biggest tutorial so far.. should probably start writing a book lol..Wow you are moving to England? where abouts?
LikeLike
How long did it take you to make this!?
Beautiful!
LikeLike
Hi Heartfeltangoras, I tend not to time my work so that i just carry on and enjoy it. Lots of hours though as I did a bit here and there over a few weeks and I do remember spending most of my time over two weekends doing it too 🙂
LikeLike
That Is F*cking awesome!! Just WOW! You are such an artist. I would never be able to do that.
LikeLike
Thanks Veronica. A year ago I never thought I could. Have a go and persevere 🙂
LikeLike
Thank you so much for sharing your expertise in these tutorials! The owl is lovely! What a lot of work. My younger daughter loves owls so I’m thinking of taking this on as a fall project so I’ll have a very special Christmas present! Where do you buy your wool or do you dye your own? Sometimes I have trouble finding all the colors I need. Thank you again for sharing this beautiful project!
LikeLike
I sure enjoy your projects. I wish I could stick with things more. They look so waunky when I start out I usually just ditch the project. Thanks. They are inspiring.
LikeLike
Thanks Rhonda, that’s the fun of needle felting though as it could start out as one thing but then end up as something different. I think wonky is cool. Who wants a pattern copy when you can have a one of a kind special creation 🙂
LikeLike
Thank you for the lovely feedback Fairysockmother. An owl for christmas is a great idea!! I get my wool from world of wool (online) which posts out internationally. I use corriedale as a core wool then merino tops. They come in some beautiful shades. I have thought about dying wool but wouldn’t know where to start and just as easy to buy them ready dyed. Maybe one day though 🙂
LikeLike