
Are you looking for inspiration for what you can make your mum this mother’s day? this tutorial shows you how to felt a simple heart with a beautiful little flower to say how much you love her….
As this heart is actually what I have just made for my mum for Sunday I have had to ask her not to look at my blog (as she is my biggest supporter) or go on facebook until after the weekend! Sorry mum! Thankfully she is away in Norfolk until the end of the week with my dad in the caravan so enjoying the sunshine and watching the antics of squirrels feeding from their mobile bird feeder rather than being on the computer. Of course she now knows she will be getting something felted but I think she kind of expected that anyway with having a daughter addicted to needle felting! 🙂 So when you read this mum- this one is for you!!
So today I will show you (with the help of photos I took along the way) how I made a simple heart, added a flower and the word ‘mum’. Of course this is not just limited to mothers day – you could adapt it quite easily for anyone you love 🙂
So lets get started;
You will need;
- Barbed needles (plus needle holder if you have one as this holds more than one needle to save time when felting the heart)- use a few different sizes, thicker for main shapes, finer for details
- Foam pad/ brush to felt onto (and prevent stabbing your knees)
- Medium to large sized heart-shaped pastry/cookie cutter (I bought a cheap set from my local pound store with various sizes for future projects)
- Wool roving/tops in the colours of your choice (I used soft merino wool from World of wool)
- Beads/buttons/wool/threads/anything else you choose to decorate your piece
- Needle and thread for attaching beads/buttons
- Small scissors
- Lots of love and imagination…and only a few hours of time!
Felting the heart
This is really simple to do so definitely one for beginners if you haven’t tried needle felting before.
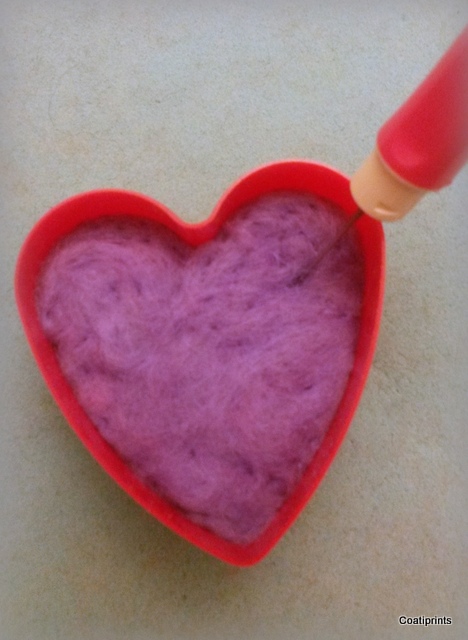
Place the cookie cutter onto your foam pad (you will need to hold its position firmly in place throughout) and then lay lengths of wool inside. It helps with the felting process if you lay the wool in one direction and then the next layer in the other direction.
Stab with your needle/s through the thickness of the wool to the foam to make sure you felt it firmly. Do this many times to bind the fibres together at various angles until it feels like a firm cushion.

Add more and more wool, felting each layer as you go. Ensure you felt well at the edges where the cookie cutter line is. You can add more to the middle if you wish it to be a nice plump heart 🙂 My cookie cutter was very deep so I could go on until the heart was very thick if I wanted to.


Press with your fingers to feel how firm the heart is and once you are satisfied that the heart is pretty firm, you are ready to turn over to felt the other side.
Very carefully peel the heart with cutter still around it away from your foam pad and turn over. You can carry on felting at the thickness it is or add more wool, its up to you. I wanted to make a two-tone purple heart so at this point I added a lighter lilac colour to the second side.
Keep on felting until happy with the consistency and firmness, you can turn over again and felt the other side again if you wish to. NB If you want to make the heart look less holey use finer needles and shallow felt the outer layer of wool.

Removing the heart from the cutter is fairly easy providing your heart is felted firm. Use a few fingers to push the heart in place against the foam and pull the cutter up and away from it. Then gently peel the heart from the foam. And voila!

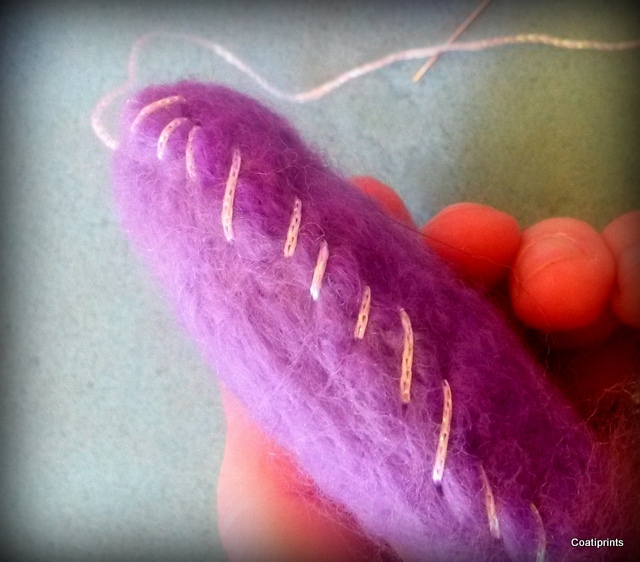
To make the shape smooth and neaten any loose wool, you will now need to felt around the edges and felt at various angles.


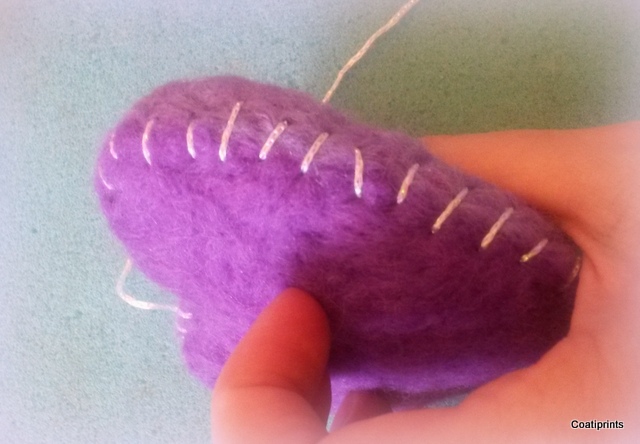
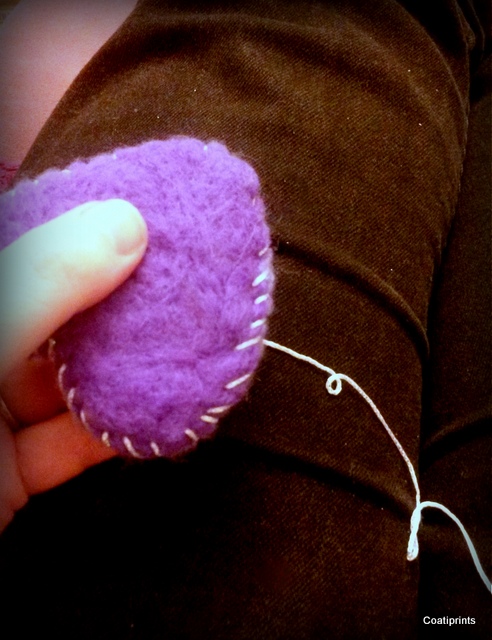
You can leave the heart as it is or you can sew around the edge for extra effect. Now as you can see my sewing skills are not the best (which is why I love needle felting!) but here you can see I have sewn a simple stich around the edge with a sparkly silver-white wool. NB the joy of felting is that you can felt over any knots or loose ends to finish off! I am sure your heart will look far neater than mine.


Making and adding the flower
My mum just loves flowers (see the little mouse I made for her previously) so I wanted my heart to stand out with a flower. This is a simple design of 5 petals which you make separately and then felt together in the middle. You can then make a simple centre out of wool or (as I have done) accessorise with a shiny button or bead.
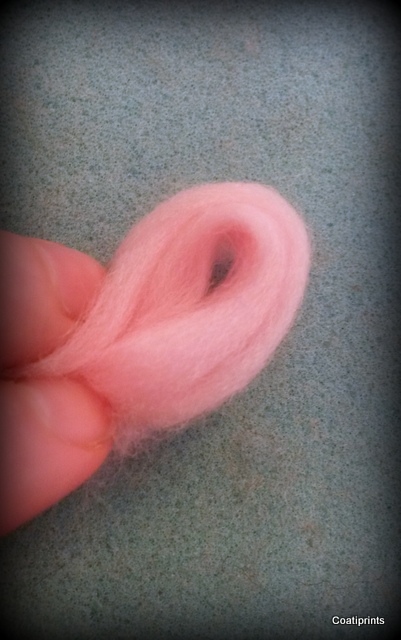
To begin then, you will need to take 5 small pieces of wool of roughly the same size (one for each petal). I will show you how to make each petal. Some of this is very similar to how I begin to make bunny ears (see here).

Fold each piece in half and then fold in half again.

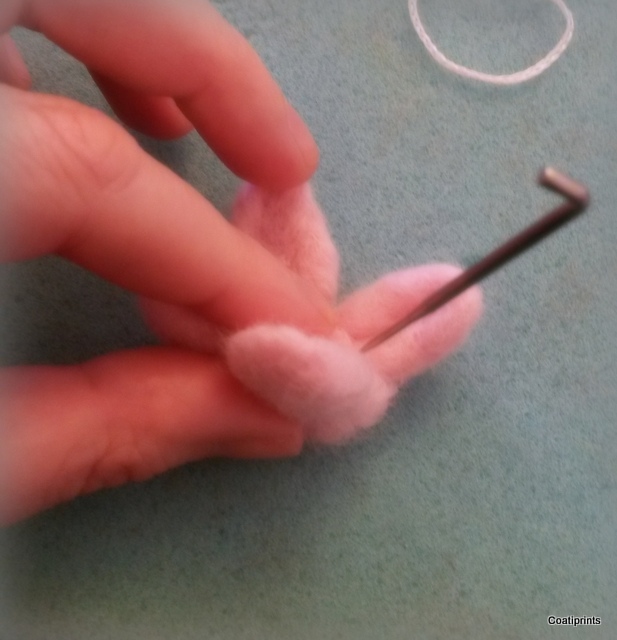
Holding the wool piece in a loop shape as above, start stabbing across it

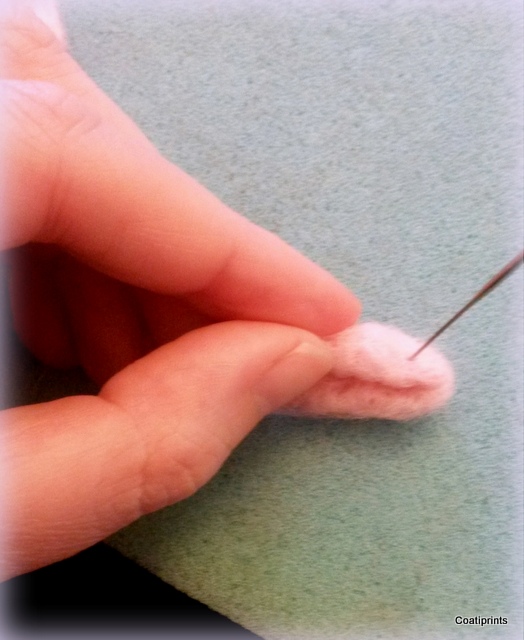
Then pull the sides in and stab along the centre line, holding the bottom part which will end up being the bottom of the petal that will be fixed to the other petals so keep those fibres loose.

Keep felting to flatten the shape but also stab the sides to keep a nice rounded petal shape. You can use your fingers to mould it as you go…


Fold length ways and needle felt along the edge at various angles to make the petal really take its 3d shape

Turn the petal over to felt on the other side… keep going on both sides until it feels fairly firm and the shape you are happy with.

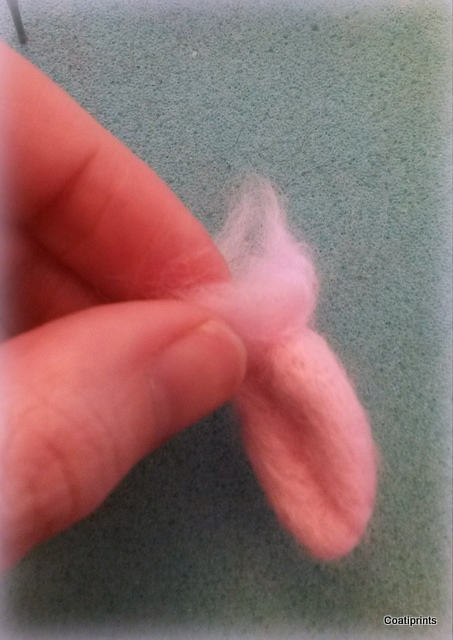
Do the same with all 5 petals. Then when you come to join petals together fluff up the bottom end of the petal which has been left loose and separate the fibres as below.


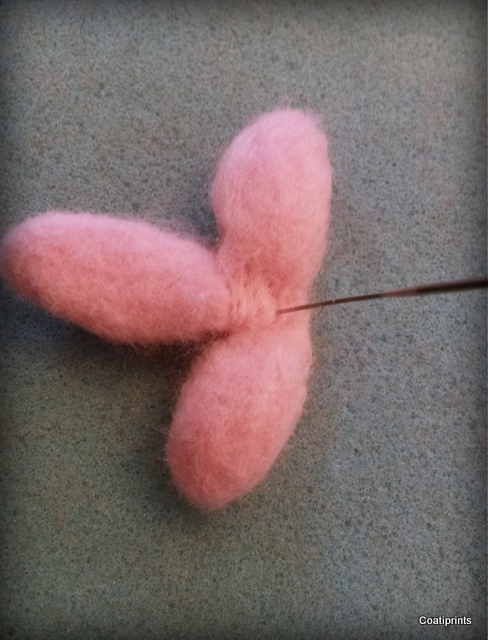
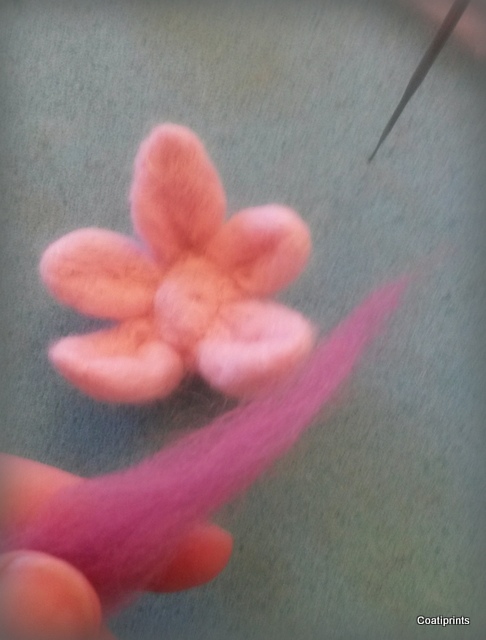
Fit the petals together, felting the loose fibres to each other which will form the base of the centre part of the flower as you go…felt well on both the front and back..


Once you have all petals fixed, you can then think about adding some more colour within the centre line of each petal to add depth..I chose a deep pink


Shallow felt the deep pink detail with a fine needle (to only a few barbs deep on your needle).


Shallow felting like this will ensure that the darker pink doesn’t show through when you turn the flower over

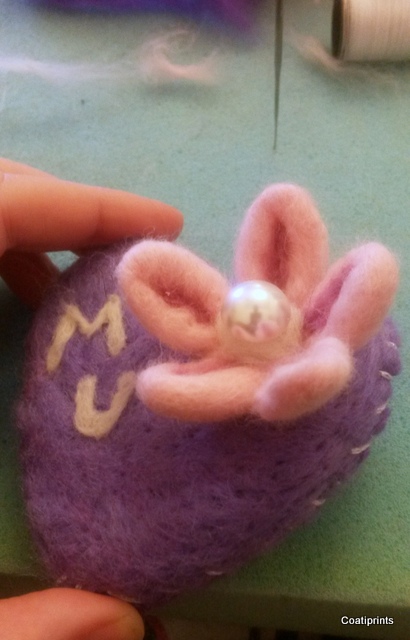
Once you have added the detail, start to build up the centre of the flower. You can just keep this as a wool centre or you can embellish with a button or bead.


I chose to add some white wool and then once I had sewn the base of my flower to the heart (just attach the centre not the petals to ensure the petals stick out nicely) I sewed on a lovely pearl button. NB you don’t necessarily have to sew the flower, you can needle felt it on if you wish, but I didn’t want to flatten the heart too much.

Adding a word e.g. ‘mum’
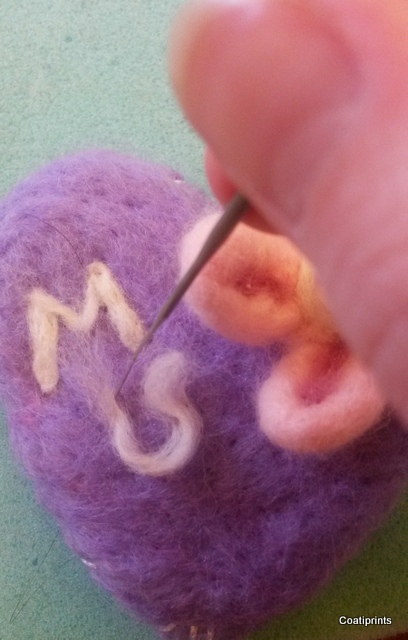
You only need to pull off a tiny bit of wool for this part. I chose a pearly white to match the pearl on the flower.
Use a fine needle to shallow felt your letters onto the heart. You can position the letters as you want them and then stab over the wool with the needle. I do this to see what it will look like but then when it comes to felting I find it becomes more freestyle, starting at one end of my tuft of wool and positioning it as I go. It is almost like you are writing with a very slow flowing ink pen even though you are frantically stabbing away at a fast pace 🙂


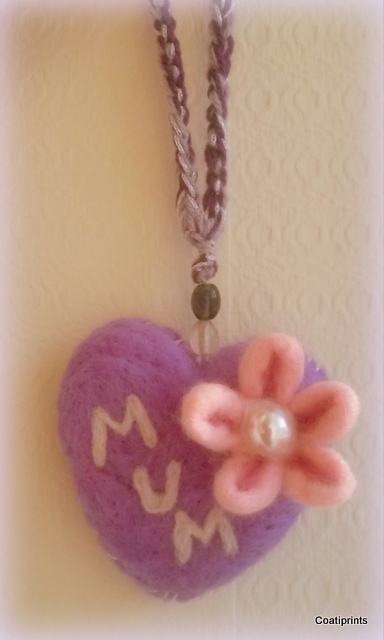
So there is your heart! sweet!

Hanging loop
How you want to display this to your mum is up to you. I thought it would be nice for my mum to be able to hang it up perhaps from a shelf, curtain tie back hook or door knob.
So I took three strands of knitting wool, one dark purple and one lilac each to match the colours of the heart and the third strand was the same glittery wool I used for the edge of my heart.

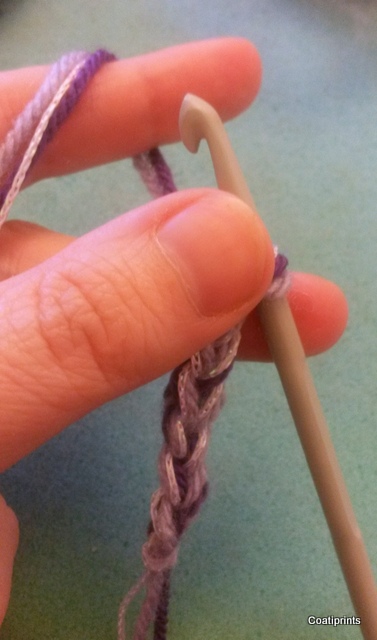
You can simply plait the strands together or if you know how to crochet, simply crochet a foundation chain (as below) to the length you would like it.


I tied a knot at the base of the loop. Then I attached a piece of the glittery wool to the top of the heart, threaded on a few beads, then sewed the top of the glittery wool securely to the base of the hanging loop.


‘Happy Mother’s day mum! I love you so much’ 🙂


I hope you like my tutorial and it has inspired you to make something from the heart for your mum this mother’s day. If you do make the above heart, please do send me photos – I would love to see what you have made. 🙂
What would you like to learn about next? please let me know
More needle felting tutorials can be found over on my tutorials page
Don’t ever miss out on my latest tutorials! Insert your email address and click the ‘Follow’ button on the right hand panel to receive notifications of when the next post is up..:-)
Don’t have time to make one but would love a one of a kind needle felted animal by Fit to be loved for yourself or for that special someone? Visit my Etsy shop today to see my latest creations. Or like my facebook page to see what I am making next.

 2) Fold the bag in half, unpick the handles and remove. You could leave handles if you wish to hang it up. By folding the bag in half it will be double layered so it will be long lasting. The size of the bag should just be right but with this one my mum picked the thread from the top side too to allow an extra inch width.
  3)Sew the edges by hand or by machine, stitches should be close enough to prevent any rice grains from coming out of the bag. Ensure the corners are well sewn by double stitching to reinforce. Simple back stitch is fine. Leave one end open for adding your rice. Turn inside out so stitching is on the inside with a neat edge.
  4) Measure approx 1.75 kg of rice. I used cheap long grain rice. Pour into the bag using a funnel or jug (you can do this straight from the bag but mine tend to spilt and rice goes everywhere). You can choose more or less rice depending on personal preference. This amount comes to almost three quarters of the bag when holding the bag upright like a sack. If you fill it too much it will be very heavy and not lay right for a flat felting surface. Too few grains and the surface will dip.


 5) Before sewing up completely, lay your bag out as you would use it to check you have the right amount of rice. You should have at least a good inch depth for the needle to go through. Then sew up as neat as you can.
 And there you have a rice bag!!! Simple!!! 🙂
  I have to say I am loving it already. It feels different to my old faithful foam pad but I am quite liking the sturdy feeling of it and it looks like good quality and long lasting. I may not carry this one around as it is fairly heavy and I have soon found my needles don’t stay put for too long if I stick them in the bag like I used to with my foam pad, but then I sometimes break my needles from being lazy and not putting them back where they belong so that may be a good thing. Hope this inspires you to have a go and make a quick simple bag for yourself… Hmmm looks like my headless cat is pawing at it and enjoying the new feel too 🙂


