Thinking of making a simple needle felted bird? not sure where to start or need some ideas of how to finish your creation with some extra detail?
Last week I had the pleasure of making a little needle felted bird for my sister as a birthday present. She asked me for a simple teal bird to go with her newly decorated room once it is finished but as soon as I started I couldn’t help but let my imagination take over.
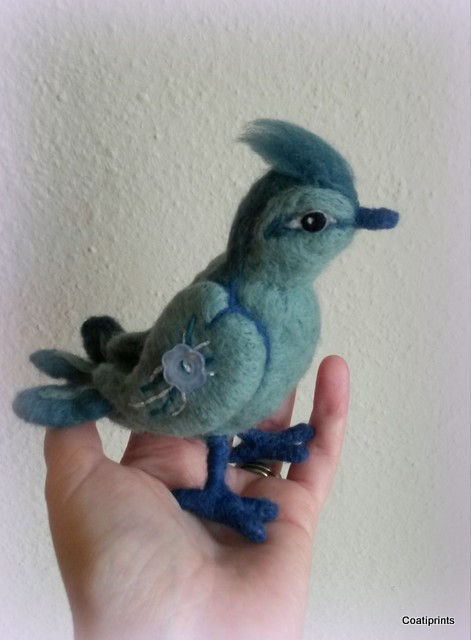
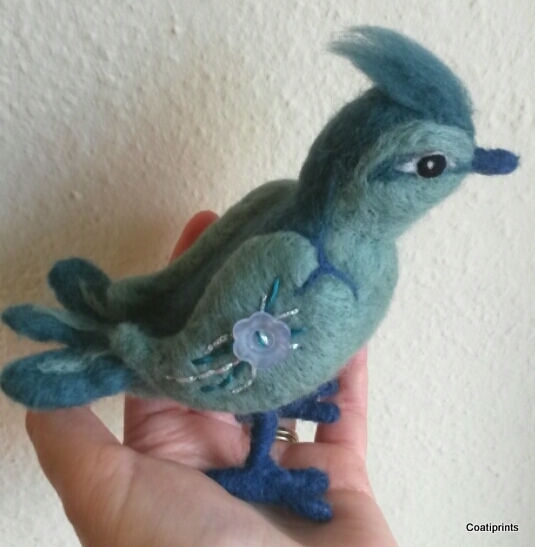
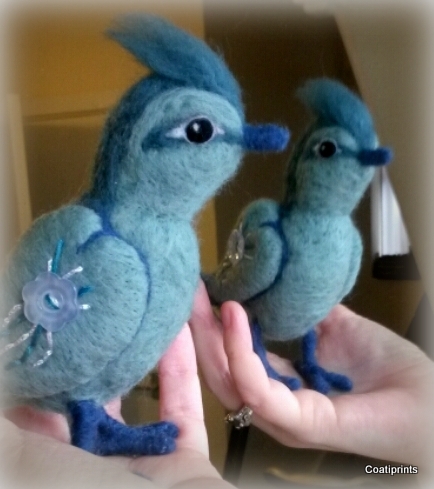
I absolutely love my sister so I expressed this by forming heart shaped wings that have beautiful button and thread embellishments. I also tried to make his facial features come to life by giving him adorable eyes and a little tuft of wool on his head(much like a woodpecker or crested tit) 🙂
Last night I got to see my sister’s face as she opened up her parcel through the wonder of ‘facetime’ on our ipads. So pleased she likes him!! I hope you like him too..
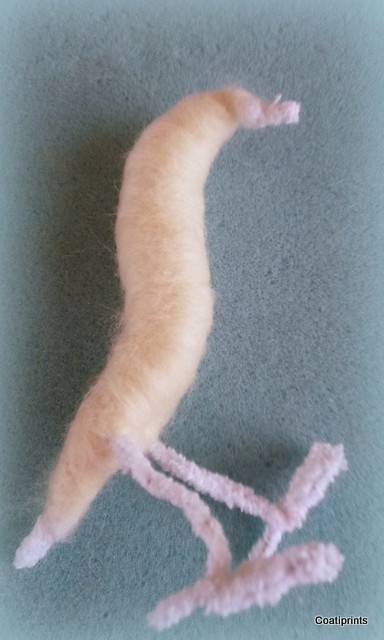
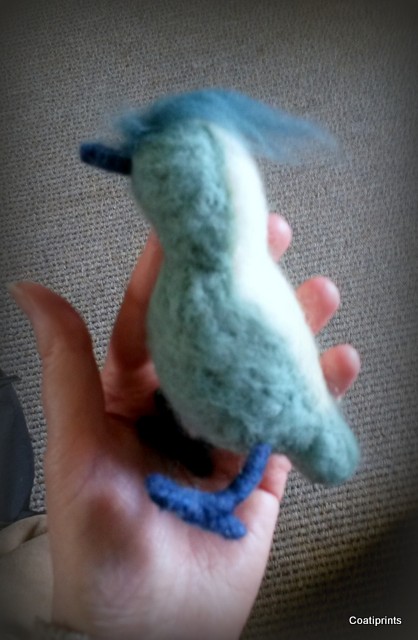
So where did I start? As you can see I twisted some cotton felt covered pipe cleaners to make a birdie shape…


I then wrapped lengths of core wool over the structure and needle felted until I got the right shape. (Be careful not to stab the wire in the centre of the pipe cleaners by felting along the edge of the pipe cleaner only).

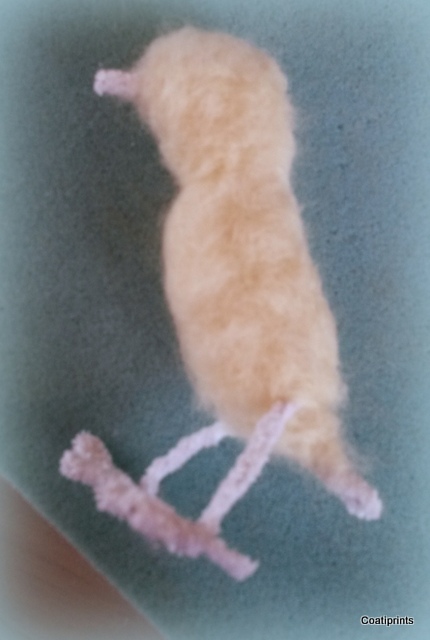
I then used softer merino wools for the teal and blue birdie colours – light and dark shades of teal and denim blue (the beige you see under the label is for another project coming soon).

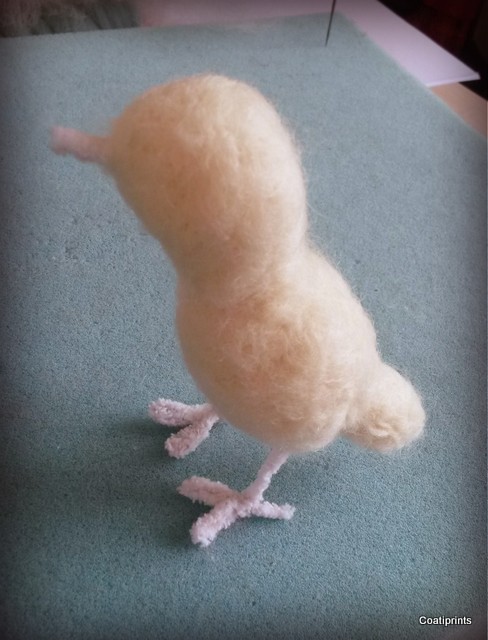
I carefully wrapped and felted the denim blue colour wool over his legs and feet. I did the same with his beak later on. (See here for other ideas on how to felt tiny animal feet and toes).

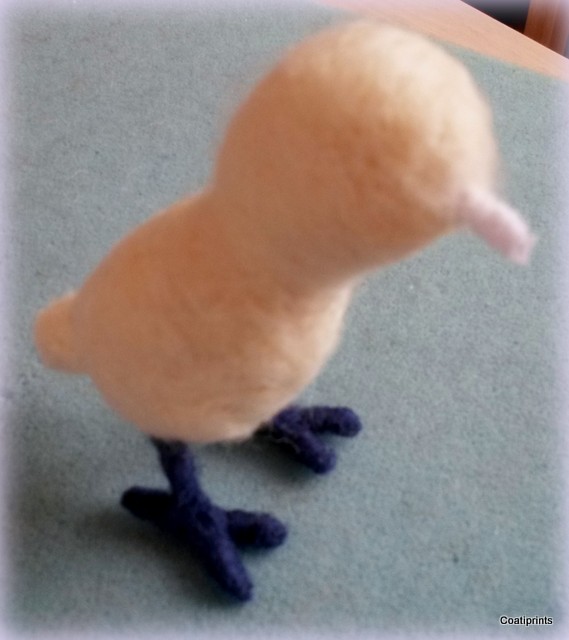
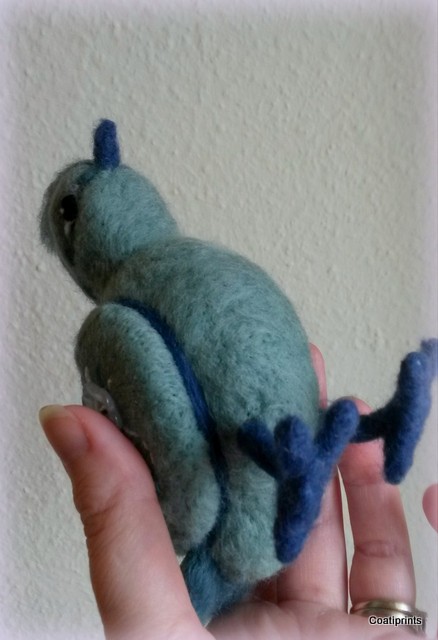
I chose the lighter teal wool for the underneath, face, wings and flecks of colour on the tail. I used the darker teal for the back, top of head with tuft, eye stripe and tail. I felted simple eyes in black with a white dot placed to mimic where the light would reflect and added a thin strip of white around the eyes. (see how to felt animal eyes here).

I made the tail and wings separately before felting them on to the body (see here for how to add body parts). I chose some pearly flower shaped button which I sewed onto the wings and stitched a pattern along the length of each wing with a teal and a glittery white embroidery thread. I didn’t fully felt the wings to a perfect shape at this stage as I completed this once attached to the body..


Once on the body I then used the denim blue wool to emphasise the shape of the heart wings by felting around the edge..
Here is the finished little teal birdie ready to send to my sister..:-)


……and of course no creation can go to is new owner without a bit of ‘fit to be loved’ wrapping..

Don’t miss out on another post from Fit to be loved, click ‘follow’ on the right hand side of my find out more page.


Pingback: Needle Felted Tutorial – Birdie – Felting – Mix Of Tips
Pingback: Needle Felted Tutorial – Birdie - Crafts Entertaining
Hey Tracie, teal is a lovely colour isn’t it! It was so nice to use a different colour from the usual browns and greys of other wildlife. Would love to see your chickadee! Feel free to post it to me here or on my Facebook page 🙂 On to a tawny owl next.
LikeLike
Love the steps & teal is one of my favorite colors-just started felting & last month made chickadee for my moms birthday – she is bird lover!
LikeLike
That is one cute little blue bird, Your sister is sure to love it, It has real character.
Thanks for sharing the creative steps. I would like to try making my own birds. Do you think they would last long outside in the weather? I’d like to put some in my garden.
LikeLike
Hi Chris, thanks for writing. You should definitely have a go. It was so much fun. Not sure if they would last putting them in the garden though unless sheltered from the rain. I should think real birds would like to have a peck too as they love the wool for nest building 🙂
LikeLike