For a bit of fun I wrote a poem about needle felting and made it into a video. It’s particularly aimed at those who may be new to it and who may be wondering what it is and why learn.
But even if you have been needle felting for years, I hope you enjoy it (especially to see some ideas for needle felted animals you could make) and feel inspired to get stabbing this new year!
Come with me on an exciting journey to explore this amazing art form.
Have a wonderful New year! 😊
If you would like to learn how to needle felt realistic and detailed animals, head over to the tutorials page for an ever growing catalogue of free tutorials.
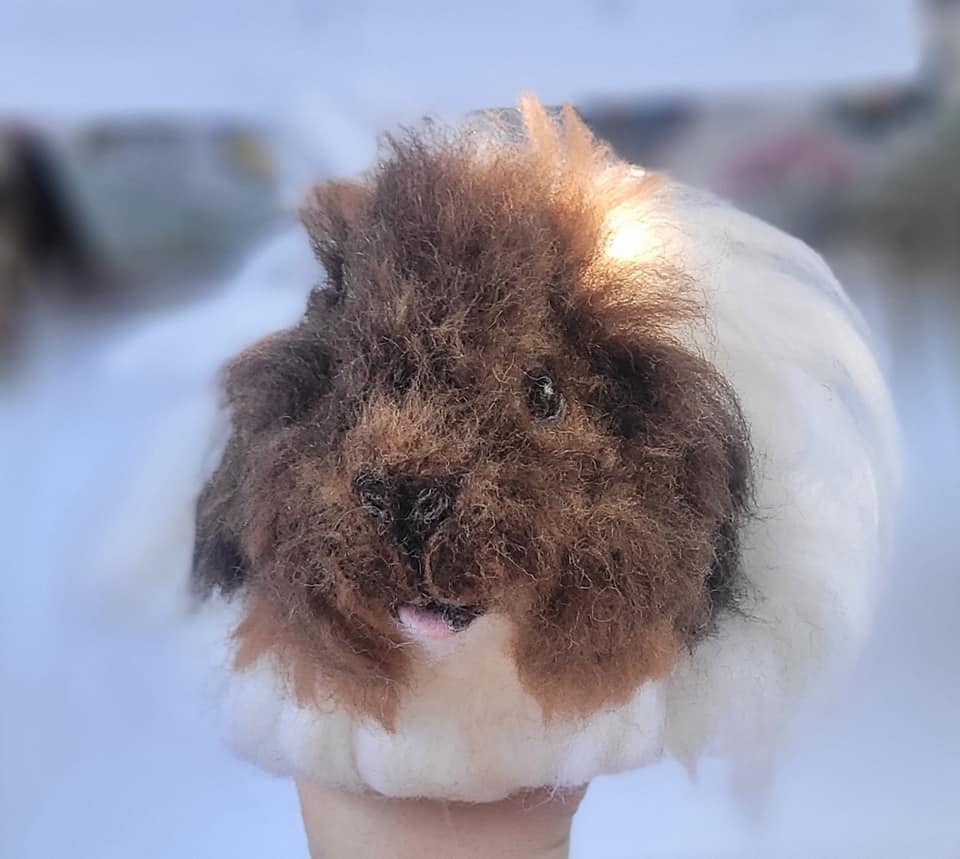
So today I thought I’d answer a common question that I get asked a lot- “if I’m needle felting a long furred animal, how do I stop all of these lovely, luscious fibres from getting all matted, flattened, tangled and just looking a complete mess?”
As you’re working on an animal, like this guinea pig I am making here, at some point you may have to turn it over or on its side.
Some of it will get fluffed up a little bit and that’s just the big challenge with felting very long fibres like this, but you can eliminate some of the issues with my three tips!
Please feel free to comment and say what you do about this because that would be really helpful to share tips and ideas with each other as well.
3 Tips to help prevent over felting, matting, frizzing, of long animal fur
(Scroll to the bottom if you’d like to watch my video version)
PLAN AHEAD
For an animal that’s upright I try to always start adding wool on the underside i.e it’s tummy and legs first so that I’m not having to turn over the lovely top layer. If I start off with the underside, that’s the bit that you’re less likely to see so if it gets a bit flattened it doesn’t matter so much.
I then turn it over and work on the top side and that’s the bit you’re mostly going to see. So you’re not going to be laying it down on all the lovely fibres and squishing them. The moment you turn your animal over, it’s going to flatten and potentially fluff up or leave the fibres looking frizzy and it’s just not going to look so great like how you added it in the first place.
CONSIDER WOOL TYPE
Think about the kind of wool that you’re going to be using.
So a lot of us will use merino wool tops for long fur. These are great because they’re really well priced. They come in the kits and you can get loads of different colours. I love the range of colours for needle felted animals here.
However you do need to think about the way that the fibres lay and the way they can potentially matt and frizz up easily.
I have been trying some other kinds of fibres recently. One I want to mention is alpaca wool (you can get some lovely alpaca tops here) and suri alpaca. They seem a lot finer and softer, but you will notice a silky like consistency to them.
So I’ve been mixing these (hand blending) with my other fibres and finding that the mix is less likely to frizz and tangle with a silkier result.
Your animal fur can still end up flattening if you’re not planning your animal properly, but generally I’m finding that I can achieve a more natural looking fur as well as it matting less. It’s a beautiful, beautiful fibre to work with!
If you’re using a coarser natural wool top, such as a corriedale top. This is brilliant for replicating a coarse rough looking kind of animal hair rather than one that is smooth and soft looking.
You can incorporate that into your animal fur look as well. I used this in some of the brown shades on my sheltie for example.
The only thing with it is that it is rougher in texture and so tends to felt a lot quicker. I find it’s tougher and not so soft and fine. But at the same time if you rub it against anything that is also rough, the friction will make it end up looking frizzy which may not be the look you were hoping for..
So think about the kind of wools that you might want to use. Try out a variety of fibres…
A ‘GLIDEY’ SURFACE
Think about what surface you’re working on. A lot of us will be using something like a felting mat or pad. My Eco felting mat from Heidifeathers has a really nice consistency and firmness to felt on. I can do all my core work sculpting on there really well and also add shorter fur fibres.
But when I come to attach my long fur, the last thing I want to do is allow my fibres to rub against the felting mat material and felt my fibres a lot further. I want them to end up looking really lovely on the animal. I don’t want them to rough up and get tangled.
So when you’re thinking about what you’re working on, think about something that is not going to be fraying your felted animal fur.
Once I’ve made the core animal shape base, I often move it off of my felting pad and I will use a slippery surface for the majority of my time…you’ll often see me use the inside of one of my beautiful storage box lids.
This allows my piece of work and the fibres to glide against it and not rough up and felt. It might move around a little bit but because my animal is contained in the lid area, it’s not going to slip too far. You don’t need to use a felting pad because the needle is not going to go through and stab into my knee or anything. Much of what I am felting onto is the thick body of the animal and as long as I don’t felt too deeply the hard surface is fine.
If I want to get at an angle though e.g. side of tummy, under a neck or felting fur on a leg I can still use the felting pad but lay a material over it.
A shiny smooth material like satin or silk is really good though test it out and see what you think. You don’t want to get too much static adding to your issues so trial it. You could get a bit of this material to lay over the pad. Tightly wrap it if you can so it doesn’t slip as you felt or buy a purpose made satin or silk surfaced pillow.
Or use a plastic bag or sheeting over the pad (I simply use the flat slippery bags that my wool come in). It can slide a little but that’s fine.
A shiny paper like tissue papers or wrapping paper or card can also work but less likely to last as long potentially.
The felting needle can enter the material a little but that’s ok.
If adding long fur to a thin piece of the animal anatomy e.g an ear or tail I would rather go back to just using my felting pad and just be very careful about not messing up the fibres.
Try a few options to see what works for you and find out what is most effective and comfortable for the process.
Whatever surface you choose, lay the animal down carefully against the surface before stabbing and ideally lay fibres in the way they should flow so they are less likely to fray at the ends or flatten or frizz from laying the wrong way.
A few extra tips
Remember to make sure that you’re not constantly touching or pulling at the fibres. Make sure you aren’t using greasy fingers of any sort, and that you’ve washed your hands really well and you’ve got no extra oils in your skin when you need to touch them.
For particularly long pieces of fur you can twist the ends carefully and tuck them down before laying your animal down when you’re working on it to prevent the ends from being vulnerable to fluffing or fraying.
To finish off your animal so it has beautiful fibres
Once you have added all the fur to your needle felted animal you can then revive the fibres if they have become a bit flat or disheveled and plump them up.
Depending on the wool you have used and how you want the fur to look you could carefully brush them with an eyebrow brush or similar brush. For many of my animals however a brush can be too much for the delicate fibres and I don’t want to break or pull out the fibres I have taken my time to add and so I simply use a clean finger and thumb to tease fibres in the direction I want them to go and to unflatten them.
A normal sewing needle or sometimes my barbed needle is also a perfect tool to manipulate the fibres and to separate them out so they still look like realistic animal fur. Then a final trim with scissors if needing to tidy or remove any excess fluff!
I hope these tips have been helpful. Let me know your thoughts on them. 😊
Here is a video version if you prefer to watch or listen: How to protect long wool fibres while needle felting animals.
Please let me know what you do to help protect your long fibres, I’d love to hear your hints and tips too 🙂
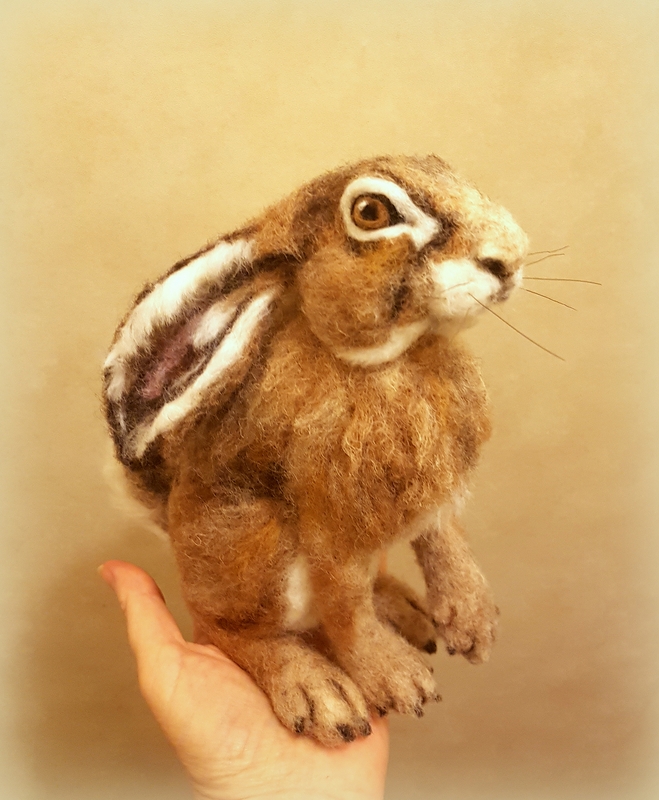
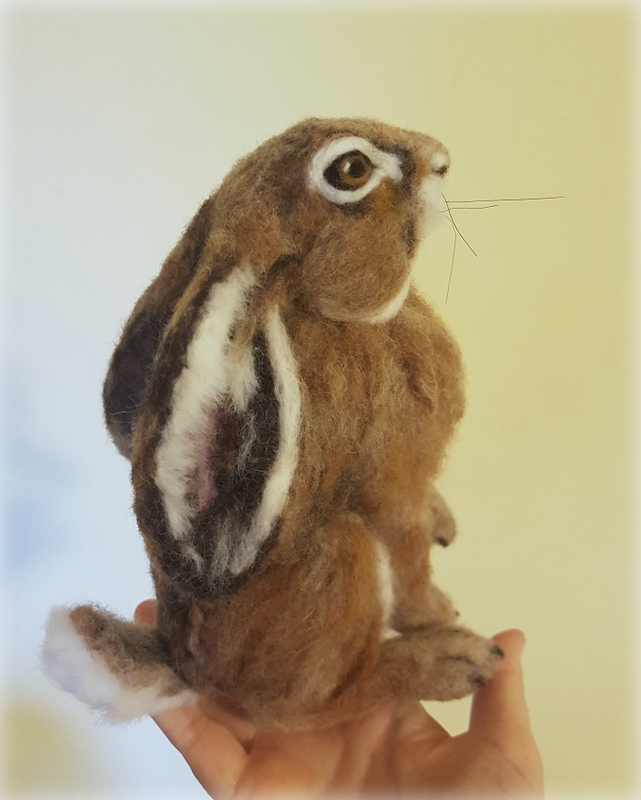
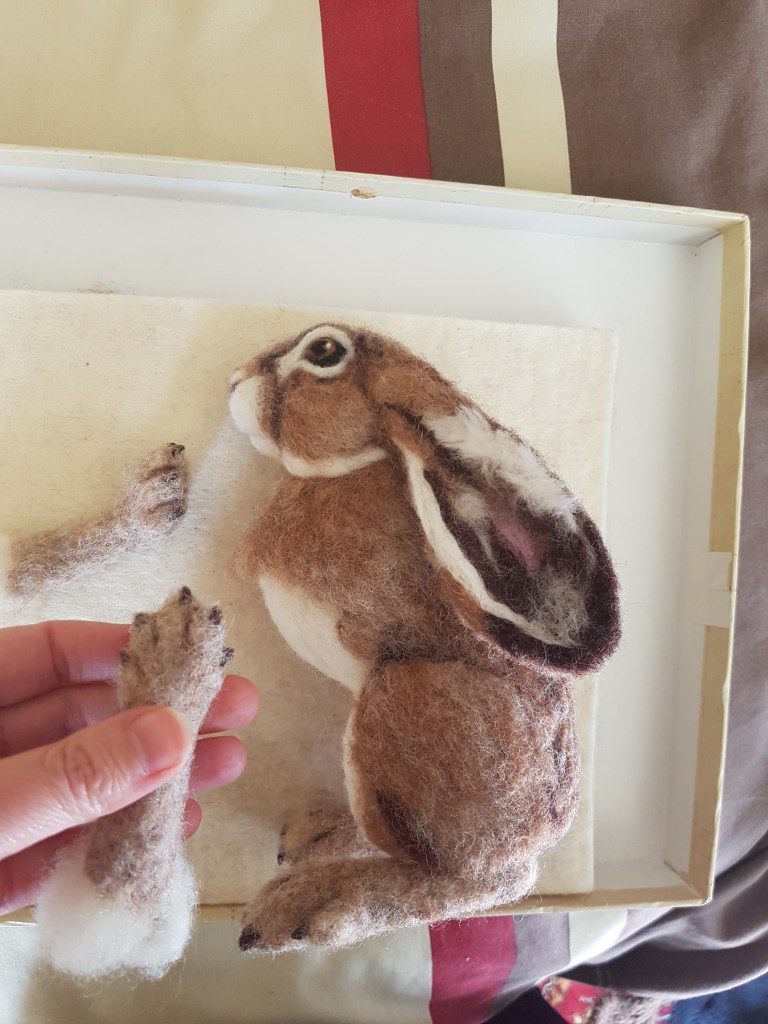
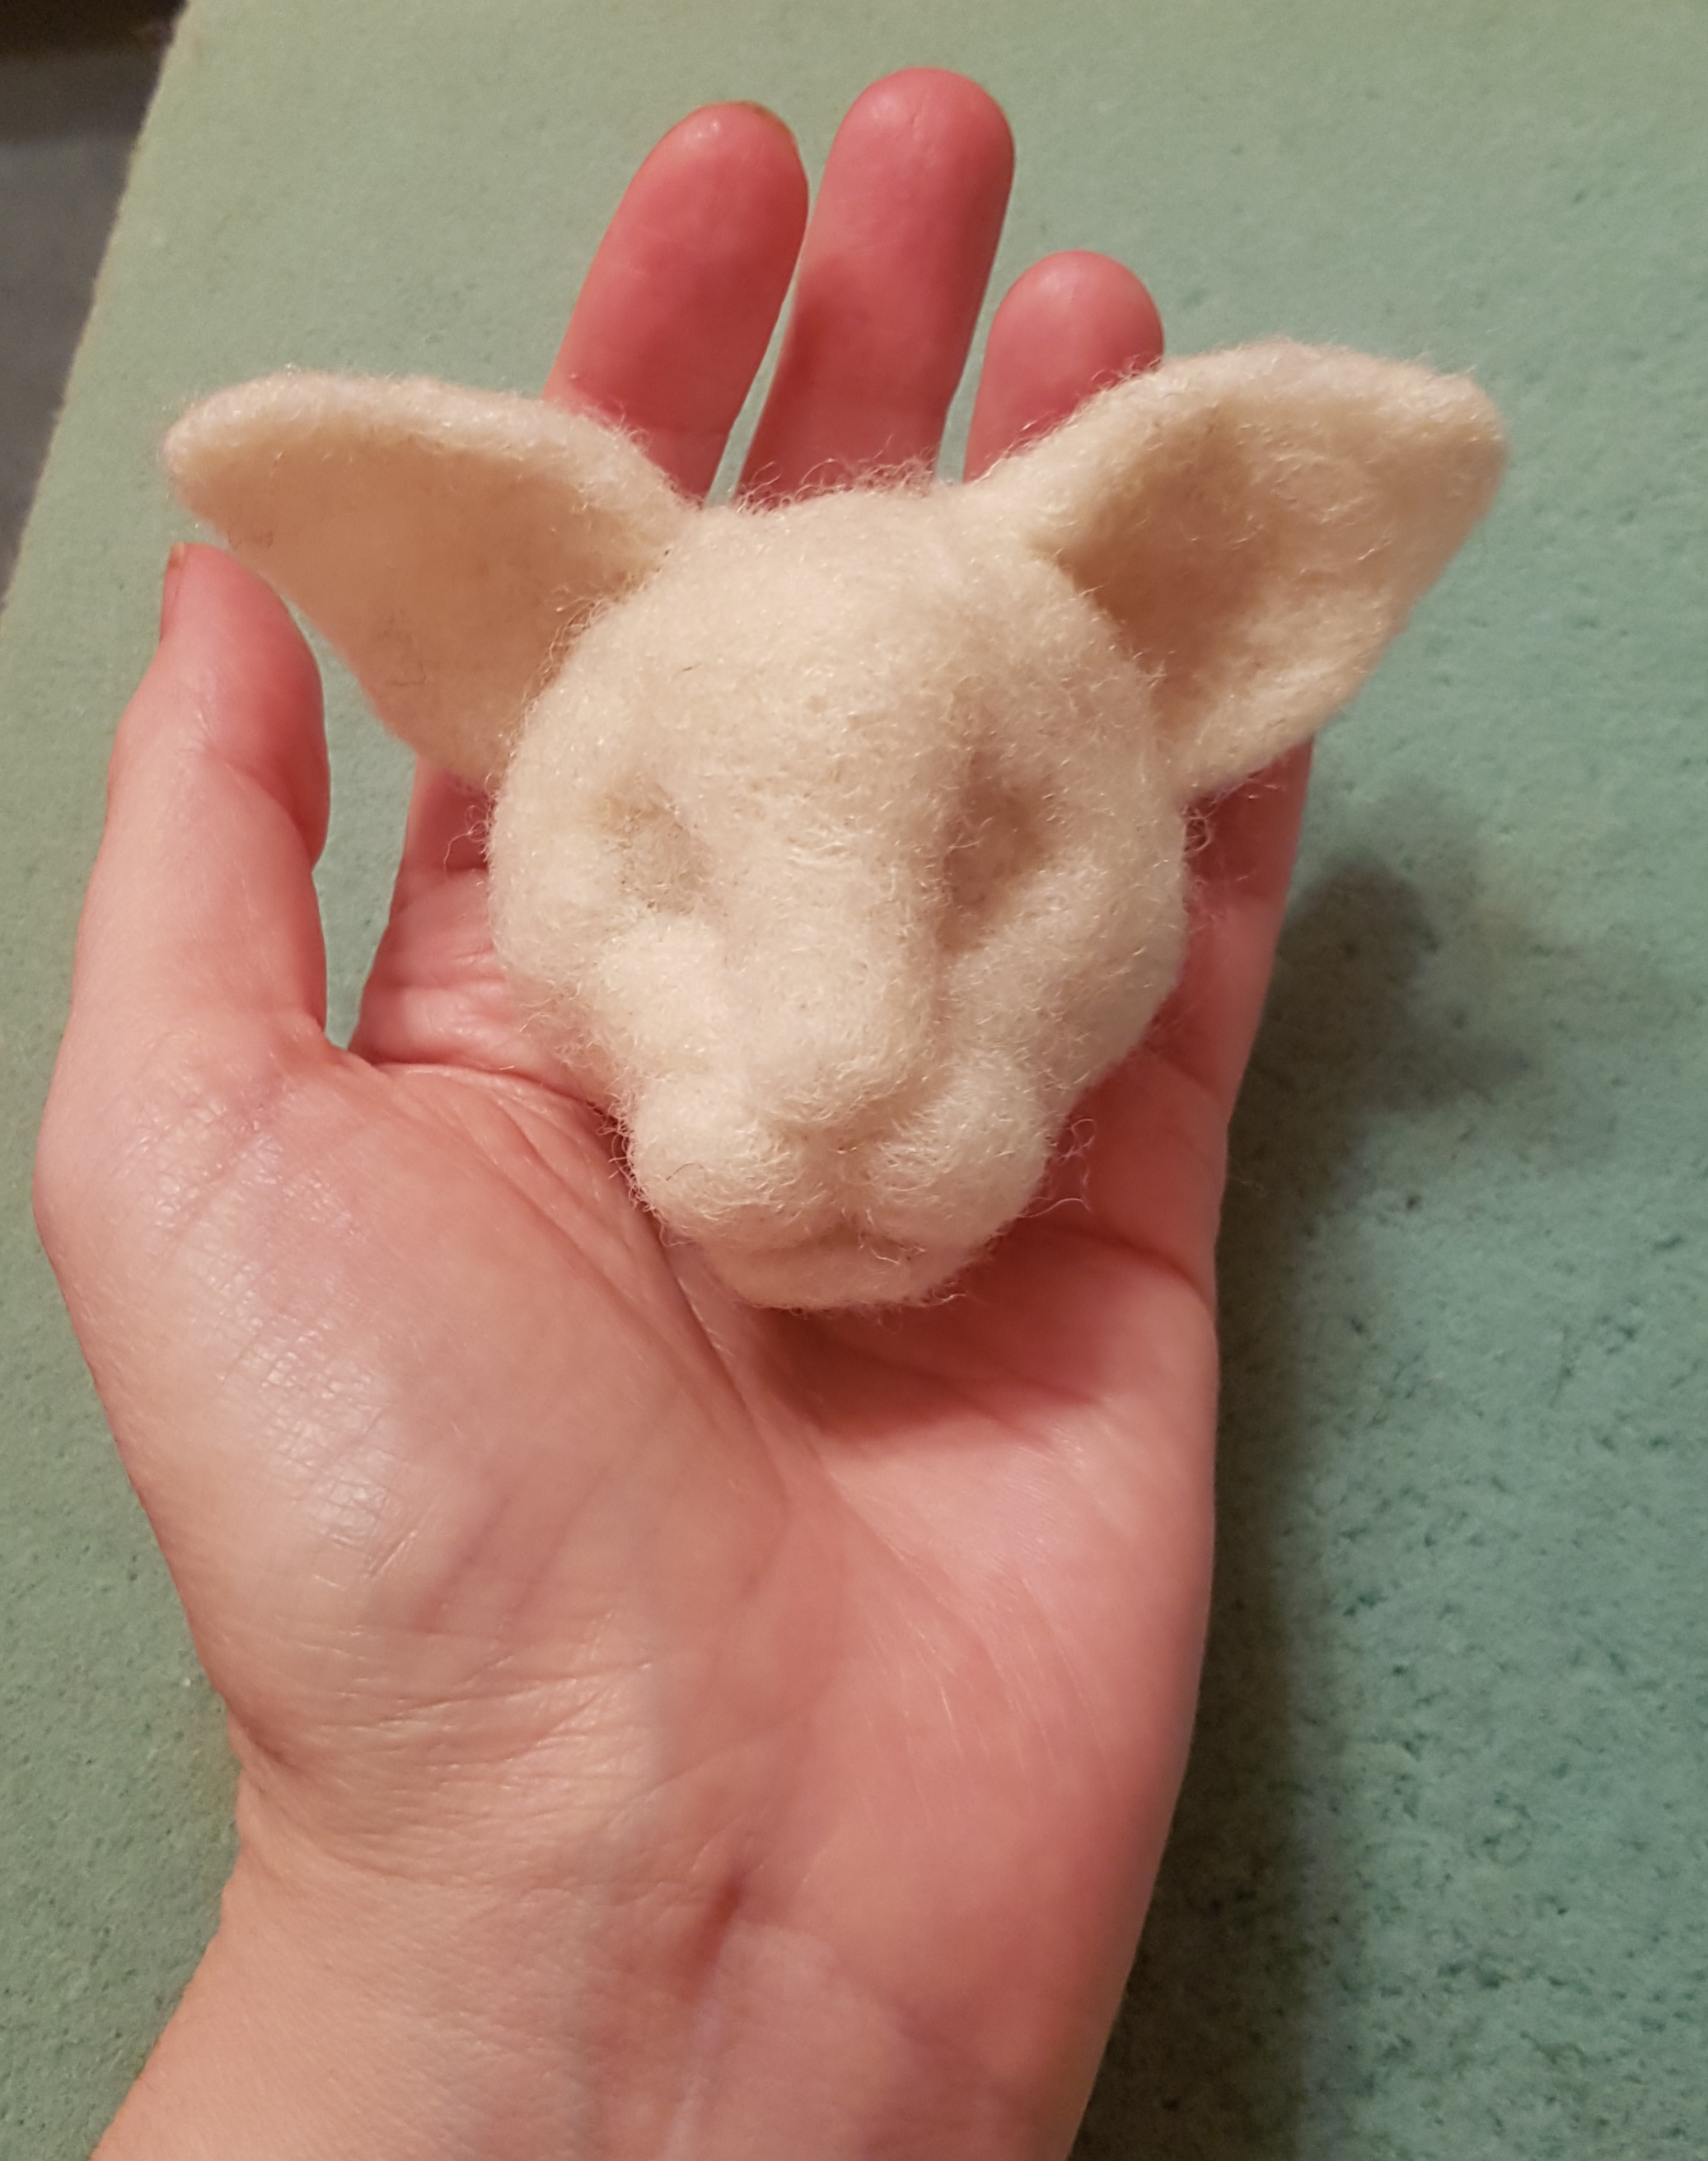
I am so excited to present to you my needle felted hare. She could be a moon gazing hare or maybe she is simply gazing up at you with those endearing eyes for some cuddles. I thought Luna was a sweet name which also means moon in Latin.
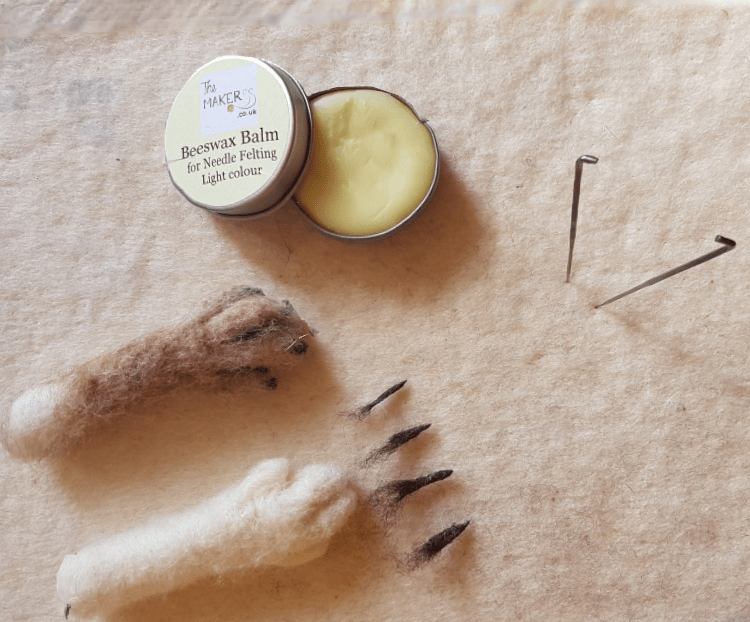
She is 100% wool except for her whiskers which are made of horse hair. Also I had some fun experimenting with wax that melts in the warmth of your hands to twist some of the wool between my fingers as a way to define the rugged and wavy texture of the hare’s fur around her neck and chest area. The wax was really effective to shape the tiny pieces of wool that I used for her claws as well.
I really love how hares have such long ears so I made these extra long for her body size, but I think that makes her even cuter, don’t you think?
The process?
I started off making the basic shape of a hare head and body with carded core wool batts and then for her top coat I added a variety of brown carded slivers and some merino wool tops using the long fur placement technique.
This sounds strange to be using this technique with carded wool but having tried it it works well to give a rough fur coat look rather than lengths of straight wool.
I also pulled some of the core wool through with my ever faithful reverse felting needles to lighten areas (especially on the limbs) and to blend some of the colours.
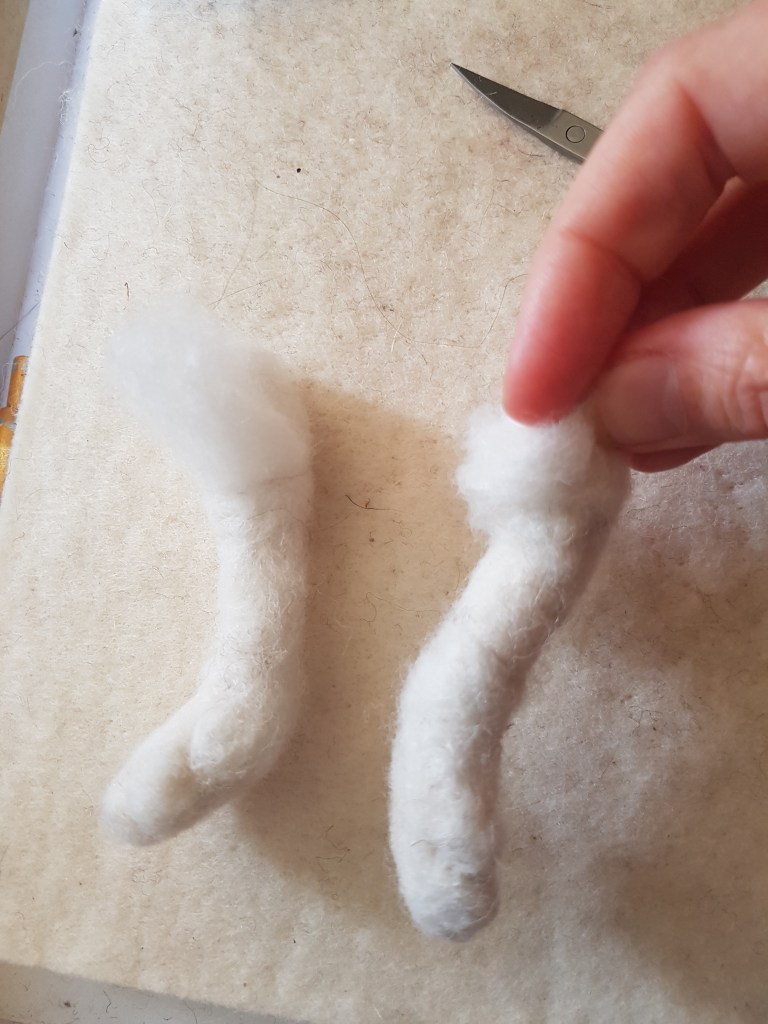
I left some parts free from the top coat where I would attach the ears, limbs and tail.
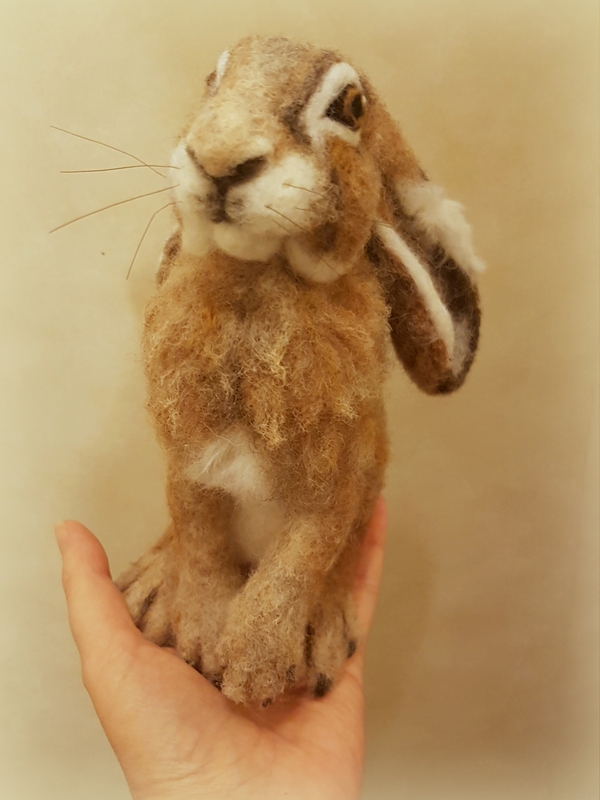
Next I made the ears and attached them, followed by the hind legs and then the front legs. Using 2 needles at once with my Clover pen style needle holder really helped to flat felt the ears and to quickly attach body parts..
Then I completed the top coat and added a tail and finally some whiskers.
I really enjoyed making Luna. I particularly loved making her as realistic as I could by taking my time to twist the wool and mimic the wavy and tousled look of the hare’s back fur.
I am pondering if to make another one and create a detailed tutorial as I go along.. I’d really value your thoughts..:-)
I have included links for where to source needle felting tools and materials. Please see Links disclaimer in the right side panel for more details.
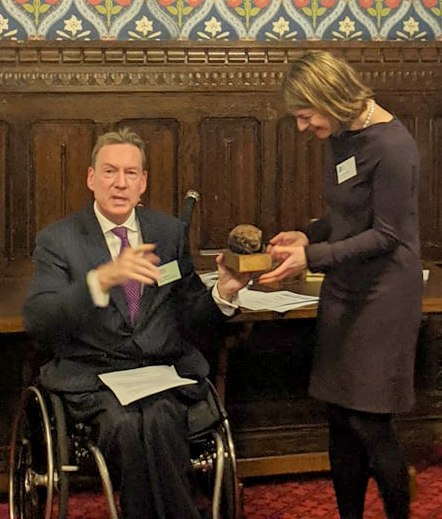
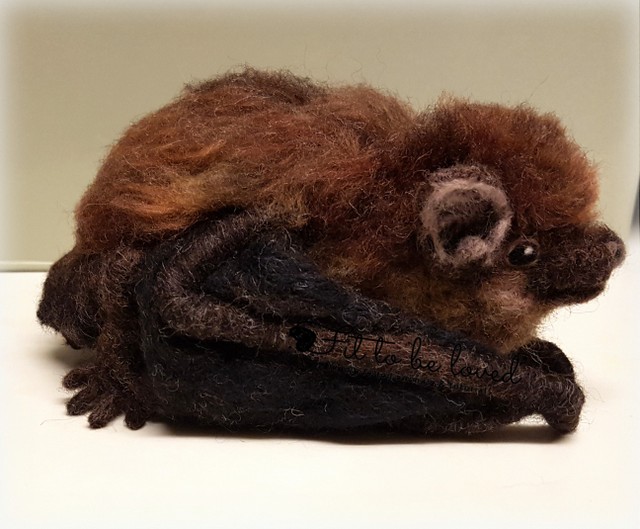
This week has been an exciting week. The needle felted pipistrelle bat I created was mounted and given as an award at the Palace of Westminster to MP Helen Hayes as she is the species champion for the common pipistrelle and won best parliamentary species champion at the Species Champions Annual awards ceremony. Well done to Helen for all her hard work!! It was presented by BBC Journalist Frank Gardner.
I am so happy that my artwork became something so special for an amazing project. The project is run by the Rethink Nature partnership, a group of seven wildlife organisations working together to make a difference to species conservation. (Amphibian and Reptile Conservation, Bat Conservation Trust, Buglife, Bumblebee Conservation Trust, Butterfly Conservation, Plantlife and the RSPB).
The little bat took many hours of sculpting through the art of needle felting. His body is made of core corriedale wool. His wings, legs and tail are wool wrapped over wire. His beautiful brown coat is made of a blend of corriedale and merino wool. His eyes, nose, ears and tiny feet are made of wool too.
The common pipistrelle as its name suggests is the most common bat that you might see flying in your garden on a summer night! Yet like all our bats in the UK they need our help and protection to ensure their numbers don’t decline again. They are so important to our environment! I love bats but some people don’t and this is usually as they don’t know much about them and bats are so misunderstood.
When you look at a bat close up they are actually very tiny and many times smaller than the size of my needle felted one. In fact a real pipistrelle bat weighs about 5g and their forearm length is less than 35mm in length. One of these tiny creatures can eat around 3 thousand insects in one night – how amazing is that!? Due to destruction of their natural habitat many bats now need to roost in houses and churches and rely on people to preserve these roosts.
Each bat usually has only one pup each year and too often that little pup will become lost or get caught by a local cat and so many each year don’t survive. The Bat Conservation Trust has a fantastic helpline if you find a bat in need of help. You can also find out how to support their work 🙂
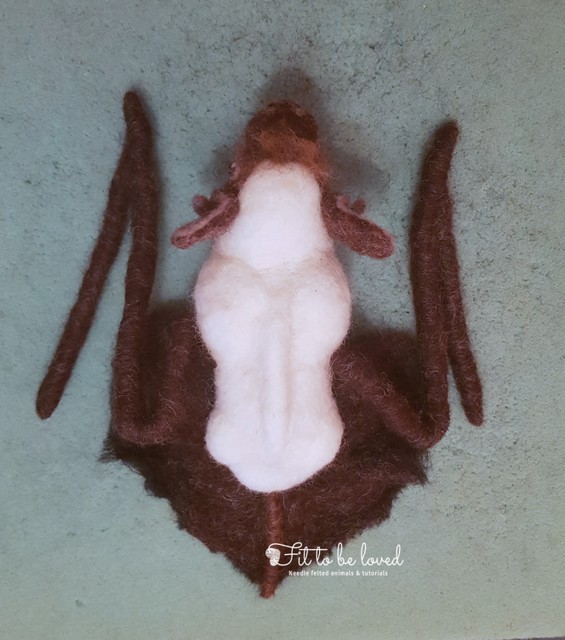
Here are a few work in progress photos of my needle felted bat…
Having worked for 12 years at the Bat Conservation Trust I have quite a good knowledge of bats but it was still a challenge to get the anatomy right. Bats are so fascinating and detailed with their tail membranes and wing membranes! I wanted to give the illusion of fully formed wings that could spread out but tucked in as if it has landed. I hope I did it justice.
As with all my needle felted animals I used lots of photos of the real animal at every angle for reference. Thankfully no needles were broken but I did remake his face at one point and a good deal of patience and chocolate rewards were needed along the way!! This aside I really did enjoy making him and I was so overjoyed to see the smile on Helen Hayes’ face too when she received him as her award !
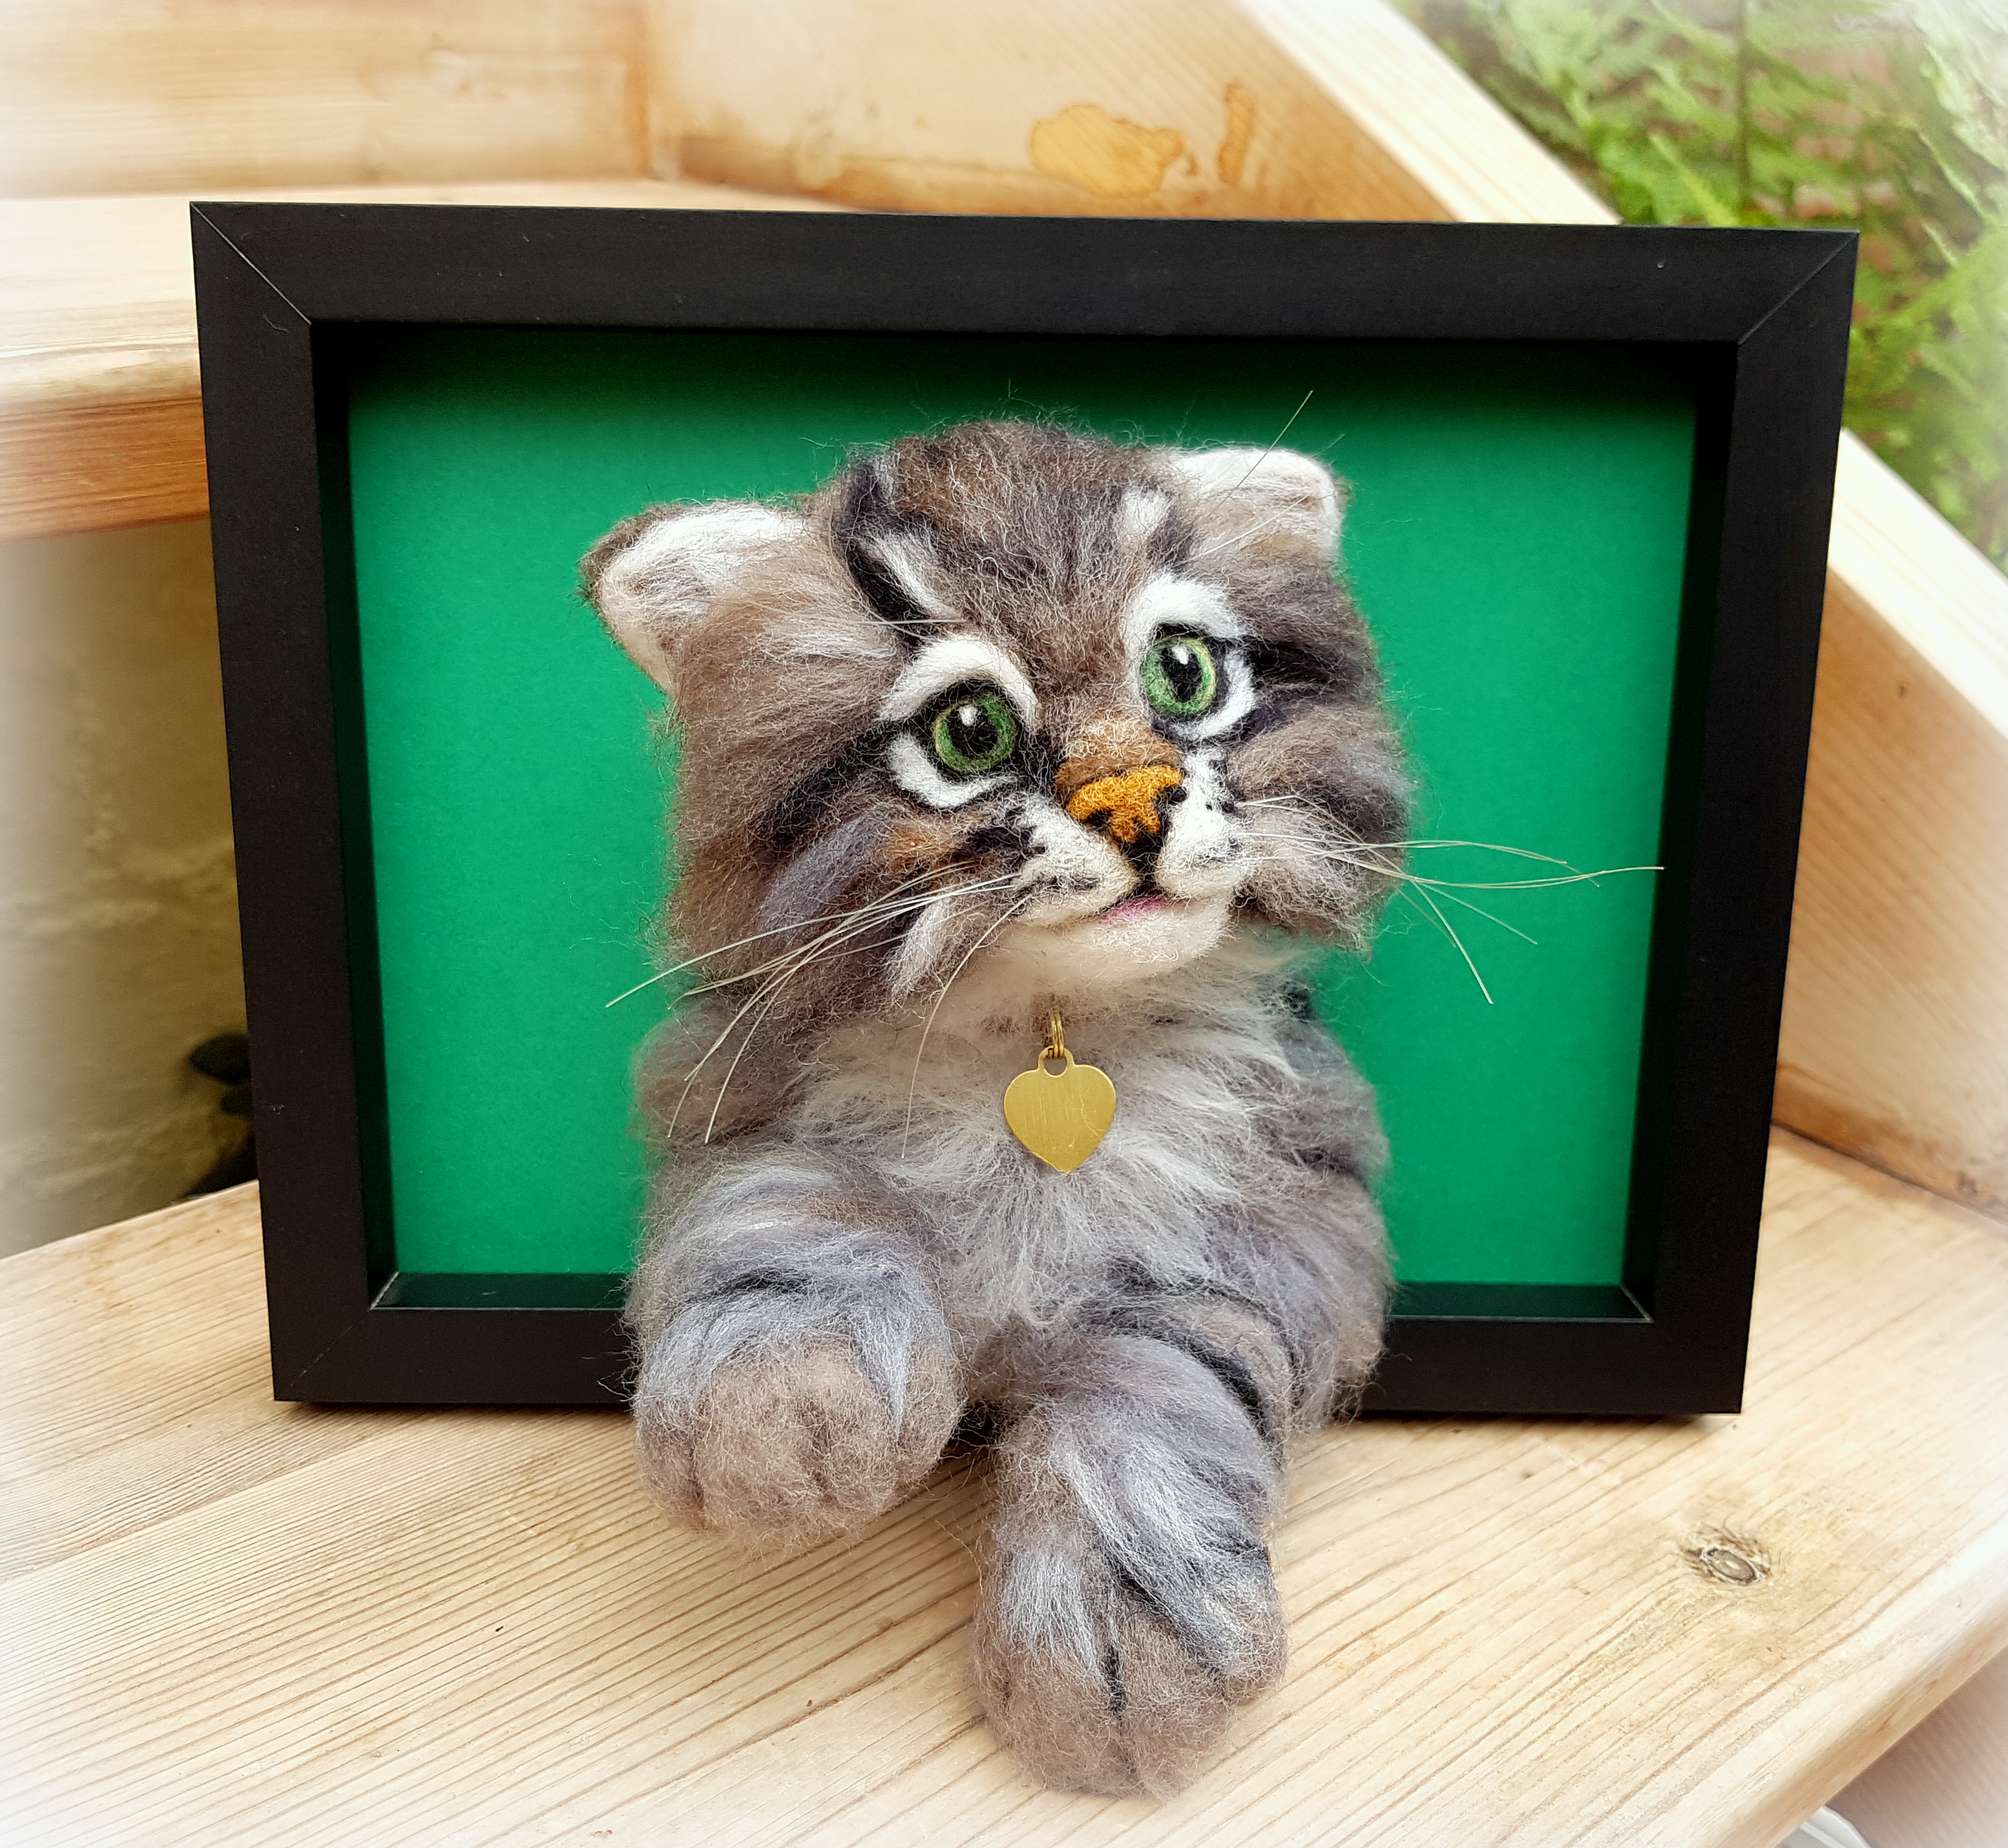
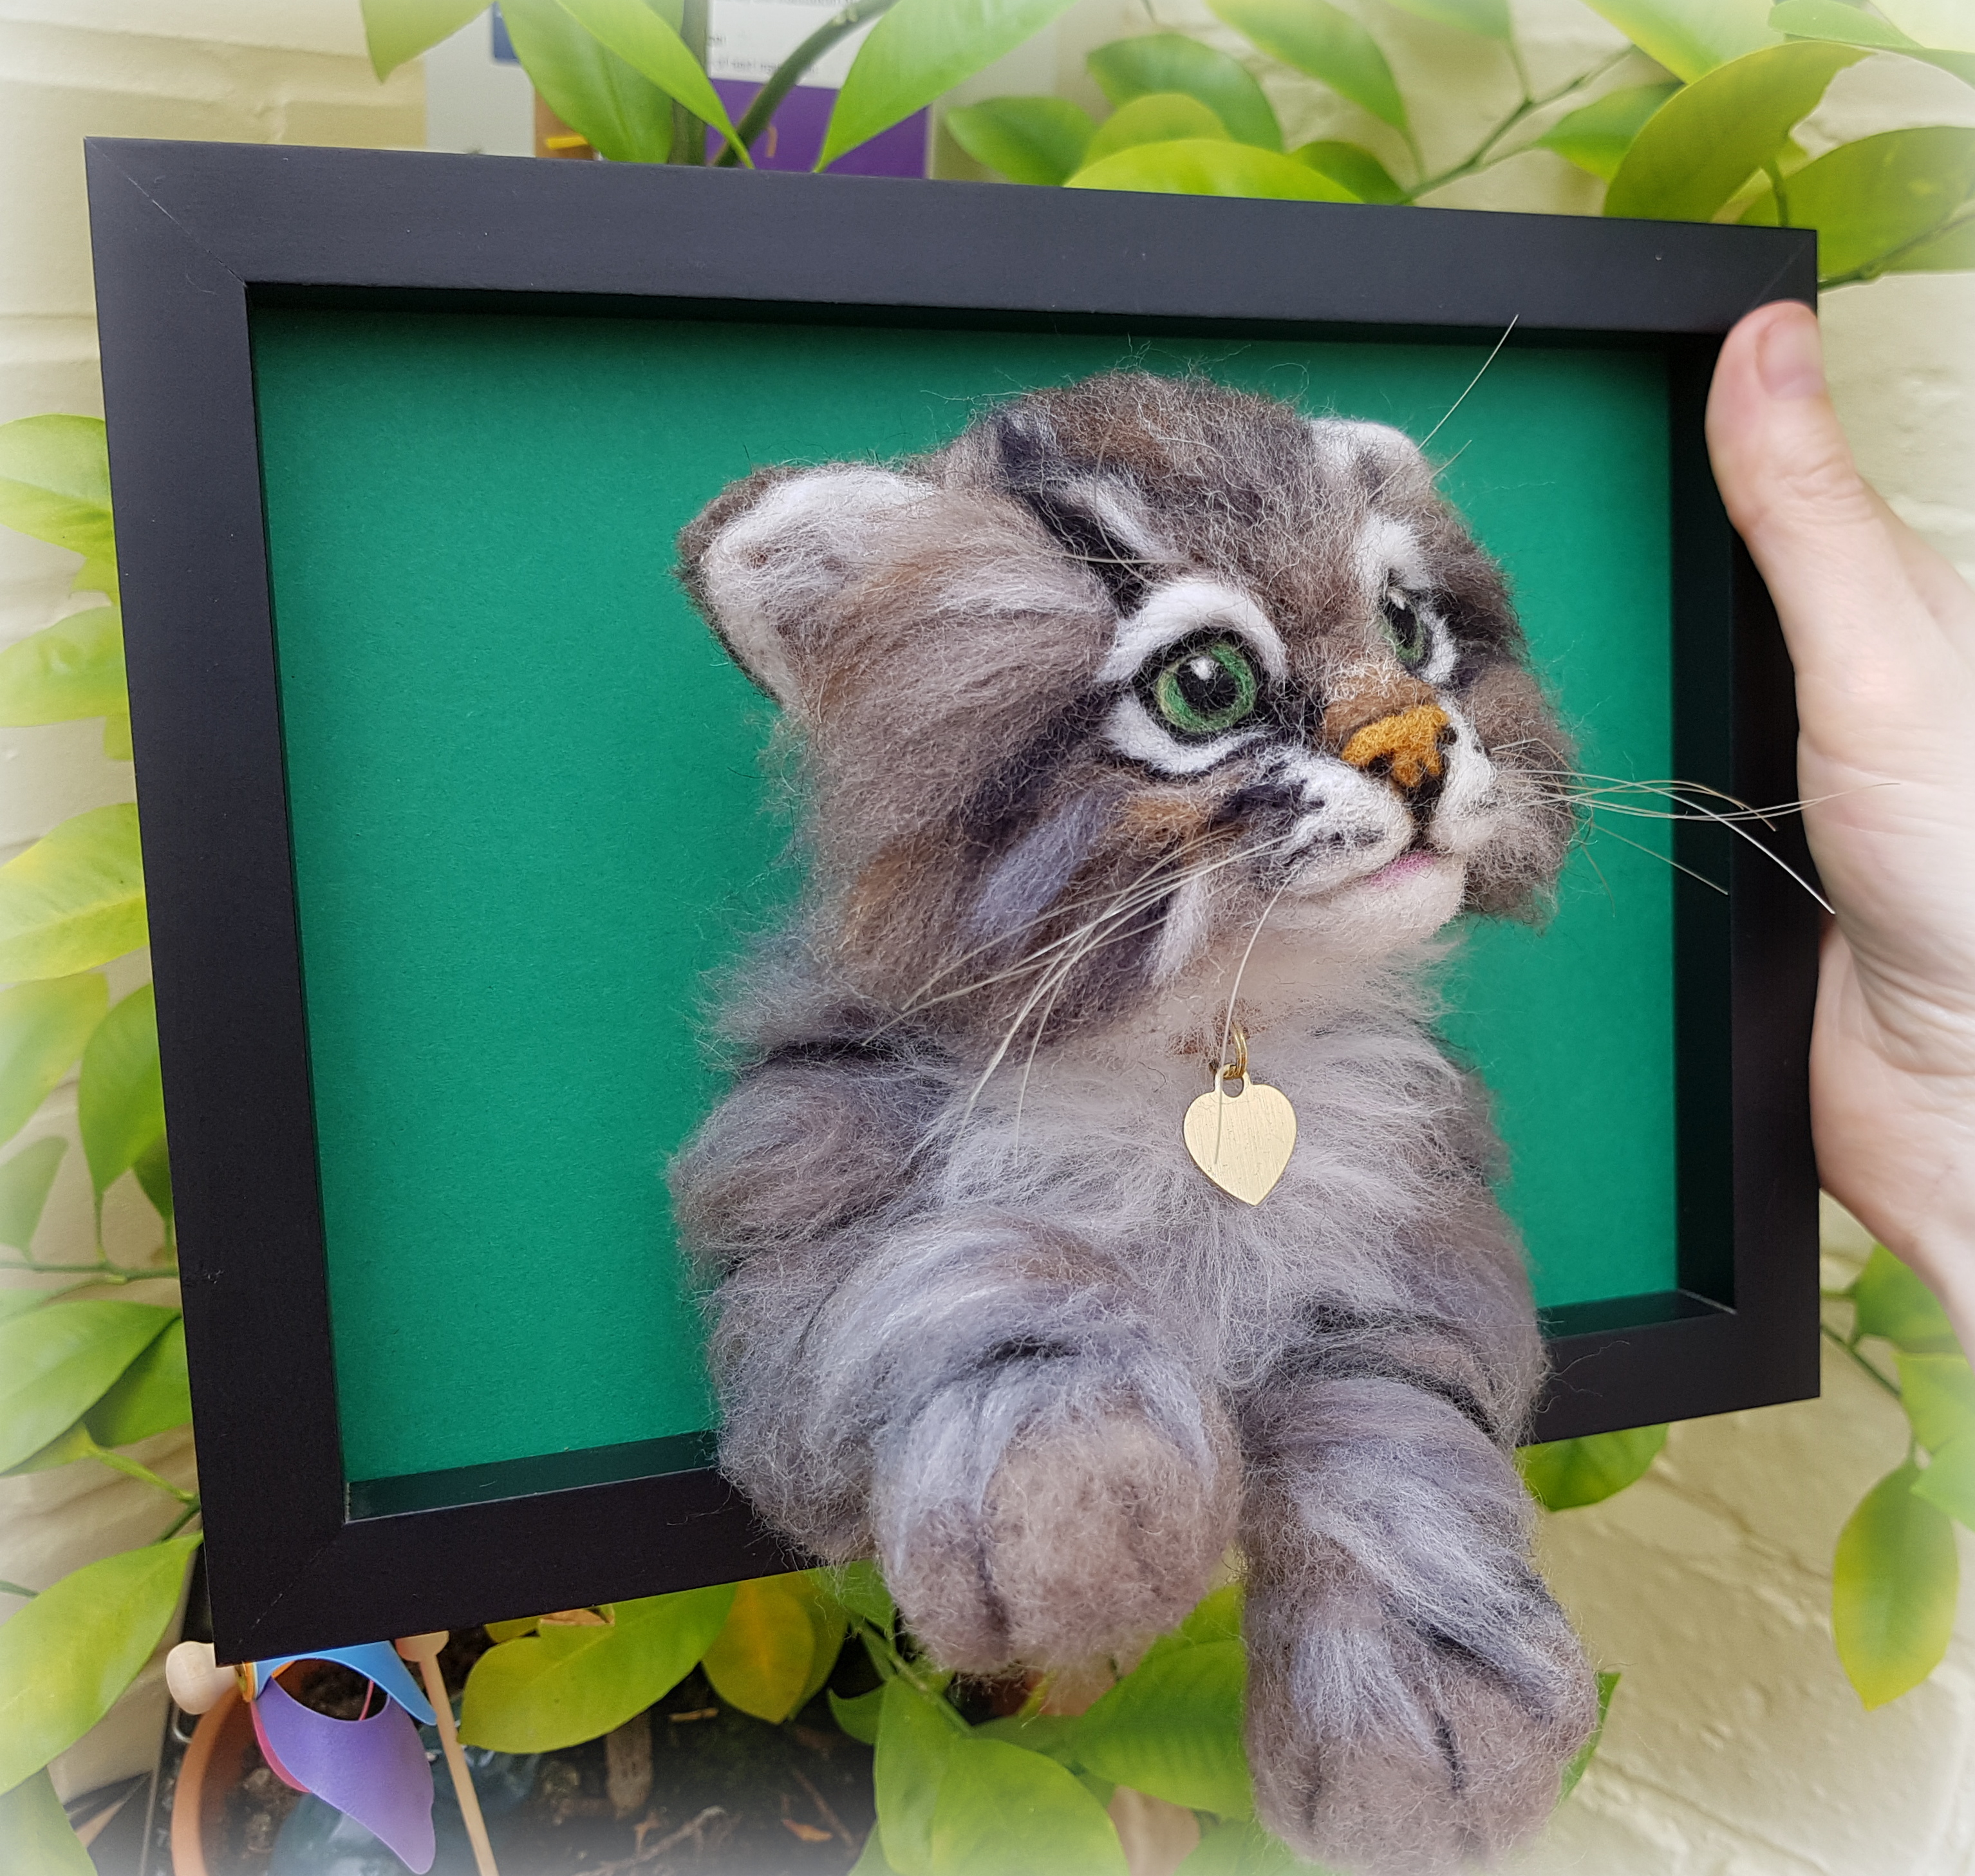
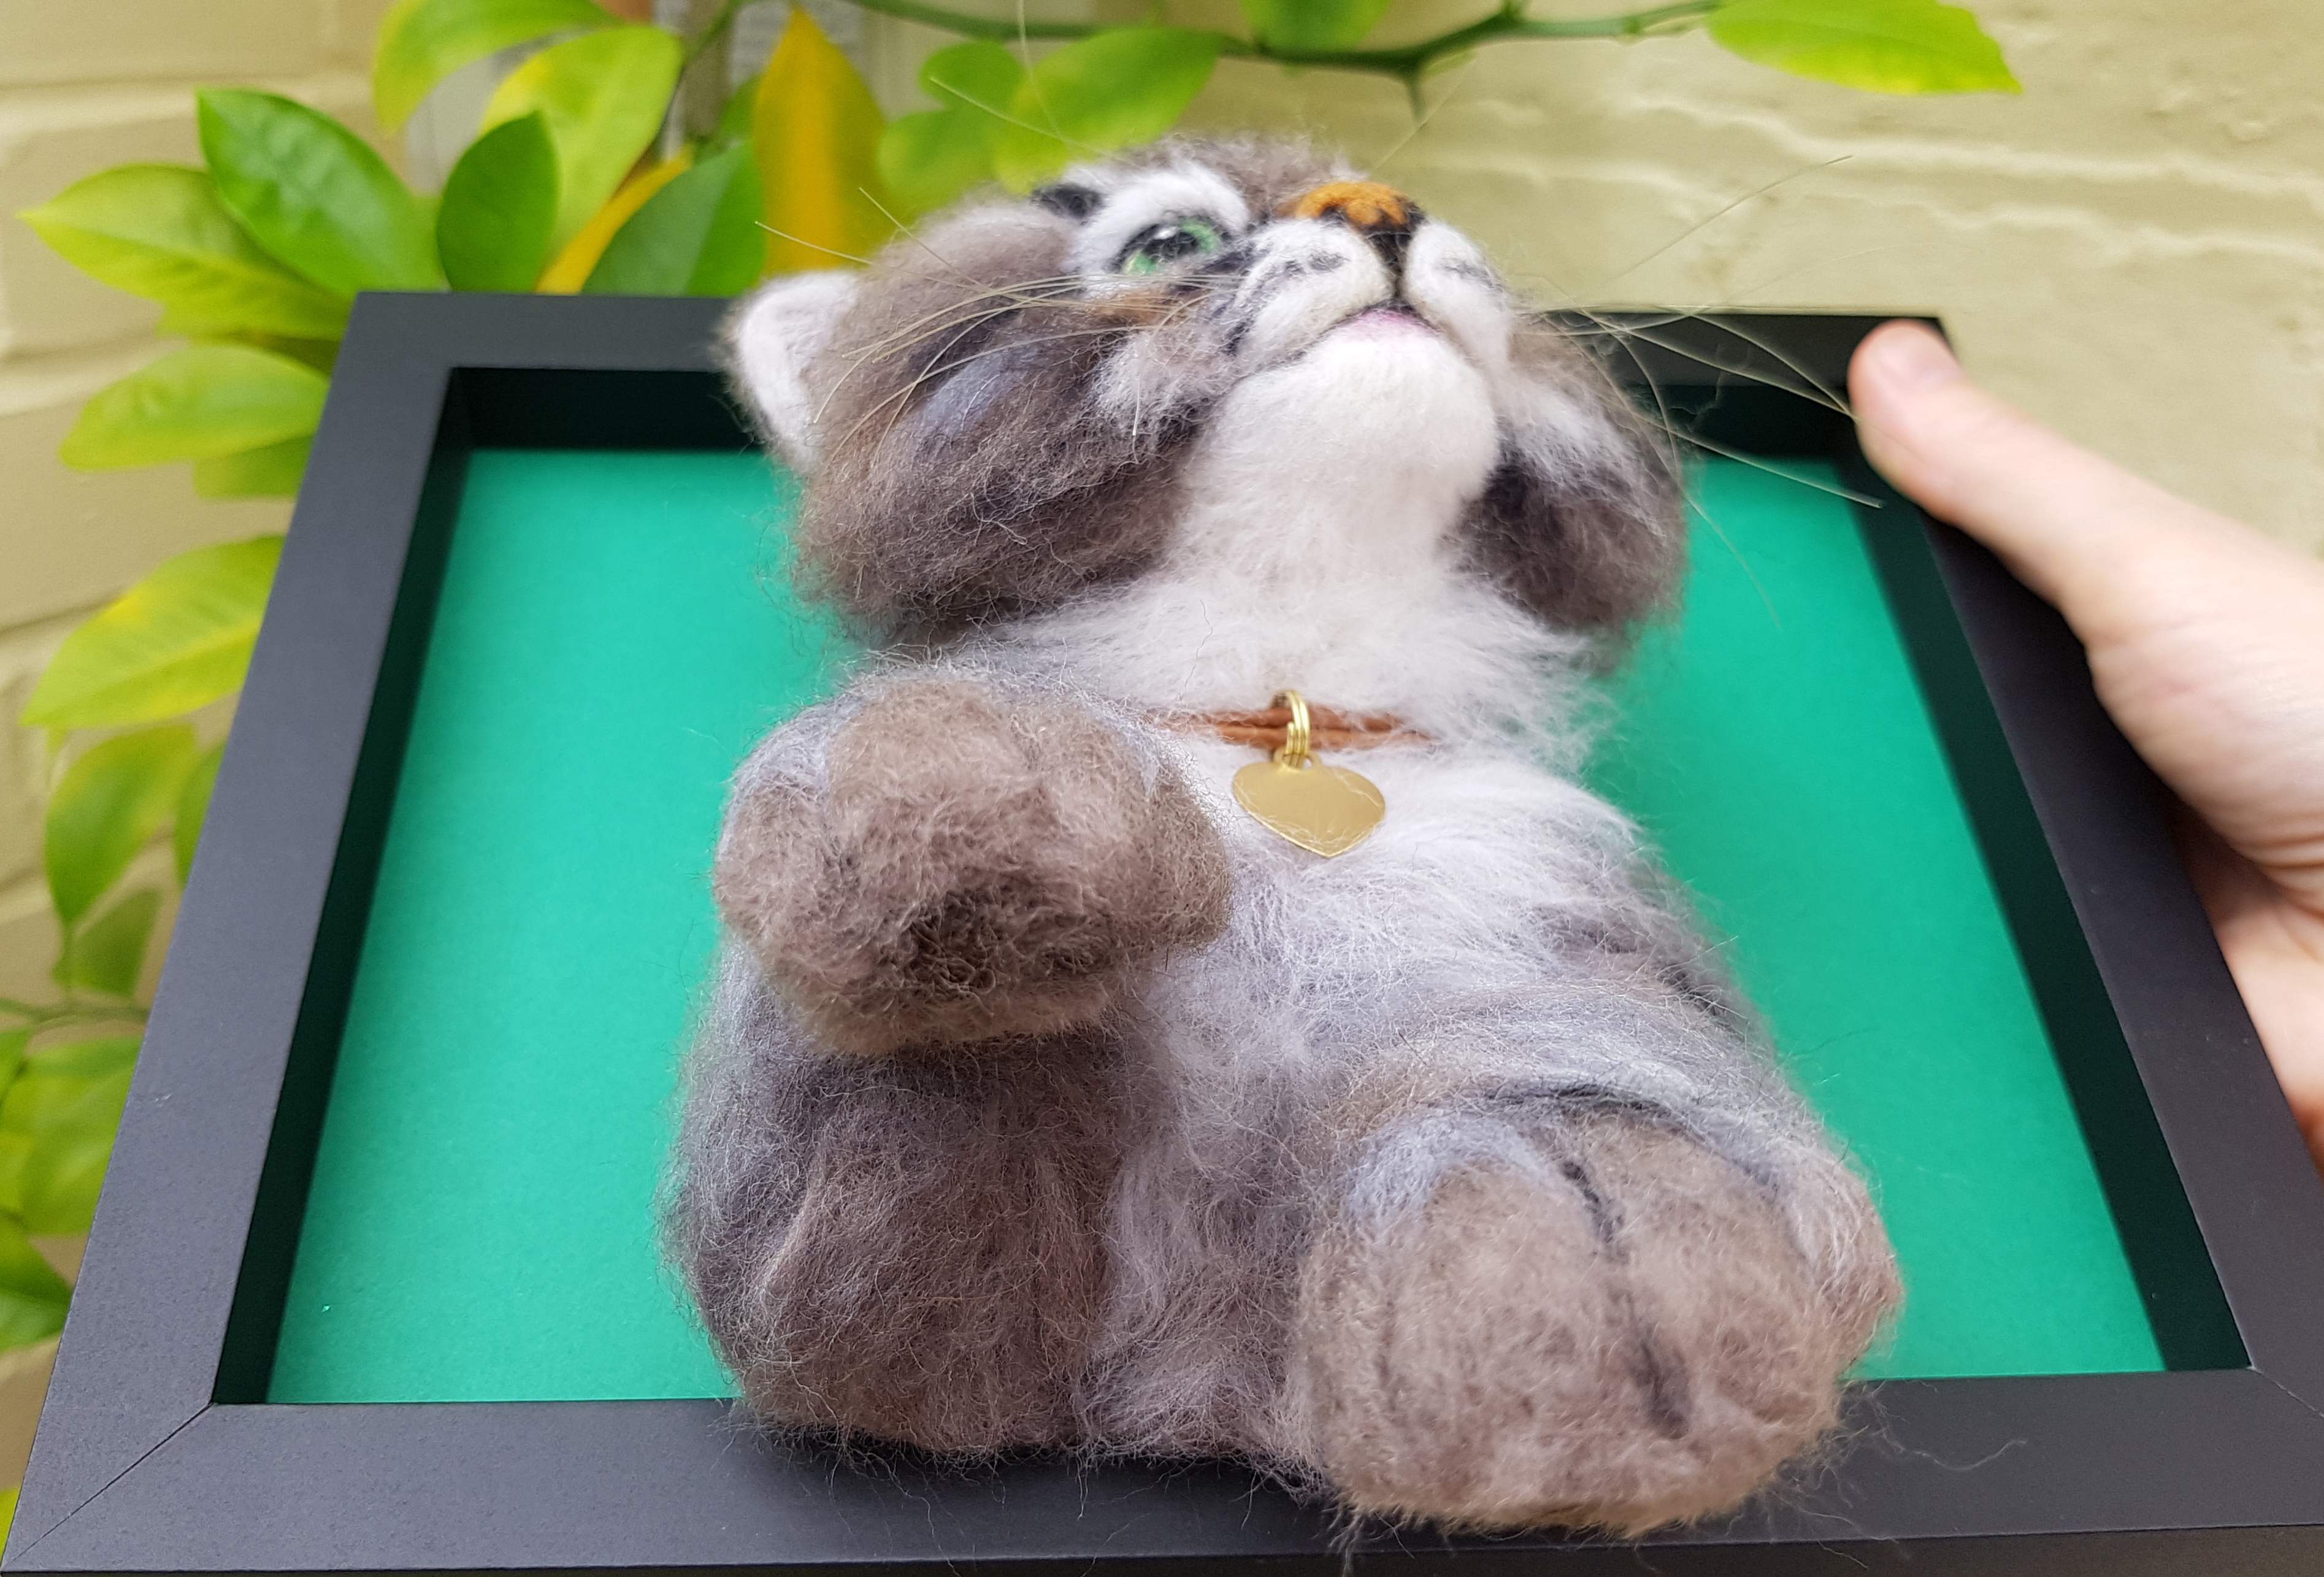
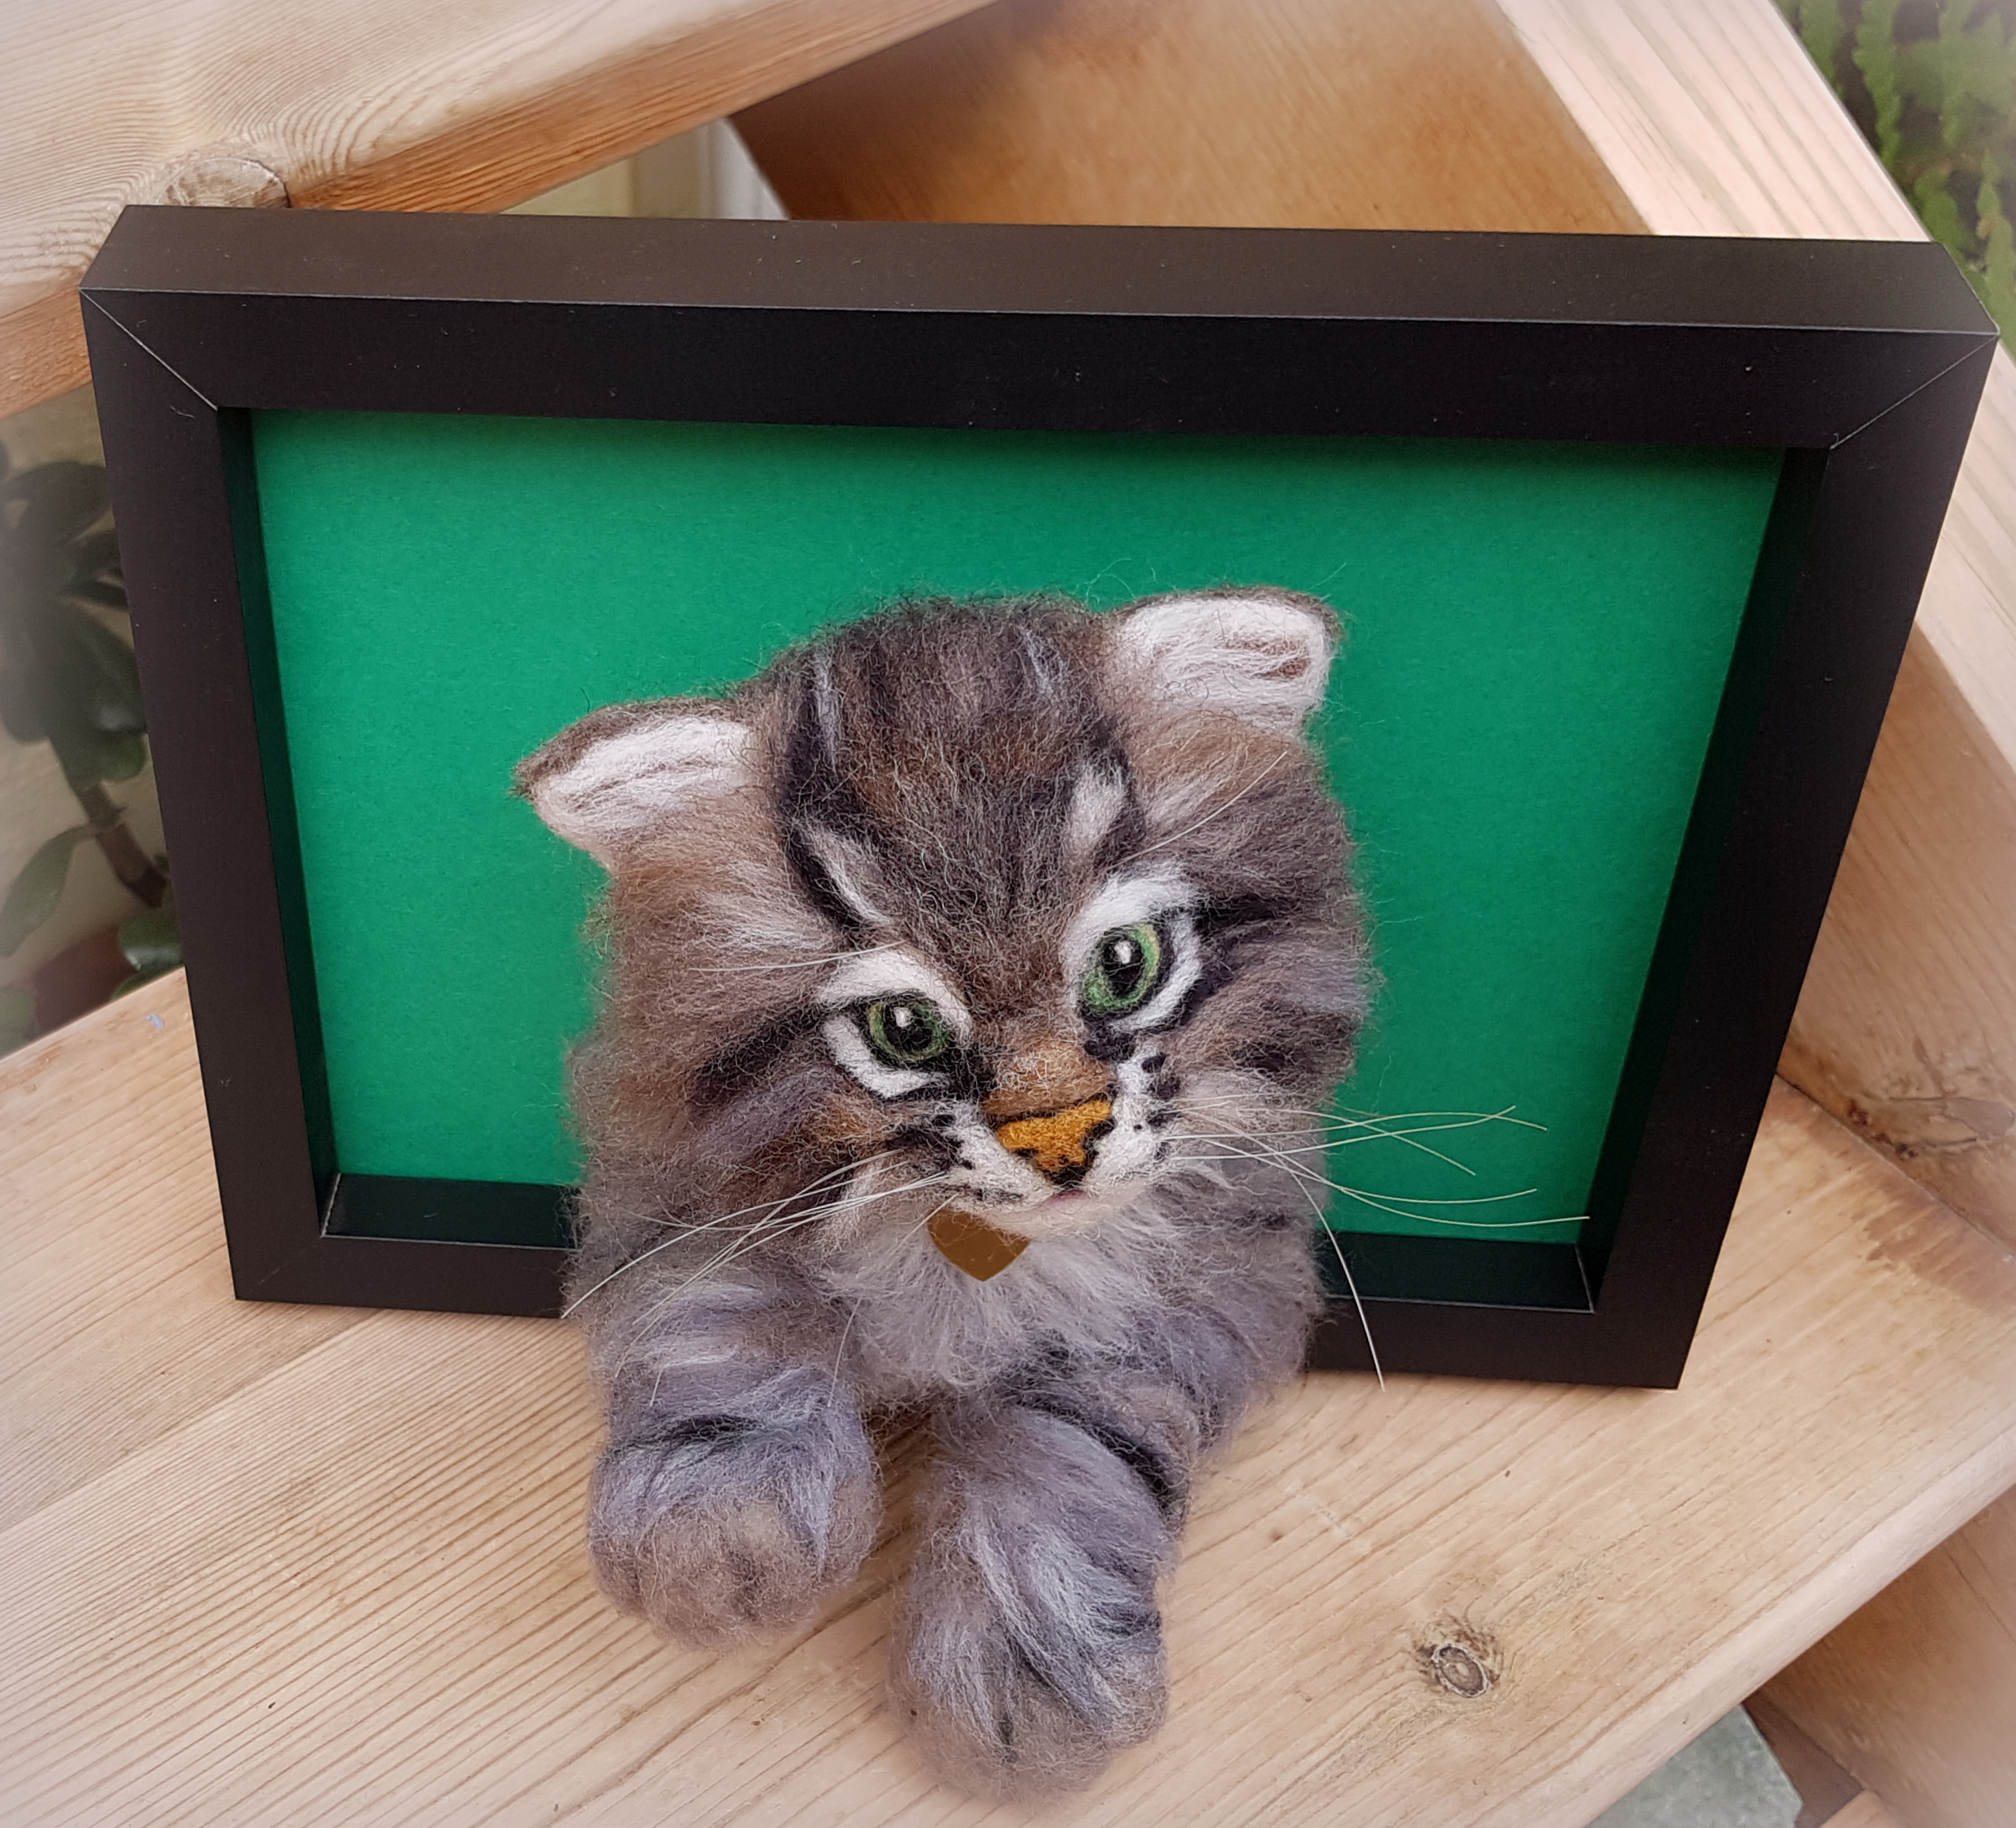
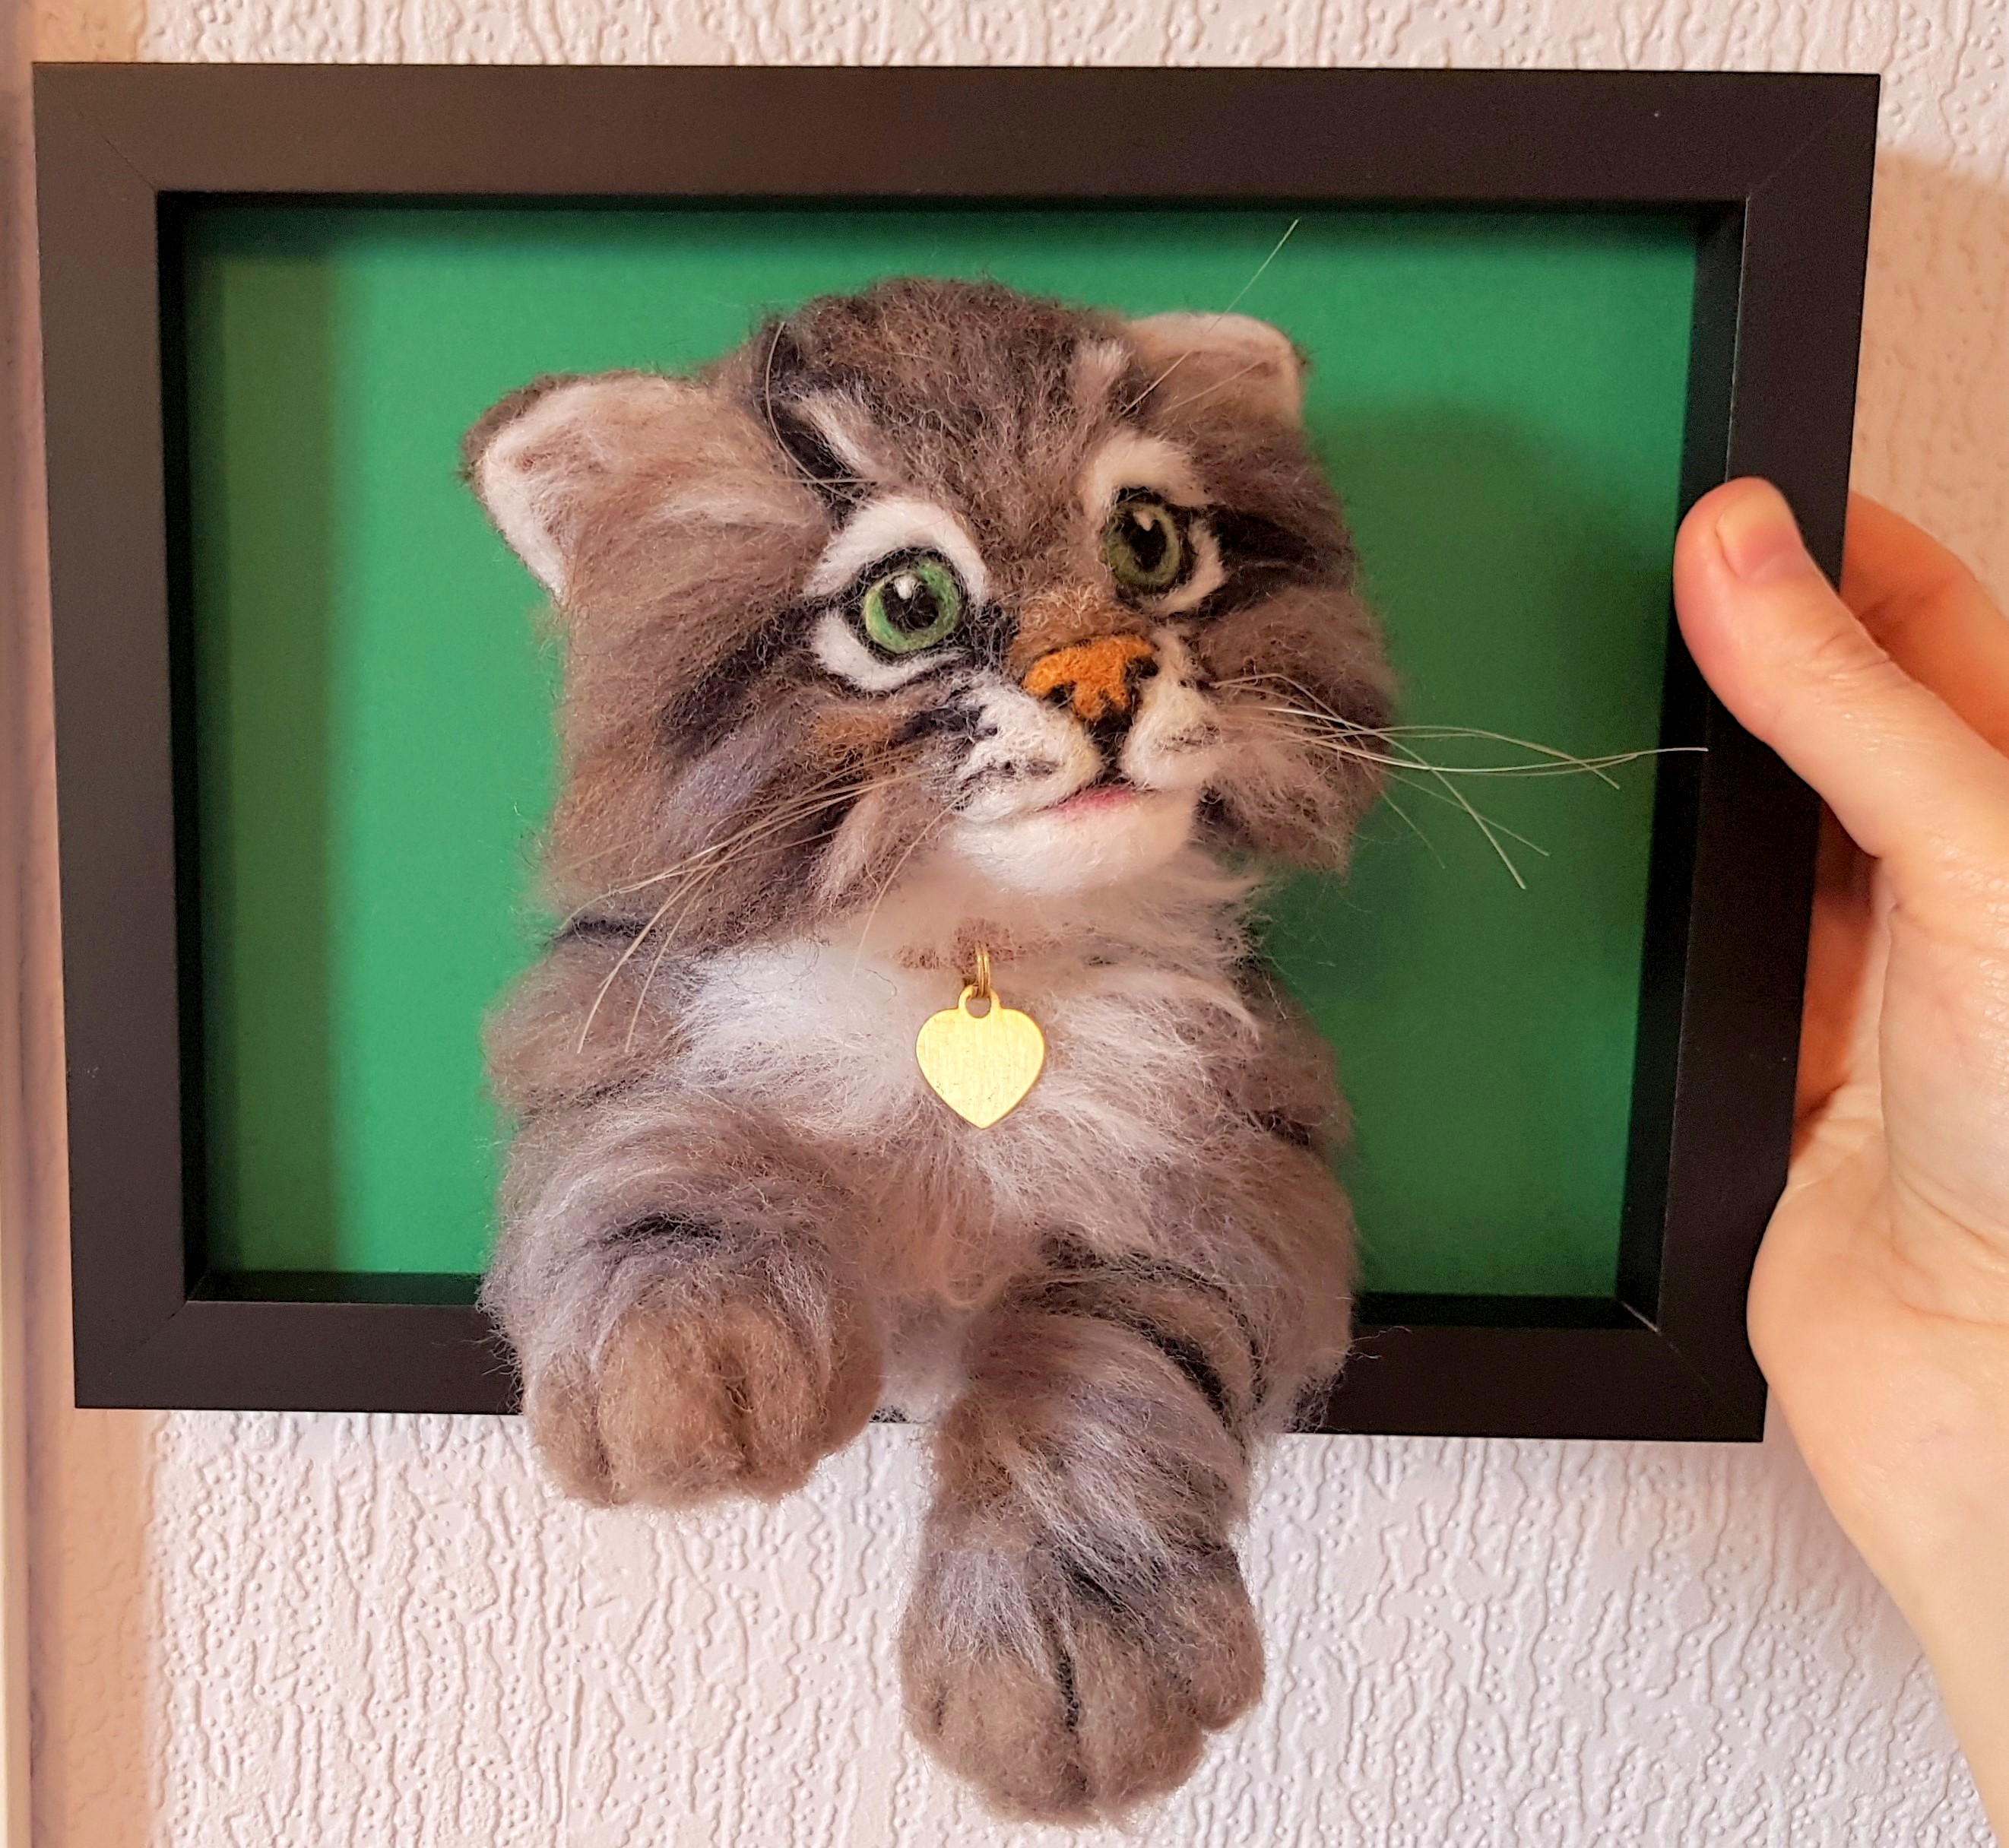
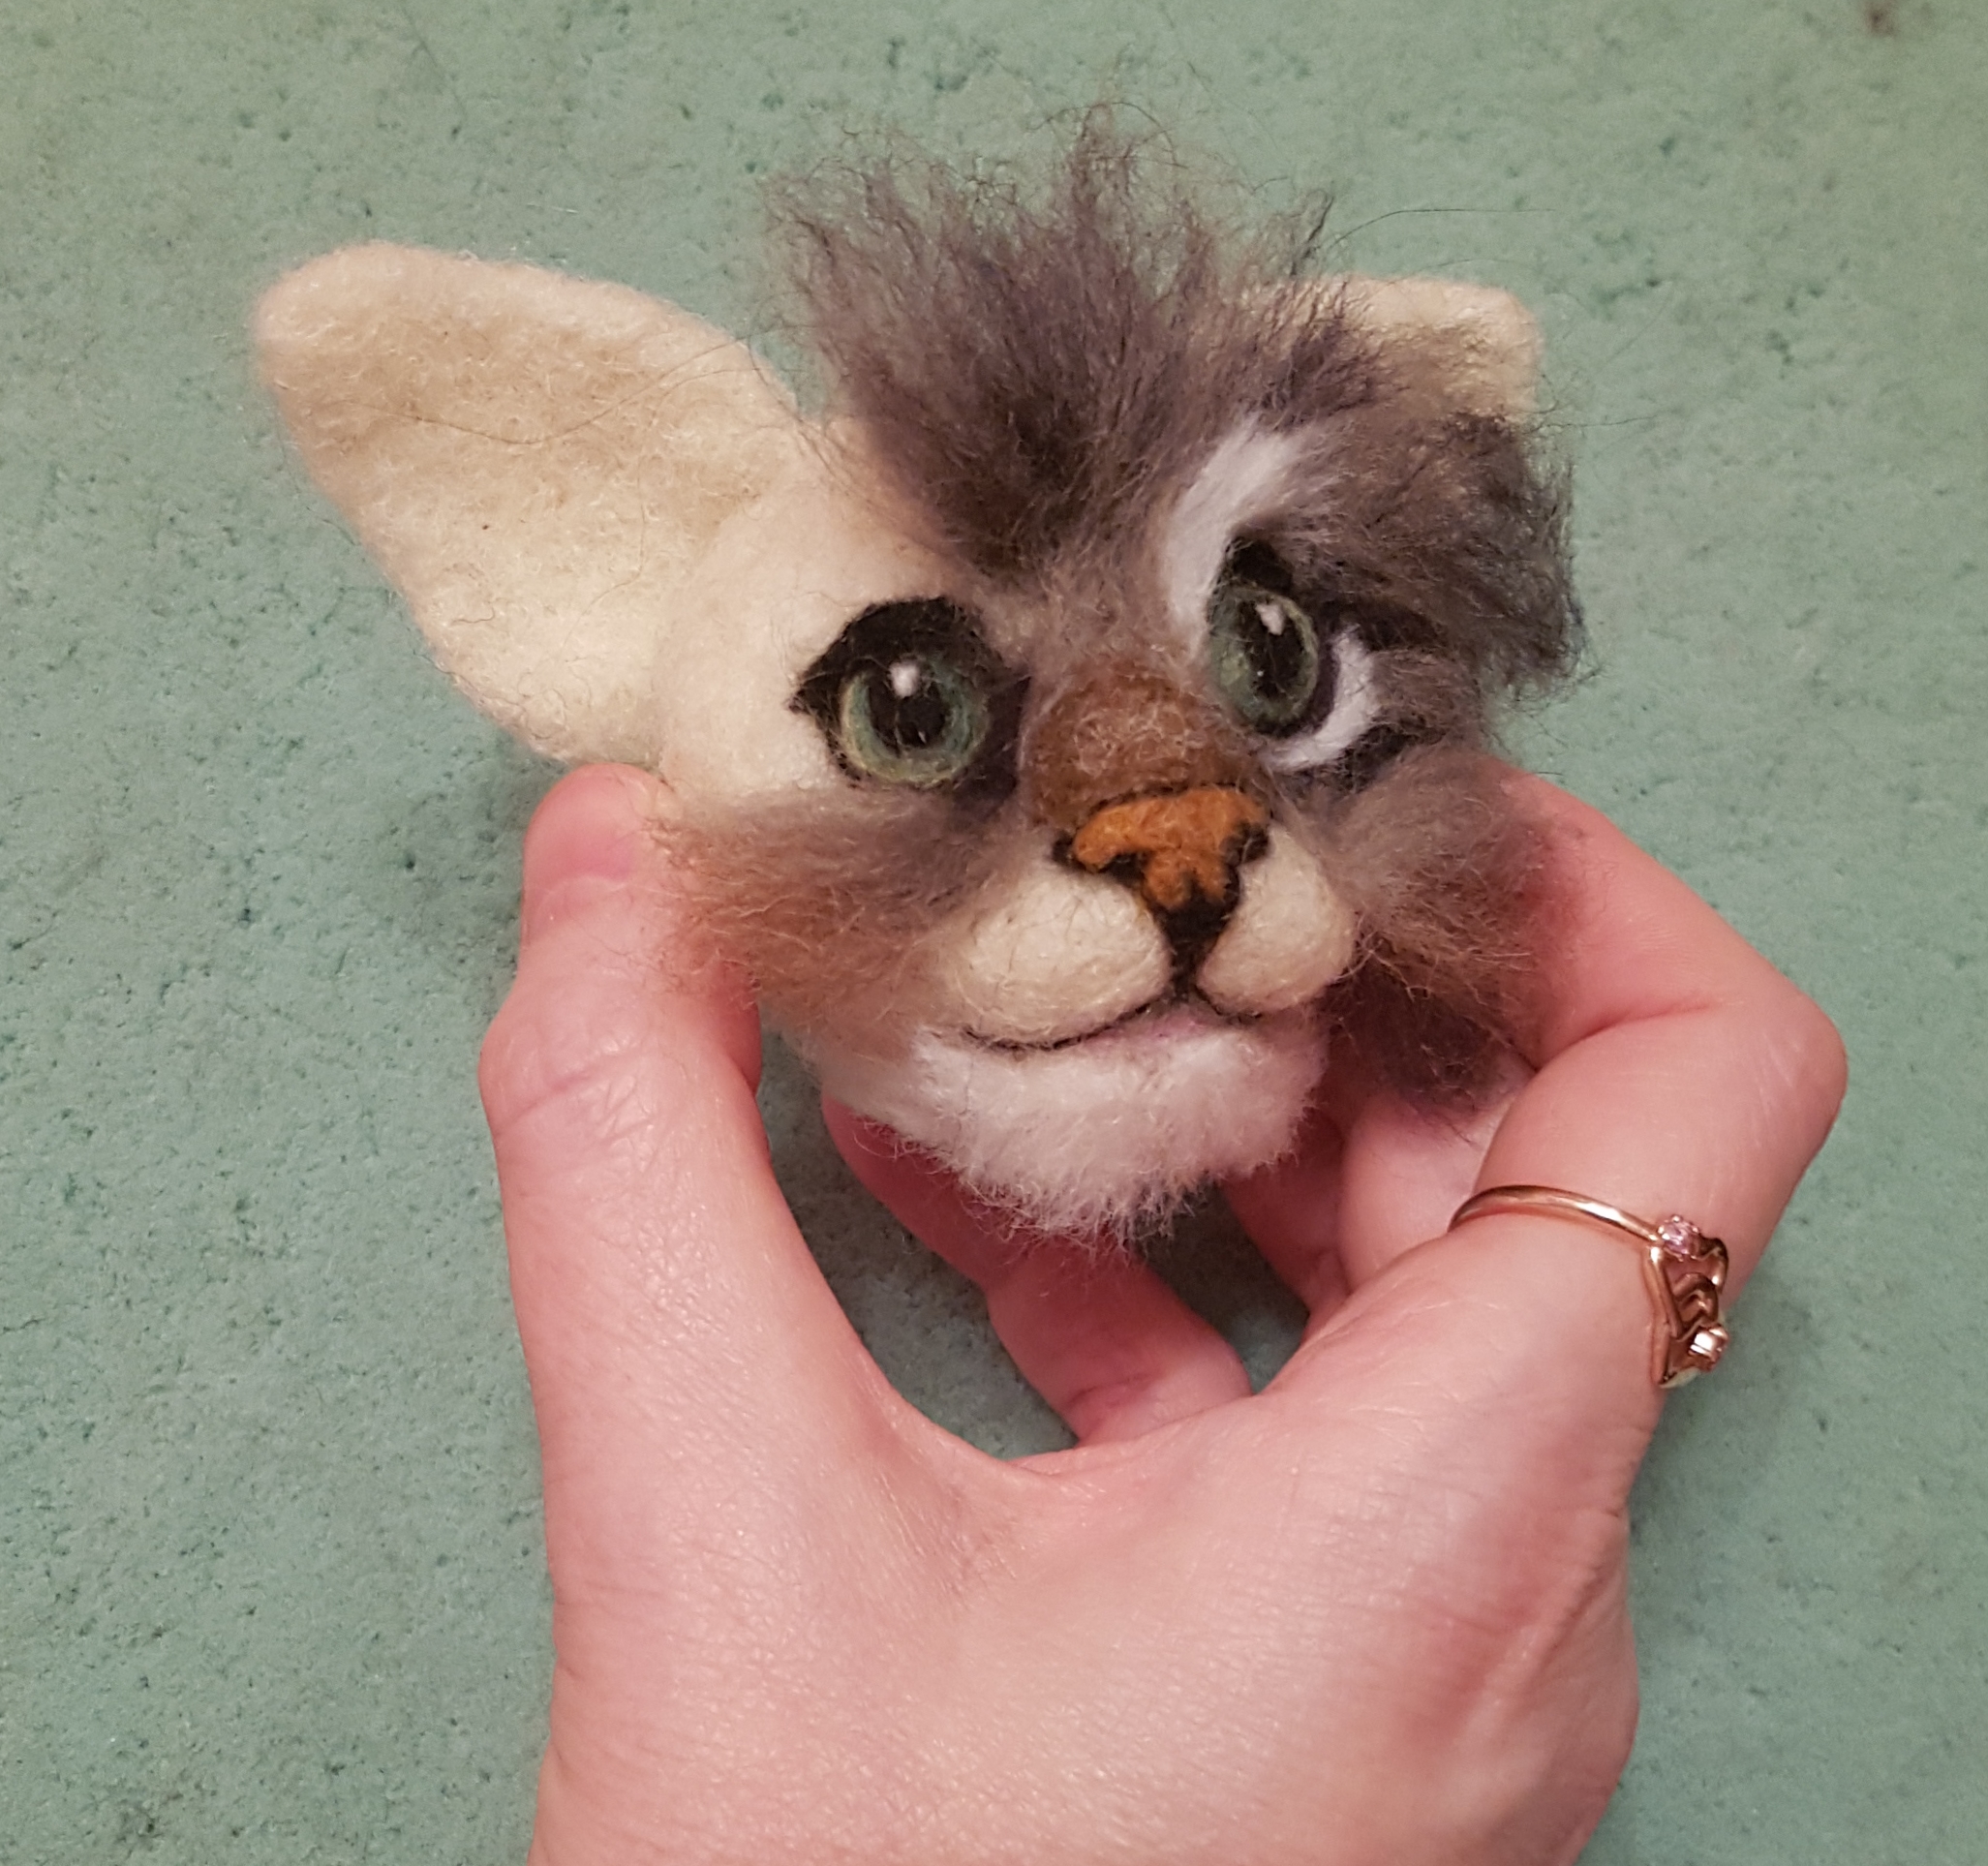
“Paws”, an adorable and realistic looking Tabby kitten, is looking up at you with those big green eyes. His little paws playfully protrude out of the picture. He has been lovingly hand-made and is ‘fit to be loved’. As you can see from the photos he is in a black frame with green insert to compliment his eyes.
The frame I used measures 9 inches wide by 7 inches tall perfect for fixing to a wall or standing on a table/chest of drawers. It took many hours of hard work and love to give him his playful character through the art of needle felting.
His beautiful soft fluffy fur is a blend of merino sheep’s wool (non-mulesed) from South Africa and British Corriedale wool. His nose and eyes are made of wool too, so no glass or plastic. He even has cute brown wool paw pads when you look underneath! His core is made of undyed mixed rare breed sheep’s wool from Scotland with a wire frame inside his legs for extra support. His white whiskers are made from horse tail hair for a realistic finish. He has a little collar with gold coloured heart pendant.
Here are some photos of the needle felting process.
With real cat photos as reference, I started sculpting the core wool to make the head,
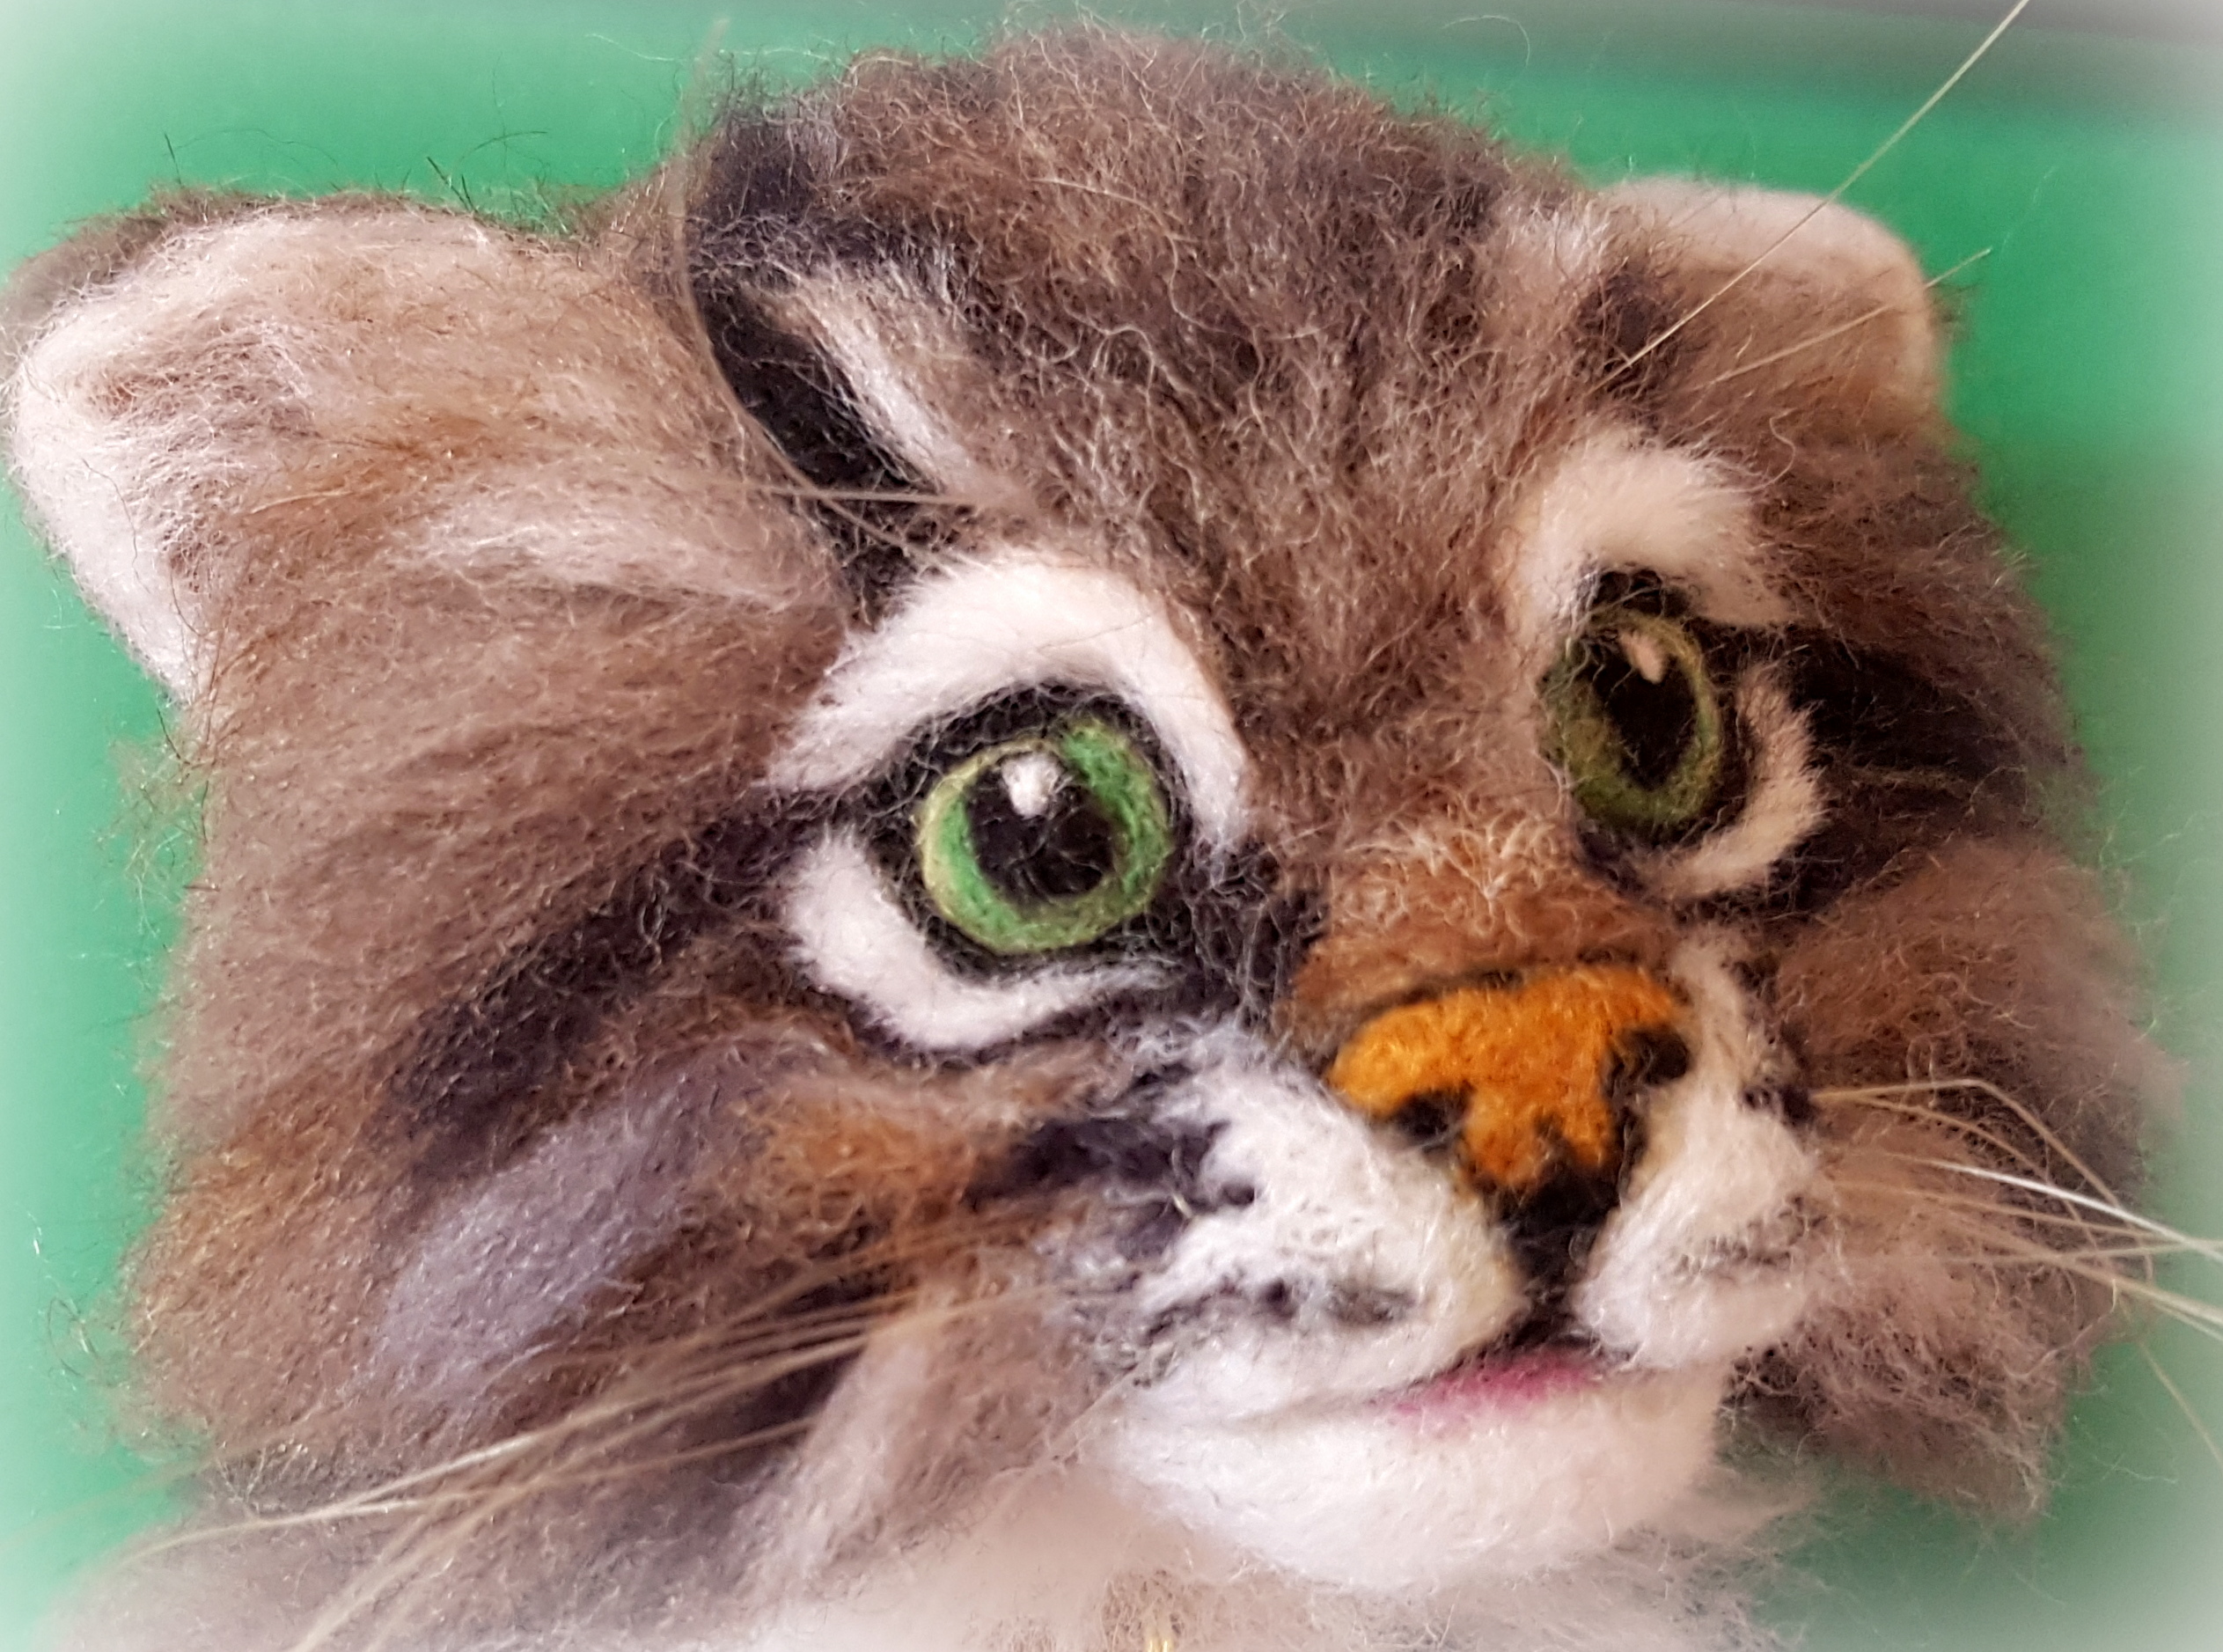
I then filled in the eyes and added layers of grey, black, brown and white wool to resemble cat fur.
I added nose and mouth detail.
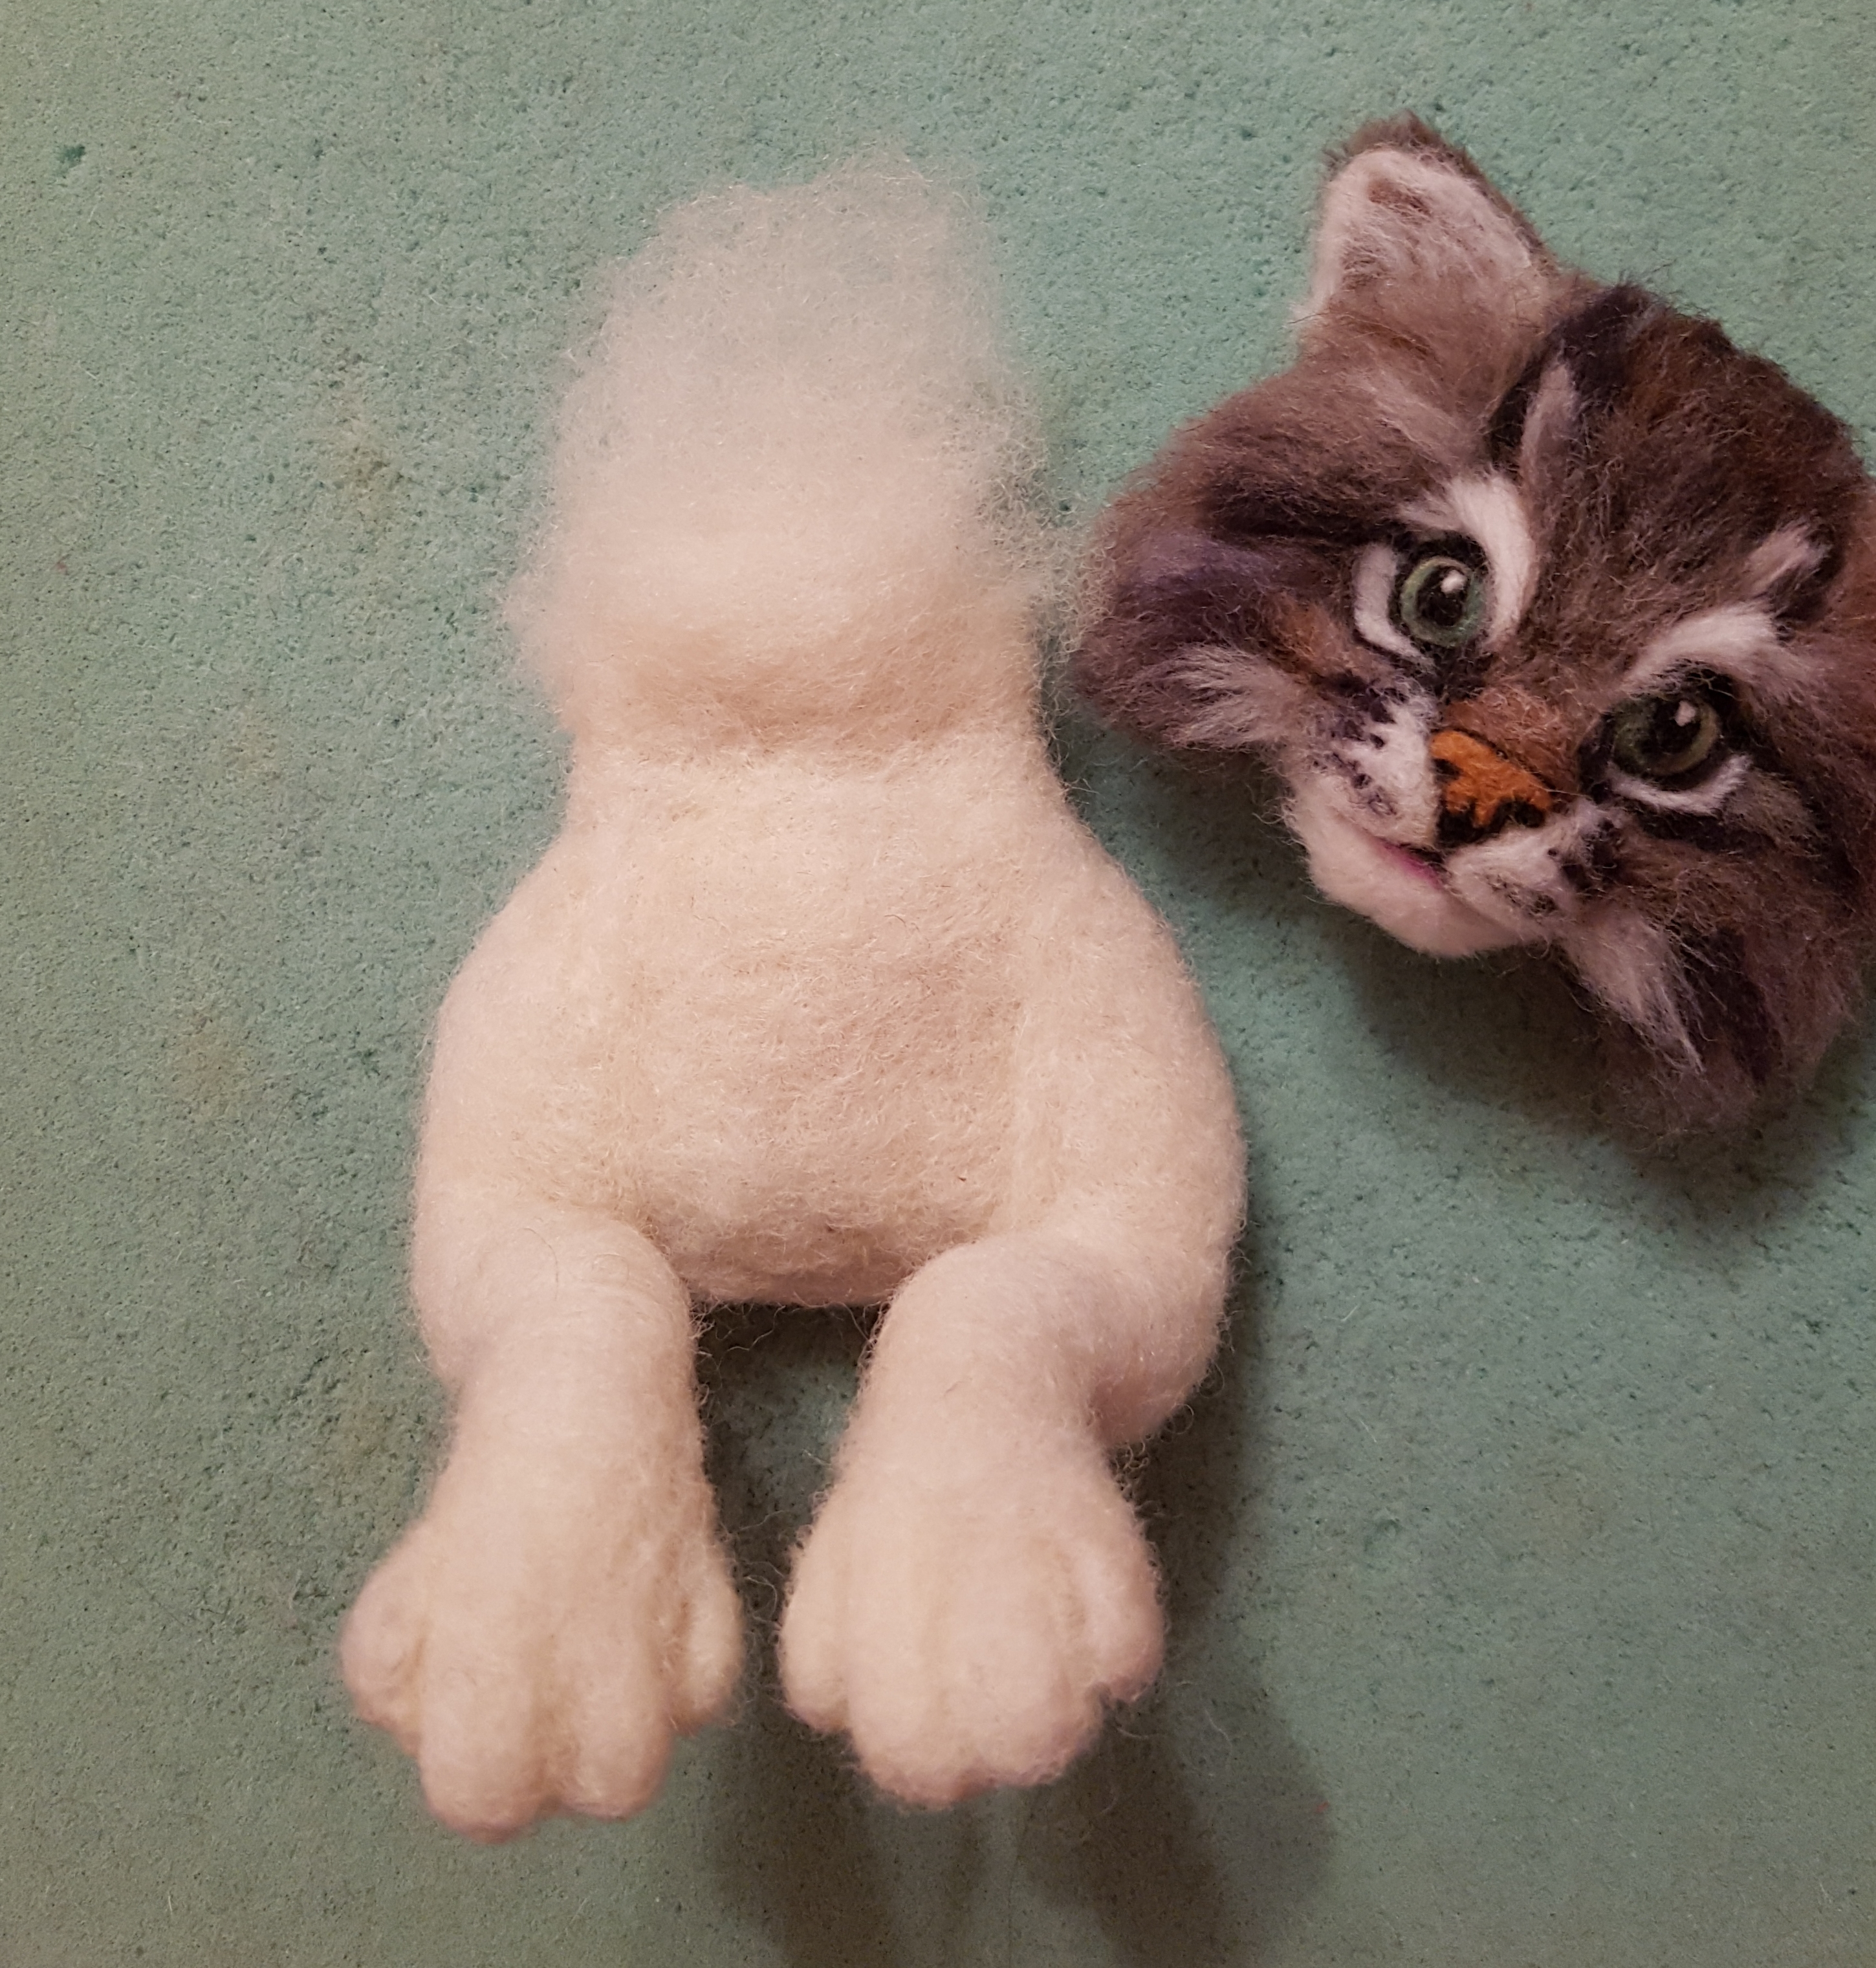
Once the head was complete I wrapped more core wool over a wire armature and sculpted the legs and torso.
After attaching the head I layered coloured wool over the top of the body and legs to give that soft fluffy cat fur look as well as the paw pad detail.
Finally after tying a collar round its neck with a gold coloured pendant, I threaded the horse hair whiskers.
As with all my long haired sculptures I went over all the furry layers with a tiny needle to separate fibres and ensure no fluffing or matting and then trimmed any excess fibres that stuck out.
After making him I went on to make a Tabby Birman cat head and made a needle felted cat head series for you to enjoy, see the videos list here.
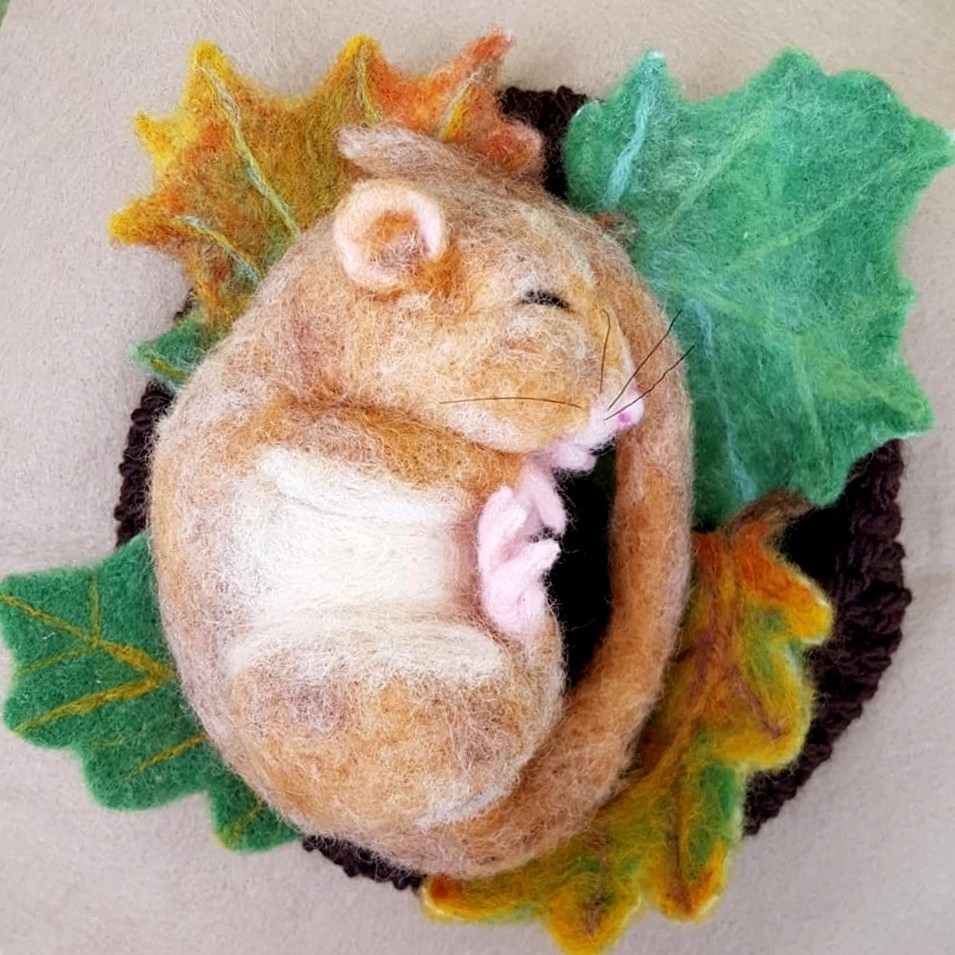
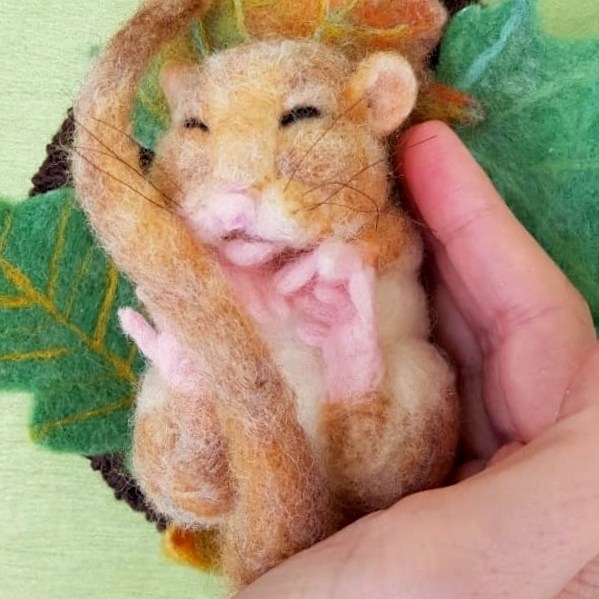
May I present to you ‘Hazel’ the sleeping hazel dormouse. She is snuggled up on her needle felted leaves in a wool nest I crocheted.
She is a mix of merino and corriedale wools with a wire in her tail and has horse hair for whiskers. Her tiny toes are all wool – I think they are the tiniest I have made yet and were very fiddly but certainly worth every minute of the process.
Hazel was such a joy to make while I have been recovering from a life changing operation. Curling up into a little ball just like she is doing in her cosy nest is something I have felt like doing a lot the past few weeks as I have needed so much sleep.
I hope you like her. I will be posting more about how I made the leaves soon too.
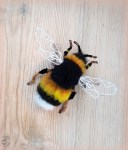
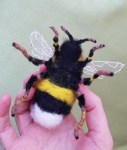
Here is my first attempt at a needle felted bumble bee. I gave it to my sister for her birthday last week. My sister’s name Melissa means ‘honey bee’ but she loves bumbley bees as they are so fluffy looking! I was brave enough to let it sit on my hand without any worries about being stung. Good job as it is much larger than life size!
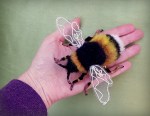
I started off using black pipe cleaners as legs and antennae. I twisted them together in the middle to form the base for the body. I trimmed the pipe cleaners with small angled nail scissors to accentuate the leg segments and added tan coloured wool..
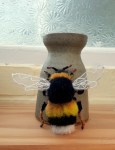
I tightly wound yellow, black and white merino wool tops over the middle section to form the head, thorax and abdomen and added more and more of the merino on top to build up the height. I needle felted the body with a barbed needle to sculpt into a bee shape. To create a furry bumble bee look I then used a reverse felting needle to pull out the fibres and added a layer of rusty orange over the yellow to give the colour more depth. (Note I didn’t use a cream colour core wool for this piece to ensure that only the pure colours I wanted came through when I used the reverse needle not any underlay of core wool fibres).
I had to get really creative for the wings. I searched my stash of crafty bits and ended up cutting out wing shapes from a silvery coloured organza bag and then hand sewed the pattern on each wing by hand with white embroidery thread.
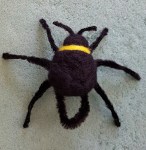
Here are a few photos of the work in progress of how I started.
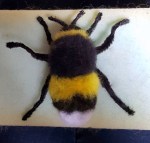
I am so pleased that my sister adored him!!
******how about creating your very own Mr Bumbley Bee? The detailed and beautifully illustrated PDF tutorial is now available here ******************
I am very excited to present to you my greatest needle felting challenge yet. He is modelled on a beautiful young Shetland sheepdog (Sheltie) called Schubert (Schubie)! The real dog is very much loved by his human mum and dad and his dad wanted a surprise gift for his wife (Schubert’s mum) for Christmas!
I rarely do commissions as I try to avoid the stress of it but having spent quite a bit of time admiring the real Schubert I had been wondering how it would be to needle felt a mini one and quite fancied a stab at it! 🙂
Schubert has so many tones to his luxurious fur so I spent quite a bit of time blending wool colours. He also has very long fur so I really put into practice my ‘adding long animal fur’ techniques.
I started off wrapping corriedale core wool over a wire armature. Then I added paw pads and then some detail on his face before starting on his belly fur and working from his tail end towards his neck with merino wool. I did his wispy feet hair and tail last. Please see the work in progress videos below for more info.
In an attempt to keep him as authentically ‘Shetland’ as possible I managed to include some brown Shetland sheep wool in his coat and his whiskers are made of black Shetland pony tail hair all the way from Scotland.
As with all my creations it took many hours of needle felting and love. I am very pleased with the way he turned out and I hope you like him too 🐶🐕😆
Here are some short videos of the process, followed by the final photos of Schubie.
Here is the process of the armature with the body shape sculpted over it in wool:
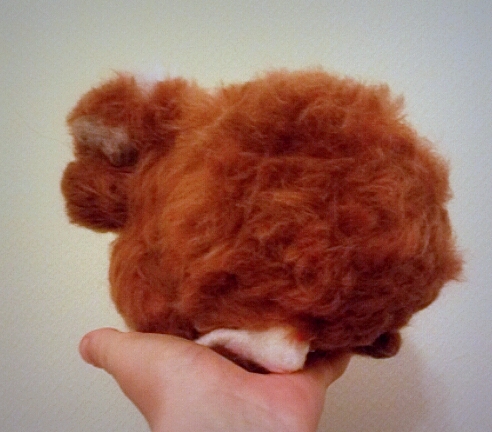
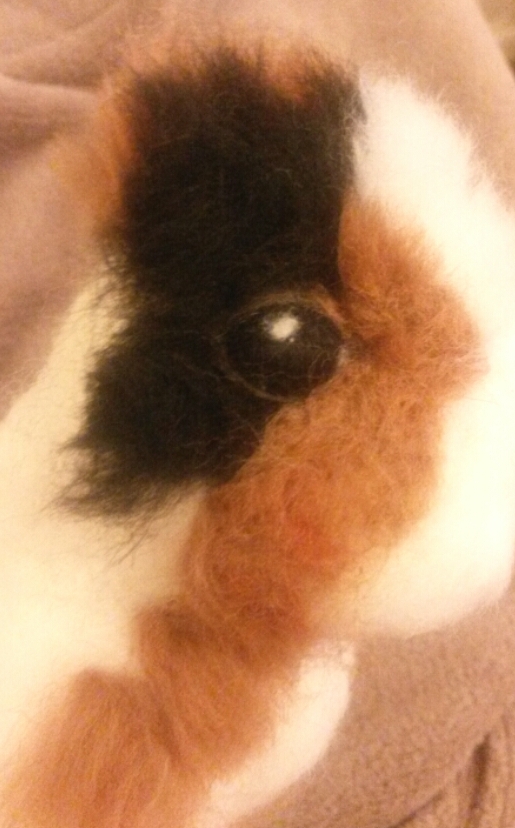
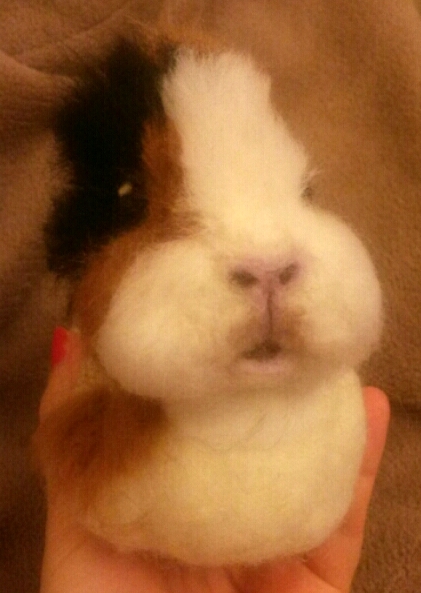
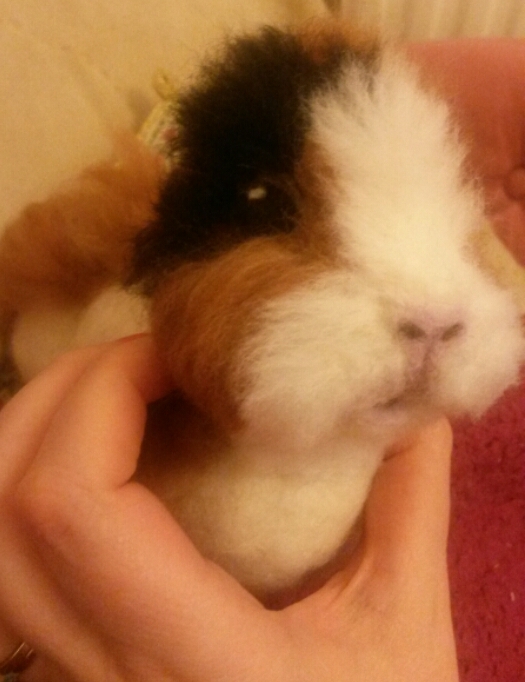
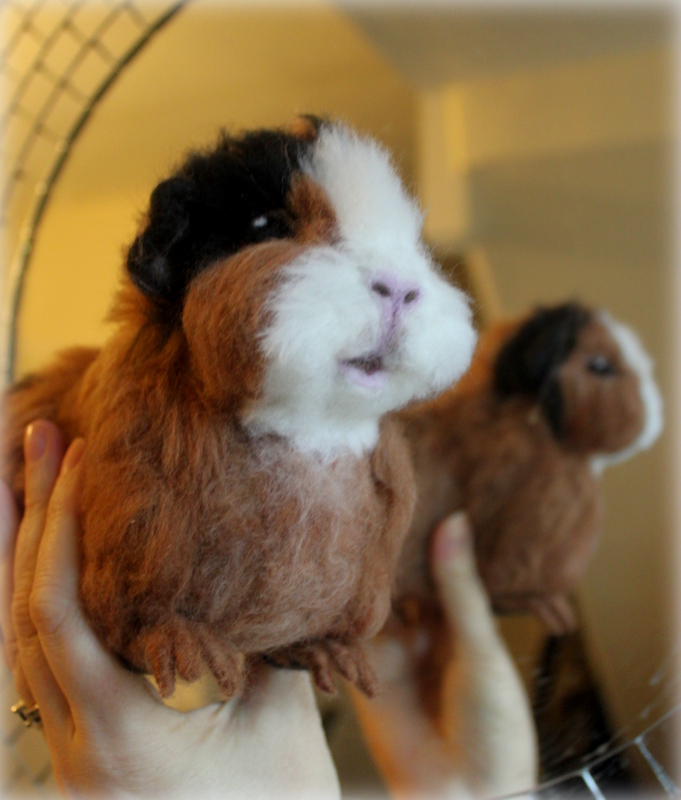
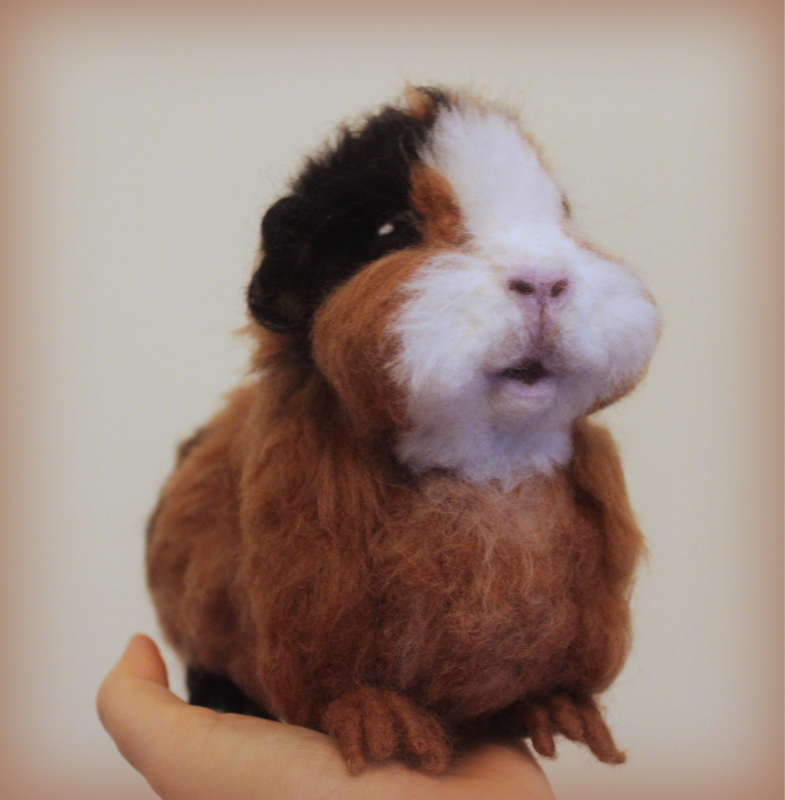
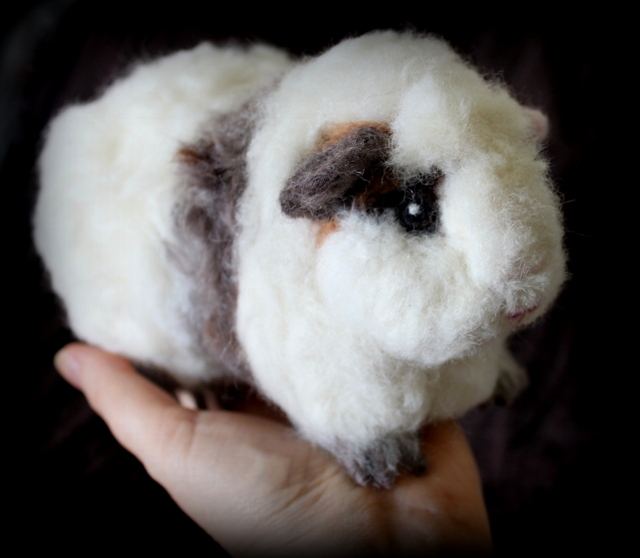
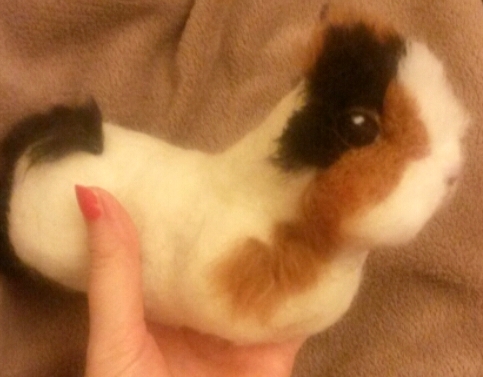
I would like to introduce you to a gorgeous needle felted guinea pig called ‘Teddy’.
As you can see he has a cheeky little face and I really tried to make sure his autumnal orange fur tones ended up looking as fluffy and soft as possible just like a real guinea pig.
He is now on his way to France to live with a lovely lady who will take good care of him.
Bon Voyage little guinea pig! You were a pleasure to create and I hope you have a wonderful life at your new furever home x
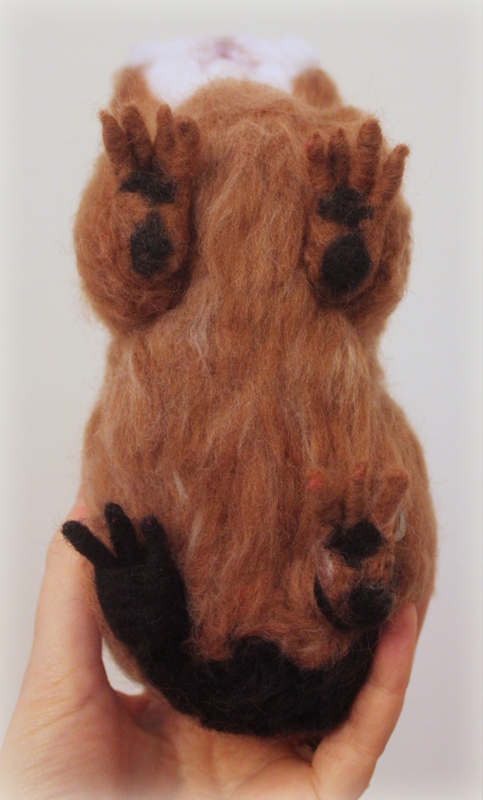
His core is made of natural undyed Corriedale wool from New Zealand. His beautiful soft fur and detail on his cute piggy paws, ears and face are of soft merino wool (non-mulesed) from South Africa (Cape). His toes have been sculpted by wool wrapped delicately onto wire.
His eyes are made of wool too, so no glass or plastic.
You can see he is life-sized from the close up of me holding him in my hand.
Hope you like him 🙂
Would you like to know how to make a guinea pig? (click on the photo to get started).
Making a needle felted animal and need some help adding layers of wool to achieve a realistic long fur look? (click the photo to learn more…)
See here for a variety of tutorials, tips and ideas to suit your project
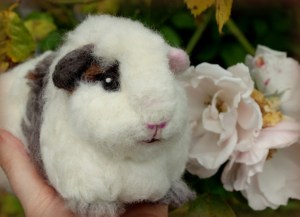
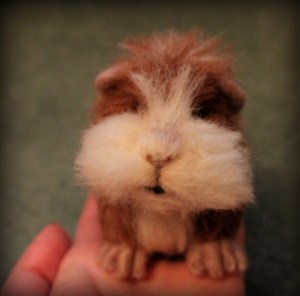
Here are some other needle felted guinea pigs for more ideas.
I absolutely adore my mum. She is always there for me and whatever I say in a card or buy for her on mother’s day would not even come close to showing her just how much she means to me.
Life has been extra challenging these last few weeks and she has lovingly sent me a text message every morning without fail full of encouraging words to inspire me and reassure me for the rest of my day.
Although I have been full of cold this week and tired I wanted to make something beautiful for her as a glimpse of my appreciation for all that she is.
I managed to create an orchid from a combination of crochet and needlefelt. 🙂 – something a bit different from my usual felted sculptures.
Real flowers often don’t last long and even orchids which can flower each year don’t always flourish. Wool flowers however will last so much longer and will still be there in years to come.
I followed and adapted a free pattern I found on line for the flowers, added a bit of felt to them and wired them to my own felted stem (with buds) and leaves.
I watched her open her package this morning on the ipad. It was a privaledge to see her smile.
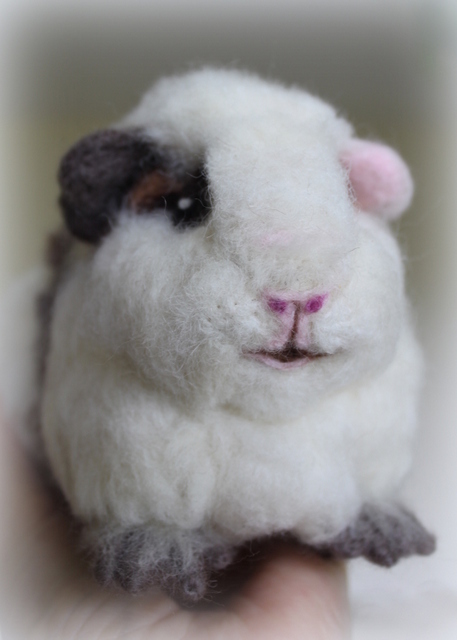
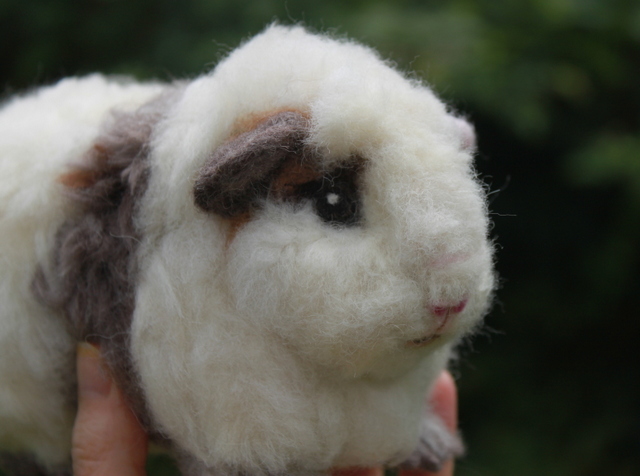
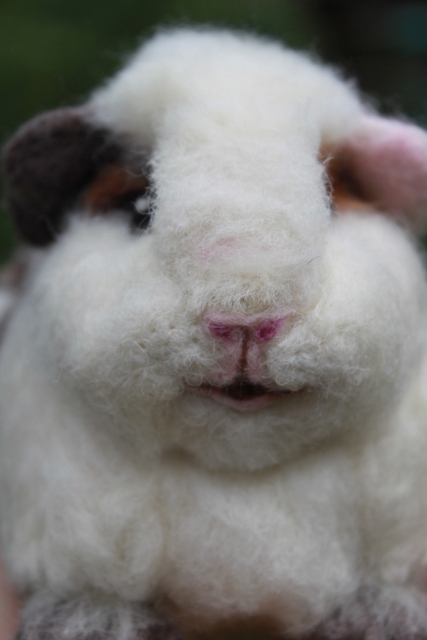
May I introduce you all to my third needle felted guinea pig. I made her in loving memory of a beautiful piggie of a lady in Warrington. I completely enjoyed felting her especially as she has the cutest face and wonderful markings! She has now gone to live at her furever home and will receive lots of cuddles. She is also my first creation to have one of my new ‘Fit to be loved’ heart tags sewn on. 🙂
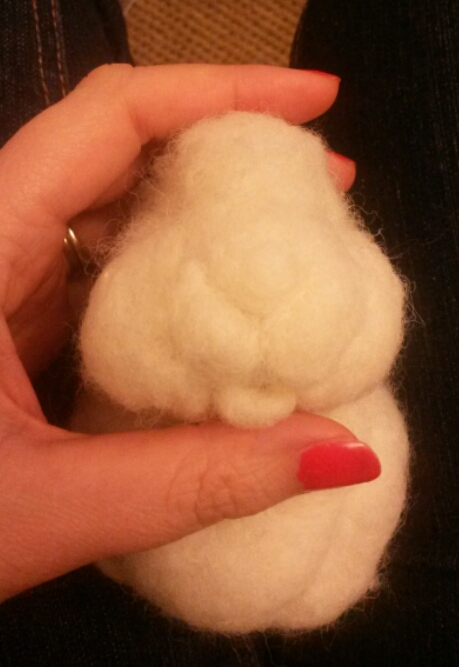
Here are few photos of her when she was a work in progress. If you would like more ideas on how to make a guinea pig of your own please see my photo tutorials; felting a guineapig and felting long fur.
And here she is all fluffed up and posing for the camera 🙂
Don’t ever miss out on another blog post! enter your email on the right hand panel of my about page for notifications of when the next post is up..:-)
After 7 weeks I finally stepped back into my office in London today. Pneumonia and pleurisy was not at all nice to have and definitely took away my energy (even to the point of not being able to needle felt at one point! )but I managed it in. Yay!!
I have so been blessed by my parents (who looked after me for 2 weeks at theirs in Lincolnshire) as well as my friends who have made me feel very loved indeed with texts and cards and gifts ! I have also been able to rest and slow down! I am now home with my lovely hubby again and getting back to normality gradually..
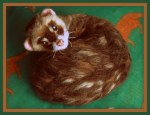
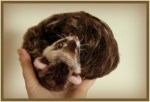
Today was not just about accomplishing the commute and seeing my colleagues who I have so missed, but I have been working on a surprise secret birthday buddy gift for my CEO who celebrated her big 40 at the weekend and today she got to see her new ferret. Of course she knew it was me as she knows I needle felt but never mind. 🙂 I just loved the look on her face. I have planned this since January when I found out I was her birthday buddy!
She did at first jump with a delighted shock when she opened the wrapping as I had found a picture of her beloved pet ferret on facebook and copied the colours and pose as best I could. So worth the hours spent when I can make someone smile 🙂
I started with the head with core wool, very similar to when I made my badger, adding layers of soft merino colours on top.
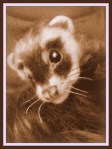
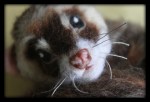
Ferrets are beautiful creatures and very unique with having such a long body and neck. This one has just been asleep and woken up so is still curled up tightly but face looking at you with those adorable big eyes and twitchy nose and whiskers asking for a cuddle. I made the eyes bigger than in real life as .. well I couldn’t help myself- a bit of a fit to be loved interpretation 🙂
You can see more pictures in my facebook Ferret album, but here are a few of the finished ferret. Hope you like them xx
Do you ever feel like you just don’t have the time to needle felt? Feel envious of those amazing artists who produce several sculptures a week whilst you work hard at your full time job and dream you could be stabbing some wool but then feel too tired when you finally get home?
Well you are not alone! …I really haven’t had much time at all recently. In fact I have felt so frustrated about it and have had to remind myself that I am not in a competition but this is my hobby and my style and my time.
This month I have proved to myself that you can still take just a tiniest bit of time out to have a little stab here and there even with a full time job …and guess what ? little by little you start to make some progress and when those deep brown eyes from that newly needle felted animal are staring back at you, you soon realise you have managed to create something quite wonderful and all that effort and time passing by has been worthwhile!! 🙂
Of course seeing that end result is very satisfying but it’s time to enjoy the journey too (no matter how long it takes) !!
So, the dark eyes staring back at me? Well they would be from the little guinea pig I just finished for a very doting guinea pig lover in Warrington in memory of her precious loved guinea pig.
This sweetie pie has taken me a while but I got there in the end!…. phew…. Hope you like her.:-)
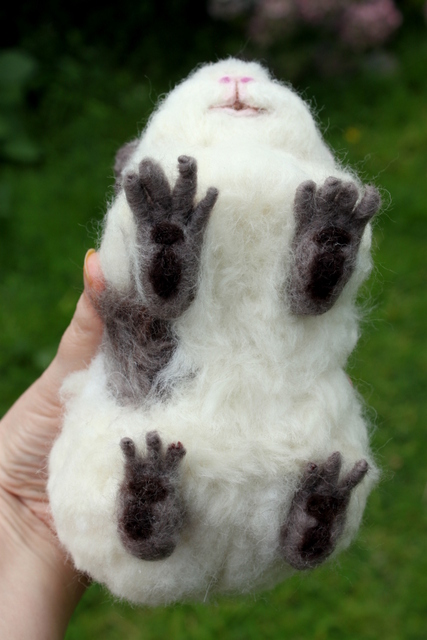
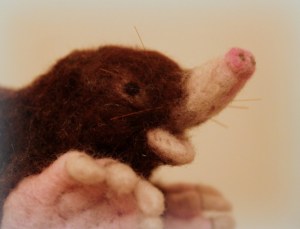
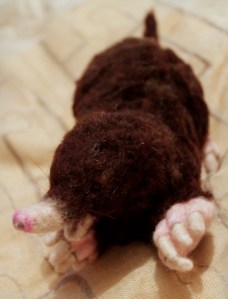
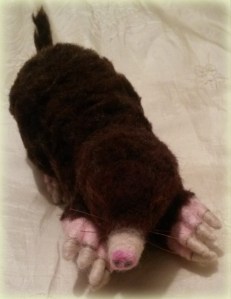
The past few weekends I have been making my latest British mammal, a mole!! He is a one of kind commission and will be going to his forever home very soon.
He has corriedale and alpaca wool for his core, then layers of velvety textured fur made from luscious chocolate merino wool mixed with brown corriedale wool. To get this effect I attached the wool in strands (see my tutorial here on needle felting long fur) but then cut it really short to give that mole fur look. I can’t help but feel how soft he is. 🙂 I chose pinks and creams for his nose, mouth and feet. He has wire in his toes and tail for that bit of pose-ability. He has tiny black felted eyes and his whiskers are made of horse hair..
I hope you like him. I gave him that ‘Fit to be loved’ cheeky smile!
Thinking of making a simple needle felted bird? not sure where to start or need some ideas of how to finish your creation with some extra detail?
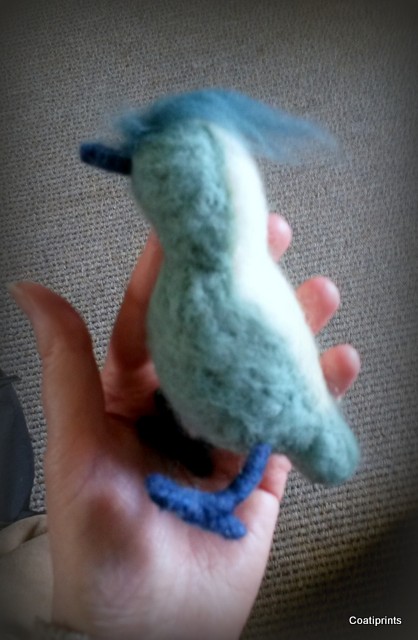
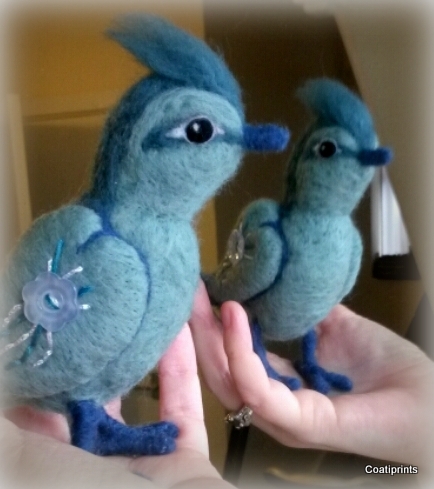
Last week I had the pleasure of making a little needle felted bird for my sister as a birthday present. She asked me for a simple teal bird to go with her newly decorated room once it is finished but as soon as I started I couldn’t help but let my imagination take over.
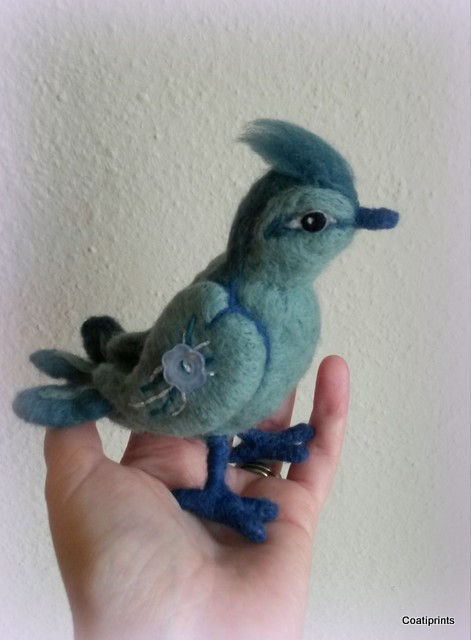
I absolutely love my sister so I expressed this by forming heart shaped wings that have beautiful button and thread embellishments. I also tried to make his facial features come to life by giving him adorable eyes and a little tuft of wool on his head(much like a woodpecker or crested tit) 🙂
Last night I got to see my sister’s face as she opened up her parcel through the wonder of ‘facetime’ on our ipads. So pleased she likes him!! I hope you like him too..
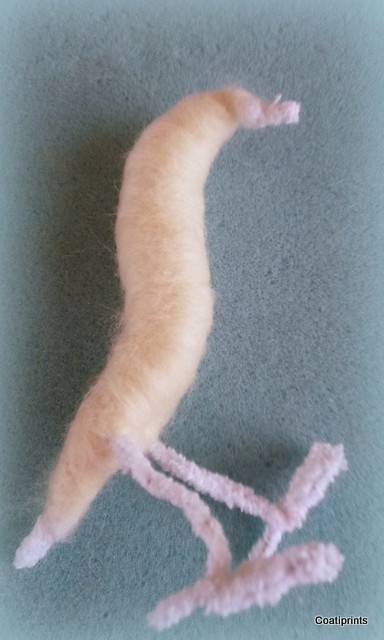
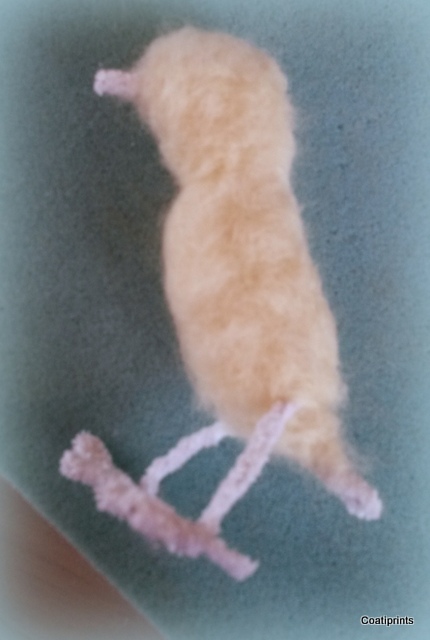
So where did I start? As you can see I twisted some cotton felt covered pipe cleaners to make a birdie shape…
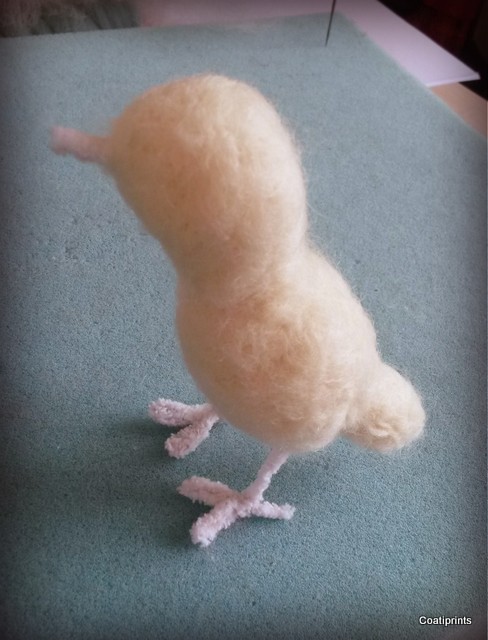
I then wrapped lengths of core wool over the structure and needle felted until I got the right shape. (Be careful not to stab the wire in the centre of the pipe cleaners by felting along the edge of the pipe cleaner only).
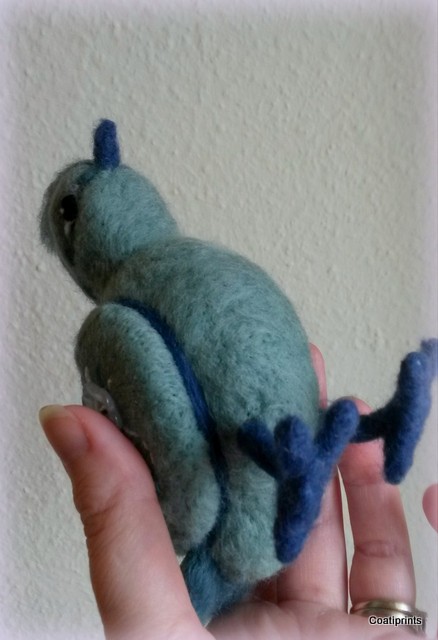
I then used softer merino wools for the teal and blue birdie colours – light and dark shades of teal and denim blue (the beige you see under the label is for another project coming soon).
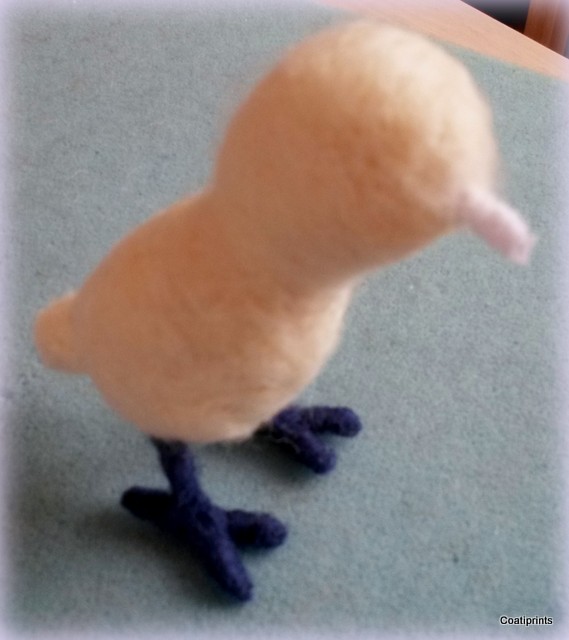
I carefully wrapped and felted the denim blue colour wool over his legs and feet. I did the same with his beak later on. (See here for other ideas on how to felt tiny animal feet and toes).
I chose the lighter teal wool for the underneath, face, wings and flecks of colour on the tail. I used the darker teal for the back, top of head with tuft, eye stripe and tail. I felted simple eyes in black with a white dot placed to mimic where the light would reflect and added a thin strip of white around the eyes. (see how to felt animal eyes here).
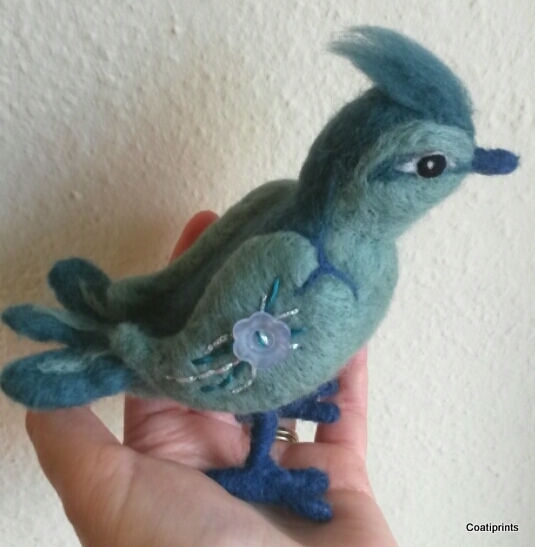
I made the tail and wings separately before felting them on to the body (see here for how to add body parts). I chose some pearly flower shaped button which I sewed onto the wings and stitched a pattern along the length of each wing with a teal and a glittery white embroidery thread. I didn’t fully felt the wings to a perfect shape at this stage as I completed this once attached to the body..
Once on the body I then used the denim blue wool to emphasise the shape of the heart wings by felting around the edge..
Here is the finished little teal birdie ready to send to my sister..:-)
……and of course no creation can go to is new owner without a bit of ‘fit to be loved’ wrapping..
Don’t miss out on another post from Fit to be loved, click ‘follow’ on the right hand side of my find out more page.
My site includes links for where to source needle felting tools and materials. These are my personal recommendations and from my favourite suppliers who I trust and who have excellent reviews. Some are affiliate links so I may receive a small commission at no extra cost to you. This supports my website and enables me to continue to provide valuable content and for that I am so very grateful to you – Thank you!!


")


