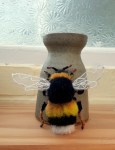
If you’ve not already got a copy, i have a Black Friday sale on my Mr Bumbley Bee PDF Tutorial over in my Etsy shop! You’ll get a 30% discount. Grab it while you can as the offer ends tomorrow 🐝
Read the rest of this entryTag Archives: handmade
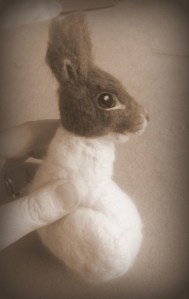
Luna the Needle Felted Hare
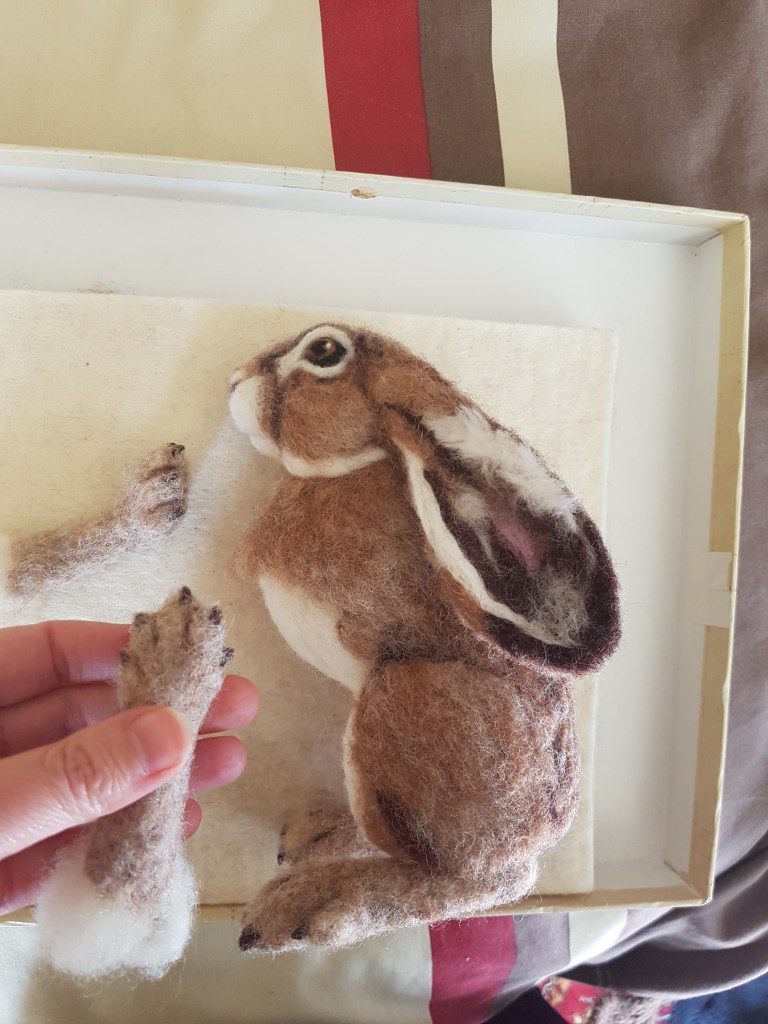
I am so excited to present to you my needle felted hare. She could be a moon gazing hare or maybe she is simply gazing up at you with those endearing eyes for some cuddles. I thought Luna was a sweet name which also means moon in Latin.

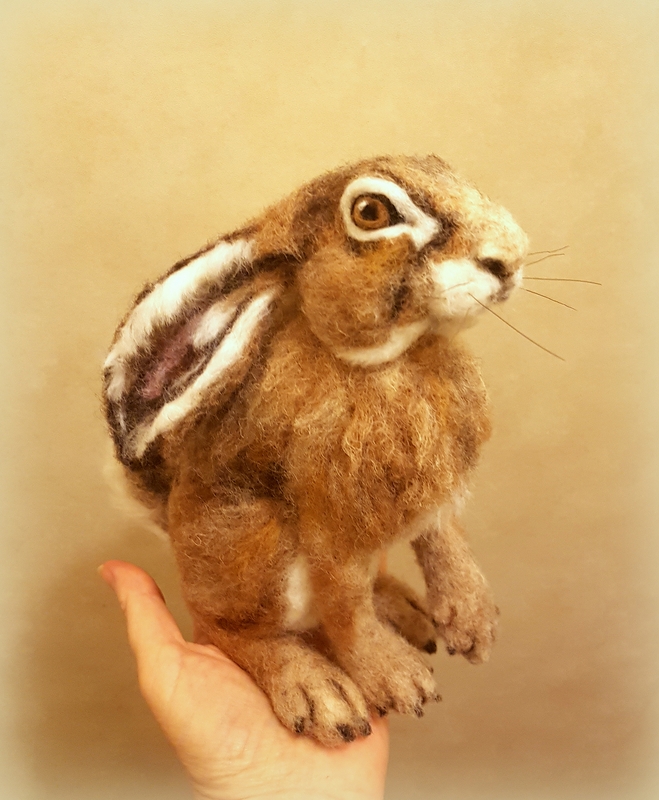


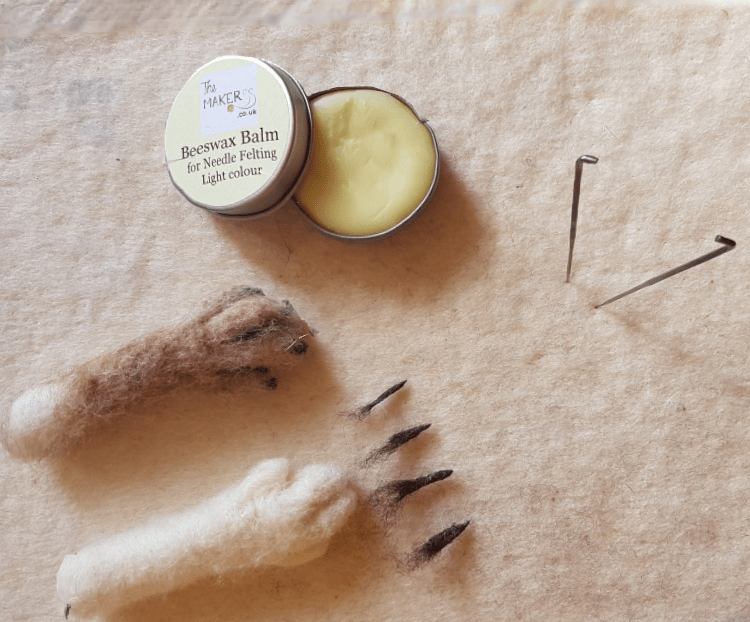
She is 100% wool except for her whiskers which are made of horse hair. Also I had some fun experimenting with wax that melts in the warmth of your hands to twist some of the wool between my fingers as a way to define the rugged and wavy texture of the hare’s fur around her neck and chest area. The wax was really effective to shape the tiny pieces of wool that I used for her claws as well.
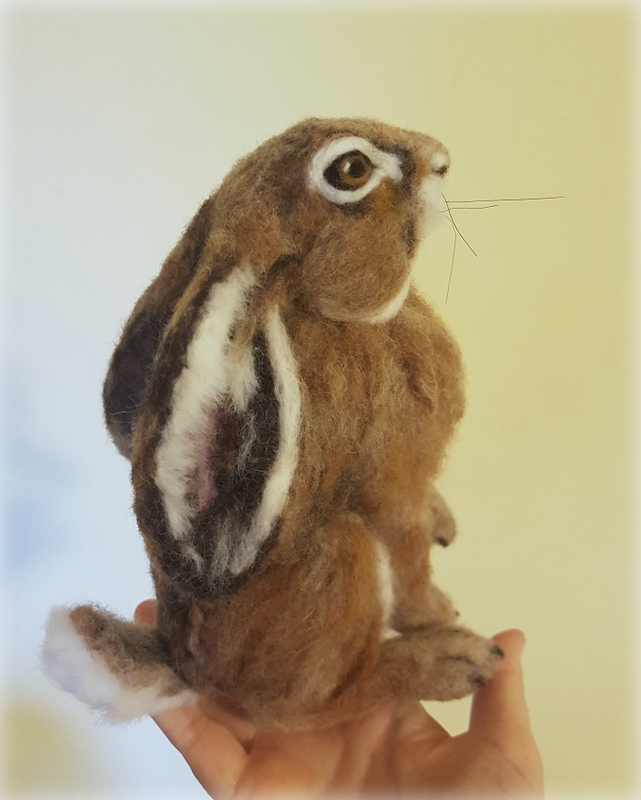
I really love how hares have such long ears so I made these extra long for her body size, but I think that makes her even cuter, don’t you think?


The process?
I started off making the basic shape of a hare head and body with carded core wool batts and then for her top coat I added a variety of brown carded slivers and some merino wool tops using the long fur placement technique.


This sounds strange to be using this technique with carded wool but having tried it it works well to give a rough fur coat look rather than lengths of straight wool.

I also pulled some of the core wool through with my ever faithful reverse felting needles to lighten areas (especially on the limbs) and to blend some of the colours.
I left some parts free from the top coat where I would attach the ears, limbs and tail.
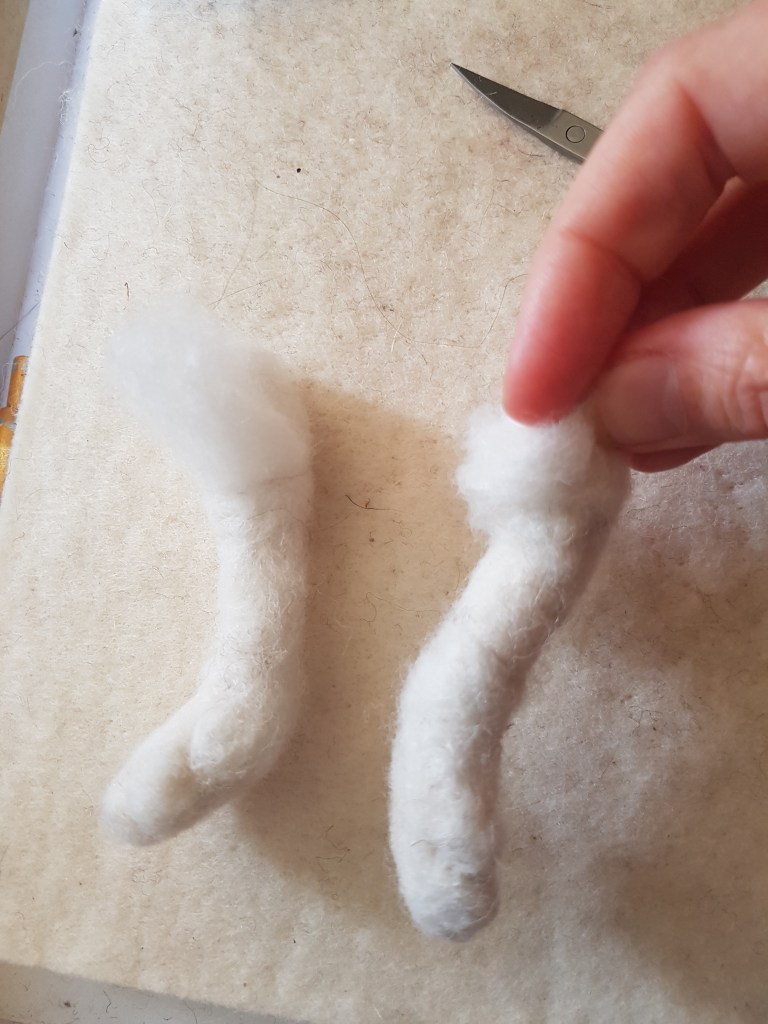
Next I made the ears and attached them, followed by the hind legs and then the front legs. Using 2 needles at once with my Clover pen style needle holder really helped to flat felt the ears and to quickly attach body parts..


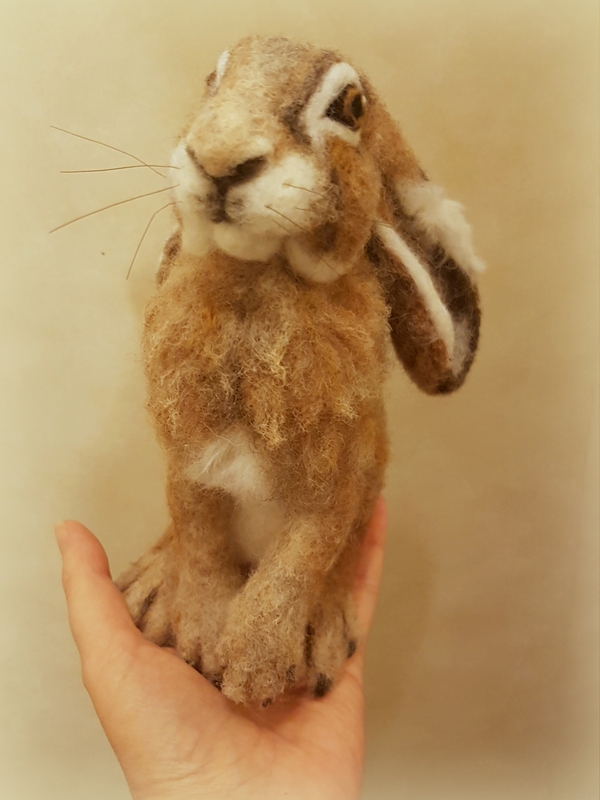
Then I completed the top coat and added a tail and finally some whiskers.
I really enjoyed making Luna. I particularly loved making her as realistic as I could by taking my time to twist the wool and mimic the wavy and tousled look of the hare’s back fur.
I am pondering if to make another one and create a detailed tutorial as I go along.. I’d really value your thoughts..:-)
I have included links for where to source needle felting tools and materials. Please see Links disclaimer in the right side panel for more details.
Needle felted pipistrelle; Species Champion award
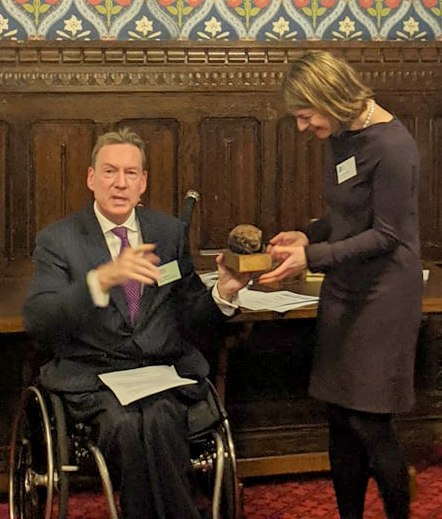
This week has been an exciting week. The needle felted pipistrelle bat I created was mounted and given as an award at the Palace of Westminster to MP Helen Hayes as she is the species champion for the common pipistrelle and won best parliamentary species champion at the Species Champions Annual awards ceremony. Well done to Helen for all her hard work!! It was presented by BBC Journalist Frank Gardner.

I am so happy that my artwork became something so special for an amazing project. The project is run by the Rethink Nature partnership, a group of seven wildlife organisations working together to make a difference to species conservation. (Amphibian and Reptile Conservation, Bat Conservation Trust, Buglife, Bumblebee Conservation Trust, Butterfly Conservation, Plantlife and the RSPB).


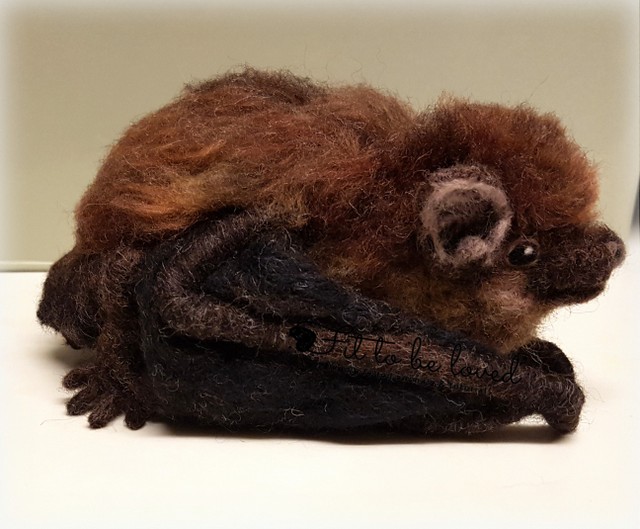
The little bat took many hours of sculpting through the art of needle felting. His body is made of core corriedale wool. His wings, legs and tail are wool wrapped over wire. His beautiful brown coat is made of a blend of corriedale and merino wool. His eyes, nose, ears and tiny feet are made of wool too.
The common pipistrelle as its name suggests is the most common bat that you might see flying in your garden on a summer night! Yet like all our bats in the UK they need our help and protection to ensure their numbers don’t decline again. They are so important to our environment! I love bats but some people don’t and this is usually as they don’t know much about them and bats are so misunderstood.
When you look at a bat close up they are actually very tiny and many times smaller than the size of my needle felted one. In fact a real pipistrelle bat weighs about 5g and their forearm length is less than 35mm in length. One of these tiny creatures can eat around 3 thousand insects in one night – how amazing is that!? Due to destruction of their natural habitat many bats now need to roost in houses and churches and rely on people to preserve these roosts.
Each bat usually has only one pup each year and too often that little pup will become lost or get caught by a local cat and so many each year don’t survive. The Bat Conservation Trust has a fantastic helpline if you find a bat in need of help. You can also find out how to support their work 🙂
Here are a few work in progress photos of my needle felted bat…


Having worked for 12 years at the Bat Conservation Trust I have quite a good knowledge of bats but it was still a challenge to get the anatomy right. Bats are so fascinating and detailed with their tail membranes and wing membranes! I wanted to give the illusion of fully formed wings that could spread out but tucked in as if it has landed. I hope I did it justice.
As with all my needle felted animals I used lots of photos of the real animal at every angle for reference. Thankfully no needles were broken but I did remake his face at one point and a good deal of patience and chocolate rewards were needed along the way!! This aside I really did enjoy making him and I was so overjoyed to see the smile on Helen Hayes’ face too when she received him as her award !
How to needle felt leaves
If you are looking for a simple and effective method to needle felt some lovely looking leaves then this will hopefully give you some inspiration.
I recently felted some leaves for ‘Hazel’ the sleepy Dormouse and took some photos of the process for you along the way.


There are many ways to make needle felted leaves e.g. using leaf-shaped cookie cutters or felting sheets of wool and then cutting out the leaf shapes.
I decided to experiment with sheets of wet wipes (just cheap every day baby/hand wipes are fine). I found that not only are they a nice thin base to felt the wool onto for natural looking leaves but you still end up with sturdy pieces that keep intact and don’t easily fall apart. Having leaf shape cut-outs ready to work on made the process nice and easy too!
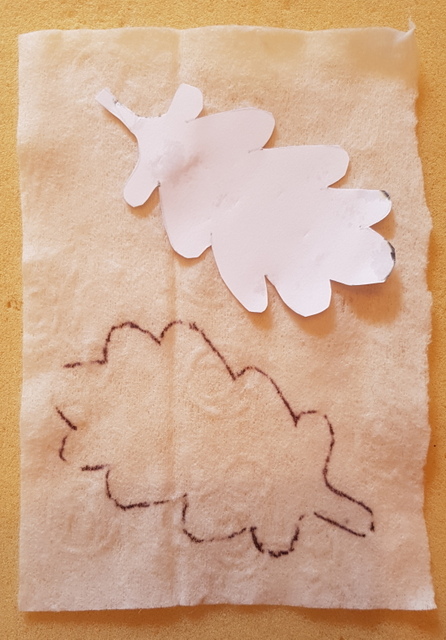
You can draw leaf shapes straight onto the wet wipes or you can (as I did) draw on to paper or card first to try out a few sizes and variations and choose the shapes you like best.
I looked up oak and maple leaves in a tree identification book and copied them freestyle onto my paper. You could also sketch leaves whilst you see them on a walk or collect them to draw when you get home. If you aren’t confident to draw them freestyle then why not trace over a book or computer/tablet screen image.

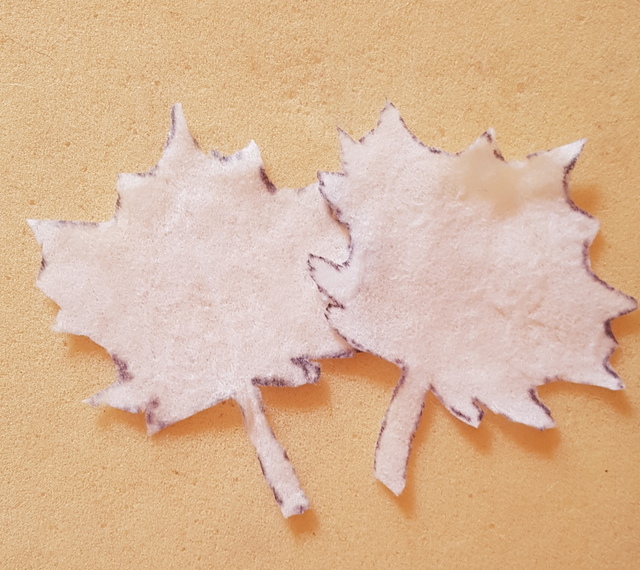
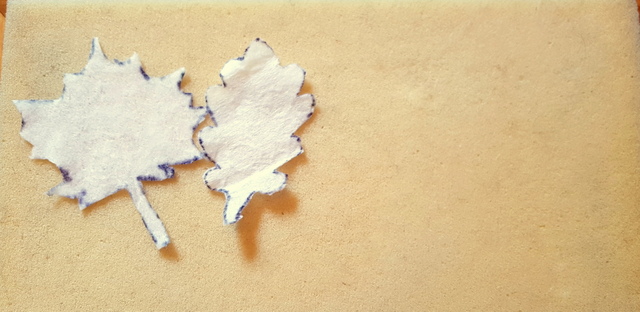
Here are my four sheets of wet wipes and I have cut out my leaf shapes (oak on the left and maple on the right) from paper ready to use as templates to draw round.
It is best to use a pen to trace round the leaf shapes rather than a pencil to make sure the lines show up clearly. Don’t worry about the wet wipes still being slightly damp as they will soon dry.
When it came to cutting I used small scissors as it was easier to cut the tiny jagged edges.


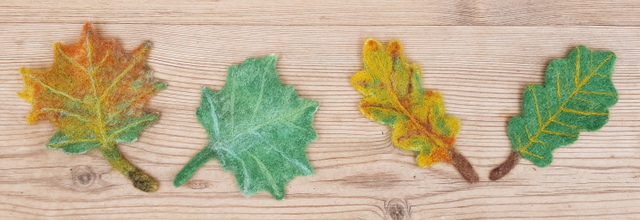
You can make as many leaves of however many species you like. I stuck to just the oak and maple and made two of each; a ‘spring/summer green’ version and a ‘changing to autumn’ version.
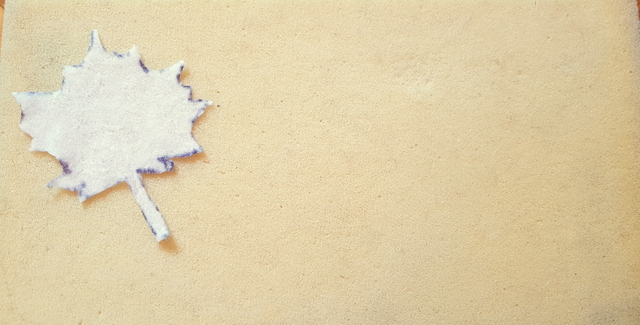


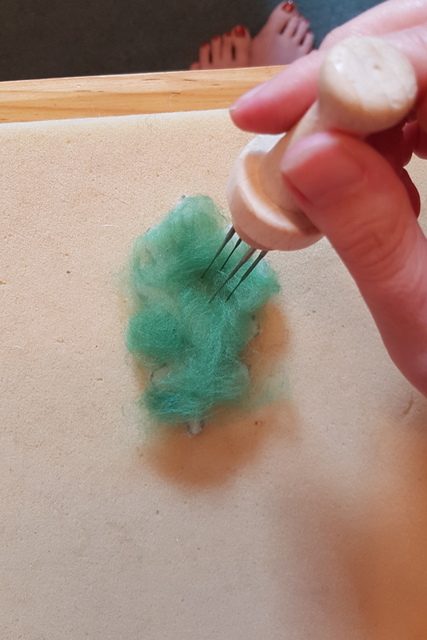
Here I am making a start on my first oak leaf.
For the ‘spring/summer green’ versions I chose a mixture of some beautiful vibrant green merino wools.
If you want to felt flat pieces quicker, a four needle tool is perfect. Triangle or star needles are great for this.
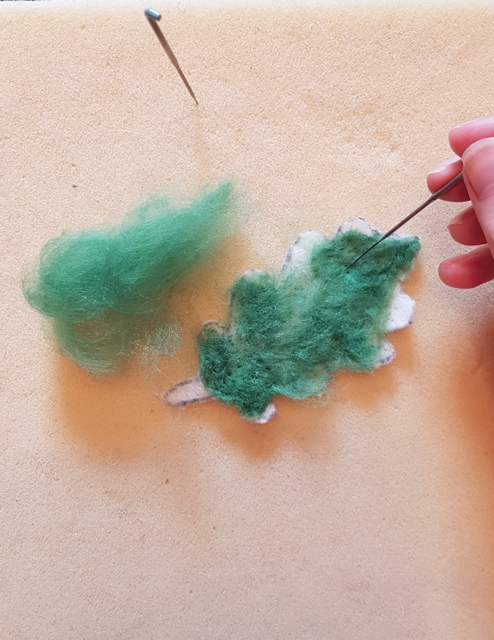
Continue to add more wool and firmly needle felt it into place. A single thinner needle (star or triangle) will help to define the edges and keep the wool to the shape of the cut-out.
If you are gluing or sewing the leaves onto a picture/collage you won’t need to felt the other side as well. For my dormouse nest however I wanted to be able to take the leaves out the nest as separate pieces of art so I decided to felt the other sides of the leaves too.
I used brown wool for the protruding stem of the oak leaf.
To ensure the surface of the leaves don’t look holey or to carefully brush the fibres in one direction for hairy leaves (make sure you have firmly felted the wool first before attempting this), use a spiral/twisted needle.


For the upper side of the leaf, carefully felt the stem and leaf veins with a thin (preferably a spiral/twisted) needle. Alternatively you could stitch on this detail using embroidery threads.


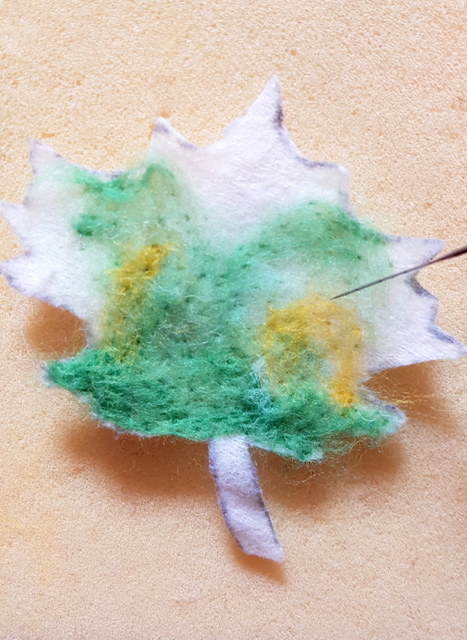
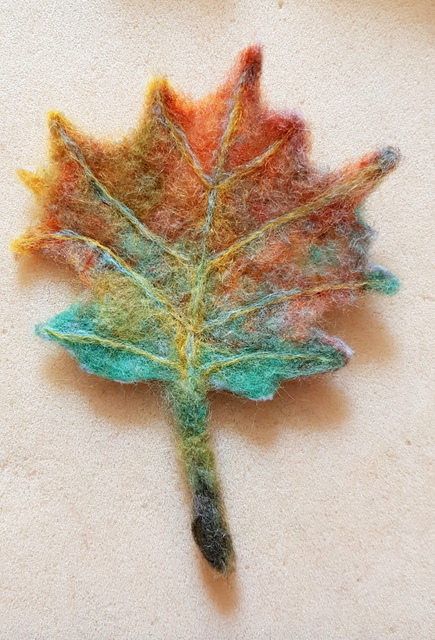
Here are a few process pictures of the maple leaf.


For my ‘changing to autumn’ versions I added thin layers of varying shades of green, yellow, orange and red merino wool to give a lovely blended finish before adding the stem and vein details.
You can really use your imagination when it comes to colour. When you look at real leaves no one leaf is the same as the next. I just love going for walks in the countryside and admiring the leaves on the trees or those in the autumn around my feet that have fallen. They are so amazing!


For really flat leaves, steam iron them for just 10 seconds each below a cotton sheet/tea towel.
I hope you found this step by step photo guide helpful for making your own needle felted leaves. Let me see how your leaves turned out!
Here are some final pictures of the leaves once they were finished. They look great on their own or with a woodland creature! 🙂


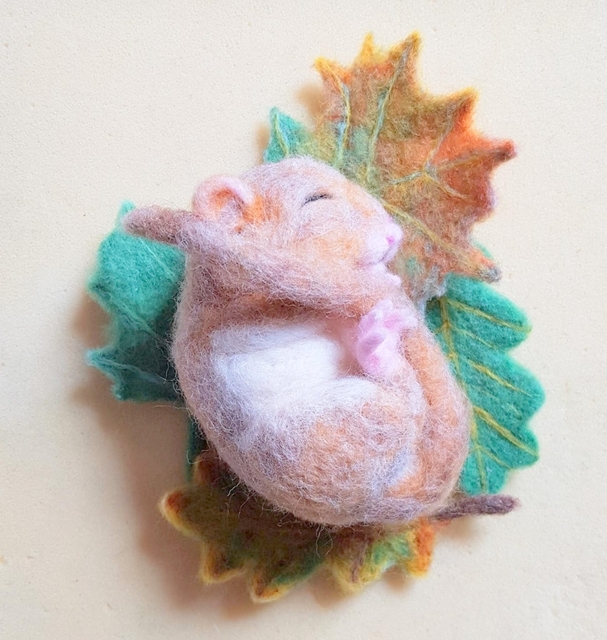


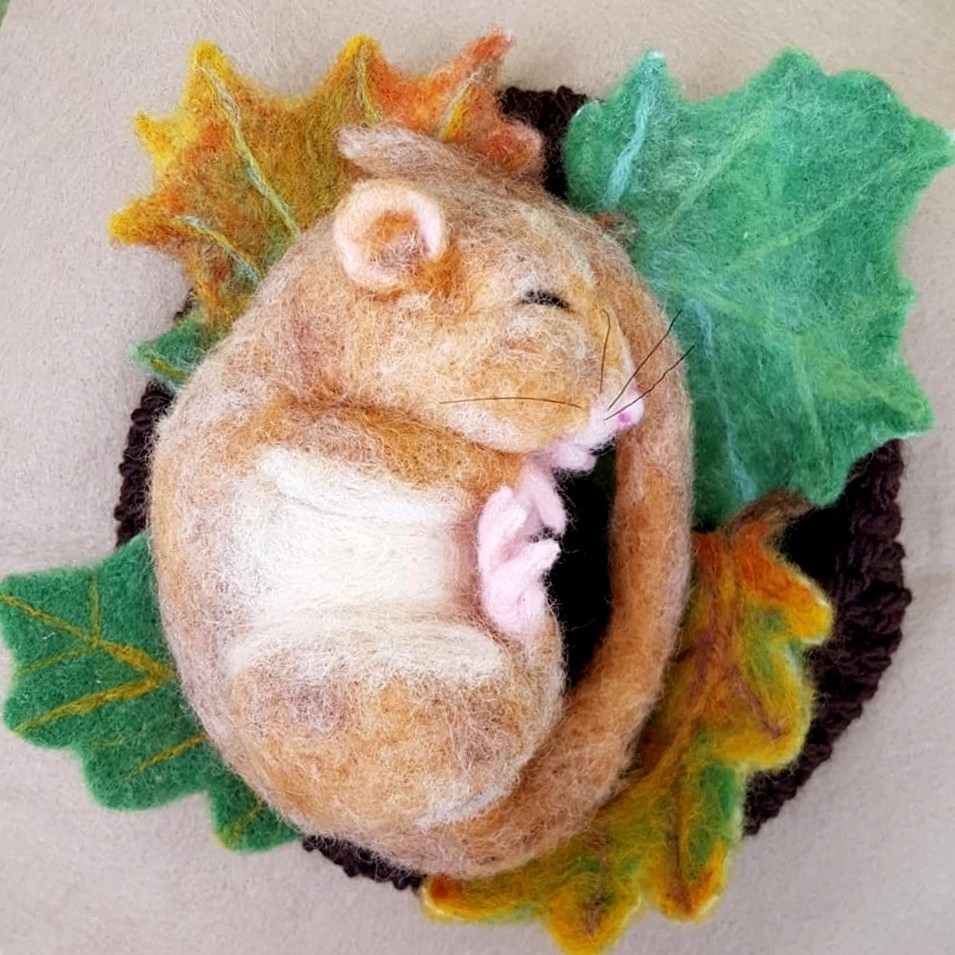
Needle felted dormouse
May I present to you ‘Hazel’ the sleeping hazel dormouse. She is snuggled up on her needle felted leaves in a wool nest I crocheted.
She is a mix of merino and corriedale wools with a wire in her tail and has horse hair for whiskers. Her tiny toes are all wool – I think they are the tiniest I have made yet and were very fiddly but certainly worth every minute of the process.
Hazel was such a joy to make while I have been recovering from a life changing operation. Curling up into a little ball just like she is doing in her cosy nest is something I have felt like doing a lot the past few weeks as I have needed so much sleep.
I hope you like her. I will be posting more about how I made the leaves soon too.


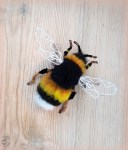
Needle felted bumble bee

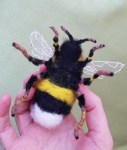
Here is my first attempt at a needle felted bumble bee. I gave it to my sister for her birthday last week. My sister’s name Melissa means ‘honey bee’ but she loves bumbley bees as they are so fluffy looking! I was brave enough to let it sit on my hand without any worries about being stung. Good job as it is much larger than life size!


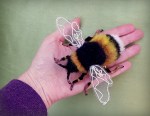
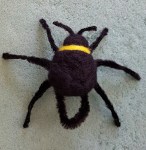
I started off using black pipe cleaners as legs and antennae. I twisted them together in the middle to form the base for the body. I trimmed the pipe cleaners with small angled nail scissors to accentuate the leg segments and added tan coloured wool..
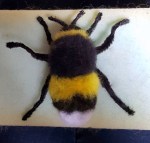
I tightly wound yellow, black and white merino wool tops over the middle section to form the head, thorax and abdomen and added more and more of the merino on top to build up the height. I needle felted the body with a barbed needle to sculpt into a bee shape. To create a furry bumble bee look I then used a reverse felting needle to pull out the fibres and added a layer of rusty orange over the yellow to give the colour more depth. (Note I didn’t use a cream colour core wool for this piece to ensure that only the pure colours I wanted came through when I used the reverse needle not any underlay of core wool fibres).
I had to get really creative for the wings. I searched my stash of crafty bits and ended up cutting out wing shapes from a silvery coloured organza bag and then hand sewed the pattern on each wing by hand with white embroidery thread.
Here are a few photos of the work in progress of how I started.


I am so pleased that my sister adored him!!
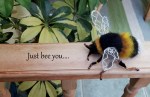
******how about creating your very own Mr Bumbley Bee? The detailed and beautifully illustrated PDF tutorial is now available here ******************
Needle felted animal vote
Hi everyone. I have set up a fun poll to help decide what to make next.
I have chosen 5 animals which I think will be quite a challenge to needle felt.
Which one would you like to see me make next? 🙂
I will take photos as I go to show progress as usual on my facebook page and will blog about it once finished.
Whatever I make will be one of a kind and available in my Etsy shop.
So please vote here:
Bon Voyage little guinea pig!
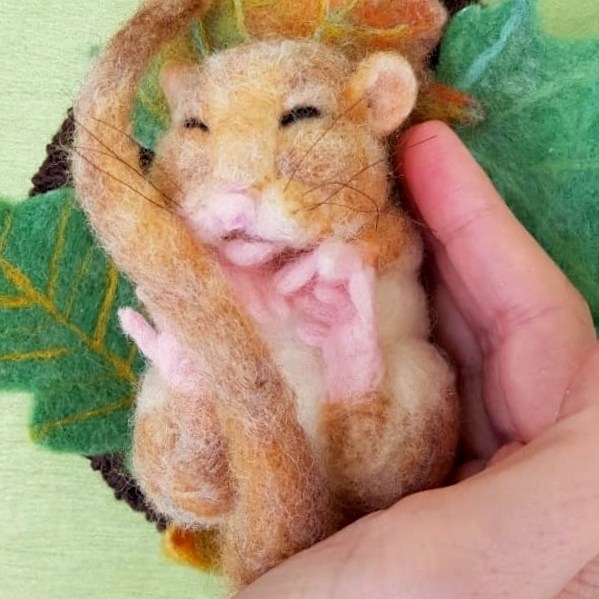
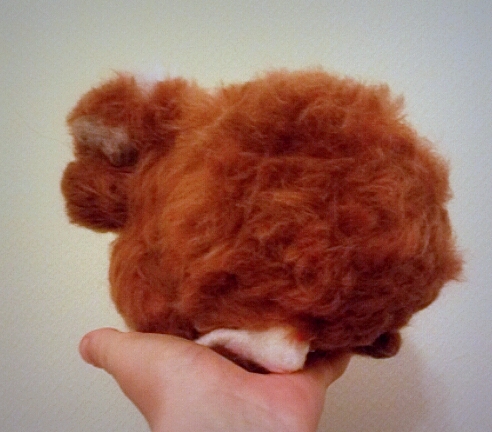
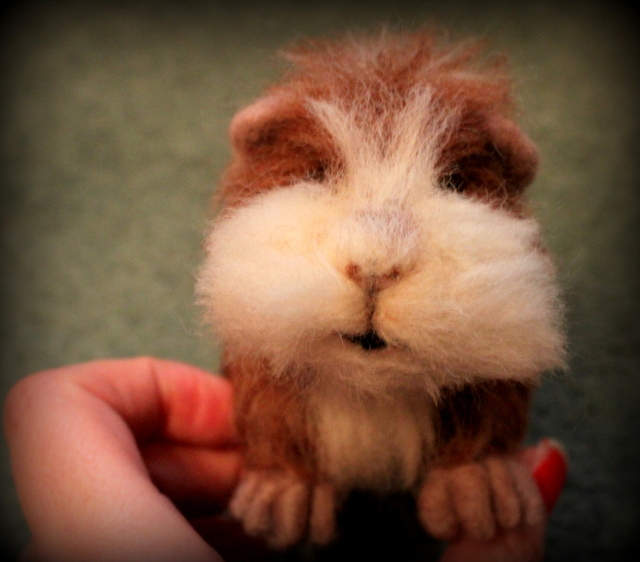
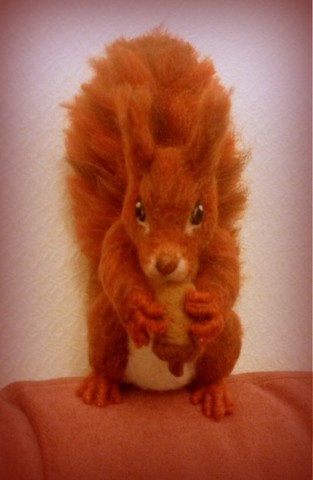
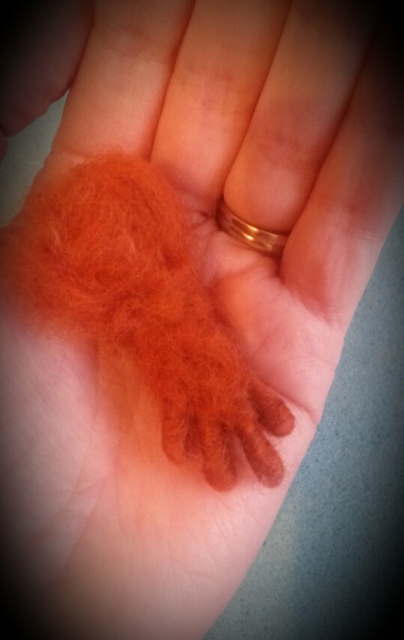
I would like to introduce you to a gorgeous needle felted guinea pig called ‘Teddy’.
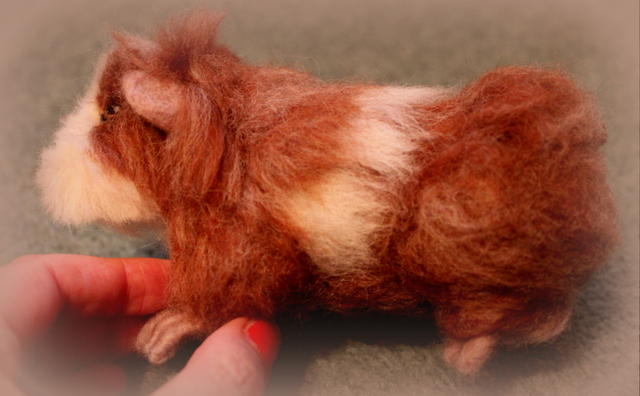
As you can see he has a cheeky little face and I really tried to make sure his autumnal orange fur tones ended up looking as fluffy and soft as possible just like a real guinea pig.

He is now on his way to France to live with a lovely lady who will take good care of him.
Bon Voyage little guinea pig! You were a pleasure to create and I hope you have a wonderful life at your new furever home x


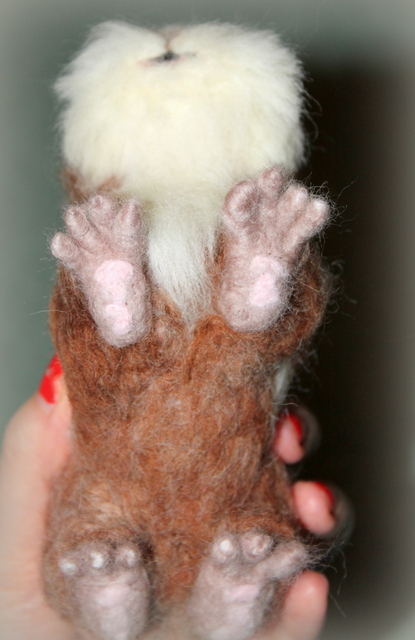
His core is made of natural undyed Corriedale wool from New Zealand. His beautiful soft fur and detail on his cute piggy paws, ears and face are of soft merino wool (non-mulesed) from South Africa (Cape). His toes have been sculpted by wool wrapped delicately onto wire.
His eyes are made of wool too, so no glass or plastic.
You can see he is life-sized from the close up of me holding him in my hand.


Hope you like him 🙂
Would you like to know how to make a guinea pig? (click on the photo to get started).

Making a needle felted animal and need some help adding layers of wool to achieve a realistic long fur look? (click the photo to learn more…)

See here for a variety of tutorials, tips and ideas to suit your project
Here are some other needle felted guinea pigs for more ideas.


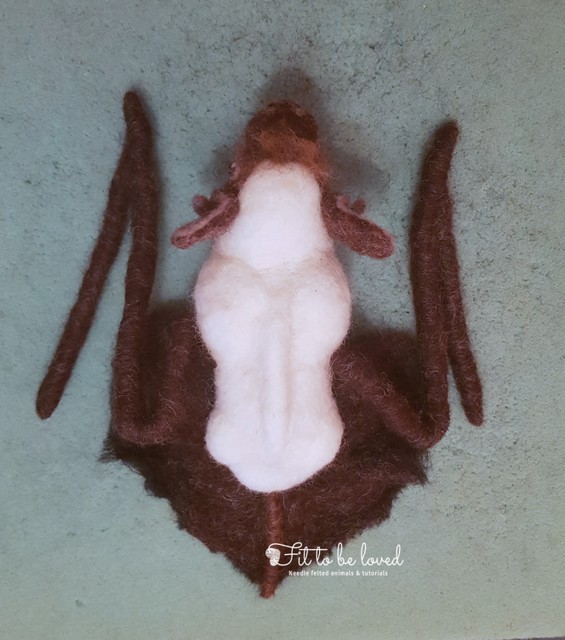
Needle felted bat (Brown long eared bat)
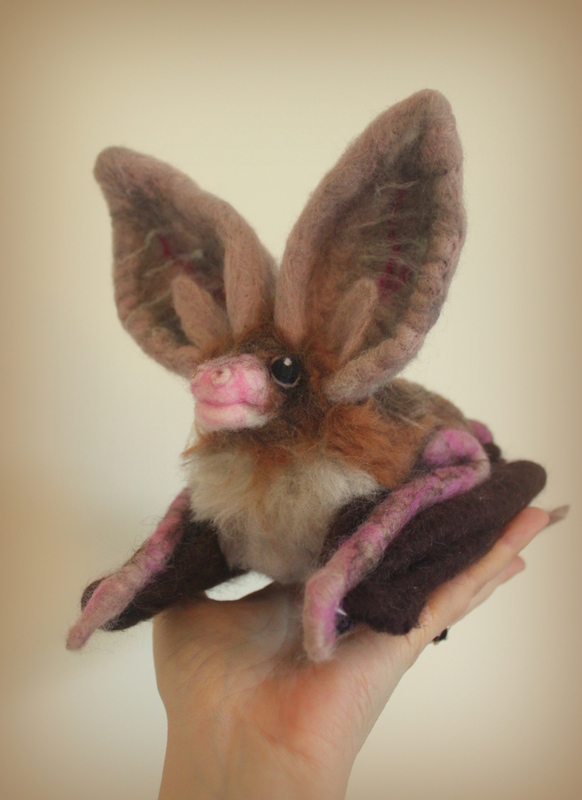
Seeing as I manage the National bat helpline (UK) as my day job it was about time I made a bat! Thankfully I was asked to make this little brown long eared bat (BLE) (Plecotus auritus) – although when I say little she is very big compared to real BLEs which have a body length of around 5cm.
She was a challenge as not only did I have to work out how to make folded wings and a tail membrane but BLEs have such massive ears as you can see. She is made of corriedale and merino wool and has wire inside her forearms, legs and ears.
BLEs can live up to 30 years, eat thousands of insects each night, have only one baby a year and these fantastic huge ears help them to listen for prey as they glean them from leaves.
This one is definitely alert and looking for a cuddle but usually at rest their ears curl back a bit like ram’s horns to show only the tragus (the pointy inner ear lobe). Hope you like her and agree that bats are amazing! 🙂


Needle felted solenodon

Ever heard of a solenodon?
I had never heard of one until I came across this strange but interesting creature a few months ago when researching what to make my colleague for his birthday. I discovered that he had spent several years working on a conservation project for this intriguing animal in the Dominican Republic.
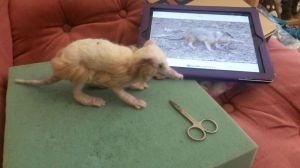
As soon as I saw the solenodon’s shrew-like snout, shaggy dense coat, long clumsy legs and thick scaly tail, I couldn’t wait to get started. As this was a secret birthday buddy present though I had to keep quiet..
I started with a wire armature covered with pipe cleaners, then wrapped core wool (corriedale batts) over the wire to give him some shape.

Then came the layers of luxurious merino wool for his cream fur with dark brown flecks over the top. I also made tiny toes from thinner wire with merino wool wrapped over it. He has a lovely pinkish nose, ears, feet and tail and little black eyes to finish.

Not sure if many people have heard of this animal let alone needle felted one!!
Creating an animal you know is so much easier – with this one I had to keep looking at the photos frequently to ensure I captured its build and character correctly. It was a lot of fun !!
My colleague loved his surprise! yay!! 🙂


The real solenodon has a venomous bite – thankfully this one doesn’t!


Don’t ever miss out on another blog post! enter your email on the right hand panel of my about page for notifications of when the next post is up..:-)
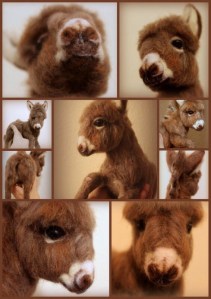
Miniature donkey

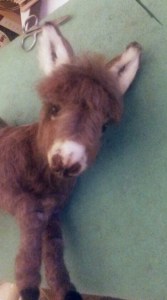
I can now reveal my latest creation, a miniature donkey!
I was sent some photos of an absolutely gorgeous real miniature donkey and asked to needle felt her as a surprise Christmas present for her loving owner. It was an absolute pleasure to create her as I looked at those cute eyes and wonderful fluffy coat.
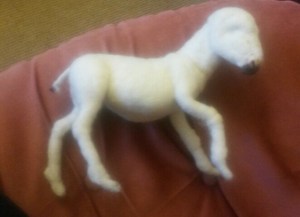
As she is a hoofed animal I quickly realised that to stand up she would need some stability so I wrapped core Corriedale wool over a wire armature. She soon started to take shape!!
I made her as a young fluffy donkey with long fur rather than when she was a bit older after a summer moult but this meant I really had to think about how to get the right colour and texture for her fur. I ended up buying 4 wool colours and mixing them carefully by hand with other brown and cream colours I had to get the right shade.

Once I started adding the long fur I had to be so careful not to let the strands fuzz up when laying the animal down to reach all sides. I therefore had to start on the legs and tummy and do the back and face last so the fur was looking its best in these areas and I didn’t end up squashing her ears.


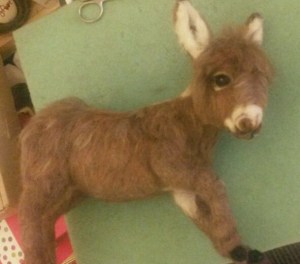


Thankfully donkey fur is slightly matted so I didn’t have to worry too much about it having to look silky smooth! I just love doing faces so this was hard for me to have to wait til the end but it was definitely worth it 🙂


Felted birdie
Thinking of making a simple needle felted bird? not sure where to start or need some ideas of how to finish your creation with some extra detail?
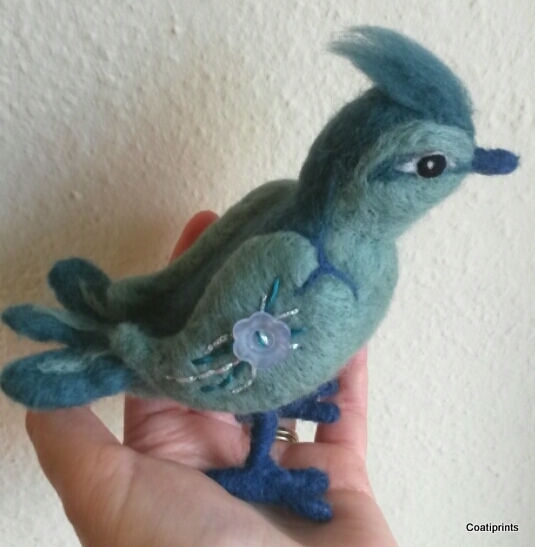
Last week I had the pleasure of making a little needle felted bird for my sister as a birthday present. She asked me for a simple teal bird to go with her newly decorated room once it is finished but as soon as I started I couldn’t help but let my imagination take over.
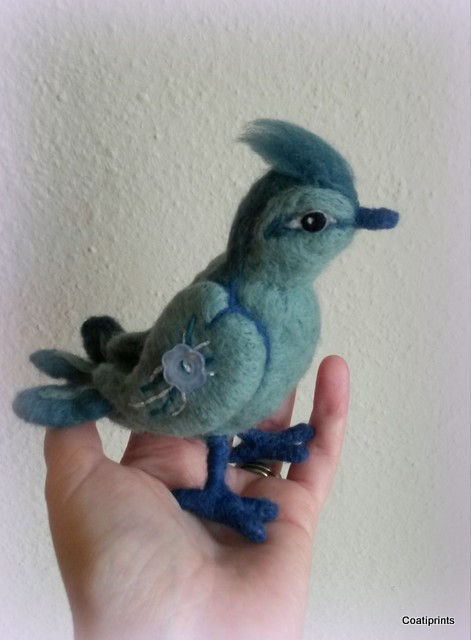
I absolutely love my sister so I expressed this by forming heart shaped wings that have beautiful button and thread embellishments. I also tried to make his facial features come to life by giving him adorable eyes and a little tuft of wool on his head(much like a woodpecker or crested tit) 🙂
Last night I got to see my sister’s face as she opened up her parcel through the wonder of ‘facetime’ on our ipads. So pleased she likes him!! I hope you like him too..
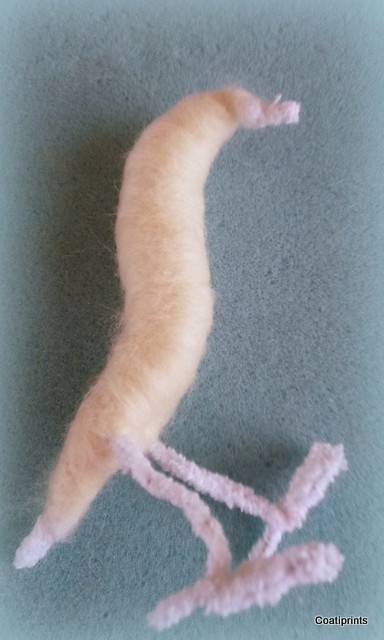
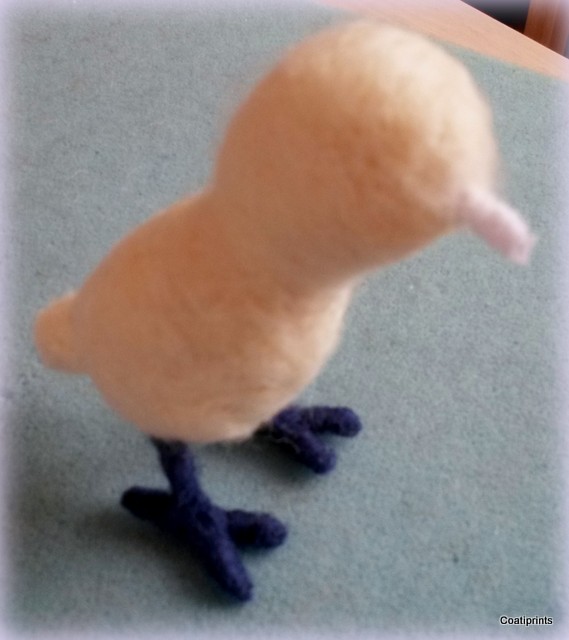
So where did I start? As you can see I twisted some cotton felt covered pipe cleaners to make a birdie shape…


I then wrapped lengths of core wool over the structure and needle felted until I got the right shape. (Be careful not to stab the wire in the centre of the pipe cleaners by felting along the edge of the pipe cleaner only).

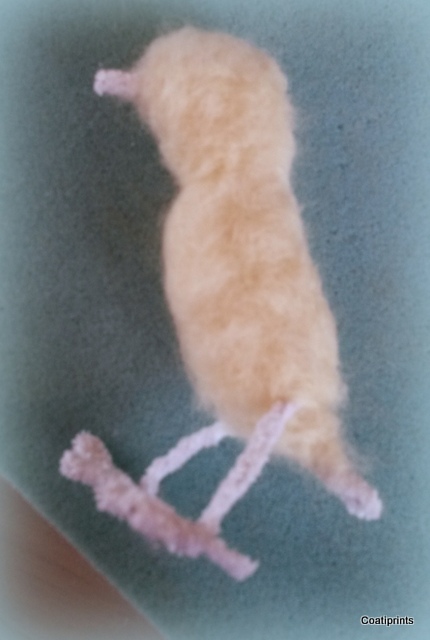
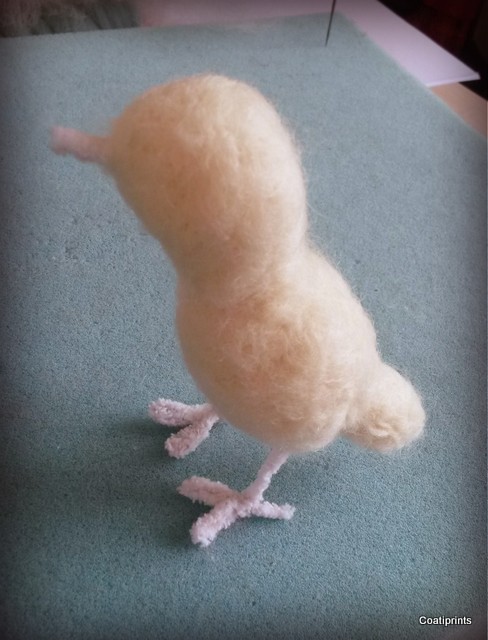
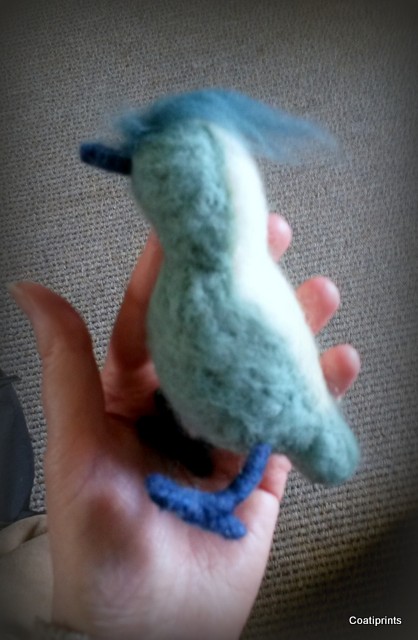
I then used softer merino wools for the teal and blue birdie colours – light and dark shades of teal and denim blue (the beige you see under the label is for another project coming soon).

I carefully wrapped and felted the denim blue colour wool over his legs and feet. I did the same with his beak later on. (See here for other ideas on how to felt tiny animal feet and toes).

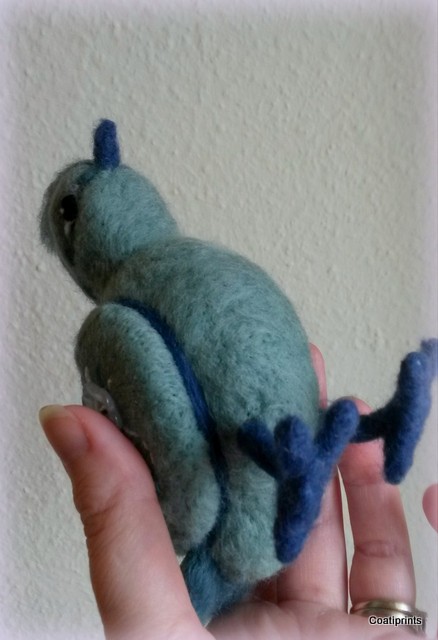
I chose the lighter teal wool for the underneath, face, wings and flecks of colour on the tail. I used the darker teal for the back, top of head with tuft, eye stripe and tail. I felted simple eyes in black with a white dot placed to mimic where the light would reflect and added a thin strip of white around the eyes. (see how to felt animal eyes here).

I made the tail and wings separately before felting them on to the body (see here for how to add body parts). I chose some pearly flower shaped button which I sewed onto the wings and stitched a pattern along the length of each wing with a teal and a glittery white embroidery thread. I didn’t fully felt the wings to a perfect shape at this stage as I completed this once attached to the body..


Once on the body I then used the denim blue wool to emphasise the shape of the heart wings by felting around the edge..
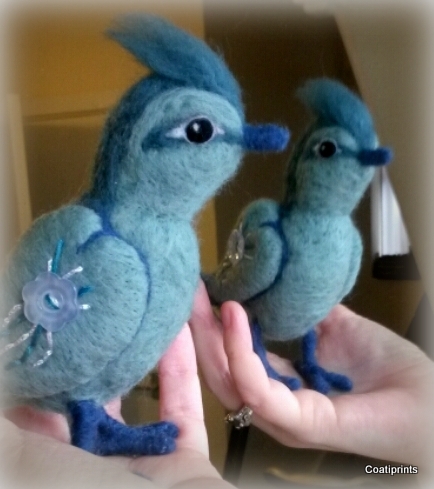
Here is the finished little teal birdie ready to send to my sister..:-)


……and of course no creation can go to is new owner without a bit of ‘fit to be loved’ wrapping..

Don’t miss out on another post from Fit to be loved, click ‘follow’ on the right hand side of my find out more page.
Tiny feet and tiny toes – needle felt tutorial

How do I give my needle felted animal cute detailed feet or tiny toes?
This tutorial will hopefully inspire you with some ideas for how you might tackle felting animal feet and a step by step guide to making individual toes using wool wrapped over wire.
Basic feet
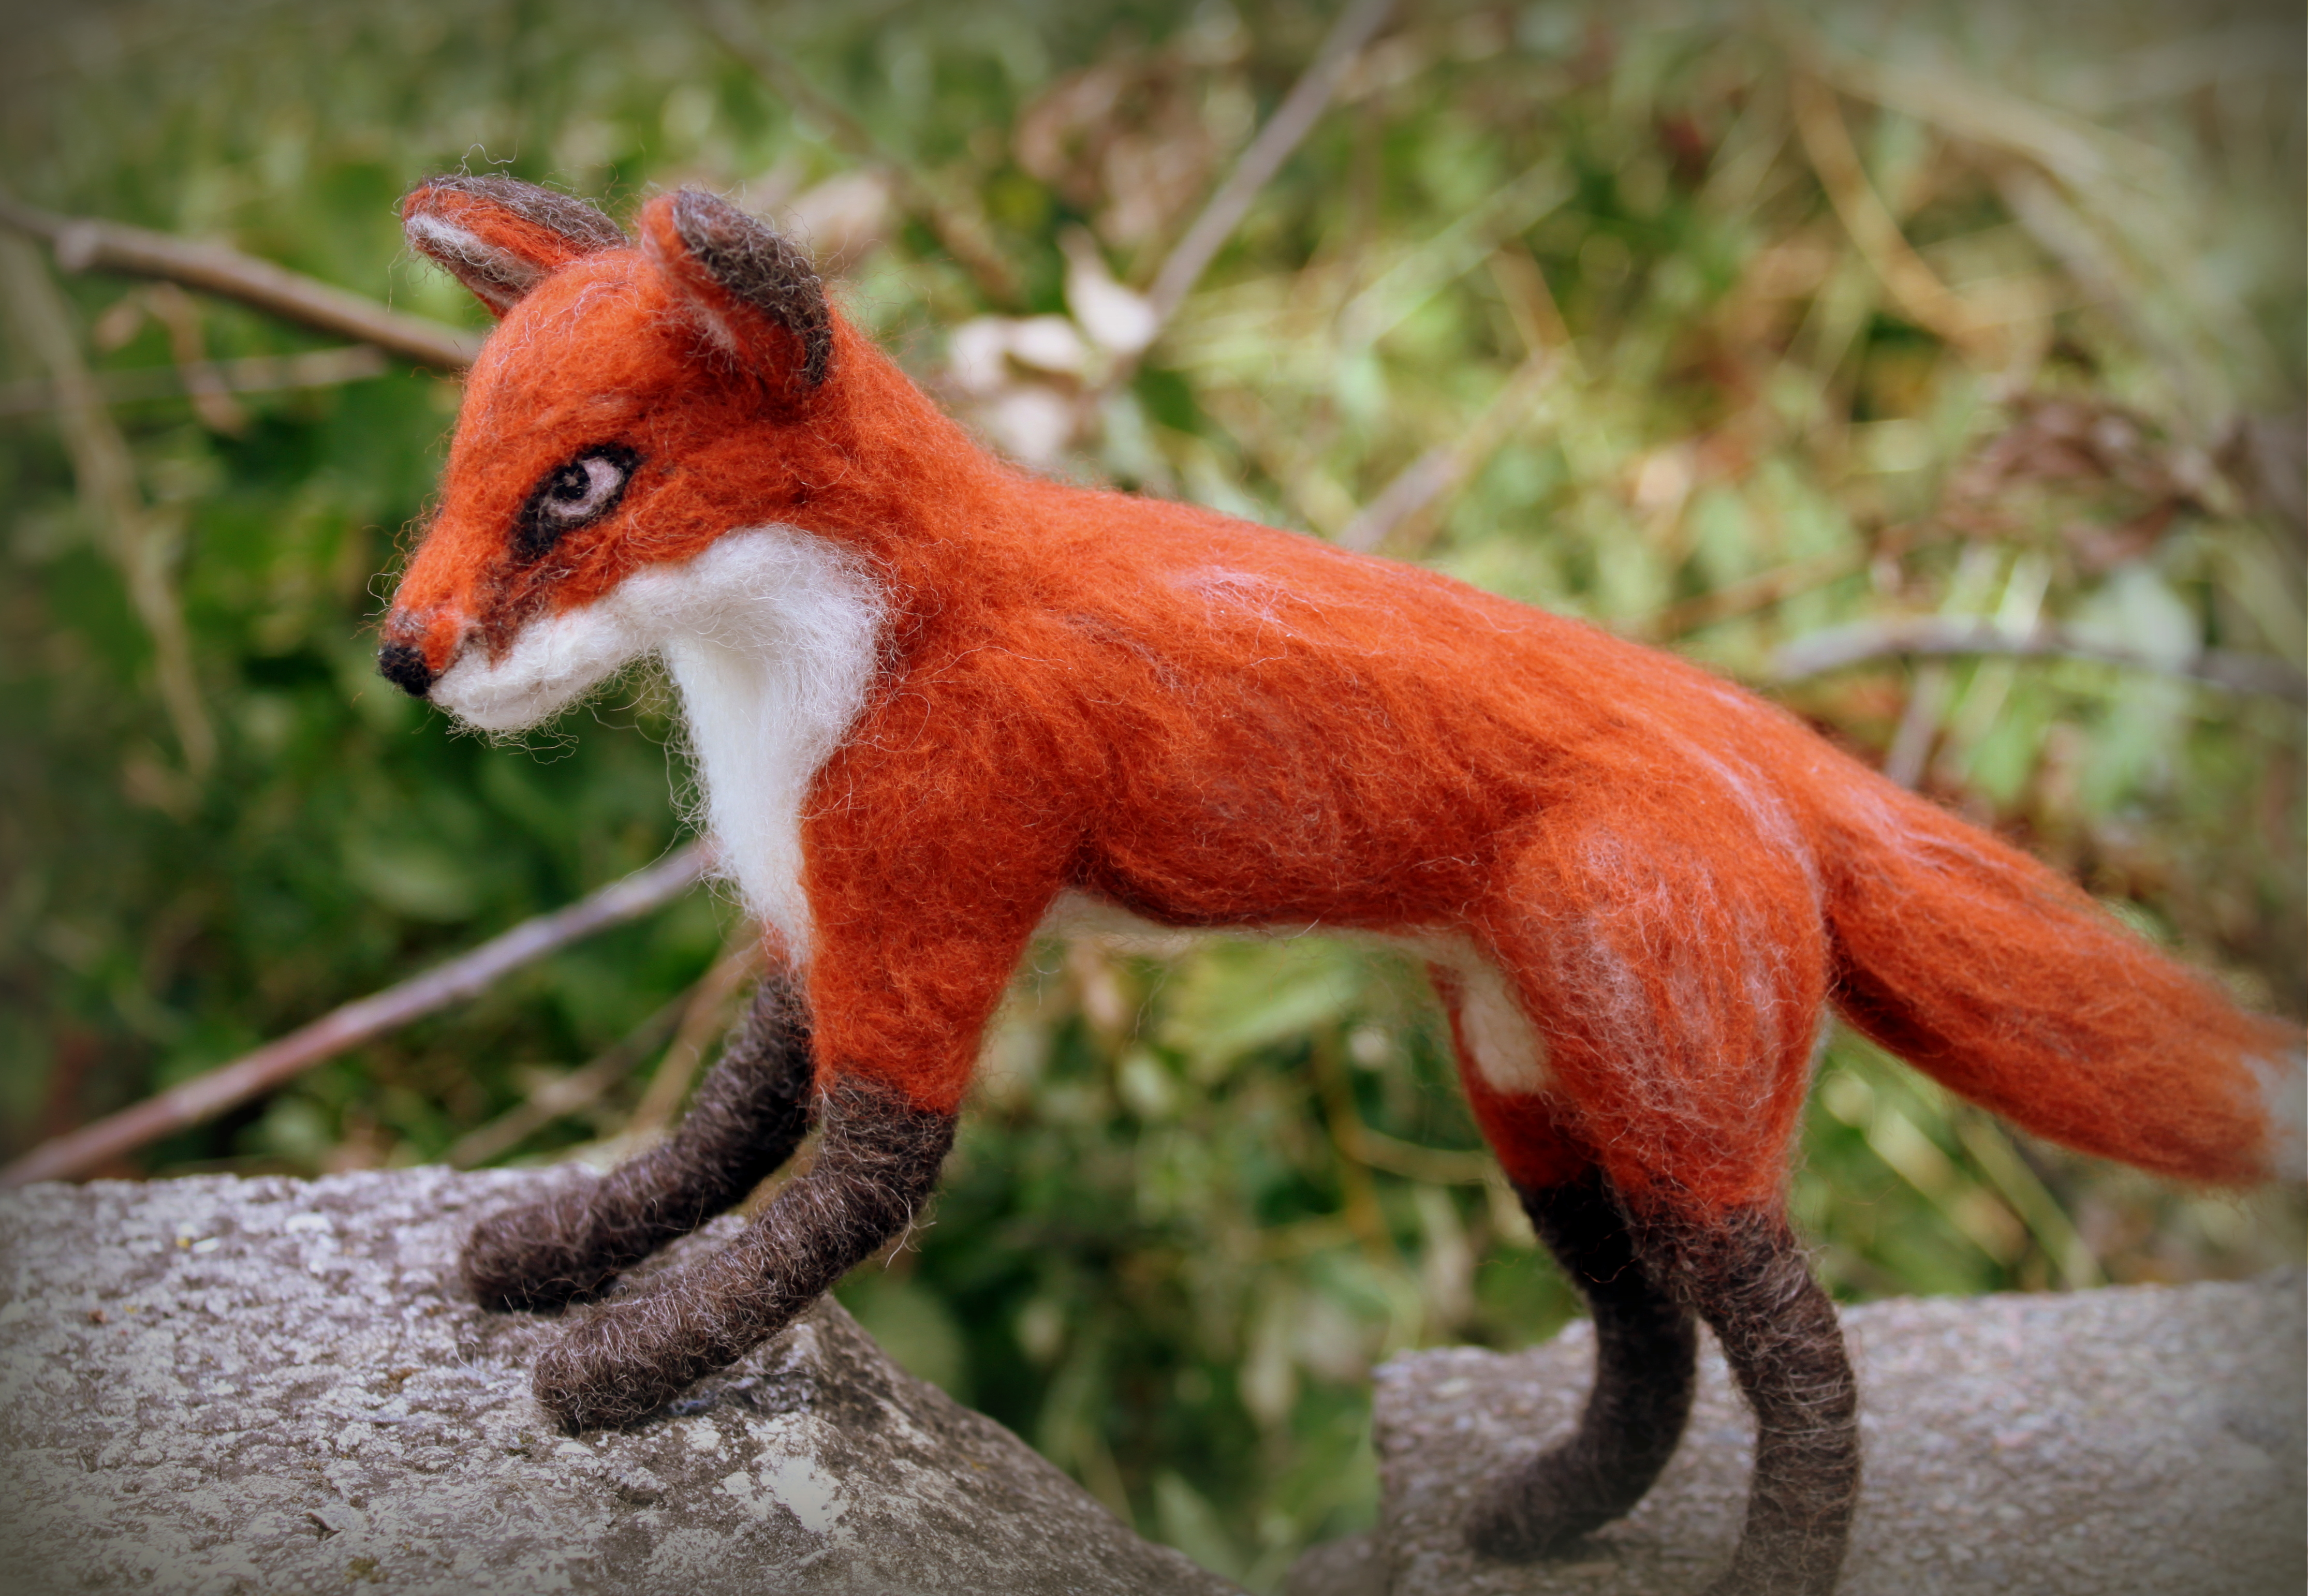
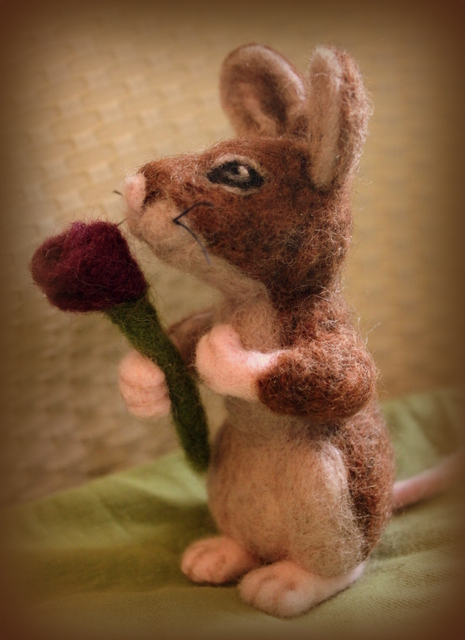
For some of my felted animal sculptures I decided not to give their feet too much detail. Here you can see that my hare and fox merely have simple dark rounded feet. Their sitting or standing positions mean that you only really see the top of their feet. Of course I could have spent more time on them but I didn’t want to over emphasise their paws and was satisfied with how they looked as they are. Their expressions and character come through enough in their faces and other cute features.

A bit more detail
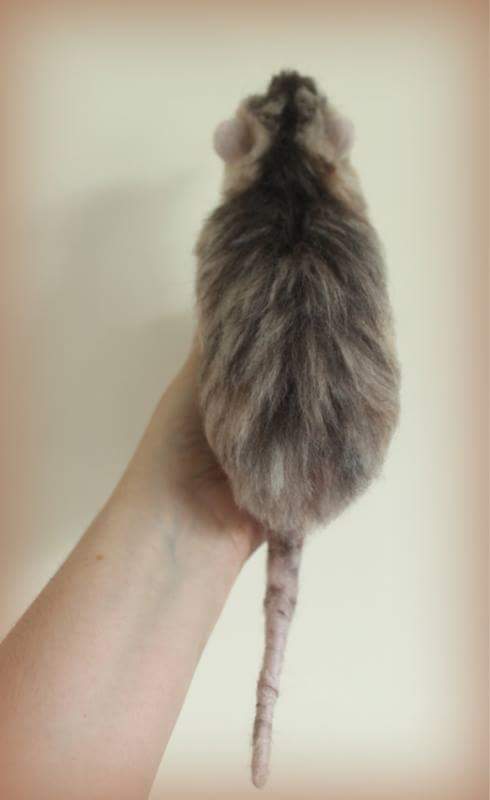
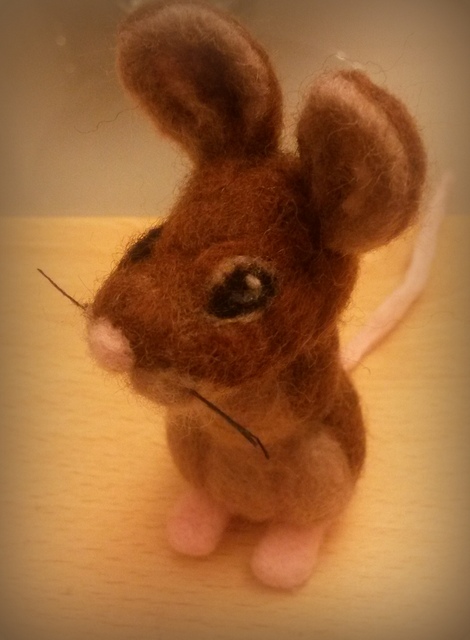
When it came to the mouse I made for my mum; his little feet were pink and would have looked a little bare with no detail. Again he is standing up so you don’t see his paw pads anyway for his back feet but I decided to add some tiny threads of wool fibre with a thin needle to show that he has separate toes. I also stabbed away to sculpt obvious paw shapes for his ‘hands’; one holds a beautiful flower and the other is pressed against his humble mouse heart to say ‘I love you!’

Cute paw pads
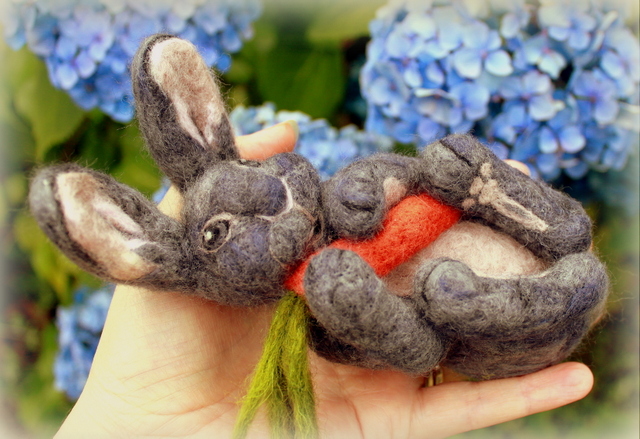
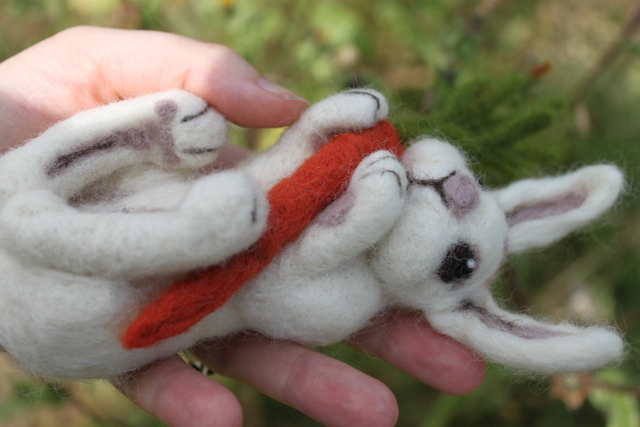
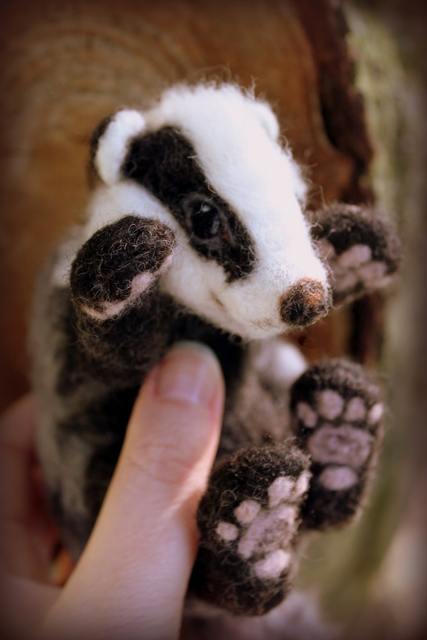
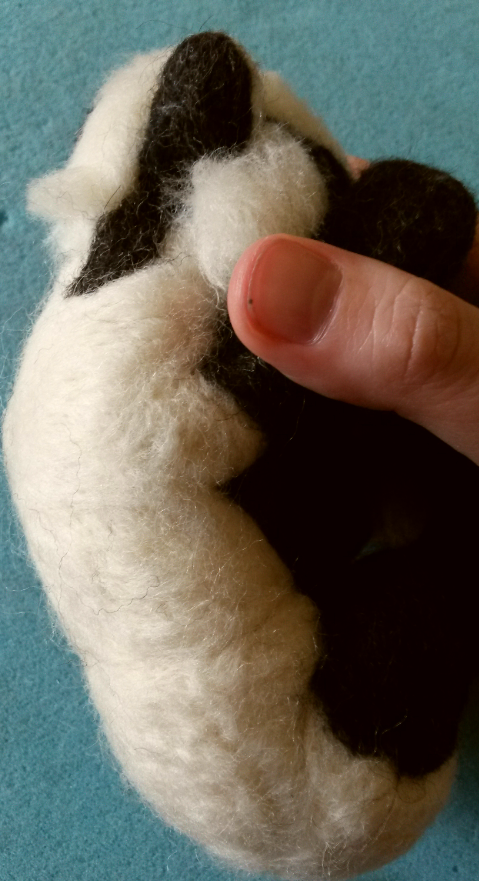
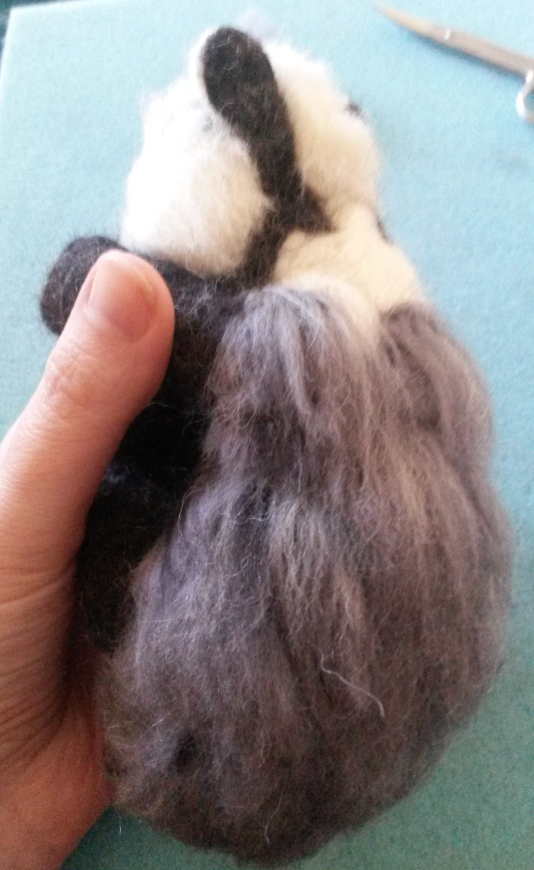
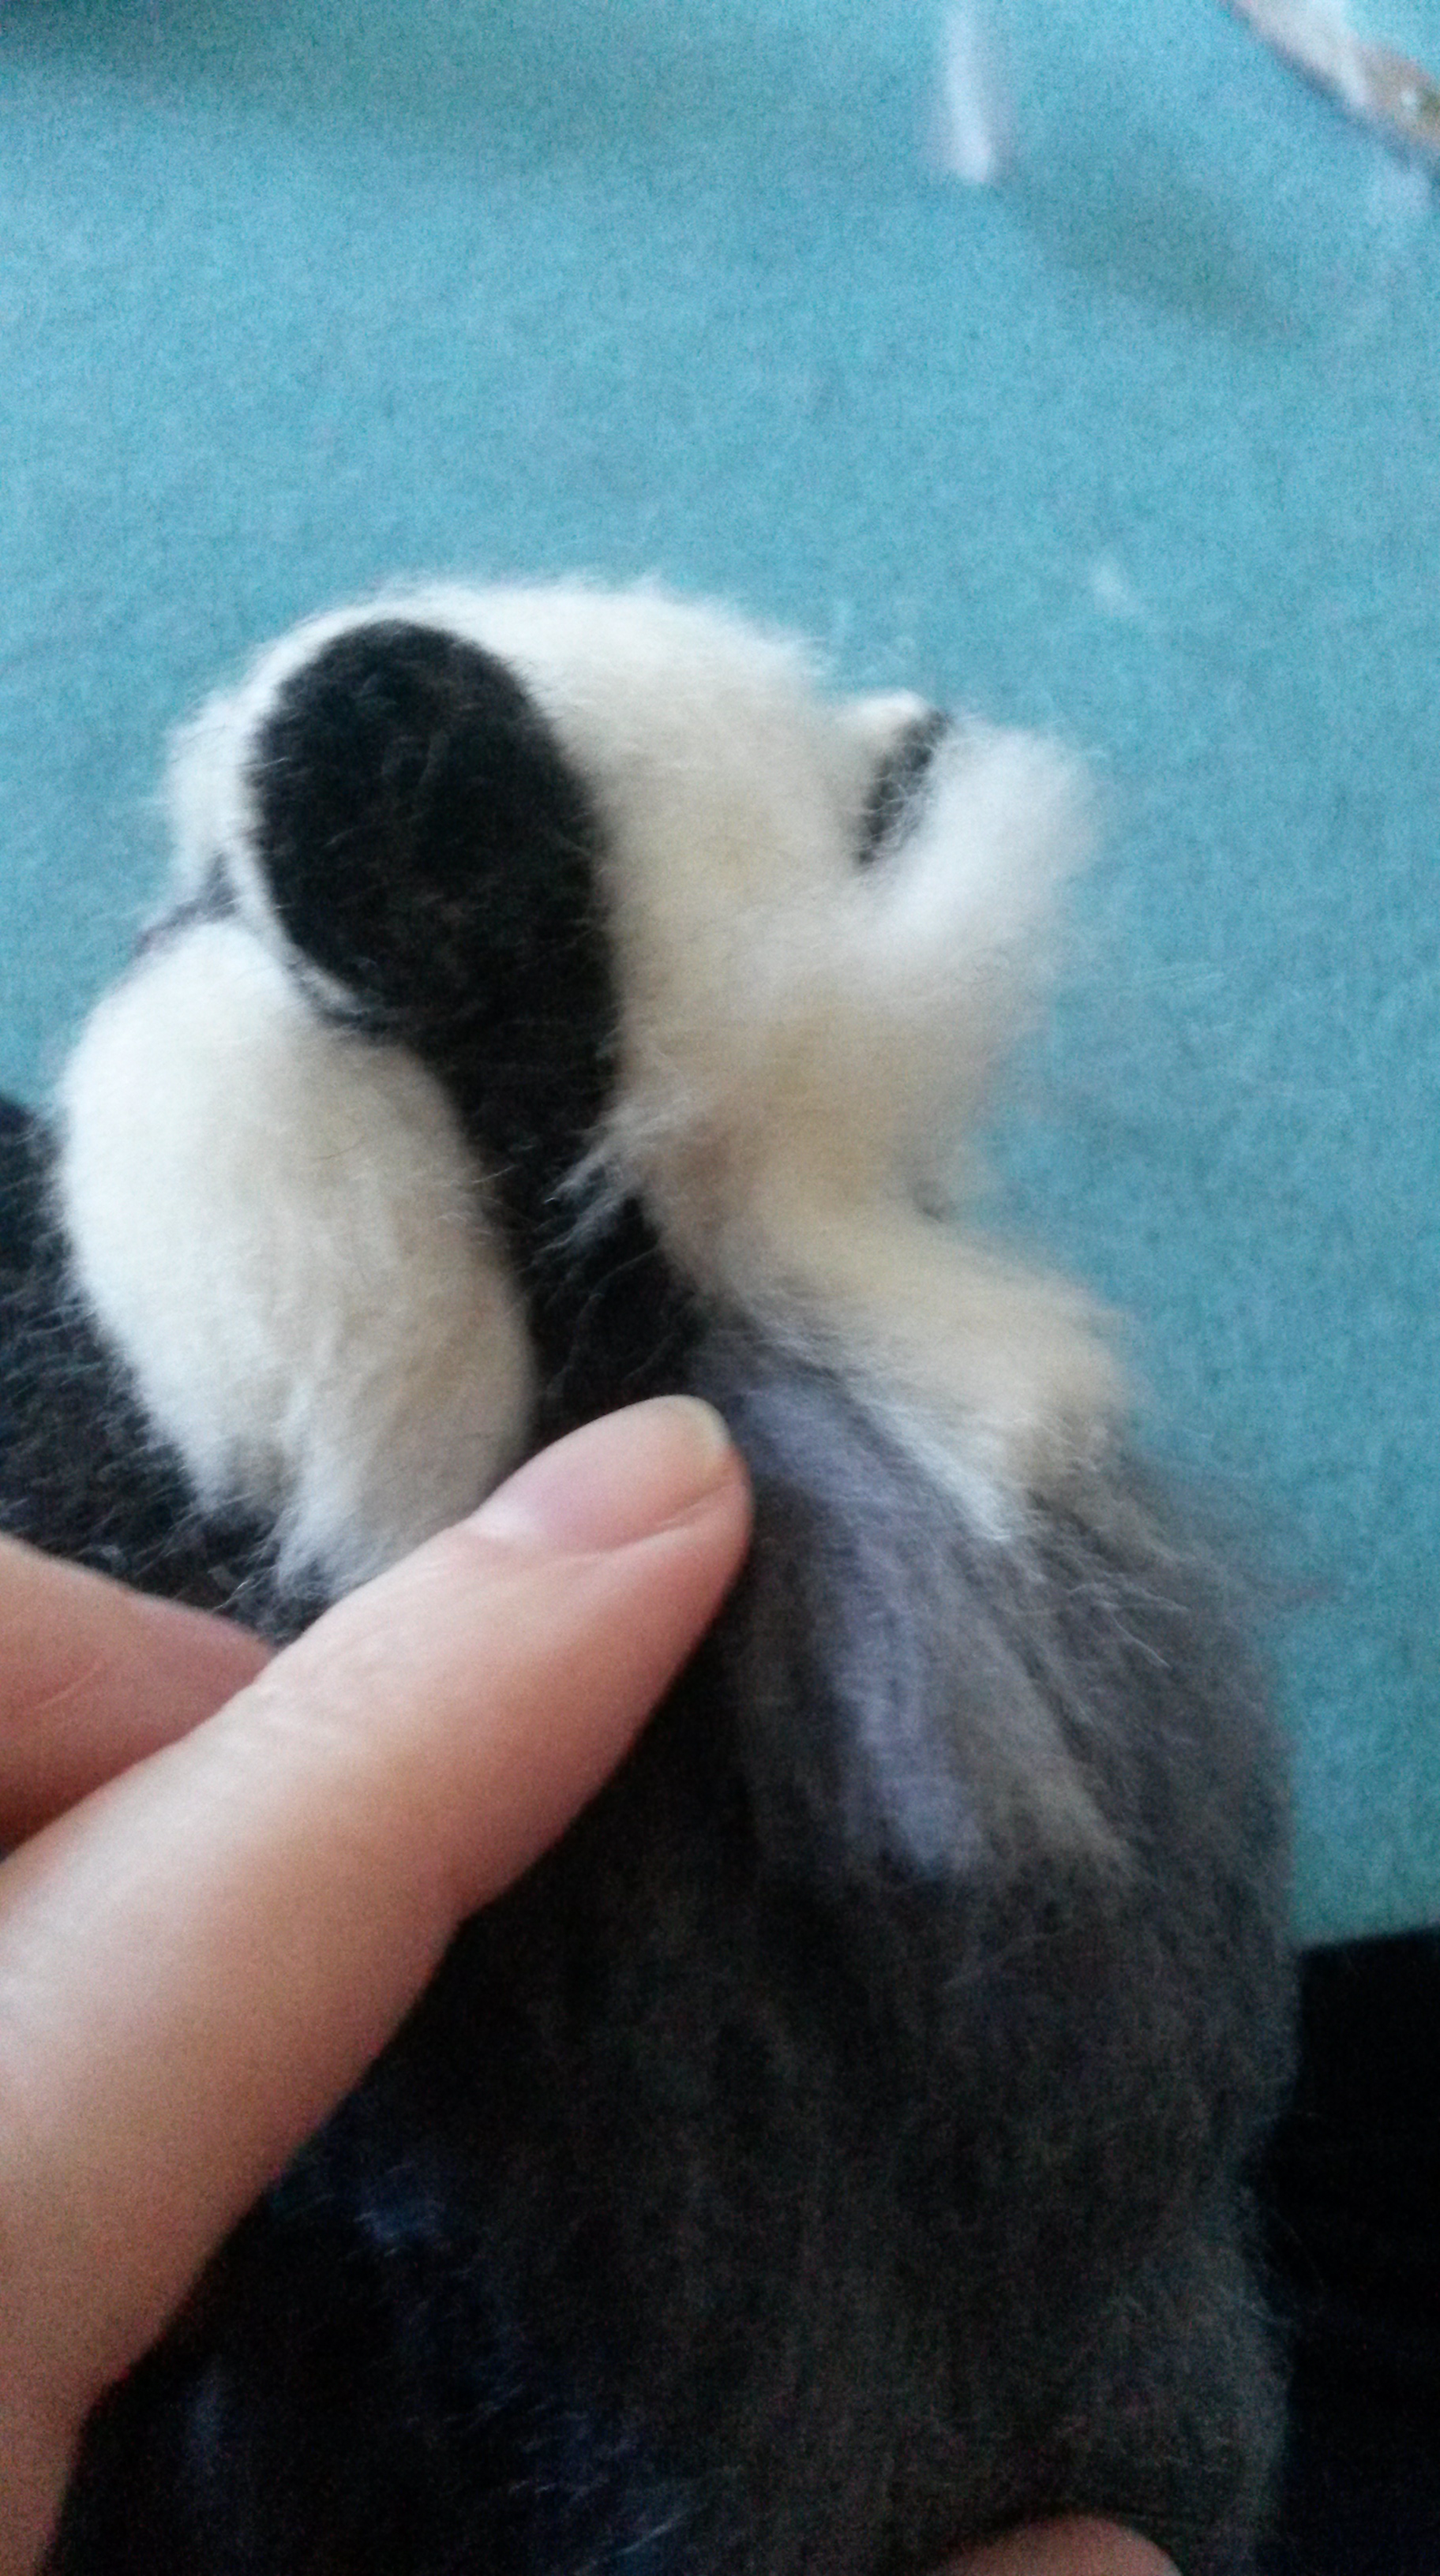
Sometimes though you will want to do so much more! Have you ever looked in detail at the underneath of bunny paws and considered how absolutely small, perfectly proportioned and adorable they are? When making my bunnies and badgers I just couldn’t resist felting the little details that make them look so much more like real paws and make your friends want to say ‘squee’ 🙂 especially as these sculptures are laying on their backs with feet in the air ready to be cuddled or tickled.
To get ideas for how these should look, google images of paws or look at photos of your own pets. All I did with my bunny here was to just felt little blobs of lighter coloured wool onto the underside of the feet and then add some darker fibres on top as shading/ furry bits to make them look more natural. So simple but effective!


Why not have a go? As you can see in the pictures below, leaving their feet as just rounded shapes would not have had the same affect!


Tiny toes that bend
For some animals you may want to take it a step further and make some tiny toes. If you have enough patience you can carefully sculpt the toes from making long sausage shapes that you felt firmly together. You can see I did this with my Christmas owl.

I have found however that using wire makes this much easier, the toes don’t flatten or fray as much, they are stronger, take the weight of the animal’s body better and it also means you can bend the toes to the position you want them to stay in.
Those of you who already make your animals from wrapping wool over a wire armature will likely already know how this is achieved but please do read on in case there is anything you find useful. Those who prefer not to use a wire armature for the main body can still use wire for the feet , why not mix it up a bit?
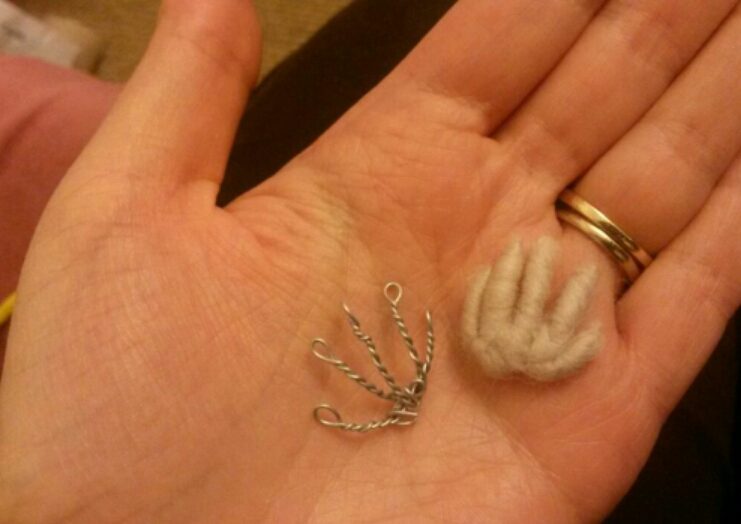
There are several ways to wrap wool over wire to make tiny toes; one way is to wrap the wool over bare wire (See my video tutorial afterwards to demonstrate this). This works really well especially for animals where you really want the toes as thin as possible and make them taper at the ends or for projects which are on a very tiny scale. (Some people use hot wax to fix the first layer of wool)
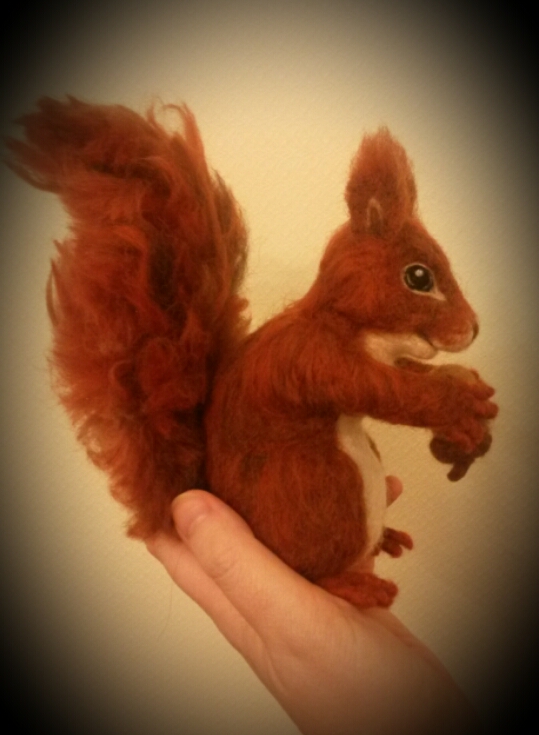
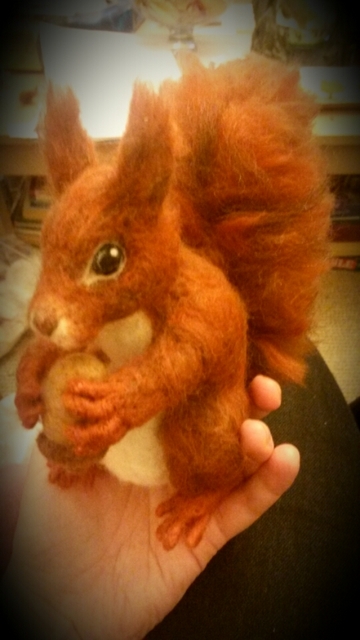
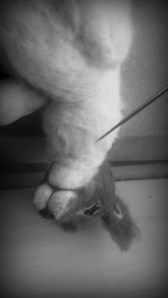
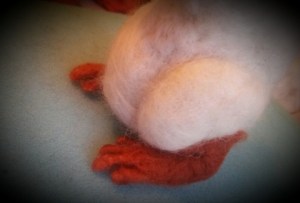
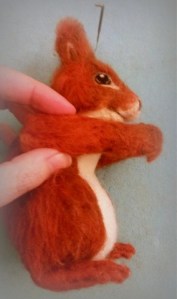
Another simple way (and far less messy if using wax!) which I will demonstrate in this tutorial is to felt wool over a pipe cleaner to ensure it says well (which is basically a very thin piece of wire already wrapped in a layer of material such as cotton or chenille). These can be used for feet where toes can be a bit thicker and for medium or larger projects. I used this method for my guinea pig and Chestnut, my red squirrel. You can see that I also added a bit of paw detail on to the guinea pig afterwards.

Step by step guide for felting feet with tiny wired toes
I will demonstrate here how I made Chestnut’s feet. I decided that each foot would have four toes. My guinea pig however had three toes at the back and four at the front like a real guinea pig. You can decide what you think looks best!
What you will need:
- Pipe cleaners (I bought 30cm length cotton ones)
- Scissors to cut the pipe cleaners to size
- Wool (I used merino wool which felts well and is soft to touch)
- Barbed needles (thinner ones are best for tiniest toes)
- Felting pad/brush (to prevent you from stabbing your knees)
- Lots of love and patience and time – this is worth the effort believe me! 🙂
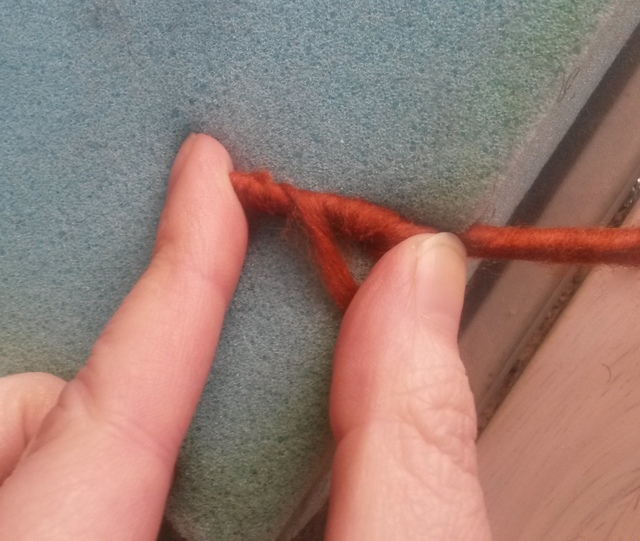
1) Cut two lengths of pipe cleaner for each of your feet (I measured one twice the length of my index finger and the other slighter shorter) It is easier to make two toes from one piece. Prepare these for both feet at the same time.

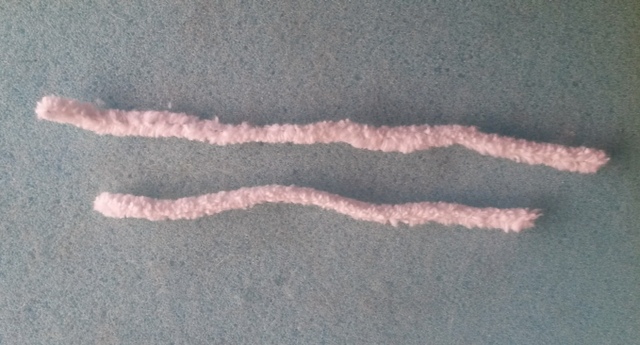
2) Take a thin piece of wool measuring at least one and half times the length of the pipe cleaner and roughly a finger’s width.

3) Tightly wrap the wool over each length of pipe cleaner; keep the wool flat and wind around, carefully overlapping the previously wrapped fibres all the way along. You can start at the end but I prefer to go from the middle and work to each end.
The tighter and smoother you wrap the less felting will be needed later on to fix it in place.

4) On reaching the ends tightly fold the fibres over the end, hold a finger over the end to keep in place whilst overlapping the work you have done very tightly for a few wraps back the other way towards the middle until you reach the end of your wool. Pull off any excess wool if you find you have too much (you don’t want to make the toes too thick).
5) Using your barbed needle, stab the fibres in place along the length of the structure and especially at the ends to secure them and prevent them from fraying, taking care not to break your needle by hitting the wire as you go.


6) Bend the pieces in half and then overlay, squeeze and slightly twist the bases of the two toe pairs together, the two longer pieces will become the two centre toes.

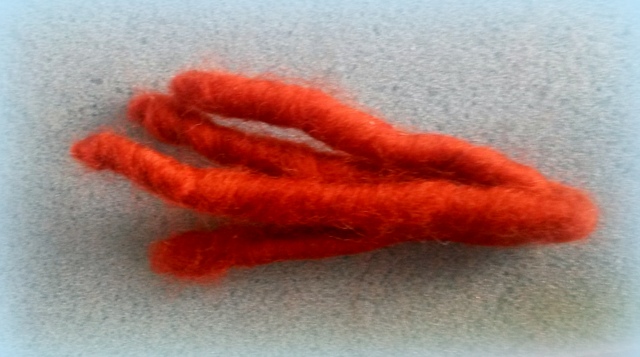
7) Wrap some thicker wool over the twisted section to form the rest of the foot. Spread out the toes into the position you wish them to be in.


8) Add more wool and felt onto the foot on both sides to shape the foot, and ensure you fill in between the toes and make the ‘knuckle area’ thicker. See how your tiny toes are becoming reality ? 🙂


9) Build up layers of wool. Your cute little feet are beginning to really take shape!
For the hind feet you will see I kept the toes and foot fairly flat and long and built up a heel. One of the toes ended up a little longer but I quite like this; gives a more natural look.
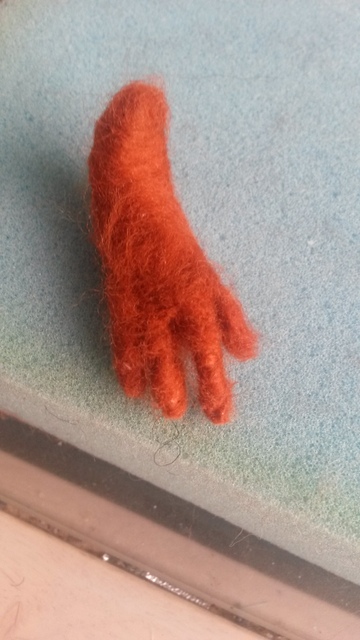
For the front paws (which will be holding a felted acorn) I kept them daintier and shorter and curled the ‘fingers’ into a gripping position, and added an ‘arm’.

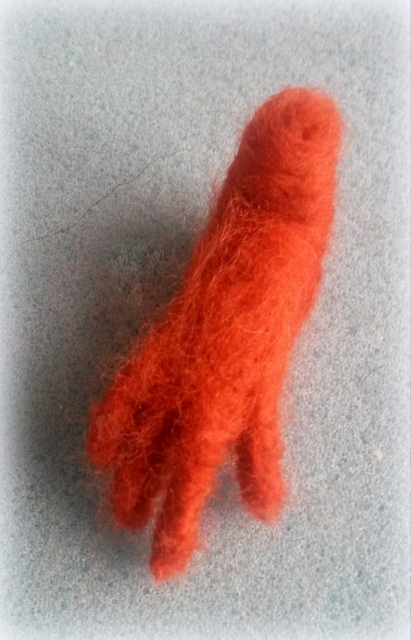
10) Keep going and ensure you have left some loosely felted wool where the foot/leg will join onto the body. See here for a tutorial on how to add head and limbs to animals.


and …. SQUEEE!
Did you find this tutorial helpful? What would you like to learn about next? Please leave comments. Why not post a photo of your own creations?
For more tutorials like this please visit my Tutorials, tips and ideas page.
Don’t ever miss out on my latest tutorials! Insert your email address and click the ‘Follow’ button on the right hand panel to receive notifications of when the next post is up..:-)
Don’t have time to make one but would love a one of a kind needle felted animal by Fit to be loved for yourself or for that special someone? Visit my Etsy shop today to see my latest creations. Or like my facebook page to see what I am making next.
How to add head and limbs onto needle felted animals
“How do I felt body parts onto my needle felted animal? How can I make them stay secure and not easily pull off?”
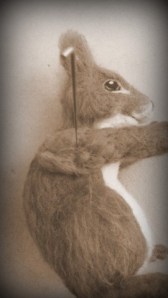
Today I want to show you some more basics of needle felting animals. In my other tutorials you will see how to make various animal parts e.g a badger head, bunny ears as well as the various stages of felting a full guinea pig, bunny etc. However one of my followers commented that it would be good to do a tutorial showing how to felt the head and limbs onto your animal. It is not so easy to demonstrate with photos but I have done my best by using the shots I took along the way when sculpting Chestnut; the little red squirrel I made.
There are many ways of felting one piece to another so you may have already found the best way for you. The method I will show you is just one way and was the easiest for my squirrel at the time. 🙂
Please note that the following tutorial will assume you know a little bit about needle felting already. See basics here.
Adding the head

At this point I have felted the head more or less to completion. The body has its shape but no fur yet…
I have sometimes only got as far as the shape of the head when joining it to the body but I quite often find that it’s the head of an animal that gives its unique soulful character (especially once it has eyes).
I often don’t decide on exactly how the body will look until I have the head sorted. Being delighted by the cute nature of the face (as is what happened with Chestnut) often inspires me to continue on with the rest of the body.
1) To join two felted objects together leave enough loose fibre on at least one of the objects where the join will be so that it can be felted into the other.

It is a lot harder and perhaps impossible to join them if the wool is felted too firmly and the fibres cannot mix and bind with the fibres on the other object when you stab with your needle.
As you can see, the neck at the top of Chestnut’s torso has been left loose and soft. The base of the head is soft to medium felted rather than firm to allow plenty of further stabbing..
2) Fluff the fibres up a bit before putting the head into the position you would like it to be.

3) Stab at the wool from a 45 degree angle under the chin of the animal. In effect what you are doing is poking the loose wool from the neck into the head. Insert the needle as deep as it can go and on all sides of the neck. This helps to anchor the head to the body. Remember (particularly at this stage when the head will just fall off the body if you try any other way) to lay your animal on a felting pad/brush and stab away from your fingers!


To join body parts I use a medium width barbed needle (I find these are stronger than the finer ones for this purpose but do try out various ones to see what you are comfortable with and what works best for the wool and size of animal you are felting). If possible use one with many barbs along the length to help bind the fibres and as the needle will be inserted quite deep.
4) Once it feels like the wool fibres have attached so much so that the head no longer topples away, you can try felting at other angles at various depths. Here I laid Chestnut’s head over the edge of the felting pad as it made it easier to get the angle I wanted and also prevented me from squishing her carefully felted nose 🙂


5) Carefully stab a few times from the top of the head to ensure it is firmly secure. NB this is easier if the head has no fur yet but if you have (like I have) you just have to take care not to leave stab marks in the face (as you are using a slightly thicker needle).
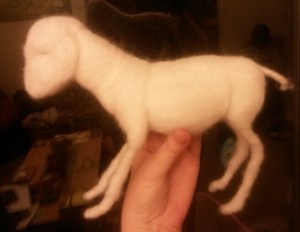
…and there we go, head on …looking more squirrel-like although much like a shawn sheep at the moment with lack of fur 🙂


Adding limbs
This is achieved in much the same way as joining the head in that you need to stab deeply in all directions to ensure all the fibres bind to each other.
For Chestnut I started with the hind legs so that it would be easier to see how her forelegs would be positioned once she was sat upright. Note the thigh part of the leg for my squirrel has already been sculpted as part of her body shape which ends up in a sitting pose. So when I refer to adding the hind leg, it is in fact the section below her thigh bone.
1) Needle felt each leg onto the body by stabbing the wool at the fluffed up end of the leg into the body.


For Chestnut I had formed her feet using wool wrapped and felted over wire (see my tutorial on tiny feet and toes here) so I had to take extra care not to break my needle by hitting the wire when stabbing.


2) Continue at all angles for both legs until firmly and securely in position.


Once in place I added more wool round the joins as fur and then decided to felt some of Chestnut’s back-fur too. Aw she is looking very happy and mischievous already!


3) Then do the same for the forelegs.


As the shoulder part needs to be attached along the side of the torso it is not sufficient to merely stab from the outer side at the shoulder blade to keep the limb in place.
To felt at an angle under the ‘armpit’ and also to ensure the leg cannot pull away at the join, stuff some extra(fluffed up) wool into the join and stab it securely into place (not too deep to push the lighter coloured wool through to the other side of the shoulder).


Tip: To get the correct positioning and symmetry when adding the second foreleg(as quite often you will want to play around with this until you get it right) you may find it easier to stab the second leg into place only a tiny bit at first; enough to hold the leg in place but not so much that you can’t alter the position if you need to. You can then step away to view your animal from a distance, then adjust until happy with it.


….then secure into place.


Once all limbs are joined onto your animal you can then felt over the joins with fur. You wouldn’t even know your animal started out as separate appendages.


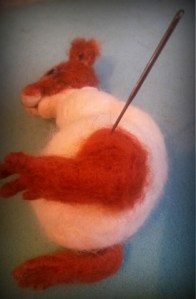
Here is Chestnut as she looks now! 🙂


How to needle felt long animal fur

Ever wondered how to get those luscious layers of long fluffy fur on your needle felted animal? more importantly how can you get them to look natural and stay put!?
Whilst making a badger I took some photos of him along the way to show you. It is fairly simple to do but does take quite a long time although once done it does give you a real sense of satisfaction and the fur really does feel soft and fur-like. Of course the end result texture does depend on the type of animal you are felting and the type of wool you wish to use.
If you are new to this amazing art form then before you get started – check out my tutorial ‘what is needle felting’ for basic needle felting techniques.
What wools to choose?
For my needle felted badger I had already made his body shape by sculpting with natural carded wool. I recommend wool batts which come in long thick sheets, making it easy to pull sections off and the wool is really fast to felt with.
Then for the top coat (which I will be demonstrating in this tutorial) I mixed grey and black merino wool tops with a few strands of some natural undyed wool tops for a rich cream colour. I particularly love the merino sheep wool as it comes in a variety of animal colour options and is lovely and soft to touch. Natural wool tops in breeds such as Jacob or corriedale are quick to felt and are a little more fibrous to the look and feel. When using wool tops the fibres all lay in one direction so they are perfect for cutting lengths and adding these to resemble long fur on your needle felted animal. If you would like to you could use other luxurious fibres such as baby alpaca.
What tools will you need to attach the fur?
Very simple you just need:
- barbed needle/s – I would recommend 38G Star Needles or 40G Triangle needles.
- a felting base e.g. a basic foam pad, a wool mat or a rice bag (see how I make one here).
- small scissors (I just used nail scissors but you could get some really cute stork embroidery ones for your projects – really sharp and useful for trimming long fur)
- you can also use a small ordinary sewing needle to fluff up fur at the end.

NB I didn’t want to completely flatten my fur down but allow it to stand out with some volume so only used one needle at a time rather than a multi-needle tool and changed my needle depending on detail and thickness of wool being needled. .
As you can see I have completed my badger except for his back fur and tail at this point. For how to make a badger head please see my tutorial here.
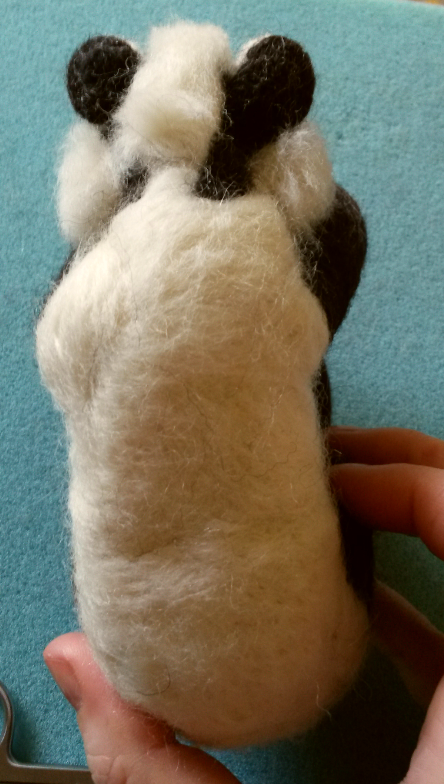
I love the fur on a badger’s back, it is greyish in colour but with flecks of black, brown and cream.

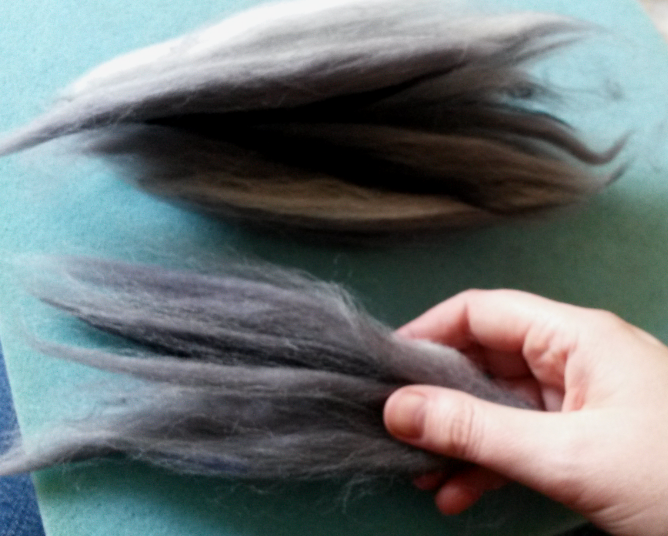
Now you could use carding brushes or dog brushes to blend the colours of wool but I wanted to keep the fibres all going in one direction as much as possible at this point and with block strands of full colour in black / cream / grey so not fully blended.
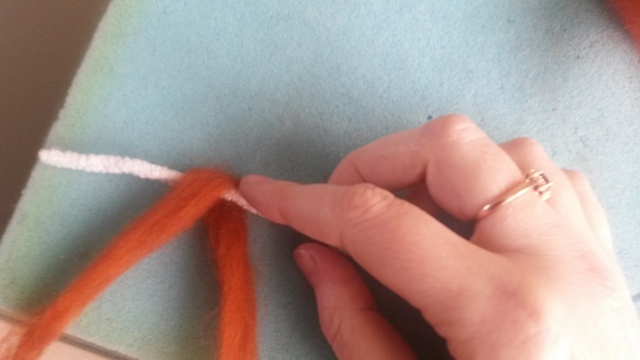
To achieve this lay lengths of each colour on top of each other and then using your thumb and first finger of each hand at each end of the wool lengths, pull your hands apart pulling the wool away from each other. Lay each layer again on top of each other (fibres all in same direction) and keep going until all the wool is blended as much as you want it to be.


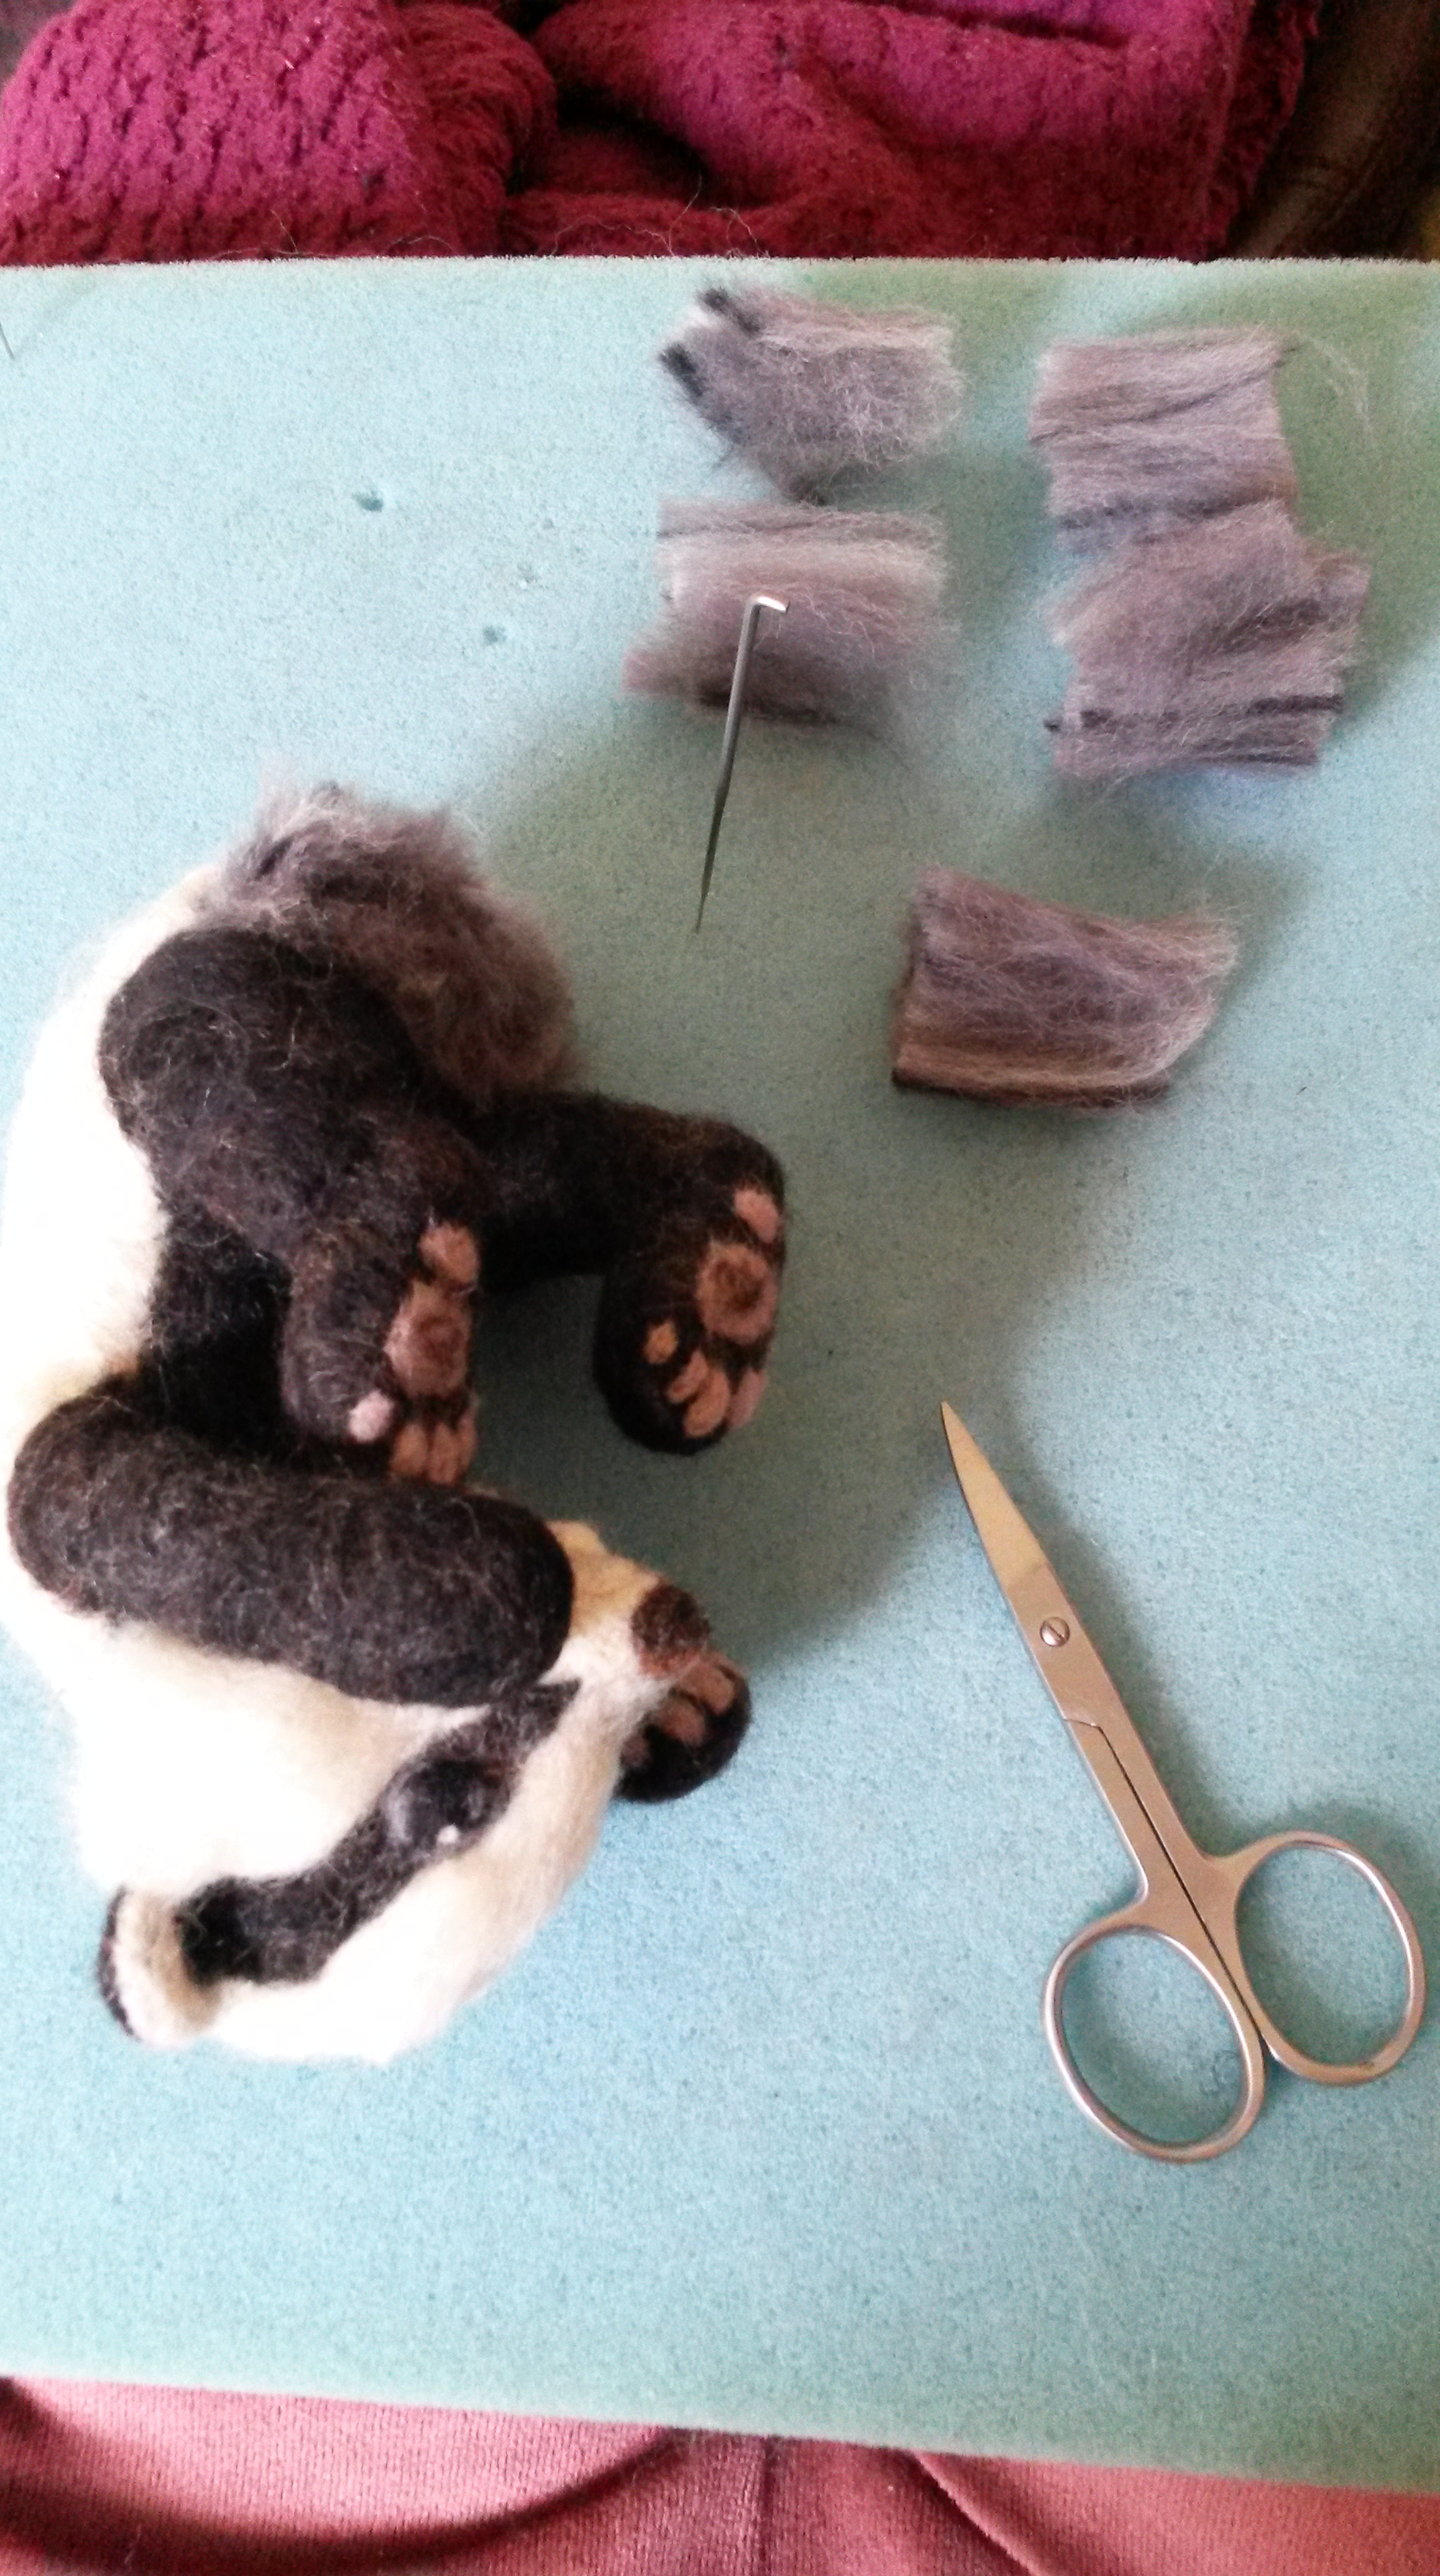
Then take narrow strands of the mixed wool the width of one or two fingers

… and cut these into small pieces, roughly the same length. The length will vary as we felt as some areas will have longer fur than others…

They don’t need to be perfect as no badger will have its own hairdresser with a perfect hair cut. 🙂

I will now demonstrate what you will do with each piece..
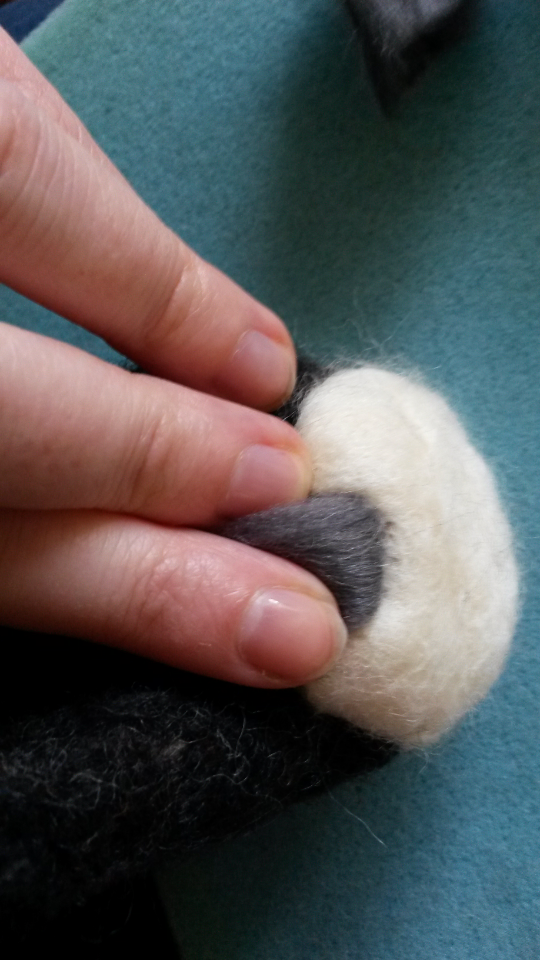
Take a piece and slightly pull in the centre in a bow-like shape

To layer the fur we need to felt from the back end of the animal layer over layer until reaching the head… so place the first piece at the very bottom of the badger’s rump.
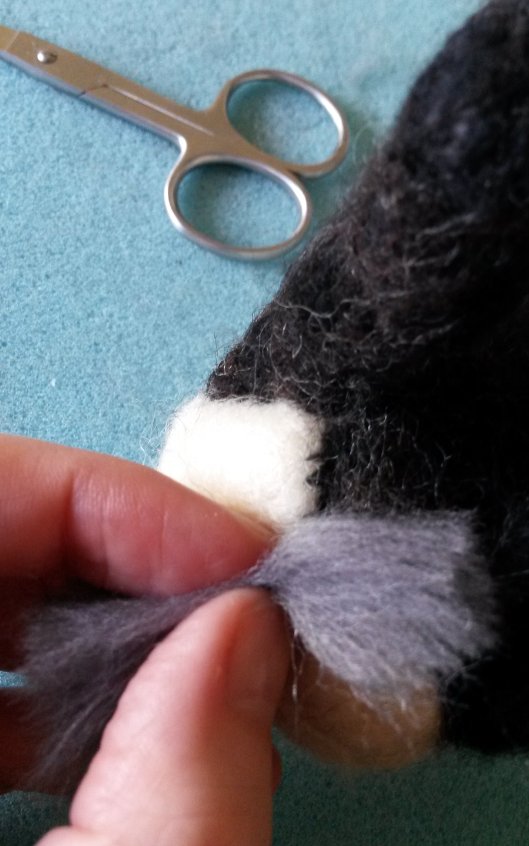
Felt using your barbed needle along the centre parting of the wool piece in various directions, the depth should go down to the first few barbs but the aim is to felt shallow but in many directions for the wool to stay put.


You can also felted slightly below the centre line onto the bottom half of the piece to ensure it is in place.
Now carefully pull down the top section


… and ensure there are no stray edges by encouraging the wool in from both sides..
Now felt along the top folded edge until it is firmly in place.

Felting along the centre and then on the top edge in this way helps the wool to stay in place. Give a tiny tug to check it doesn’t easily pull out. NB a really good tug will likely pull fur out hence why these cute little animals are not meant to be toys to be pulled around…they should take cuddles and some handling though so ensure you felt well.
Again ensure you felt in many directions and then continue on to the next piece…layering the wool to create a fur look..


When moving up to the next layer, position the wool just above the last layer – you don’t want gaps in between of core wool showing so don’t leave too big a gap…


Don’t worry about the fur being too long or tufts sticking out, as you can give the end of the fur a trim as you go (time to use your hairdressing skills :-))

By the way this doesn’t need too much skill and I am definitely no hairdresser, just trim in various directions for a more natural fluffy look.

Any bits you trim off can be used for other felting projects or even for any areas you wish to fill in later at the edges so don’t waste them just put aside in a neat pile for later..

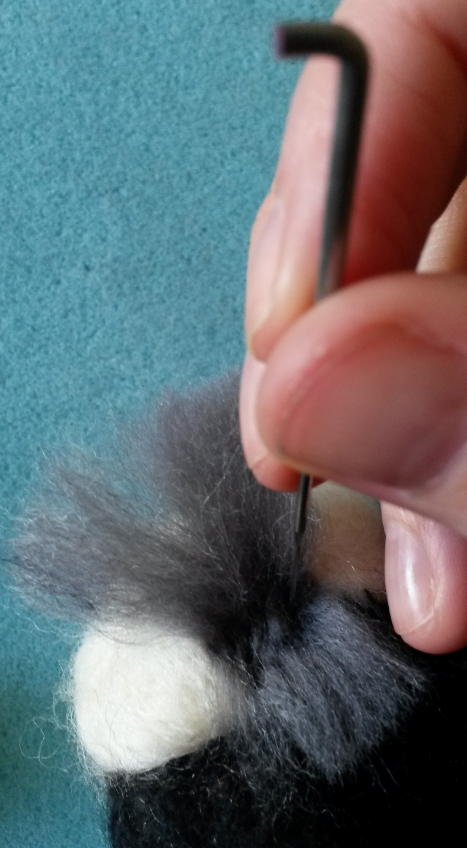
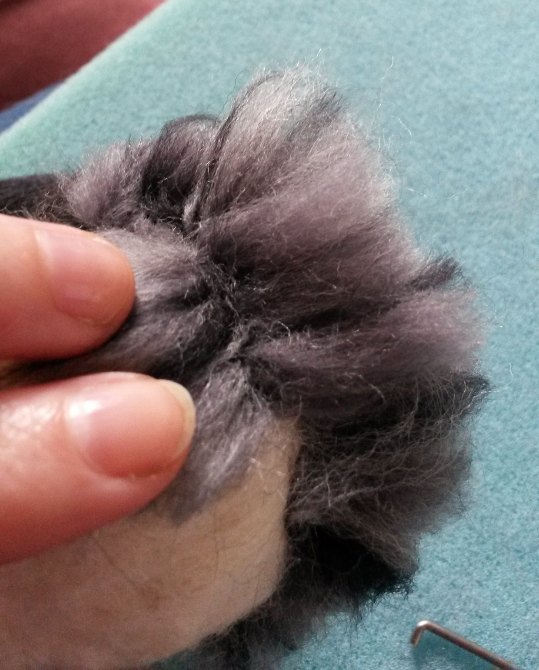
Optional; For the back end of the badger I wanted this to be extra fluffy with the fur standing up slightly on end so to achieve this, run fingers through the strands of wool to fluff up and stab the wool all over between the strands, not to felt down but to fluff up…(

As you can see we have a way to go but we are on our way !!
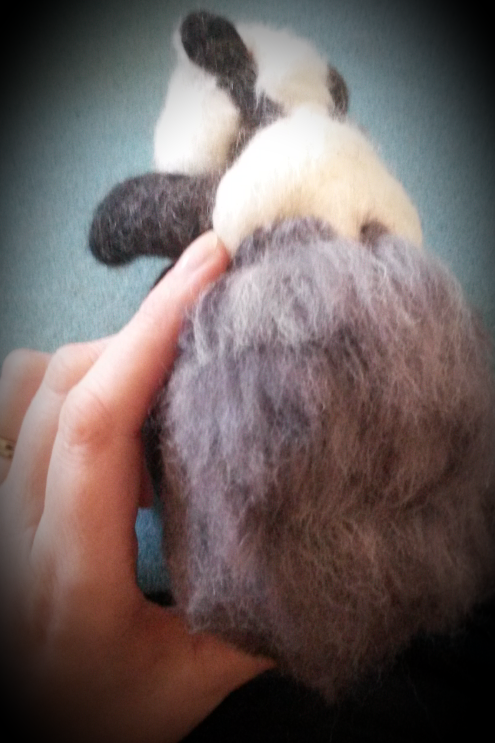
Aw look at him waiting so patiently to be finished 🙂

You may find it easier to turn his body as you go – work with whatever position you find comfortable and whatever means less squishing of his cute little nose into the felting mat..

As you reach the main length of his body you may now decide to cut the lengths of wool a bit longer

For a more realistic look vary the colours so that you sometimes get more black or cream in the strand you felt…mix it up a bit..

Keep going…


Almost there… take a breather – have a hot chocolate !!

Specifically for the badger- when reaching the neck line, overlay some strands of black wool at the base of the ears …

Then finish off with some more of the cream at the base of his head..

You can use a normal sewing needle now if you wish to carefully fluff up the fur where it may have flattened slightly..
And there you have a gorgeous badger! fully furred waiting to be cuddled and fit to be loved!!

I added his tail after this which also had several layers of wool as fur…
Here he is all completed !! so playful !!

Long Animal Fur video!
Find it easier to learn by watching how it is done?
 My ‘Long animal fur’ video tutorial is NOW AVAILABLE on my YouTube channel in 4 parts.
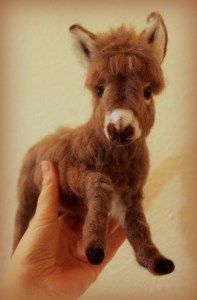
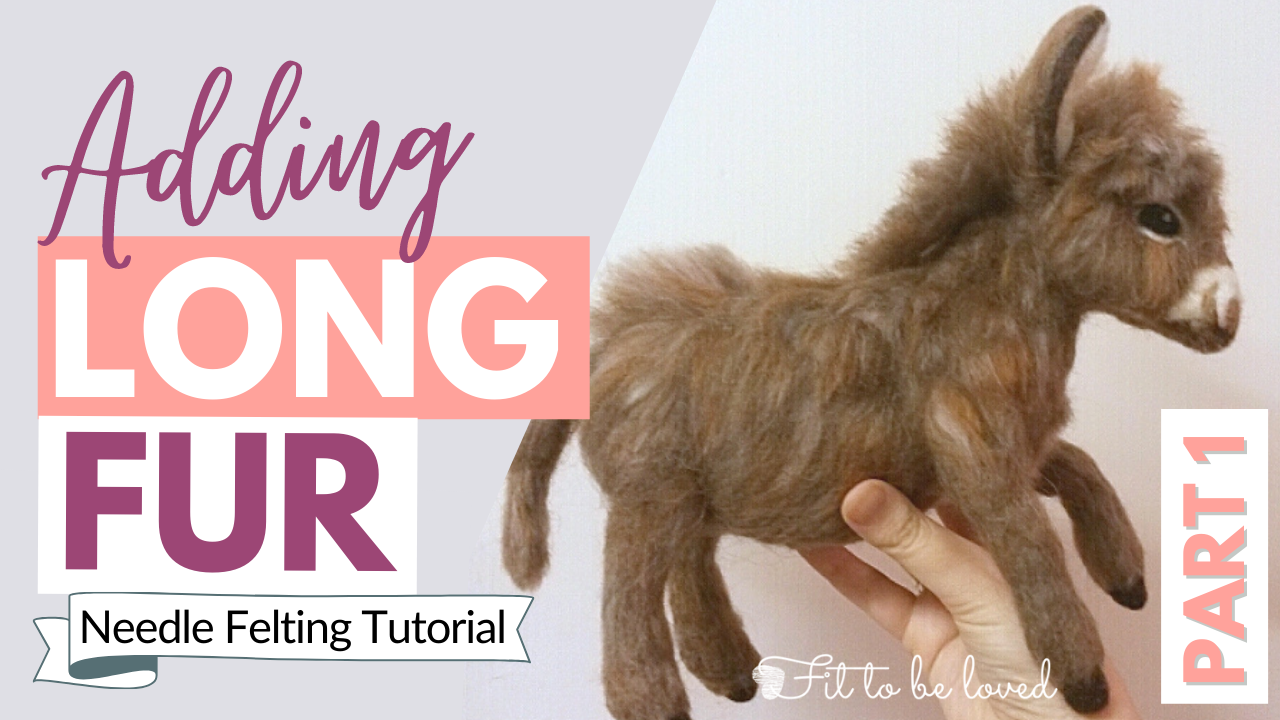
<<<Click the donkey picture to start watching part 1
You’ll learn even more techniques for adding long fur (as demonstrated on this adorable miniature donkey).
Did you find this tutorial helpful? What would you like to learn about next? Please leave comments. Why not post a photo of your own creations?
Don’t ever miss out on my latest tutorials! Insert your email address and click the ‘Follow’ button on the right hand panel to receive notifications of when the next post is up..:-)


