If you are looking for a simple and effective method to needle felt some lovely looking leaves then this will hopefully give you some inspiration.
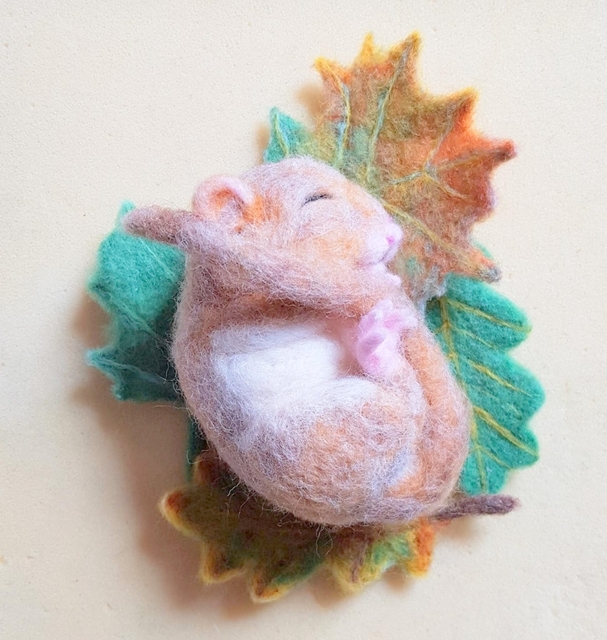
I recently felted some leaves for ‘Hazel’ the sleepy Dormouse and took some photos of the process for you along the way.


There are many ways to make needle felted leaves e.g. using leaf-shaped cookie cutters or felting sheets of wool and then cutting out the leaf shapes.
I decided to experiment with sheets of wet wipes (just cheap every day baby/hand wipes are fine). I found that not only are they a nice thin base to felt the wool onto for natural looking leaves but you still end up with sturdy pieces that keep intact and don’t easily fall apart. Having leaf shape cut-outs ready to work on made the process nice and easy too!
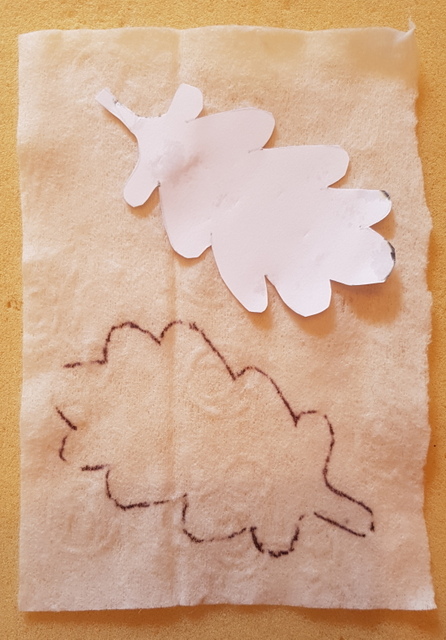
You can draw leaf shapes straight onto the wet wipes or you can (as I did) draw on to paper or card first to try out a few sizes and variations and choose the shapes you like best.
I looked up oak and maple leaves in a tree identification book and copied them freestyle onto my paper. You could also sketch leaves whilst you see them on a walk or collect them to draw when you get home. If you aren’t confident to draw them freestyle then why not trace over a book or computer/tablet screen image.

Here are my four sheets of wet wipes and I have cut out my leaf shapes (oak on the left and maple on the right) from paper ready to use as templates to draw round.
It is best to use a pen to trace round the leaf shapes rather than a pencil to make sure the lines show up clearly. Don’t worry about the wet wipes still being slightly damp as they will soon dry.
When it came to cutting I used small scissors as it was easier to cut the tiny jagged edges.


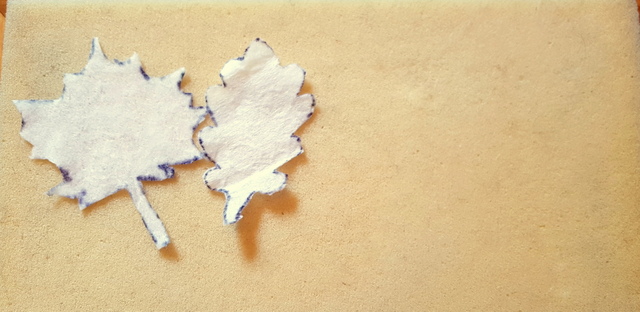
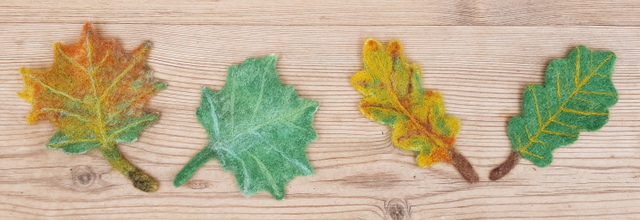
You can make as many leaves of however many species you like. I stuck to just the oak and maple and made two of each; a ‘spring/summer green’ version and a ‘changing to autumn’ version.


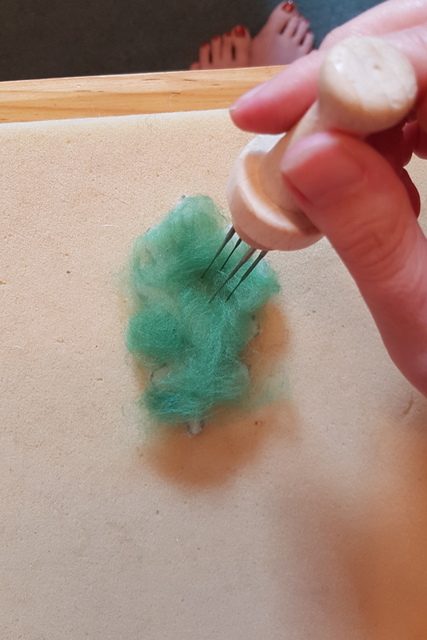
Here I am making a start on my first oak leaf.
For the ‘spring/summer green’ versions I chose a mixture of some beautiful vibrant green merino wools.
If you want to felt flat pieces quicker, a four needle tool is perfect. Triangle or star needles are great for this.
Continue to add more wool and firmly needle felt it into place. A single thinner needle (star or triangle) will help to define the edges and keep the wool to the shape of the cut-out.
If you are gluing or sewing the leaves onto a picture/collage you won’t need to felt the other side as well. For my dormouse nest however I wanted to be able to take the leaves out the nest as separate pieces of art so I decided to felt the other sides of the leaves too.
I used brown wool for the protruding stem of the oak leaf.
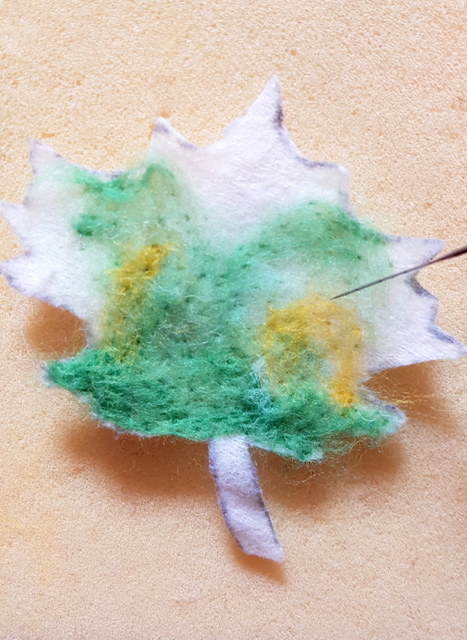
To ensure the surface of the leaves don’t look holey or to carefully brush the fibres in one direction for hairy leaves (make sure you have firmly felted the wool first before attempting this), use a spiral/twisted needle.
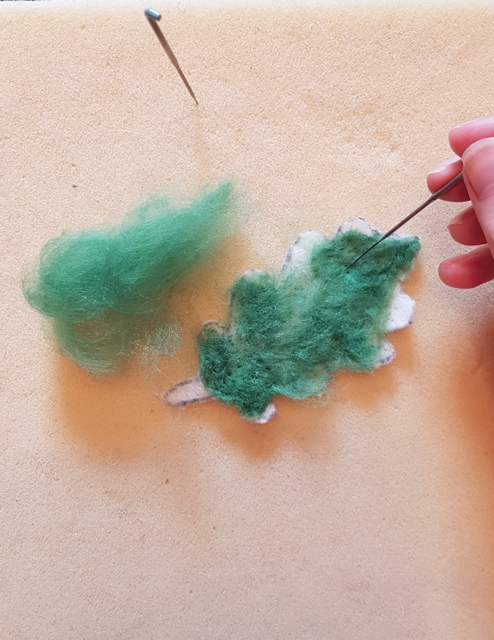


For the upper side of the leaf, carefully felt the stem and leaf veins with a thin (preferably a spiral/twisted) needle. Alternatively you could stitch on this detail using embroidery threads.


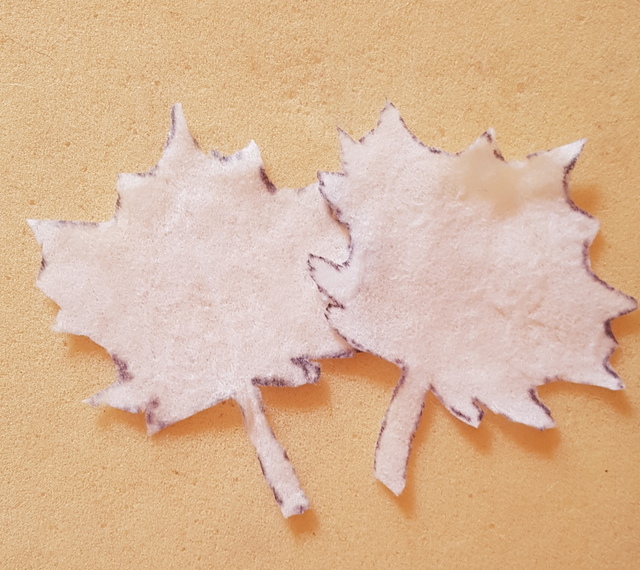
Here are a few process pictures of the maple leaf.


For my ‘changing to autumn’ versions I added thin layers of varying shades of green, yellow, orange and red merino wool to give a lovely blended finish before adding the stem and vein details.
You can really use your imagination when it comes to colour. When you look at real leaves no one leaf is the same as the next. I just love going for walks in the countryside and admiring the leaves on the trees or those in the autumn around my feet that have fallen. They are so amazing!


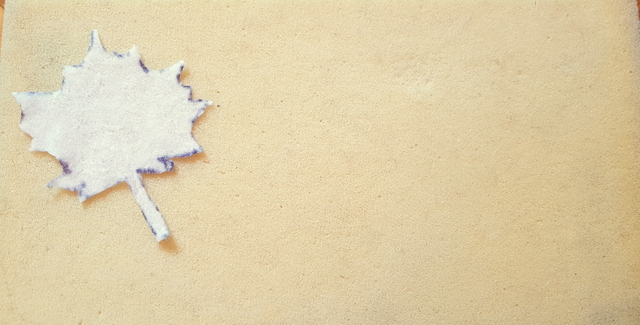
For really flat leaves, steam iron them for just 10 seconds each below a cotton sheet/tea towel.
I hope you found this step by step photo guide helpful for making your own needle felted leaves. Let me see how your leaves turned out!
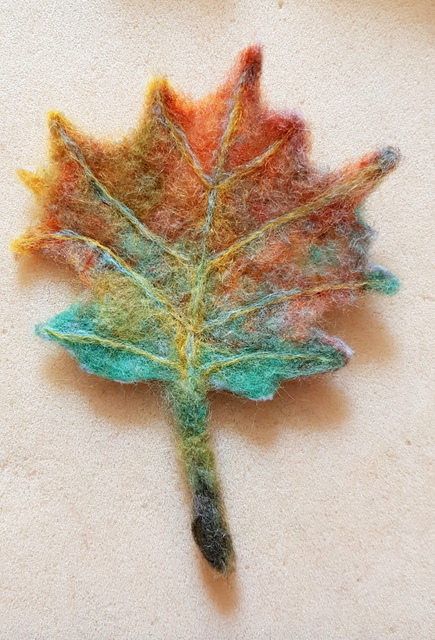
Here are some final pictures of the leaves once they were finished. They look great on their own or with a woodland creature! 🙂


Do you remove the wipe?
LikeLiked by 1 person
No it’s felted onto the wipe.
LikeLike
This is such a great project, with beautiful pictures and clear instructions,
I can’t wait to make them,
Thanks for the inspiration,
LikeLiked by 1 person
I’m so pleased you like it. Thank you for your comment.
LikeLike
THIS IS SUCH A GREAT PROJECT, With excellent directions and pictures .
I really appreciate your clear instructions and beautiful work, I can’t wait to make them!!
LikeLike
Thank you! Wanting to make a birthday crown with fall leaves and this is exactly what I needed to help me where to start!
LikeLiked by 1 person
That’s great. I’m glad they will be of help
LikeLike
Pingback: Array - Blog
Pingback: Needle and Wet Felting Inspiration from Nature! – JACE NETWORK
Pingback: Needle and Wet Felting Inspiration from Nature! – Felting – While Windows Shopping
Pingback: Needle and Wet Felting Inspiration from Nature! – Felting – Crypto News
Pingback: Needle and Moist Felting Inspiration from Nature! – Felting - Origami
Pingback: Needle and Wet Felting Inspiration from Nature! – Felting
I like how you experiment and come up with new ideas. Thank you for sharing them with us!
LikeLike
Thanks for saying Chris 😊
LikeLike
Thank you for the lovely tutorial
LikeLiked by 1 person
Thanks for saying Judy. Glad you liked it. 😊
LikeLike
Fabulous ideas and you made it look easy, thank you!
LikeLike
Thank you. It was fairly easy but time consuming 😊
LikeLike
Thank you Amanda. That is very helpful! 😀
LikeLiked by 1 person
Glad it is of use 😊
LikeLike