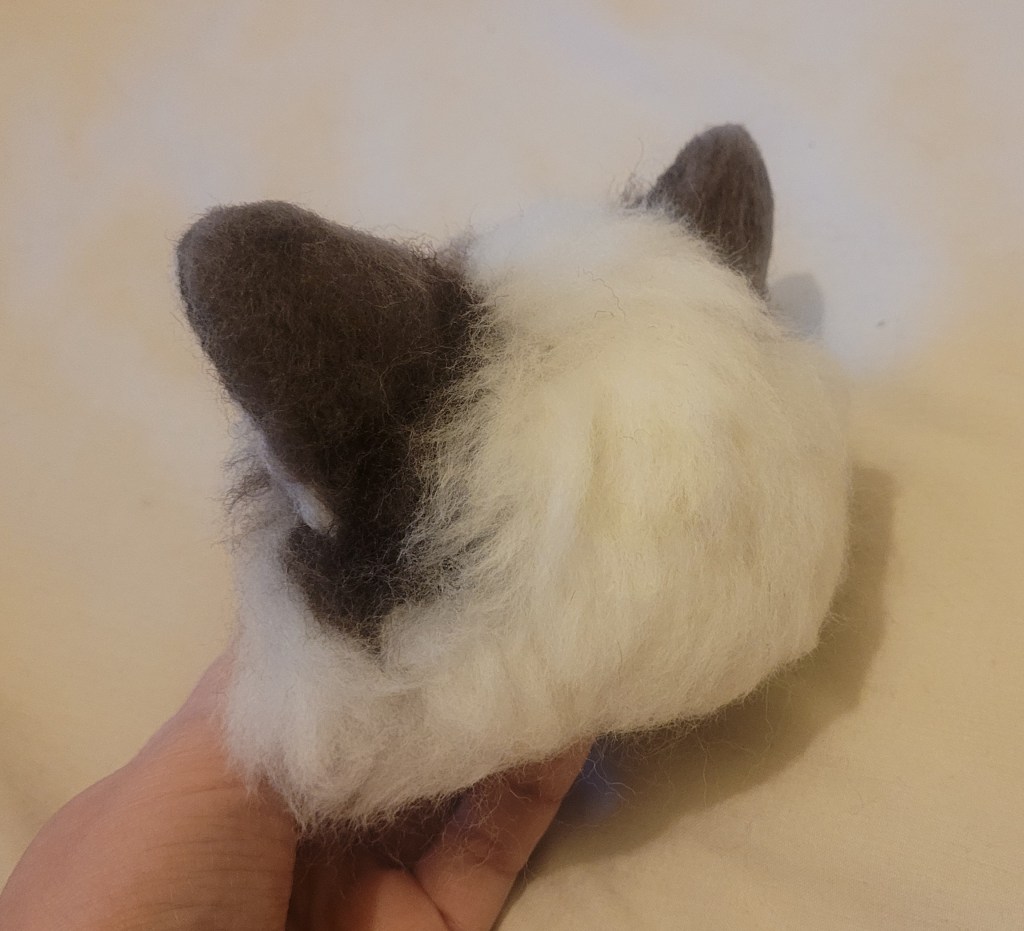
Would you like to know how I needle felted the long fur on my Tabby Birman cat?
Here is a video tutorial with techniques of how to blend wool colours, plant (attach) long fur to your cat head, layer the wool pieces, reverse felt wool in some areas (for blending, gradients and fluffy fur), create tabby marking patterns and trim wool.
It’s great if you would like to make realistic cat fur!
This is part 3 of 5 in my series of Needle Felted Cat Head tutorials.
I hope you enjoy it
Here is the next tutorial for making the cat ears.
Or if you would like to know how to do the whiskers then that part is here.
If you missed the previous 2 videos or would like to rewatch them:
Tutorial one for Needle Felting a Cat Head Shape is here.
Would you like to learn how to attach long fur to your needle felted animal? not sure how to firmly add the wool or where to begin?
You have likely seen my photo tutorial with basic techniques for adding long fibres onto a badger. Well here is a video series for those of you who learn best by watching how it’s done. These are far more in depth with more techniques and tips along the way! You too can create a detailed and realistic fur effect!
This was available as a paid tutorial for some years but I have decided to offer it for free. I have embedded all 4 parts on this page for you to watch and have included chapter start time stamps, so feel free to start at the beginning or skip to the parts you feel would be most useful 🙂
Difficulty ranking: Intermediate level or beginners looking for a challenge.
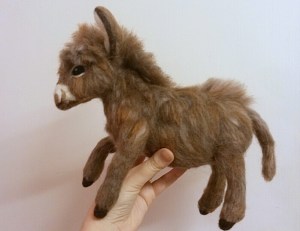
The result: Amazing detail; the look of a real animal with layers of fur.
In this series of videos I demonstrate how I create a realistic fur look by attaching lengths of wool to my miniature donkey. These techniques can be adapted for any long furred animal. Join me on my journey from preparation to finish; starting with carefully ‘needle brushed’ leg fibres, then fluffy tummy and long textured back fur. You will also see how I create a middle parting on the donkey’s muzzle, add a long fluffy fringe and a beautiful flowing mane.
Skills you will master across the 4 parts:
Simple hand blending of wool roving for natural, textured colour tones
Preparing wool lengths and a test/sample piece
Knowing how firm to felt your core base
Two easy methods to firmly attach various lengths of wool fibre
The art of layering and trimming fibres
Specific skills for adding fur to various body parts including legs, tummy, back, ears, tail, face and mane
How to prevent over felting or flattening of long fibres
Finishing techniques for defining strands or fluffing them up
Music is by two artists; Jahzzar and Slainte (full use rights).
Details of where you can get my tools are at the end of this page.
Please note: this tutorial series assumes you will have already felted the basic animal shape. My demonstration donkey already has a wire armature with core wool wrapped over it plus facial features and hoofs. I show the advanced techniques beyond this.
PART 1: Hand blending wool, attaching fur to legs (time stamps included below for chapter begin times)
Intro (0:00)
What you will learn in part 1 (01:05)
Where to start? (02:00)
Preparing and blending wools (03:30)
What tools do I need? (11:56) (links to the tools can be found at the end of this page)
Shorter fur – layering on the legs (I show the basics of the 2 techniques) (13:30)
PART 2: Attaching fur to tummy, torso & rump (time stamps included below for chapter begin times)
Intro (0:00)
What you will learn in part 2 (0:52)
Soft tummy fur (technique 1) (01:28)
Continuing the tummy (and a few ways of blending colour) (07:03)
How firm should the core wool be? (11:10)
Lots of thick fur layers (across the torso) (technique 1) (13:13)
Tips for preventing fluffing up and positioning animal whilst felting (18:02)
Adding fur on rump (techniques 1 and 2) (19:20)
PART 3: Adding fur to back, muzzle and fringe (time stamps included below for chapter begin times)
Intro (0:00)
What I’ll cover in part 3 (00:52)
Long fluffy back fur (technique 2) (01:24)
Ears and tail (brief overview for ideas) (09:18)
Fluffy textured muzzle and fringe (very long fur pieces) (technique 2 plus other tips) (10:56)
PART 4: Donkey mane, defining and finishing (time stamps included below for chapter begin times)
Intro (0:00)
What I’ll cover in part 4 (00:52)
Making a mane (an extra attachment method) (01:21)
Attaching the mane (08:05)
Finishing off your animal; defining etc (14:28)
Final donkey photos (what a cutie!) (18:58)
************* LINKS TO THE TOOLS: ***********************
Best NEEDLES I use for quality are from Heidifeathers (all come colour coded for easy identification too)
Well worth getting a set of 30 Mixed Felting Needles:
– 10 Colour Coded Different types – Triangular, Star, Reverse and Twisted Needles – get here.
Don’t ever miss out on my latest tutorials! Insert your email address and click the ‘Follow’ button on the right hand panel to receive notifications of when the next post is up..:-)
My site includes links for where to source needle felting tools and materials. These are my personal recommendations and from my favourite suppliers who I trust and who have excellent reviews. Some are affiliate links so I may receive a small commission at no extra cost to you. This supports my website and enables me to continue to provide valuable content and for that I am so very grateful to you – Thank you!!