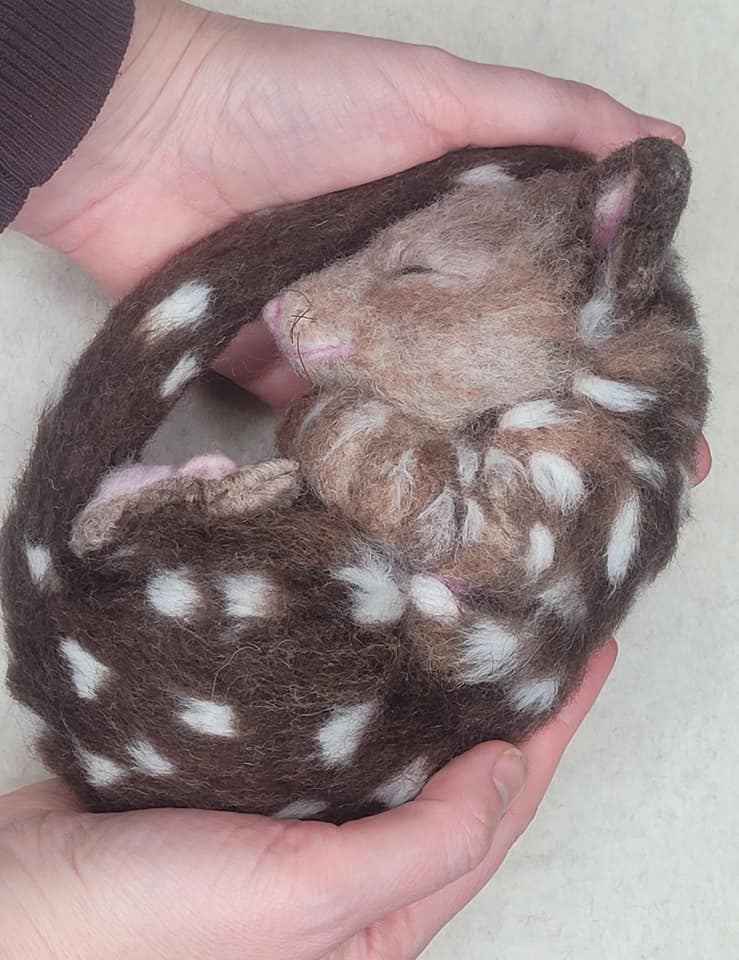
I’m so excited to show you my latest needle felted quoll. He’s curled up fast asleep and looking rather cuddly don’t you think?
It’s been a few years since I made my first one and I absolutely loved making one again.
Quolls are incredibly unique animals. They are spotted marsupials from Australia and my do they have interesting feet too!! I think they look almost like an imaginary creature rather than a real one.
I made his core out of Norwegian wool batts, his top coat is a mix of merino tops and corriedale slivers. I added the long fur with the long fur technique (see here for how you can do this) and also did some reverse needle felting to create a blend of lighter colours on his face. He also has wire in his tail and toes and horse hair for whiskers.
If you are wondering how to felt eyes that are closed or sleeping – here is a tutorial on how I made the quoll’s eyes. This is great for all sorts of sleeping animals 🙂 It also shows my quoll when he didn’t have any fur (just his core base).
If you are stuck on how you might needle felt spots on your spotted creations – here is a tutorial showing 4 ways you can achieve this from simple spots to more detailed long furred spots.
What are you currently making or planning to needle felt next? any interesting looking animals like the quoll maybe?
Would you like to learn how to attach long fur to your needle felted animal? not sure how to firmly add the wool or where to begin?
You have likely seen my photo tutorial with basic techniques for adding long fibres onto a badger. Well here is a video series for those of you who learn best by watching how it’s done. These are far more in depth with more techniques and tips along the way! You too can create a detailed and realistic fur effect!
This was available as a paid tutorial for some years but I have decided to offer it for free. I have embedded all 4 parts on this page for you to watch and have included chapter start time stamps, so feel free to start at the beginning or skip to the parts you feel would be most useful 🙂
Difficulty ranking: Intermediate level or beginners looking for a challenge.
The result: Amazing detail; the look of a real animal with layers of fur.
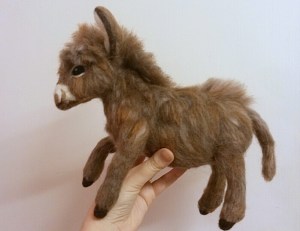
In this series of videos I demonstrate how I create a realistic fur look by attaching lengths of wool to my miniature donkey. These techniques can be adapted for any long furred animal. Join me on my journey from preparation to finish; starting with carefully ‘needle brushed’ leg fibres, then fluffy tummy and long textured back fur. You will also see how I create a middle parting on the donkey’s muzzle, add a long fluffy fringe and a beautiful flowing mane.
Skills you will master across the 4 parts:
Simple hand blending of wool roving for natural, textured colour tones
Preparing wool lengths and a test/sample piece
Knowing how firm to felt your core base
Two easy methods to firmly attach various lengths of wool fibre
The art of layering and trimming fibres
Specific skills for adding fur to various body parts including legs, tummy, back, ears, tail, face and mane
How to prevent over felting or flattening of long fibres
Finishing techniques for defining strands or fluffing them up
Music is by two artists; Jahzzar and Slainte (full use rights).
Details of where you can get my tools are at the end of this page.
Please note: this tutorial series assumes you will have already felted the basic animal shape. My demonstration donkey already has a wire armature with core wool wrapped over it plus facial features and hoofs. I show the advanced techniques beyond this.
PART 1: Hand blending wool, attaching fur to legs (time stamps included below for chapter begin times)
Intro (0:00)
What you will learn in part 1 (01:05)
Where to start? (02:00)
Preparing and blending wools (03:30)
What tools do I need? (11:56) (links to the tools can be found at the end of this page)
Shorter fur – layering on the legs (I show the basics of the 2 techniques) (13:30)
PART 2: Attaching fur to tummy, torso & rump (time stamps included below for chapter begin times)
Intro (0:00)
What you will learn in part 2 (0:52)
Soft tummy fur (technique 1) (01:28)
Continuing the tummy (and a few ways of blending colour) (07:03)
How firm should the core wool be? (11:10)
Lots of thick fur layers (across the torso) (technique 1) (13:13)
Tips for preventing fluffing up and positioning animal whilst felting (18:02)
Adding fur on rump (techniques 1 and 2) (19:20)
PART 3: Adding fur to back, muzzle and fringe (time stamps included below for chapter begin times)
Intro (0:00)
What I’ll cover in part 3 (00:52)
Long fluffy back fur (technique 2) (01:24)
Ears and tail (brief overview for ideas) (09:18)
Fluffy textured muzzle and fringe (very long fur pieces) (technique 2 plus other tips) (10:56)
PART 4: Donkey mane, defining and finishing (time stamps included below for chapter begin times)
Intro (0:00)
What I’ll cover in part 4 (00:52)
Making a mane (an extra attachment method) (01:21)
Attaching the mane (08:05)
Finishing off your animal; defining etc (14:28)
Final donkey photos (what a cutie!) (18:58)
************* LINKS TO THE TOOLS: ***********************
Best NEEDLES I use for quality are from Heidifeathers (all come colour coded for easy identification too)
Well worth getting a set of 30 Mixed Felting Needles:
– 10 Colour Coded Different types – Triangular, Star, Reverse and Twisted Needles – get here.
Don’t ever miss out on my latest tutorials! Insert your email address and click the ‘Follow’ button on the right hand panel to receive notifications of when the next post is up..:-)
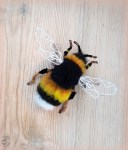
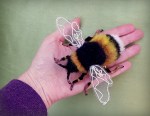
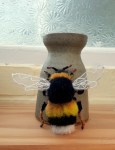
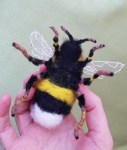
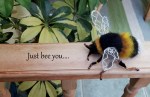
Here is my first attempt at a needle felted bumble bee. I gave it to my sister for her birthday last week. My sister’s name Melissa means ‘honey bee’ but she loves bumbley bees as they are so fluffy looking! I was brave enough to let it sit on my hand without any worries about being stung. Good job as it is much larger than life size!
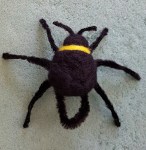
I started off using black pipe cleaners as legs and antennae. I twisted them together in the middle to form the base for the body. I trimmed the pipe cleaners with small angled nail scissors to accentuate the leg segments and added tan coloured wool..
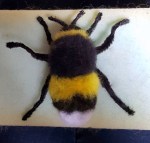
I tightly wound yellow, black and white merino wool tops over the middle section to form the head, thorax and abdomen and added more and more of the merino on top to build up the height. I needle felted the body with a barbed needle to sculpt into a bee shape. To create a furry bumble bee look I then used a reverse felting needle to pull out the fibres and added a layer of rusty orange over the yellow to give the colour more depth. (Note I didn’t use a cream colour core wool for this piece to ensure that only the pure colours I wanted came through when I used the reverse needle not any underlay of core wool fibres).
I had to get really creative for the wings. I searched my stash of crafty bits and ended up cutting out wing shapes from a silvery coloured organza bag and then hand sewed the pattern on each wing by hand with white embroidery thread.
Here are a few photos of the work in progress of how I started.
I am so pleased that my sister adored him!!
******how about creating your very own Mr Bumbley Bee? The detailed and beautifully illustrated PDF tutorial is now available here ******************
I am very excited to present to you my greatest needle felting challenge yet. He is modelled on a beautiful young Shetland sheepdog (Sheltie) called Schubert (Schubie)! The real dog is very much loved by his human mum and dad and his dad wanted a surprise gift for his wife (Schubert’s mum) for Christmas!
I rarely do commissions as I try to avoid the stress of it but having spent quite a bit of time admiring the real Schubert I had been wondering how it would be to needle felt a mini one and quite fancied a stab at it! 🙂
Schubert has so many tones to his luxurious fur so I spent quite a bit of time blending wool colours. He also has very long fur so I really put into practice my ‘adding long animal fur’ techniques.
I started off wrapping corriedale core wool over a wire armature. Then I added paw pads and then some detail on his face before starting on his belly fur and working from his tail end towards his neck with merino wool. I did his wispy feet hair and tail last. Please see the work in progress videos below for more info.
In an attempt to keep him as authentically ‘Shetland’ as possible I managed to include some brown Shetland sheep wool in his coat and his whiskers are made of black Shetland pony tail hair all the way from Scotland.
As with all my creations it took many hours of needle felting and love. I am very pleased with the way he turned out and I hope you like him too 🐶🐕😆
Here are some short videos of the process, followed by the final photos of Schubie.
Here is the process of the armature with the body shape sculpted over it in wool:
Want to know how to needle felt a bunny this Easter? How about bunny ears? … need some ideas to get started?
Hi everyone!
Now before you get too excited, sorry no I haven’t made a new bunny, but what I did want to do was bring together some pictures and links to the best of my previous bunny posts into one place for you all to enjoy this Easter! as well as offer a little Easter themed inspiration…
The other day I visited Vauxhall city farm in London (which I sometimes visit on my lunch break from managing the National Bat Helpline) and took a few snaps of a rather large bunny (I think he is part Flemish Giant) but he looks like a wild bunny with all that browney-grey fur and as you can see he is well camouflaged too.
It got me thinking and I am sure you will agree that bunnies are a great sign of spring and new life at Easter and like the Vauxhall one they are extremely cute and well worth taking the time to admire. I do of course also love to eat chocolate bunnies (yum) and can’t wait to finish my Lent no chocolate diet to get my teeth into one!
So how about making a bunny this Easter?
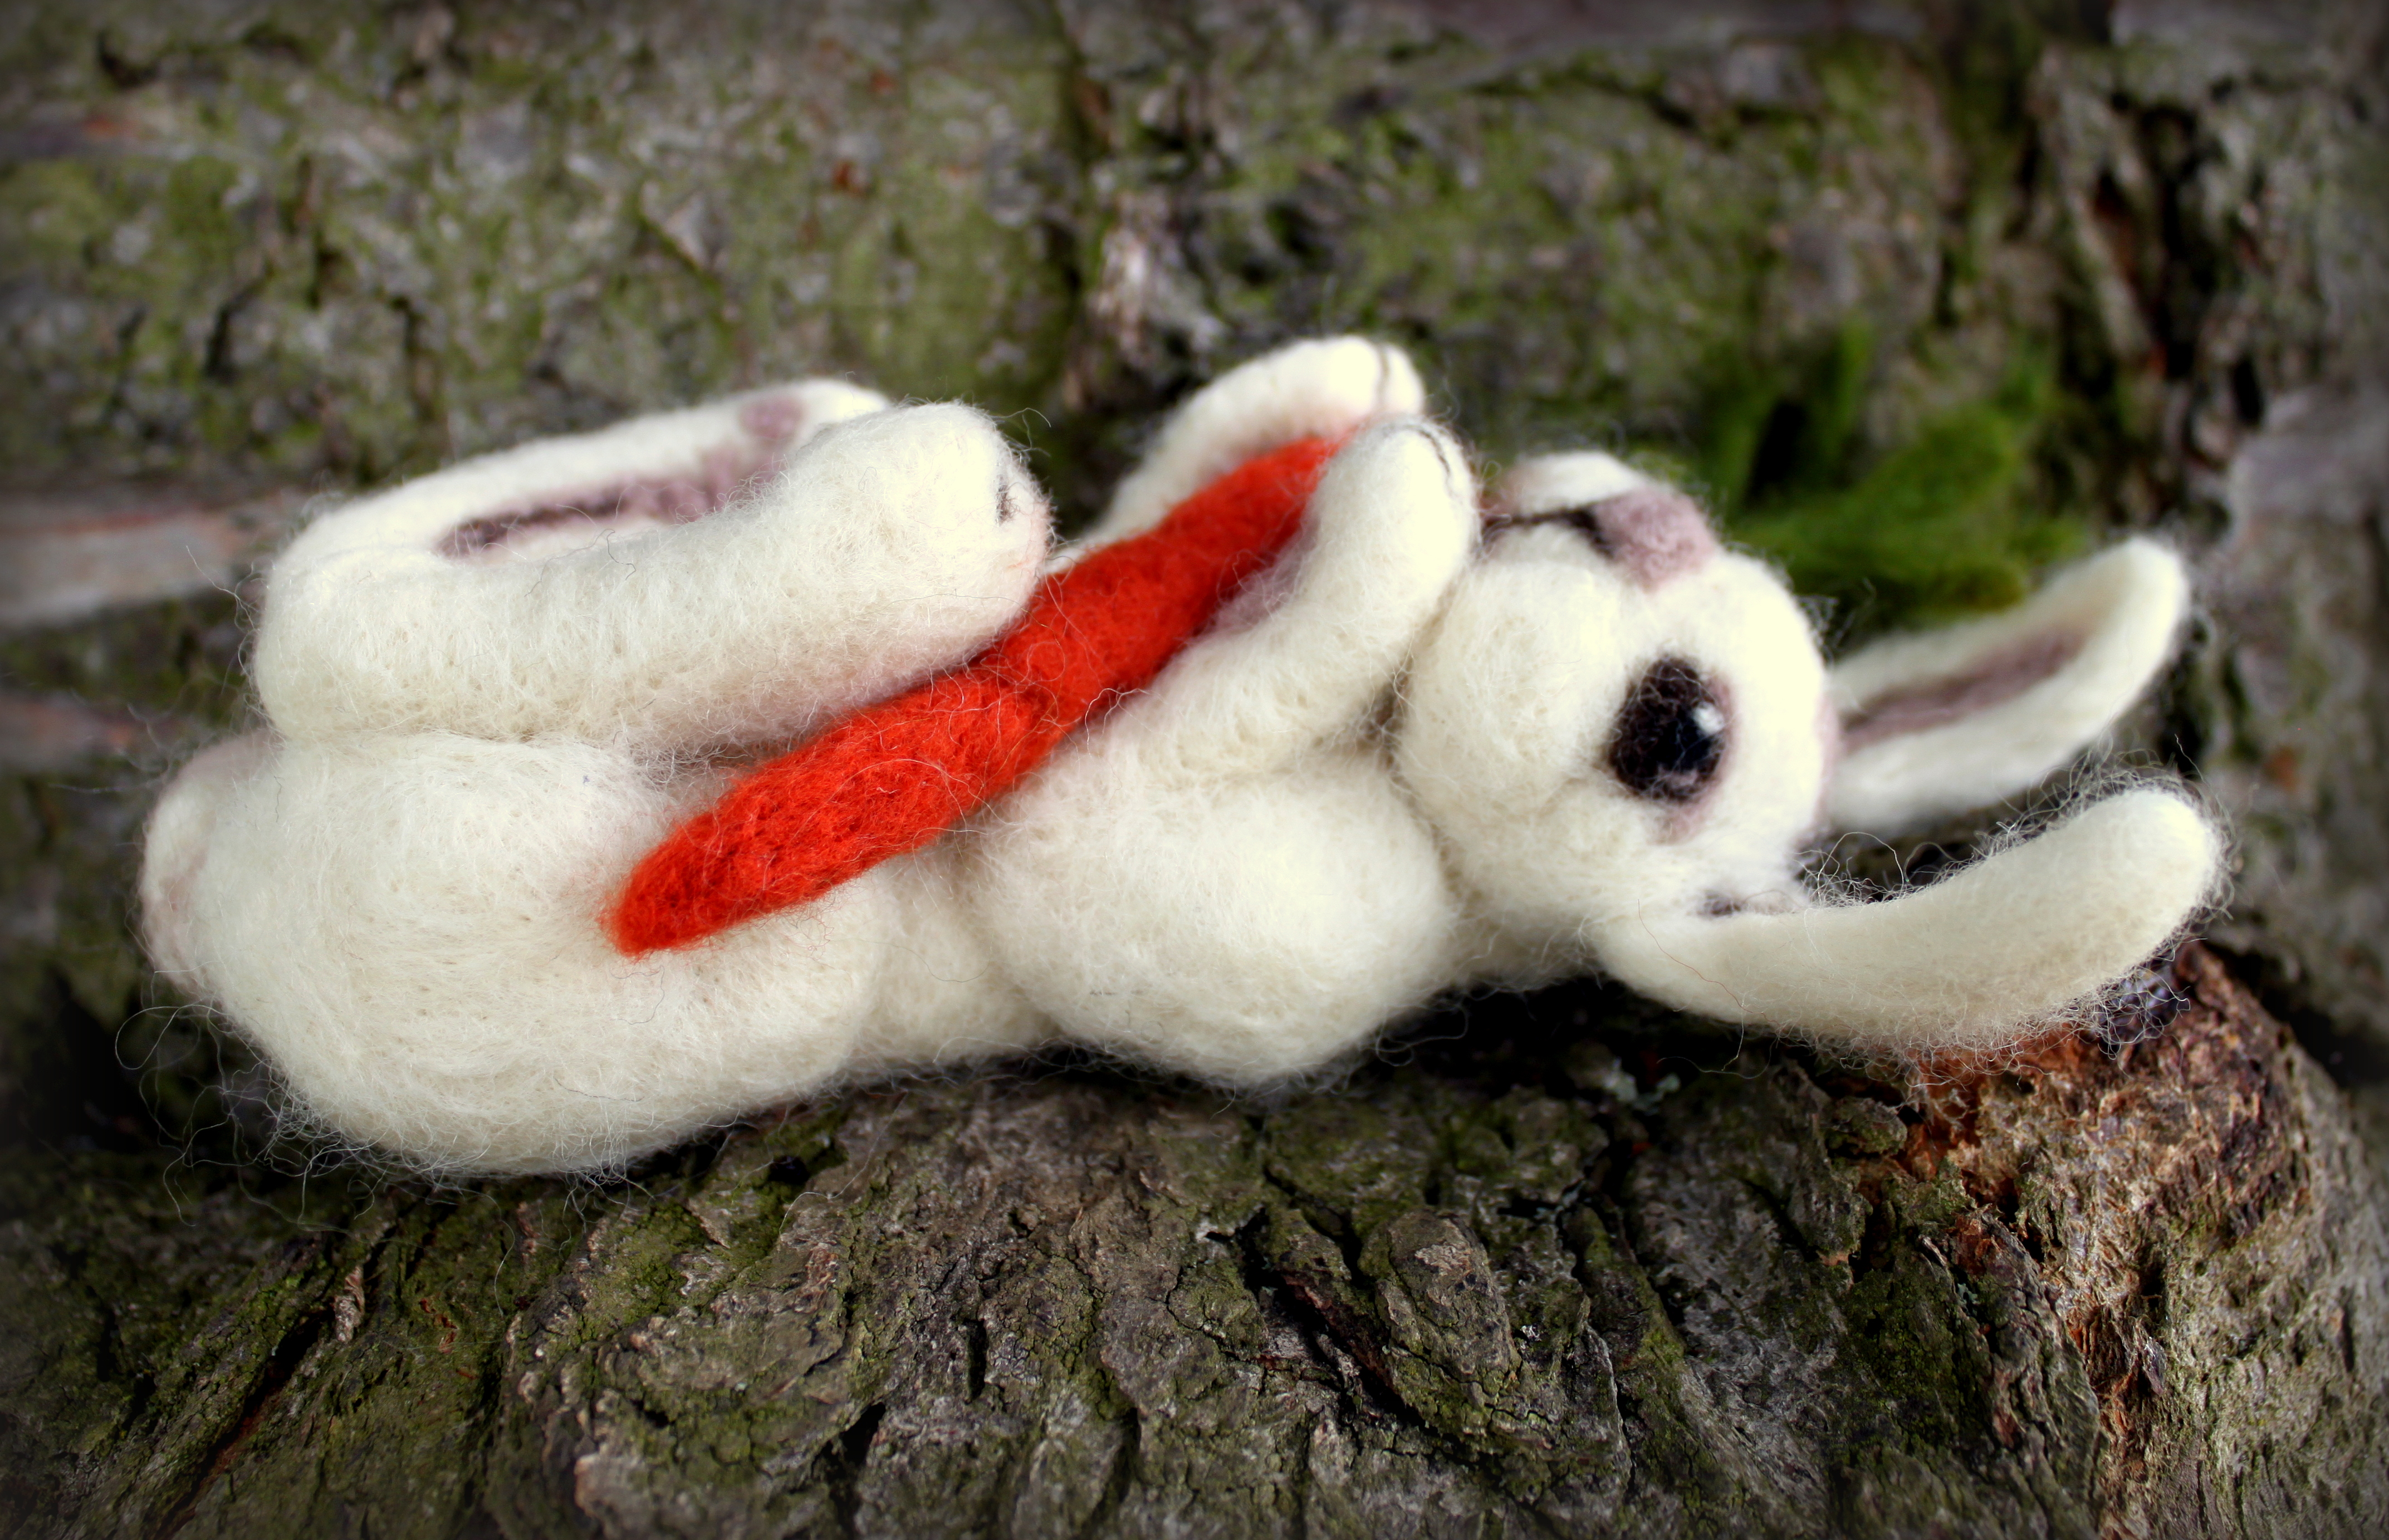
The first time I bought some wool and attempted needle felting I ended up making this little cream bunny from corriedale wool.
Then soon after I was commissioned to make a gorgeous grey bunny for a colleague who wanted to surprise his wife for her birthday. His core is corriedale and grey and pinky fur is of merino wool.
I loved making these bunnies. Both are laying on their backs as I think this is the sweetest lovable pose and reminds me of the bunnies (Benjamin, Snuggles and Peeps) I had the privilege to care for as a child. Unfortunately I have now developed an allergy for rabbit fur so making wool rabbits mean I still get to cuddle them without sneezing profusely.:-)
To make a bunny like these yourself this Easter why not click here to try out my needle felted bunny tutorial.
….and for more detail on making those lovely long ears click here.
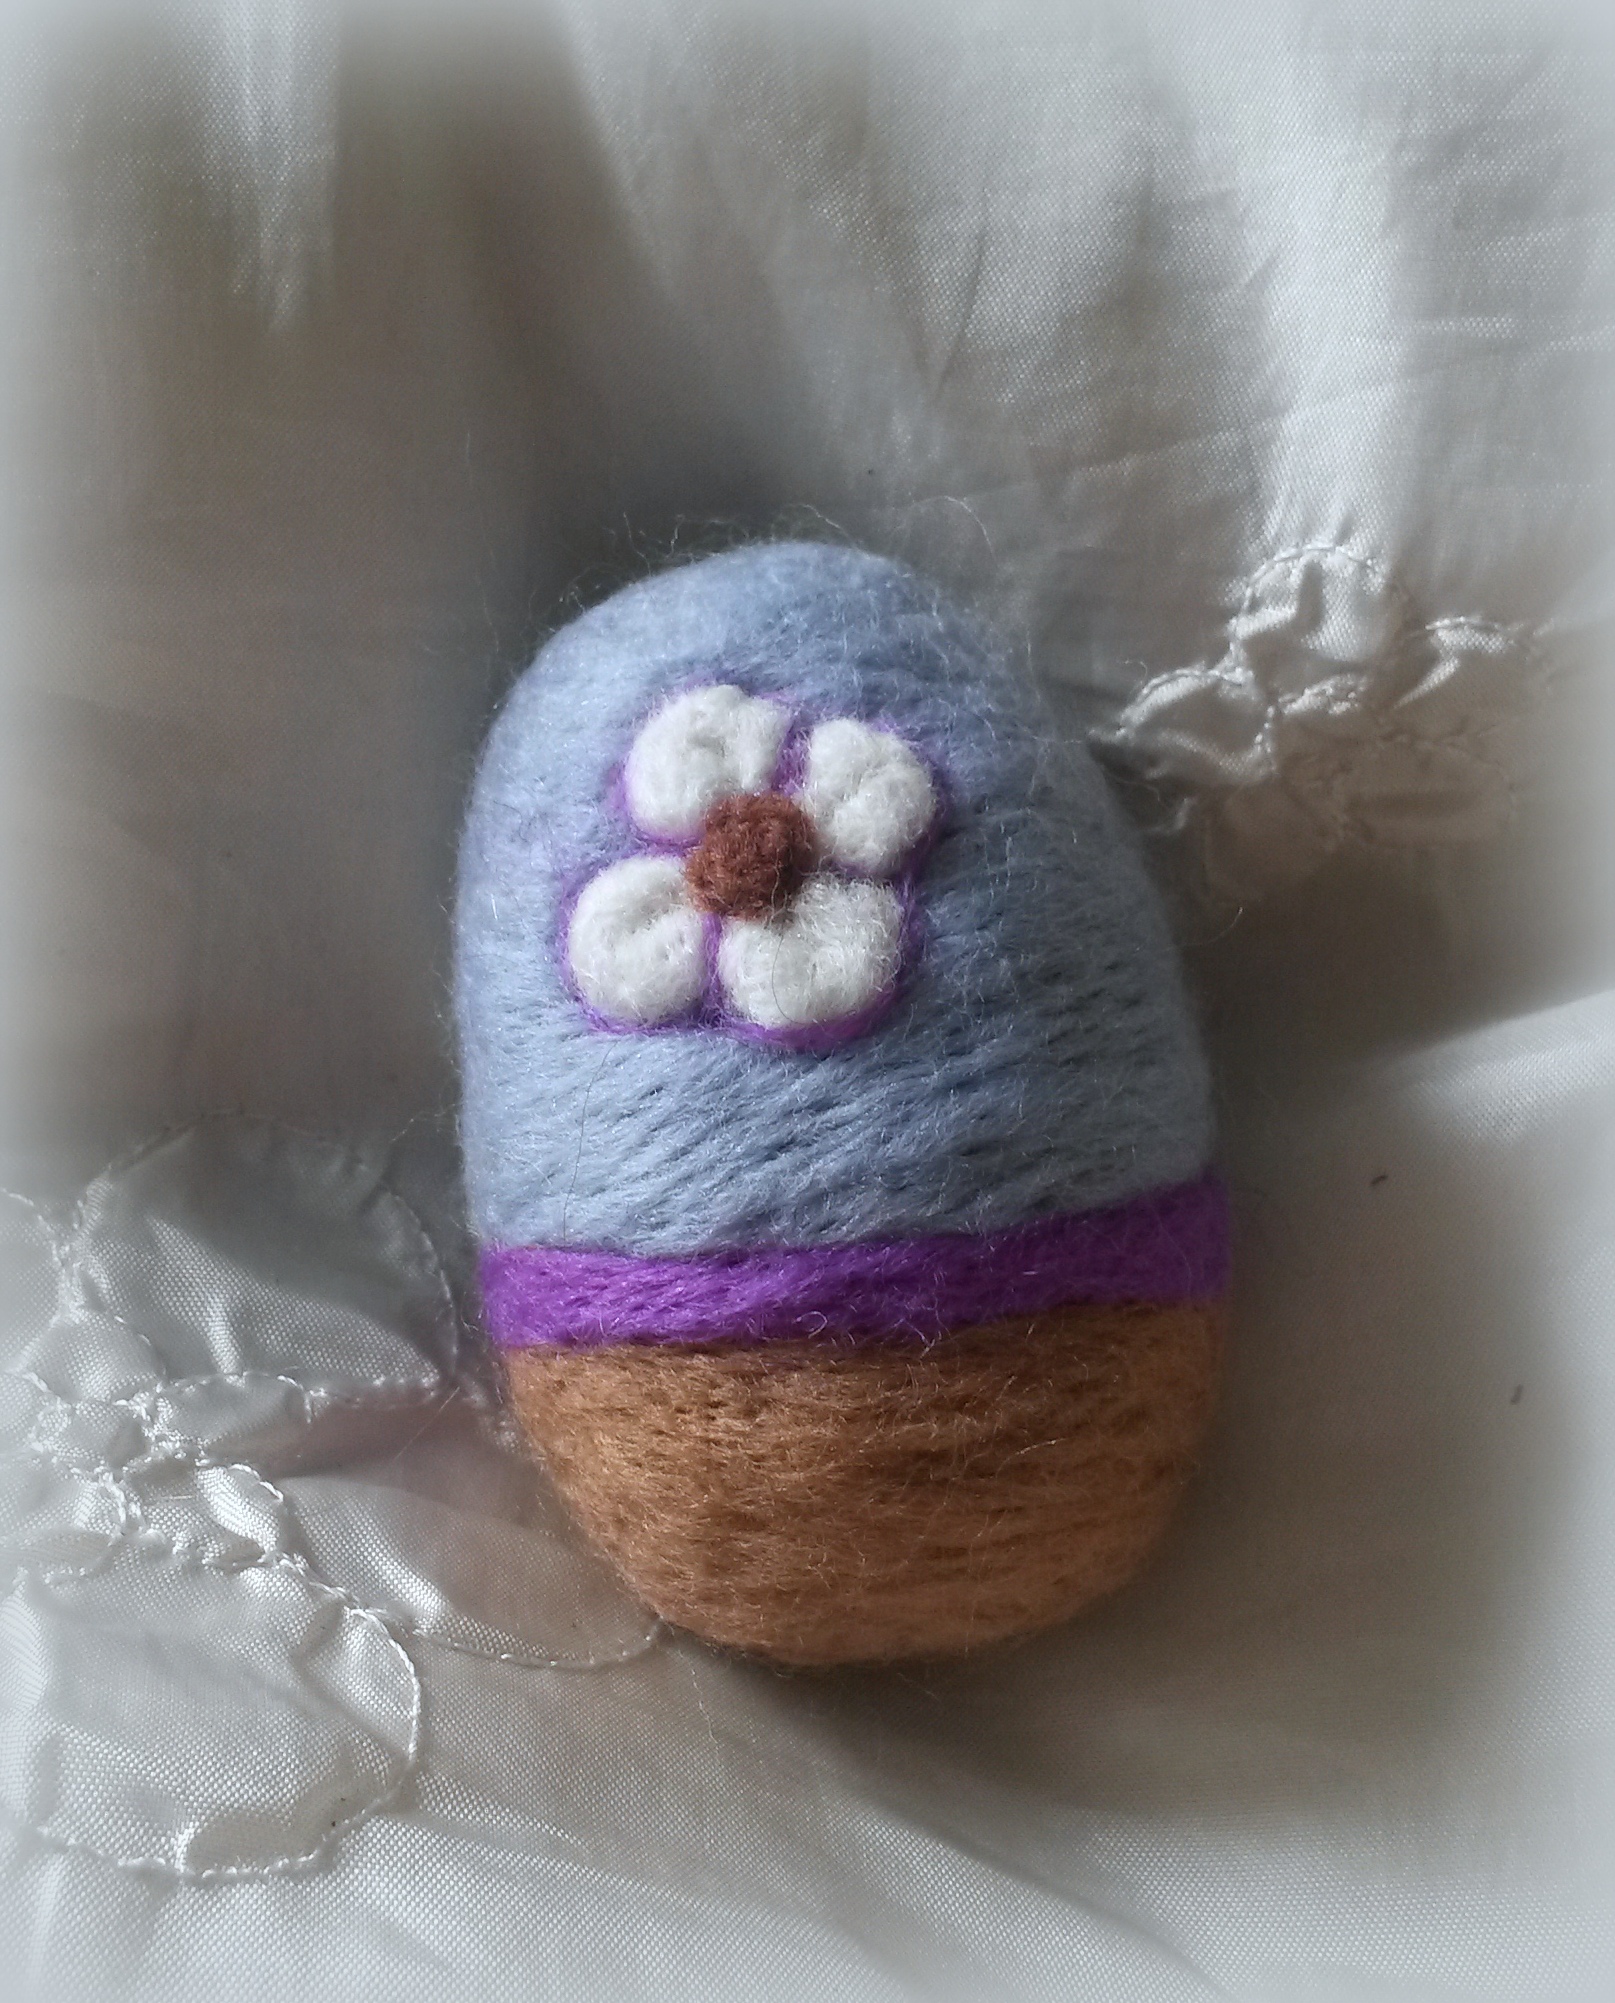
I gave my bunnies a carrot to hold but what about keeping with the Easter theme and placing your bunny in a basket holding some needle felted eggs like the one below ?
or Easter flowers?
You could wrap wool round wire and needle felt the wool in place to create stems and add simple flower heads like the one I made in this tutorial.
Today I just want to share some photos with you to give you a taster of the various stages that went in to needle felting my latest bunny. I haven’t photographed everything but stopped at various times along the journey to take a shot. Please also see here for more detail of how I made his ears. It doesn’t matter too much about what order you add each limb or ears or facial features. It is fun to experiment with different ways of doing things. You will soon find out what works best for you.
I have found though that whenever you add the eyes your creation immediately gains personality and you also get a tiny break from all the time consuming needle action. I love doing the eyes and ears best.
Basic ball to start for bunny head. Core corriedale wool.
Adding cheeks and face shape
Added torso.
Additional layer in mink coloured merino wool to form base fur.
Shoulders and thighs firmly felted
Blue and grey merino wool mixed then shallow felted to become bunny fur.
Leaving his tummy in mink.
Preparing feet
Cute bunny paw detail
Feet firmly attached
More Wool added to give shape and smooth contours
Nose and mouth coming to life
Comparing with my original bunny to check size and proportions, angle of feet etc
Forming ears. See more about making ears in a tutorial here.
Ears fixed
Eyes alert
Can’t resist a cuddle
Front paws and holding a carrot.
My sister in law popped by, bunny made her smile 🙂
Adventure for bunny in the garden for nature’s backdrop!
To see more pictures of this cute bunny and to order one as a gift just like him for someone you love, please visit my Etsy shop.
To follow my blog and receive email updates about latest fit to be loved creations and tutorials, simply enter your email address on the top right panel of my ‘find out more’ page.
See here for more pictures or to order one just like him
Now that I have revealed my latest needle felted bunny in my most recent post, I can share with you how I made his cute bunny ears. The real bunny, owned by Pete and his wife, had the most incredibly gorgeous long ears and I really wanted to take the time to detail their every curve and beauty. As I created them I took pictures at each phase to document how I made them for my own reference when making other ears in future and also to share with you now on my blog..
For those of you who have some experience of needle felting I am sure you have your own preferred technique but please do take a look – your ideas are very welcome as I am still fairly new to this and so far it has been trial and error but most enjoyable. For those who haven’t tried yet , I hope this inspires you to have a ‘stab’ at it!
This is specifically to show you how to create ears for the bunny I made above, but some of the methods are very similar for other animal ears so feel free to follow them for other projects..
To get started you will need:
Foam pad or felting brush base (so not to stab your knees and to provide a firm base to work on)
Felting needles of various sizes; wider for initial shaping and finer for detail later on
A needle holder; this is optional but for making basic shapes it saves time to use 2 or 3 needles at the same time. In the pictures you will see I use the 3 needle holder pen by Clover.
Wool to felt with; I used natural corriedale wool to make the basic ear shapes as I find it felts well and ends up nice and firm (especially to keep in alert bunny position). I then used merino wool as the top coat as it’s soft and comes in some lovely animal fur colours. I buy my wools at a very good price from World of Wool.
Finally… some time, some love, some patience, a drink and bar of chocolate for long sitting periods, perhaps some music (not tv as you may be distracted and stab your finger) and don’t forget a photo or drawing of what you would like to make…
So…. on to the tutorial!
By the way….. the point at which I am about to felt the ears I will already have my head sculpted, I can then at any time measure up the ears to the head to ensure I am getting the right proportion.
Step 1: take two equal lengths (and density) of your core wool (corriedale in this case). Bear in mind that you will need the two ears to end up the same size so keep comparing them. I find it works better if I do a bit on one then do a bit on the other as I go along rather than finish one and then start the other afterwards.
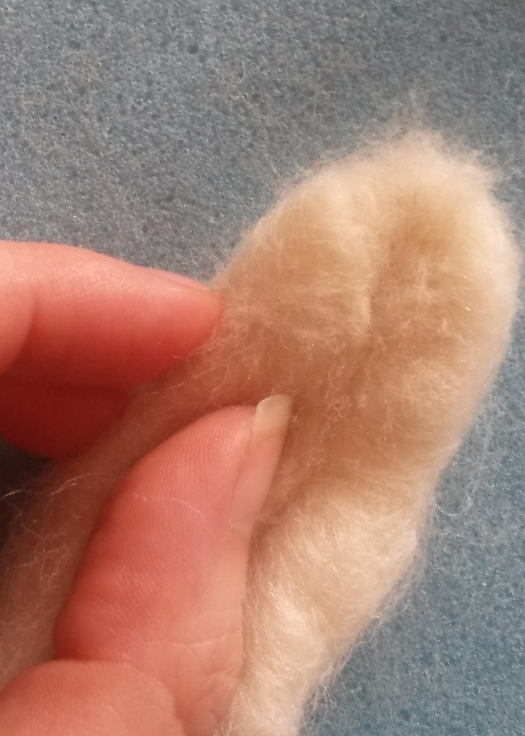
Step 2: fold the piece in half in an oval shape (you can see already this is forming a long ear shape before you even use the needle!)
Step 3: using the thicker felting needle/s start stabbing the wool to go through to the other side as well as shallower stabs to the first few barbs of the needle in many directions (ensure you lift the needle in the same direction as you placed it so not to break any needles). Then turn over and do the other side
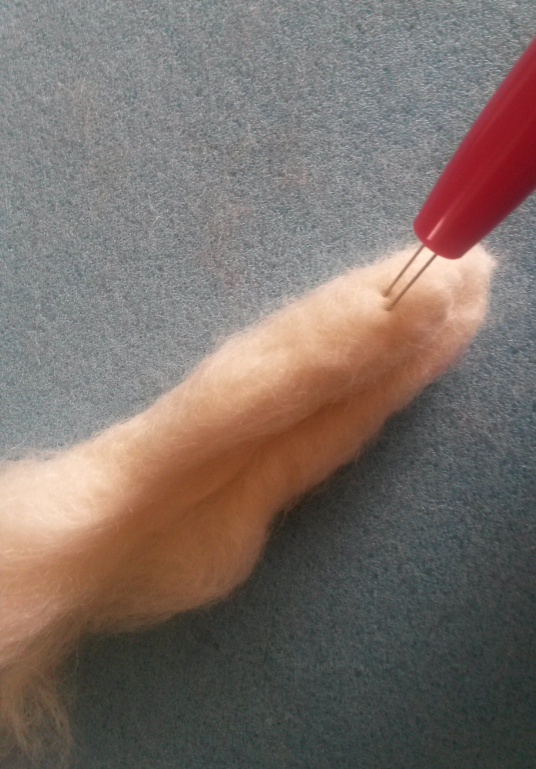
Step 4: now you have a basic flat shape you need to make it more 3d and ear-like so roll the sides in to form thicker edges and stab at 90 degrees but also inwards at an angle keeping the edges rounded where the ear edges need to curve. Do this on both ears as you go..
Step 5: Use fingers to knead the wool and stab with your needle/s and give shape on both sides. NB I have left a long unfelted end at the bottom of my work to make it easier to fix my ears on to the bunny head later on…
Step 6: keep pulling edges in and hollowing the middle section with your needle/s
………and turn over to felt the other side as you go…
…. remember to turn your work and use various angles to insert your needle/s to mould the wool into the desired shape.
Step 7: Keep felting and keep checking your photo or drawing to see how big the edges are and which areas should be flatter.
On a real bunny one edge of the ear is thicker than the other so I had to make sure this was the opposite way round on the other ear (as it is in real life) for a mirror effect. You may want to use one needle or just two needles to make more defined lines..
And there we have some bunny ears (err… minus some colour and texture!)
So then comes the exciting part …..have your finer needles and bunny fur colours at the ready for the final step….
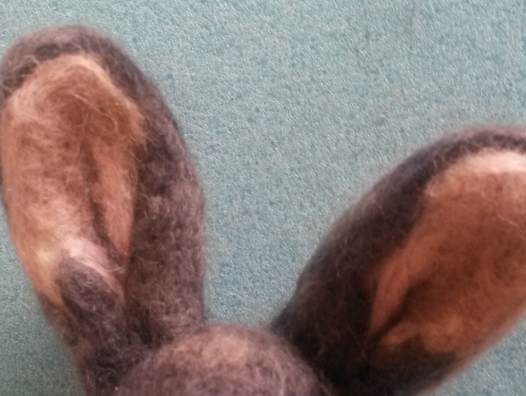
Step 8: carefully shallow felt the ears with your coloured merino wools (just to a depth of first 1 or 2 barbs on your finer needles) to fix the wool in place but not allow the wool to go through to the other side. You don’t want the darker colours to be seen through the lighter colours on the other side! and vice versa (it would be a medley of pink and grey in this case).
……..where needle holes can be seen – you can use fingers or a normal sewing needle to gently fluff up fibres
…. add different shades of colour to give a more realistic look. I mixed my greys and blues to get the bluey-grey colours. Then I used a mink colour for the middle of the ear with lighter pinks around the edges. Finally a strand of grey down the very centre for light and shadow and 3d effect…
Then your ears are ready to fix on to your bunny head for full bunny character!!
I hope you found this useful. Let me know what you would like me to write about and what you would like me to make!
My next post will be a photo gallery of how I made my bunny creation from start to finish….so you will get to see me fixing the ears in place…!
Please enter your email address here for notifications of new posts to my blog and follow me on facebook, twitter, pinterest to see what I am up to next! 🙂
My site includes links for where to source needle felting tools and materials. These are my personal recommendations and from my favourite suppliers who I trust and who have excellent reviews. Some are affiliate links so I may receive a small commission at no extra cost to you. This supports my website and enables me to continue to provide valuable content and for that I am so very grateful to you – Thank you!!