Tag Archives: felt

Needle felted bat (Brown long eared bat)

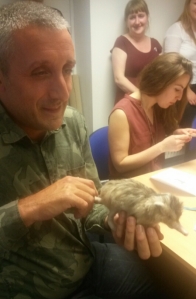
Seeing as I manage the National bat helpline (UK) as my day job it was about time I made a bat! Thankfully I was asked to make this little brown long eared bat (BLE) (Plecotus auritus) – although when I say little she is very big compared to real BLEs which have a body length of around 5cm.

She was a challenge as not only did I have to work out how to make folded wings and a tail membrane but BLEs have such massive ears as you can see. She is made of corriedale and merino wool and has wire inside her forearms, legs and ears.

BLEs can live up to 30 years, eat thousands of insects each night, have only one baby a year and these fantastic huge ears help them to listen for prey as they glean them from leaves.

This one is definitely alert and looking for a cuddle but usually at rest their ears curl back a bit like ram’s horns to show only the tragus (the pointy inner ear lobe). Hope you like her and agree that bats are amazing! 🙂
03-Needle felted bat (8)     12-Needle felted bat (35)

15-Needle felted bat (40) 25-Needle felted bat (57)

02-Needle felted bat (7)   18-Needle felted bat (45) 22-Needle felted bat (50)

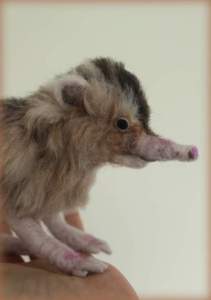
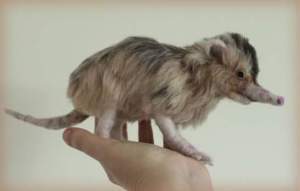
Needle felted solenodon

Needle felted solenodon

Ever heard of a solenodon?

I had never heard of one until I came across this strange but interesting creature a few months ago when researching what to make my colleague for his birthday. I discovered that he had spent several years working on a conservation project for this intriguing animal in the Dominican Republic.

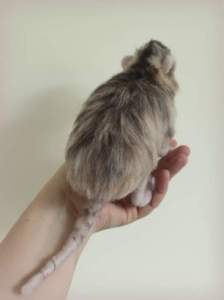
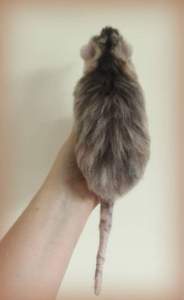
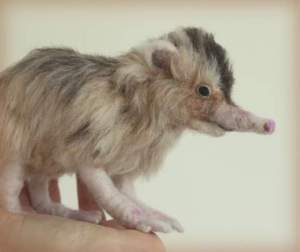
As soon as I saw the solenodon’s shrew-like snout, shaggy dense coat, long clumsy legs and thick scaly tail, I couldn’t wait to get started. As this was a secret birthday buddy present though I had to keep quiet..

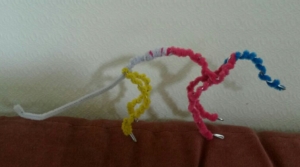
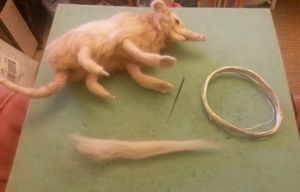
I started with a wire armature covered with pipe cleaners, then wrapped core wool (corriedale batts) over the wire to give him some shape.

2015-06-20 11.54.45

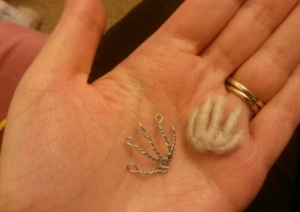
Then came the layers of luxurious merino wool for his cream fur with dark brown flecks over the top. I also made tiny toes from thinner wire with merino wool wrapped over it. He has a lovely pinkish nose, ears, feet and tail and little black eyes to finish.

2015-06-20 11.56.51

2015-06-20 11.57.31

IMG-20150614-WA0000

Not sure if many people have heard of this animal let alone needle felted one!!

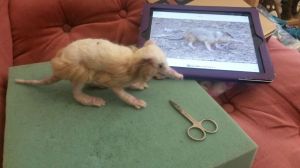
Creating an animal you know is so much easier – with this one I had to keep looking at the photos frequently to ensure I captured its build and character correctly. It was a lot of fun !!

My colleague loved his surprise! yay!!  🙂

2015-06-19 19.10.15

Needle felted Solenodon 2 Needle felted Solenodon 3

The real solenodon has a venomous bite – thankfully this one doesn’t!

Needle felted Solenodon 4 Needle felted Solenodon 5

Needle felted Solenodon 6

Don’t ever miss out on another blog post! enter your email on the right hand panel of my about page for notifications of when the next post is up..:-)

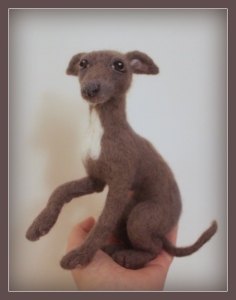
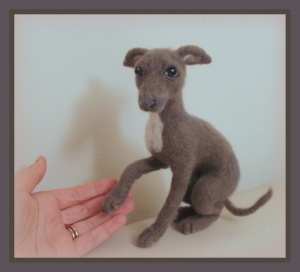
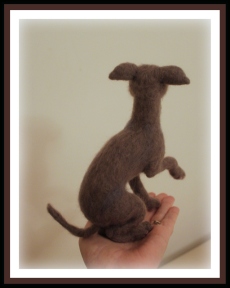
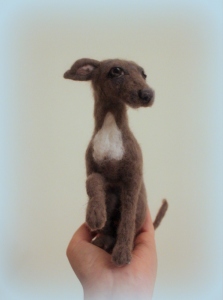
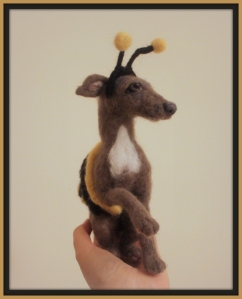
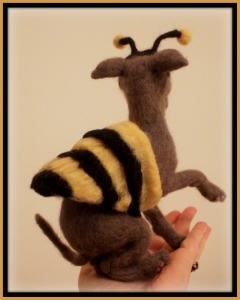
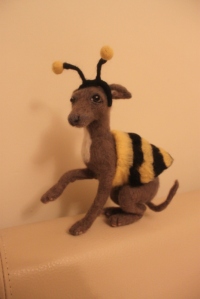
Italian Greyhound becomes Bee-dog!

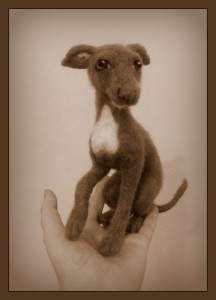
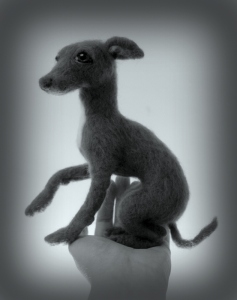
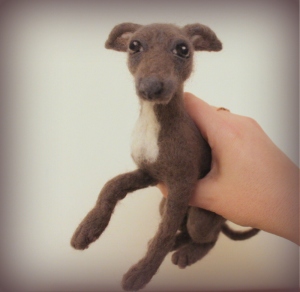
I made this cutie pie as a leaving gift for a work colleague. He is modelled on a real Italian Greyhound called Philip.

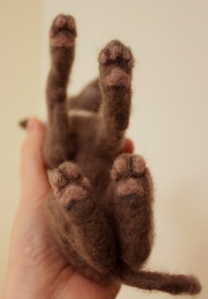
He is needle felted over a wire armature complete with a little fluffy heart shaped chest, pink paw pads and those sad puppy eyes that make you just want to take him home:-)

01-Needle felted dog (101)

04-Needle felted dog (54)

06-Needle felted dog (56)

11-Needle felted dog (4)
13-Needle felted dog (8)   14-Needle felted dog (11)

15-Needle felted dog (13)

17-Needle felted dog (19)

I soon learnt that my colleague also loved bee-dogs! Never heard of one of those before. There are whole websites about them!

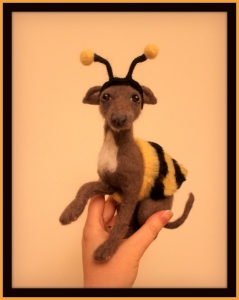
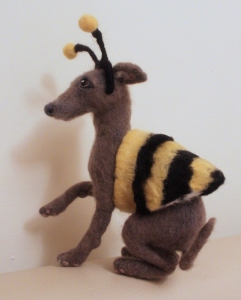
So letting my imagine run wild I just couldn’t resist giving little Philip dog his very own bee antennae and stripey cape so he too can transform into a bee-dog!

21-Needle felted dog (37)

25-Needle felted dog (41)

27-Needle felted dog (43)

28-Needle felted dog (45)

22-Needle felted dog (38)

Most bizarre creation yet but very fun! 🙂

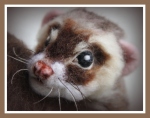
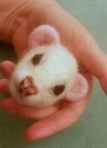
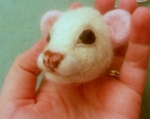
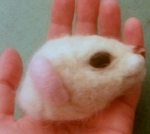
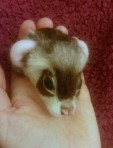
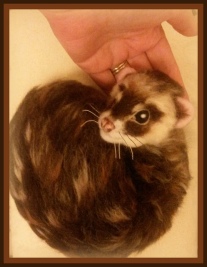
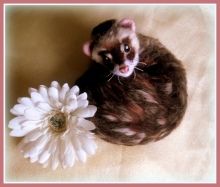
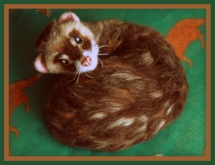
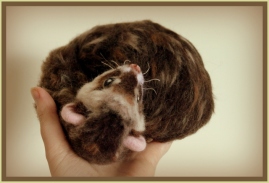
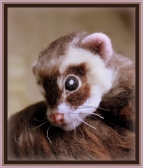
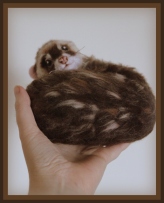
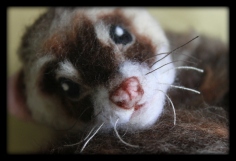
Needle felted ferret!!

Needle felted ferret!!

After 7 weeks I finally stepped back into my office in London today. Pneumonia and pleurisy was not at all nice to have and definitely took away my energy (even to the point of not being able to needle felt at one point! )but I managed it in. Yay!!

I have so been blessed by my parents (who looked after me for 2 weeks at theirs in Lincolnshire) as well as my friends who have made me feel very loved indeed with texts and cards and gifts ! I have also been able to rest and slow down! I am now home with my lovely hubby again and getting back to normality gradually..

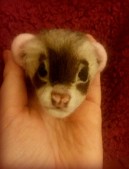
Today was not just about accomplishing the commute and seeing my colleagues who I have so missed, but I have been working on a surprise secret birthday buddy gift for my CEO who celebrated her big 40 at the weekend and today she got to see her new ferret. Of course she knew it was me as she knows I needle felt but never mind. 🙂 I just loved the look on her face. I have planned this since January when I found out I was her birthday buddy!

She did at first jump with a delighted shock when she opened the wrapping as I had found a picture of her beloved pet ferret on facebook and copied the colours and pose as best I could.   So worth the hours spent when I can make someone smile 🙂

I started with the head with core wool, very similar to when I made my badger, adding layers of soft merino colours on top.

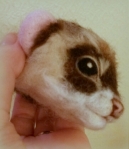
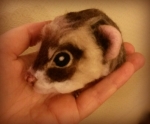
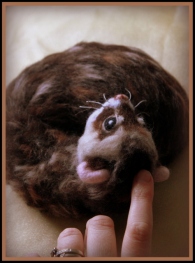
01-Ferret (14) 02-Ferret (121) 03-Ferret (1) 04-Ferret (15)

05-Ferret (16) 10-Ferret (3) 11-Ferret (4) 12-Ferret (5)

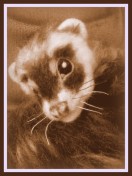
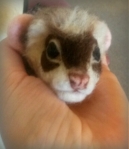
Ferrets are beautiful creatures and very unique with having such a long body and neck. This one has just been asleep and woken up so is still curled up tightly but face looking at you with those adorable big eyes and twitchy nose and whiskers asking for a cuddle. I made the eyes bigger than in real life as .. well I couldn’t help myself- a bit of a fit to be loved interpretation 🙂

You can see more pictures in my facebook Ferret album, but here are a few of the finished ferret. Hope you like them  xx

37-Ferret (90) 24-Ferret (32)

32-Ferret (42)  39-Ferret (99)

26-Ferret (35)  42-Ferret (114) 46-Ferret (119)

44-Ferret (117) 35-Ferret (84)

Beside quiet waters (landscape felting ideas)

Felting is relaxing and fun especially when shared!!

Last week I travelled back to where I grew up; Grantham in South Lincolnshire, to spend a week with my family and catch up with old friends.

I had a relaxing time away from my office job, walked the quaint streets of Stamford and visited the home of the Bakewell pudding in the Peak District. And… you may have guessed  –  (as I am quite addicted to my felting)-  that I also took some of my wools with me to get on with my latest creation.

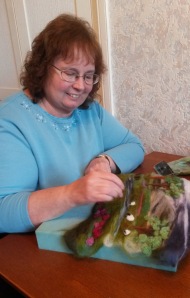
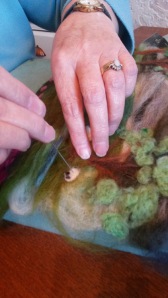
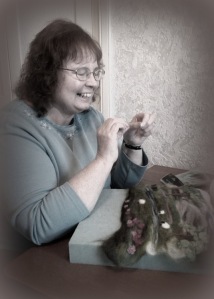
I also had the opportunity to spend one of my days showing my mum some basic needle felting techniques. Felting is not just for times alone just you, the wool and needles and your imagination but is so much fun to do with others – especially for friendship craft days, and in my case family time! for me and my mum, together sharing quality time. 🙂

Haha, my dad peered in from time to time and watched and enjoyed the artistic flair (claiming I got it all from him). They are both artistic!    I think we all can be in so many different ways!

My week was sooooo relaxing and quiet away from the hustle and bustle of the city and work. Home cooked food and love and hugs and then some felting (of course)- all I could wish for in a holiday.

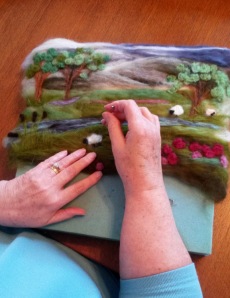
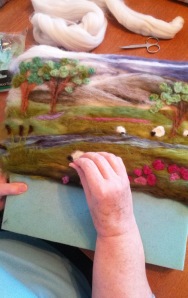
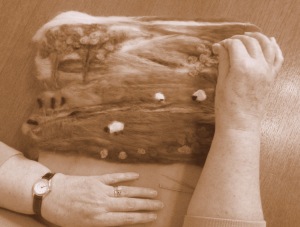
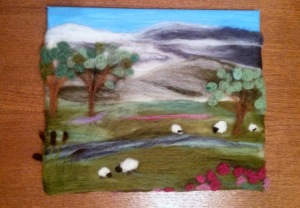
So I wanted to show you some pictures of my mum’s very first landscape piece. My mum is a painter and loves going to her art class each week and produces some beautiful water colour paintings. She loves using colour and really appreciates nature just like me which is illustrated in her work!

So here we go, she needed no help from me after I showed her a few basic hints. I think it is really great. My mum used soft luxurious merino wool from World of wool.

I have named it ‘Beside quiet waters’ as it reminds me of David’s Psalm 23 in the bible and really sums up my week with them. Thanks mum for our time together!

01-Beside quiet waters (2) 03-Beside quiet waters (4)  05-Beside quiet waters (6) 08-Beside quiet waters (9)04-Beside quiet waters (5)02-Beside quiet waters (3)

Mum then painted the sky onto her canvas and stuck the felted piece onto it…. beautiful!!

10-Beside quiet waters (11)

Of course on leaving to come back to London I left some wools and some needles with mum.. can’t wait to see what she makes next…

As quiet as a mouse!

So I really have kept ‘as quiet as a mouse’ about this one!!

I made this little mouse as a surprise birthday present for my mum (who I love beyond words).

IMG_3584

Yesterday my mum, dad and sister came to visit Ade and I for the day all the way from Lincolnshire and we celebrated my mum’s 65th birthday! She wasn’t too pleased though at receiving cards with ’65’ on them. …Mum you are beautiful and do not look your age at all, you have a young heart and I love you!

Mum just loves seeing the odd picture texted to her of my needle felt creations as I usually can’t wait until the final finished product to show her how I am getting on. She often sees my latest creations not looking like very much and often without ears and legs or fur… but loves them all the same.:-)

When making her mouse it has been so hard not to tell her or show her a photo. She didn’t expect it and of course was so excited to be given a box on her birthday and find this cute (in her words) little mouse inside!

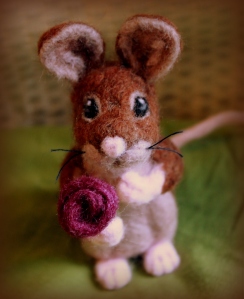
Her little mouse is saying ‘I love you’, with a flower in his right hand and left hand on his heart. He is lovingly hand-made from 100% wool.

IMG_3595

Mum really does love him and to see the teary but smiley look on her face has made the wait and the time to make him all worthwhile..

It was her and my dad who gave me my name Amanda which means ‘fit to be loved’. The journey of accepting and growing into the meaning of my name was the inspiration behind the name of my needle felting business ‘fit to be loved’ and my hope is that all my felted creations like this little mouse are as the name suggests ‘fit to be loved’. Read more about me and the name here.

IMG_3598

His core is made of natural undyed Corriedale wool from New Zealand. His fur and detail on his cute mousey paws, ears and face are of soft merino wool (non-mulesed) from South Africa (Cape) – chocolate brown, mink, raven and coral. I used coarser wools in purple and grass green for his flower to contrast with the soft contours of his body. You can see his size from the close up of me holding him in my hand. His eyes are made of wool too, so no glass or plastic but all 100% wool!

IMG_3604

IMG_3602
Do you have a birthday for a loved one coming up? need a gift idea to say ‘I love you’ ? You can buy one just like him or another bespoke animal of your choice from my etsy shop.

To follow my blog and receive email updates about latest fit to be loved creations and tutorials, simply enter your email address on the top right panel of my ‘find out more’ page.

How to needle felt bunny ears!

How to needle felt bunny ears!
See here for more pictures or to order one just like him

See here for more pictures or to order one just like him

Now that I have revealed my latest needle felted bunny in my most recent post, I can share with you how I made his cute bunny ears. The real bunny, owned by Pete and his wife, had the most incredibly gorgeous long ears and I really wanted to take the time to detail their every curve and beauty. As I created them I took pictures at each phase to document how I made them for my own reference when making other ears in future and also to share with you now on my blog..

For those of you who have some experience of needle felting I am sure you have your own preferred technique but please do take a look – your ideas are very welcome as I am still fairly new to this and so far it has been trial and error but most enjoyable. For those who haven’t tried yet , I hope this inspires you to have a ‘stab’ at it!

This is specifically to show you how to create ears for the bunny I made above, but some of the methods are very similar for other animal ears so feel free to follow them for other projects..

To get started you will need:

  • Foam pad or felting brush base (so not to stab your knees and to provide a firm base to work on)
  • Felting needles of various sizes; wider for initial shaping and finer for detail later on
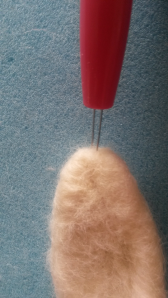
  • A needle holder; this is optional but for making basic shapes it saves time to use 2 or 3 needles at the same time. In the pictures you will see I use the 3 needle holder pen by Clover.
  • Wool to felt with; I used natural corriedale wool to make the basic ear shapes as I find it felts well and ends up nice and firm (especially to keep in alert bunny position). I then used merino wool as the top coat as it’s soft and comes in some lovely animal fur colours. I buy my wools at a very good price from World of Wool.
  • Finally…   some time, some love, some patience, a drink and bar of chocolate for long sitting periods, perhaps some music (not tv as you may be distracted and stab your finger) and don’t forget a photo or drawing of what you would like to make…

So…. on to the tutorial!

By the way….. the point at which I am about to felt the ears I will already have my head sculpted, I can then at any time measure up the ears to the head to ensure I am getting the right proportion.

Step 1: take two equal lengths (and density) of your core wool (corriedale in this case). Bear in mind that you will need the two ears to end up the same size so keep comparing them. I find it works better if I do a bit on one then do a bit on the other as I go along rather than finish one and then start the other afterwards.
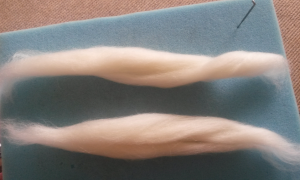
2013-08-10 19.00.33

Step 2: fold the piece in half in an oval shape (you can see already this is forming a long  ear shape before you even use the needle!)
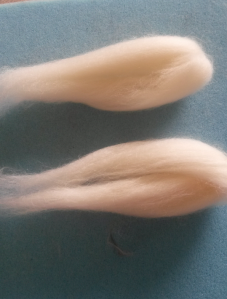
2013-08-10 19.27.05

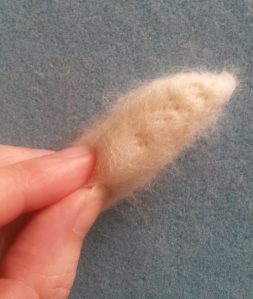
Step 3: using the thicker felting needle/s start stabbing the wool to go through to the other side as well as shallower stabs to the first few barbs of the needle in many directions (ensure you lift the needle in the same direction as you placed it so not to break any needles). Then turn over and do the other side
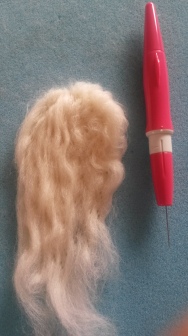
20130810_101806

Step 4: now you have a basic flat shape you need to make it more 3d and ear-like so roll the sides in to form thicker edges and stab at 90 degrees but also inwards at an angle keeping the edges rounded where the ear edges need to curve. Do this on both ears as you go..
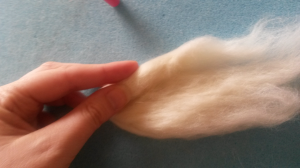
2013-08-10 18.58.02

Step 5: Use fingers to knead the wool and stab with your needle/s and give shape on both sides. NB I have left a long unfelted end at the bottom of my work to make it easier to fix my ears on to the bunny head later on…
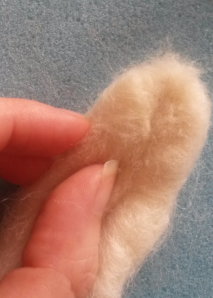
2013-08-10 18.55.43

Step 6: keep pulling edges in and hollowing the middle section with your needle/s
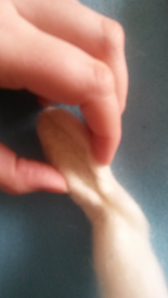
2013-08-10 19.28.59

………and turn over to felt the other side as you go…
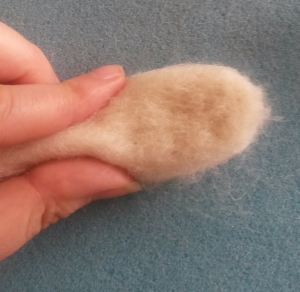
2013-08-10 18.57.10

…. remember to turn your work and use various angles to insert your needle/s to mould the wool into the desired shape.
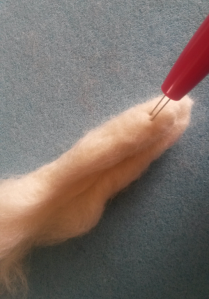
2013-08-10 19.28.102013-08-10 18.54.492013-08-10 18.59.10

Step 7: Keep felting and keep checking your photo or drawing to see how big the edges are and which areas should be flatter.
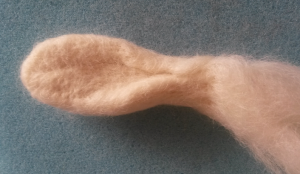
2013-08-10 18.54.02

On a real bunny one edge of the ear is thicker than the other so I had to make sure this was the opposite way round on the other ear (as it is in real life) for a mirror effect. You may want to use one needle or just two needles to make more defined lines..
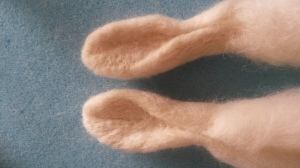
20130810_104445

And there we have some bunny ears (err… minus some colour and texture!)

So then comes the exciting part …..have your finer needles and bunny fur colours at the ready for the final step….

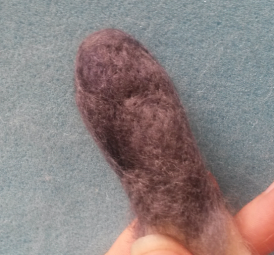
Step 8: carefully shallow felt the ears with your coloured merino wools (just to a depth of first 1 or 2 barbs on your finer needles) to fix the wool in place but not allow the wool to go through to the other side. You don’t want the darker colours to be seen through the lighter colours on the other side! and vice versa  (it would be a medley of pink and grey in this case).
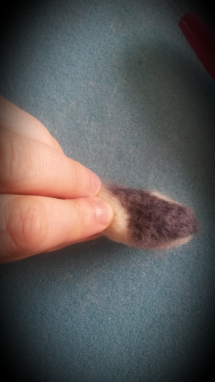
2013-08-10 15.35.55

2013-08-10 15.34.51

……..where needle holes can be seen – you can use fingers or a normal sewing needle to gently fluff up fibres
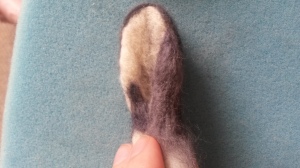
20130810_110028

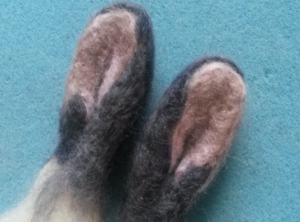
…. add different shades of colour to give a more realistic look. I mixed my greys and blues to get the bluey-grey colours. Then I  used a mink colour for the middle of the ear with lighter pinks around the edges. Finally a strand of grey down the very centre for light and shadow and 3d effect…
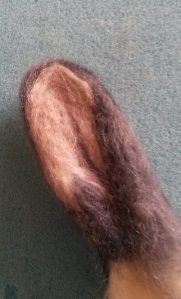
2013-08-10 15.32.44

2013-08-10 15.28.09

Then your ears are ready to fix on to your bunny head for full bunny character!!
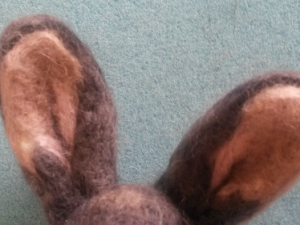
2013-08-13 13.44.37

I hope you found this useful. Let me know what you would like me to write about and what you would like me to make!

My next post will be a photo gallery of how I made my bunny creation from start to finish….so you will get to see me fixing the ears in place…!

Please enter your email address here for notifications of new posts to my blog and follow me on facebook, twitter, pinterest to see what I am up to next! 🙂

What is needle felting?

Are you new to this amazing form of art?

So was I back in 2013, but we all need to start somewhere. Once I started I just couldn’t stop and no doubt you will feel the same way too as it is very addictive.

You have probably seen some of my needle felted animals in my Gallery but what is it that I do to get from a piece of wool to a detailed sculpted animal?

Here I will show you the basics..

Have you ever had a woollen jumper? … loved it, worn it ..and then oh dear..washed it in too hot a wash and failed to read the washing instructions properly? or maybe you have heard of others doing that…Well that happened to me when I went to uni and didn’t have my mum to show me how it should be done!. My new favourite jumper shrunk to about a 5th of the size it started out as!!. Lets just say my teddy bear (I know I took a teddy to uni!) had his very own jumper which fit him perfectly… sadly though it would never reshape back to my size..

Needle felting felting is not putting wools in the machine or adding soapy water (although there is a technique known as ‘wet felting’ which does just this!) but the concept of how wool fibres latch on to each other and don’t want to let go is what I am trying to demonstrate here.

With needle felting you use a single barbed needle or several at the same time to cause the wool to felt..

First of all you choose your wools. These are some of the delicious coloured merino wools I used to make a fox.

Image

You pull off a piece (pull sections with hands far apart rather than too close).

Image

Roll or fold your wool tightly to form the shape you need. Here I am forming a spherical shape to demonstrate. You can take the wool off of the foam pad (used here to ensure I don’t stab myself) and roll in a ball in your hands too if you like – just like a piece of play dough as the ‘squishing’ action helps bind it into the shape you need as well.

Image

Then using your barbed needle you stab away at the wool hundreds of times in various directions, turning as you go (avoiding your fingers as the needle is extremely sharp) and as you do the wool fibres hug each other tight and don’t let go 🙂
Make sure the needle exit at the same angle as it entered so not to bend to bend or break it. start off slow at first until you get used to it and you will speed up in no time.

2013-07-29 14.21.06

The more you stab (which is quite therapeutic by the way after a hard day at work) the firmer and more compact the wool becomes so you can sculpt shapes. 2013-07-29 14.22.13

It is like modelling clay but with wool and a needle. Instead of moulding an area with your fingers you work it with a needle.

What I love is that there is no sewing involved (all the facial features such as eyes and noses can be needle felted too!) you just stab wool into shapes and add shapes to other shapes… and hey presto!! you have an animal.

There is of course a lot more to it than this. If you take a look at my Tutorials, tips and ideas page you will find further techniques.

Some animals can be made by simply needle felting basic body parts and felting them together.

For some you could felt the wool onto a wire armature to give the animal more structure and poseability (is that a word?). For example for the fox, cat, dog and donkey I  wrapped the wool tightly around wire which I had first prepared (after looking at photos of skeletal structures) and used my needle to fix the wool in place, firm up and blend in loose edges. Then I added more wool shapes to build up anatomy parts onto the base structure.

Here I have just started to give the fox his shape before adding his head and fuller tail and torso.

20130718_1431366

I tend to start off with core wool (usually corriedale batts) using my thicker needles to get started. Then for adding layers of realistic looking fur and to get the colours I love I use a blend of soft merino wool roving. Thinner sized needles are used for needle felting the details especially for the face and ears. I use no beads or buttons for eyes and noses…. just beautiful 100% wool!!

Did you find this tutorial helpful? What would you like to learn about next? Please leave comments. Why not post a photo of your own creations?

For more tutorials please visit my Tutorials, tips and ideas page.

Don’t ever miss out on my latest tutorials! Insert your email address and click the ‘Follow’ button on the right hand panel to receive notifications of when the next post is up..:-)

Don’t have time to make one but would love a one of a kind needle felted animal by Fit to be loved for yourself or for that special someone? Visit my Etsy shop today to see my latest creations. Or like my facebook page to see what I am making next.