In this tutorial I explain why hand blending wool is so effective when needle felting realistic animals and then I’ll show you how I do it.
It is perfect for long furred animals when you need to mix wool tops/roving colours together.
Read on or watch the video here 🙂
Why hand blend your wool?
When you closely study the lovely colours and textures of a real animal’s fur you’ll notice there are often many different tones rather than just one block colour. you’ll especially see this when looking at them in the natural daylight.
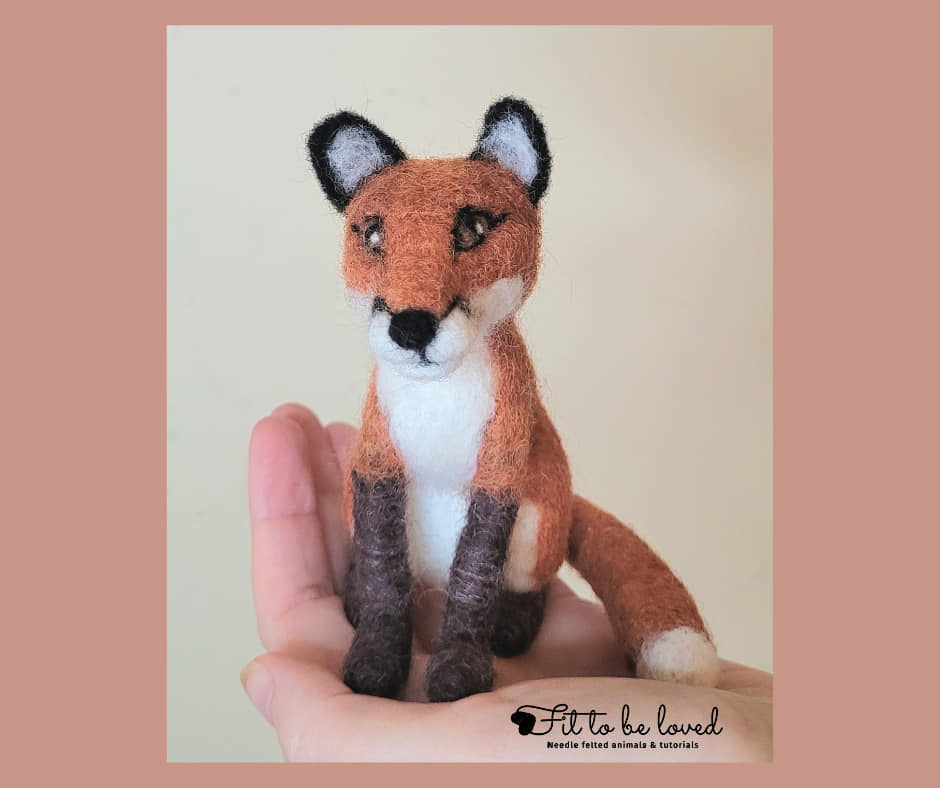
When replicating a fox I chose a variety of colours rather than just one or two to make the fur look as realistic as possible. I prepared my palette of wool colours much like a painter would prepare a palette of paints.
But how, then do I mix those colours together? …now that is where hand blending comes in…
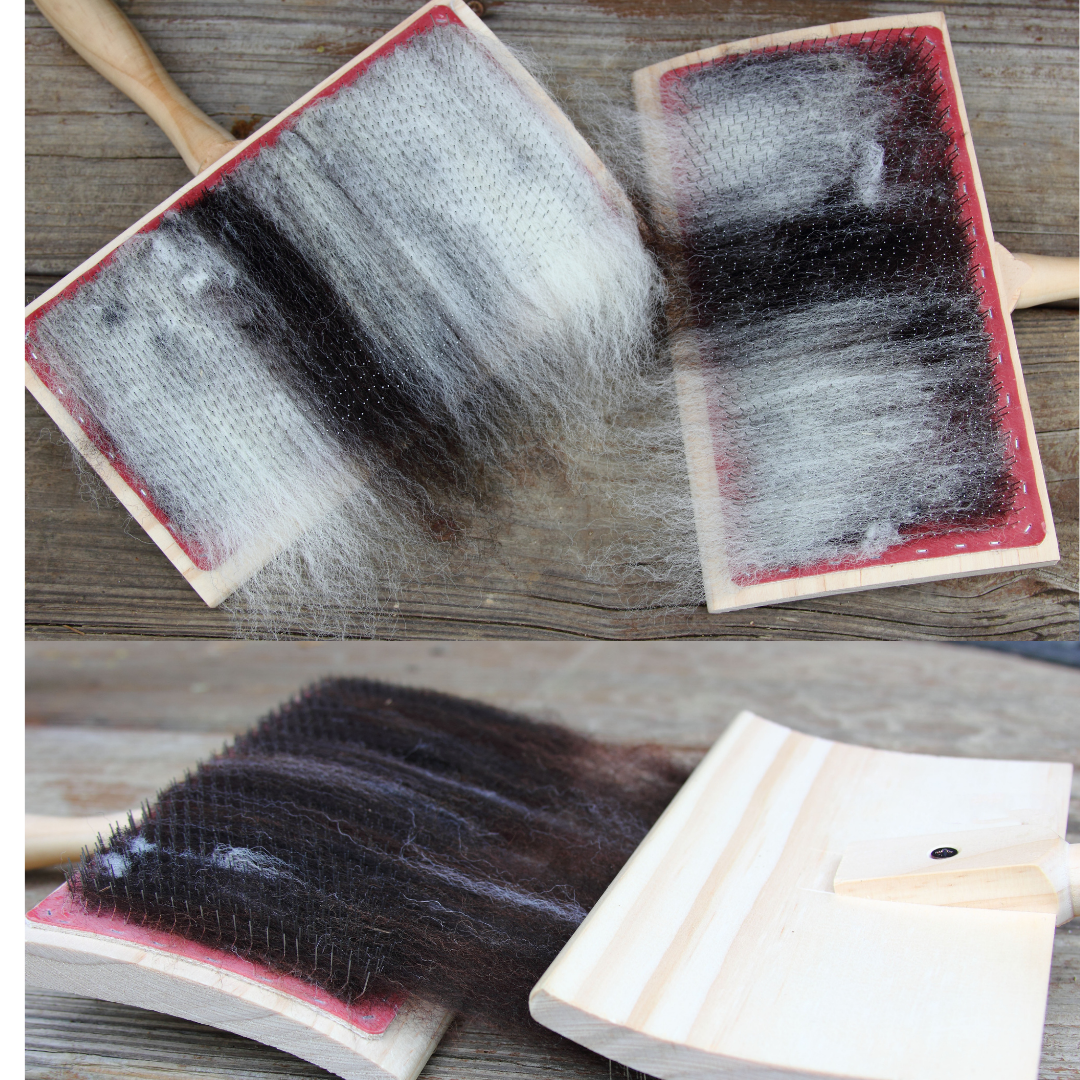
You could use carding brushes or dog brushes to blend several colours of wool to get the tone you need …and that’s great especially for smaller animal creations or where the animal has shorter fur..
BUT with hand blending, though it can take a bit longer, I feel I have a bit more control over how much I blend the colours and it’s brilliant for long furred animals.
Hand blending enables you to keep your wool tops/roving fibres lined up all in the same direction with no matting!
Those luscious long lengths can then be added as long fur to your animal…
And if you want to you can easily still see individual strands of colour for a more natural textured look
So, how do I hand blend?
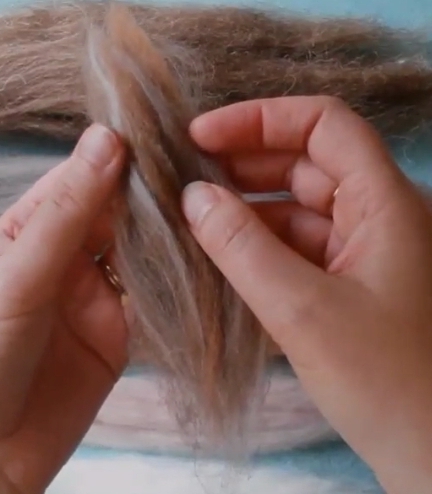
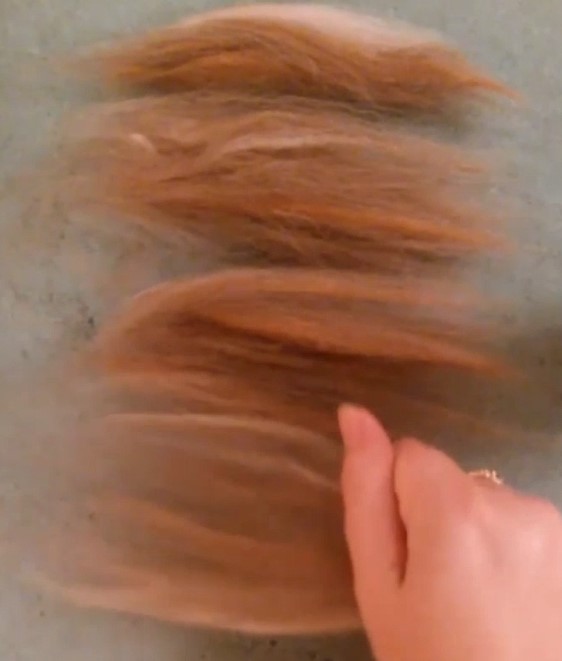
For long fur you’ll want to keep the fibres all going in one direction as much as possible. And then simply use your hands to blend the wool.
One easy way to achieve this is to stack lengths of each colour on top of each other…
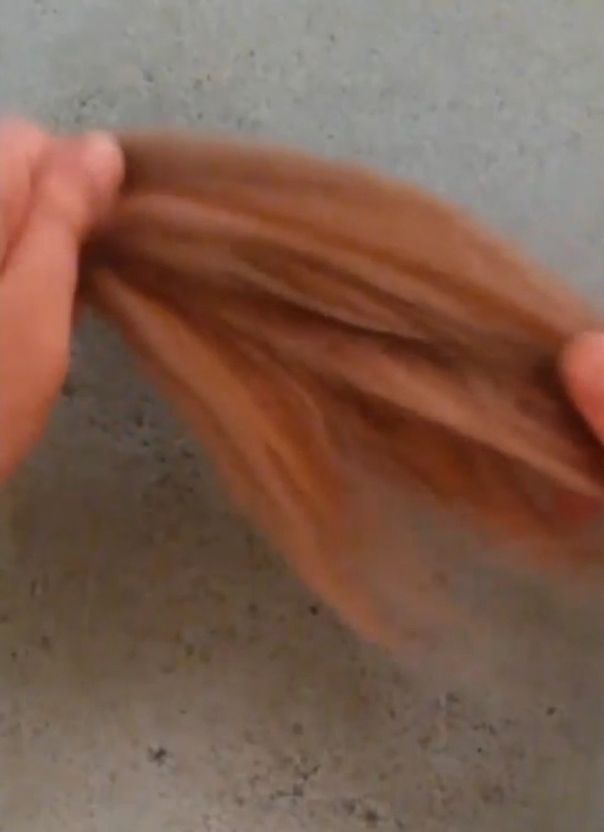
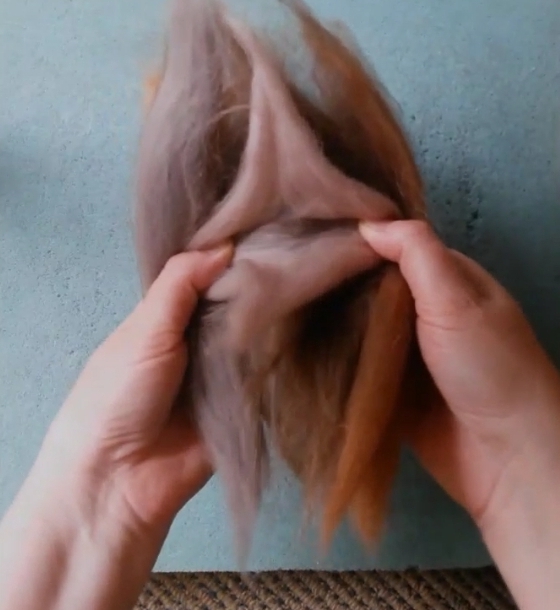
and then hold one end of the wool firmly with one hand and then using your thumb and first finger of the other hand, carefully but firmly pull the wool away.
Lay each layer again on top of each other (fibres all in same direction) and keep going until all the wool is blended as much as you want it to be.
Make sure you split the piles of wool up into smaller manageable sizes and not too much to blend in one go.
You can also split the piles lengthways if you see too much of any one colour.
I used hand blending for my sheltie dog…
Tabby Birman cat…(full series on needle felting a cat head is here)
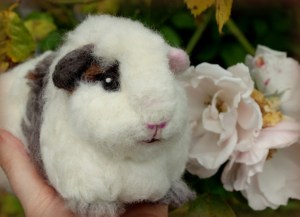
Guinea pigs…
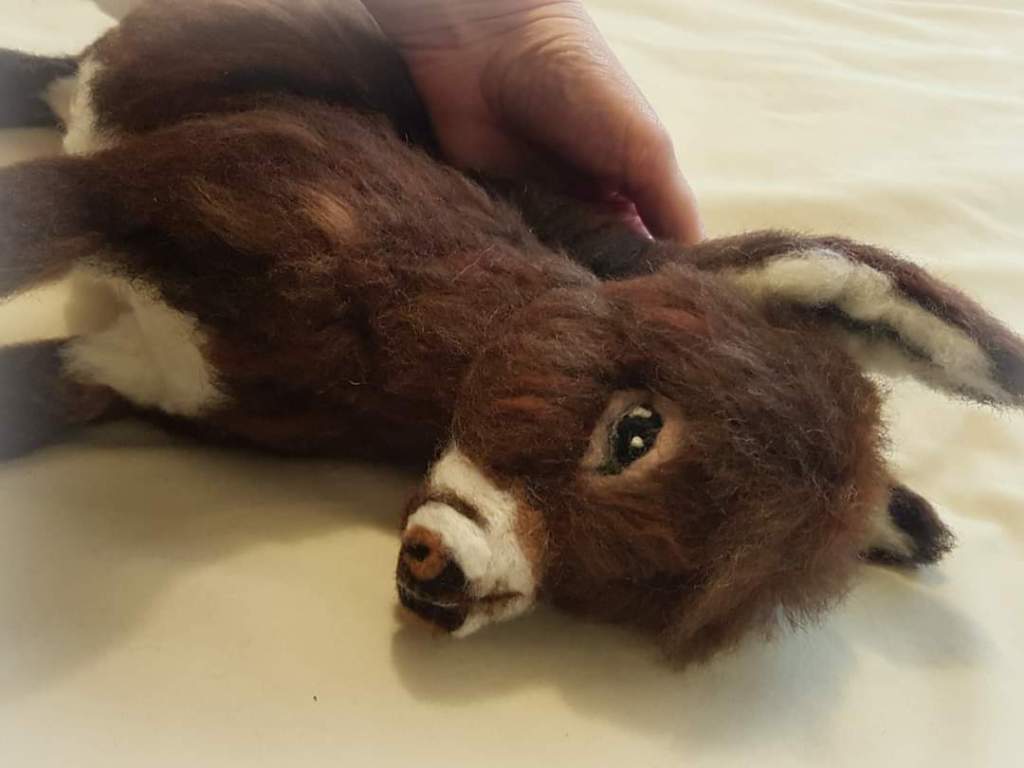
and donkeys….
Which felted animal are you going to use this hand blending technique on? Let me know in the comments.
If you need some tips on how to add long fur you might like these tutorials.
Are you planning a needle felting workshop this year?
I thought you’d find it useful if I shared what you might need.
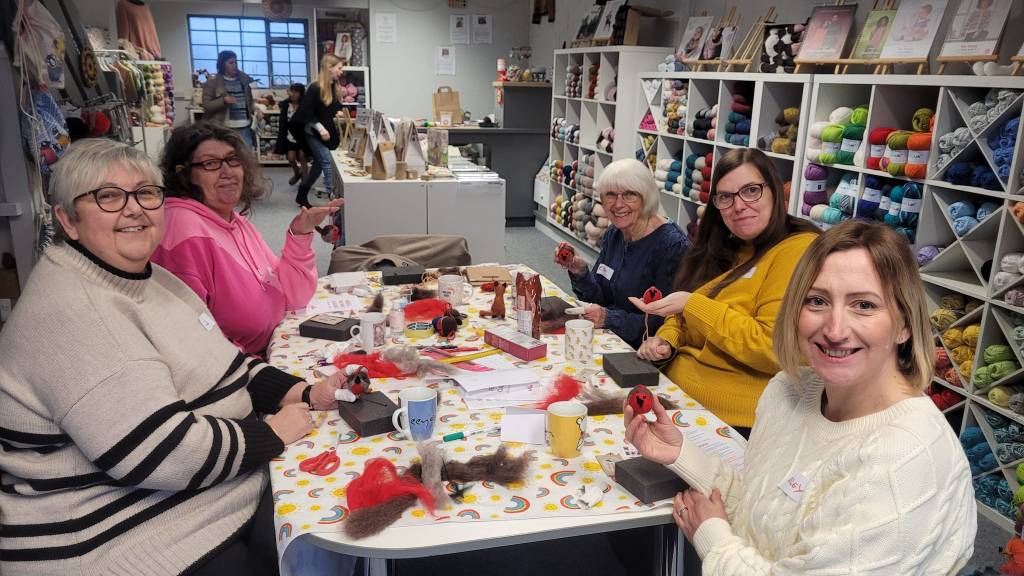
This will hopefully help you get organised and prepare well knowing the items I used in my recent workshops for the robin and the fox.
Even if you’ve run workshops before there may be a few items on the list that you haven’t considered.
Or maybe you are a little intrigued as to what needle felting tutors do when they plan a workshop.
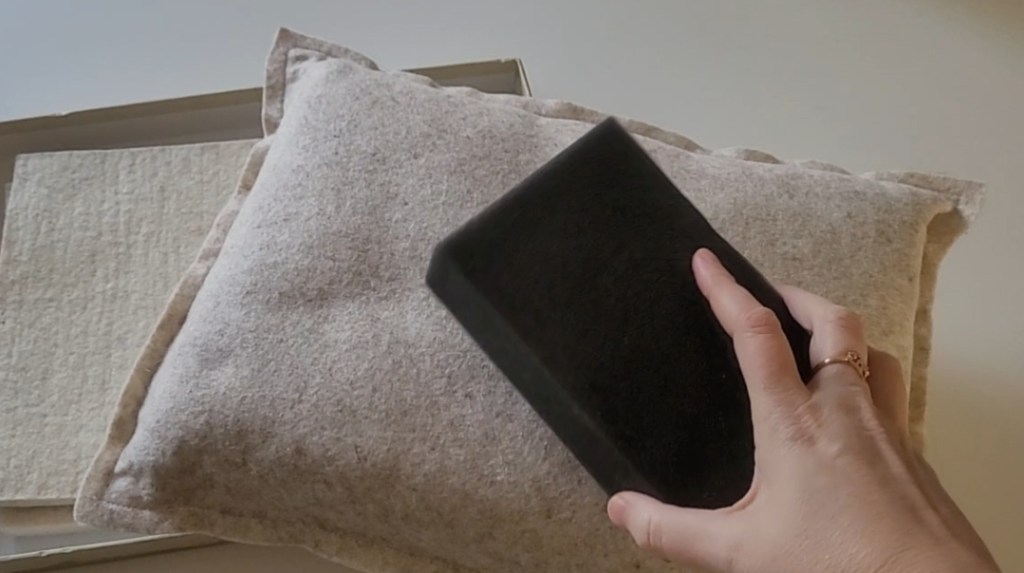
Felting Base
I include a felting base in the cost of the workshop. I bought a multipack of small black foam pads. They’re perfectly sized for a beginner project at one and a half inches thick, four inches wide and six inches long.
They’re really dense and very high quality but low in cost. We use these during the workshop but I also like to take along other options to show what’s available.
So I’ve got my Eco Wool Mat (extra large) from Heidifeathers and my Earth Mat from the Makerss. You can see my review on the the Earth Mat here).
I also show my students a hard surface for doing wire armature and keeping the wool from going frizzy on the felted mat.
This can be a table/ tray or even the inside lid of a decent box (this is what I use).
Barbed Needles
At the very beginning of my workshop I like to demonstrate how the needles work in the wool. So I’ll take a variety of different sizes of barbed needles (thicker ones right down to my finer ones). The ultimate mix from Heidifeathers has pretty much all you would need for felting and to show the differences between for example the star and triangle and also the more unusual ones like the reverse needle.
I chose Heidifeathers as my supplier as they offer good quality needles and have a great range. I find it cheaper to buy containers of each size for my workshops. They are colour coded and there is a guide I show my students.
It’s good to include the needles that they need in the cost of their workshop (I supply 2 of each size but take extras in case of any breakages). But it’s also good to show what’s available for future projects. They could perhaps buy some needles from you too on the day.
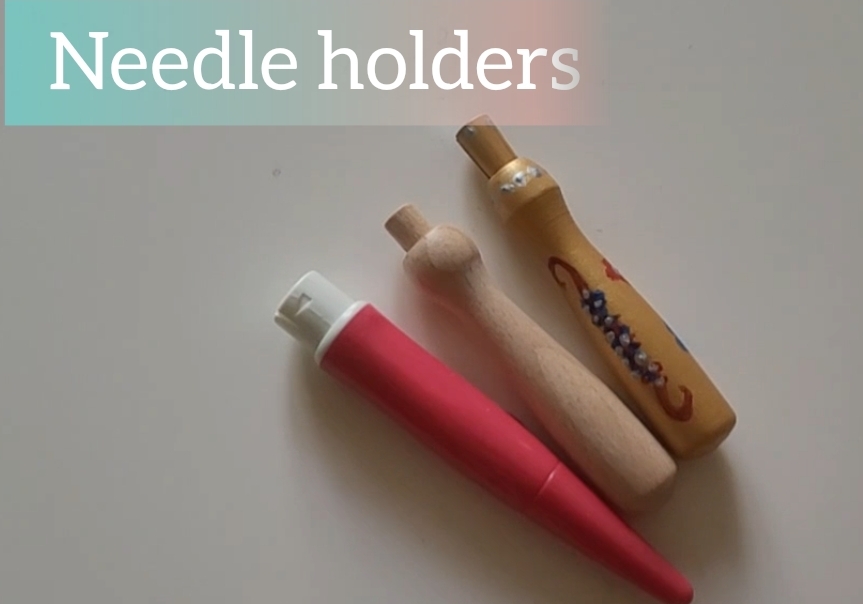
Needle Holders
It is a good idea to take along some felting needle holders. I have the Clover multi needle holder that can hold up to three needles at one time.
Then I’ve got the single needle holders made of wood. These are lovely as they are or you can paint them (my mum gave me one she’d painted in gold with cute flowers on it). The needle can be stored inside the holder when not in use (please see my guide to needle holders here).
Some of the ladies at my workshops had arthritic fingers and it was more comfortable to use a holder for the needles so I let them borrow these. However you could offer the holders as added extras to purchase in addition to your basic cost of the workshop.
Stationery
Notebooks – are ideal for taking further details from the students for example you may want to follow up on questions they have asked. Make sure you follow GDPR data protection guidelines if recording anyone’s personal contact details.
Rulers and/or tape measures – for your students to be able to take measurements of what they’re making and keep to proportions.
Pens/pencils and paper are also really useful for sketching ideas or showing shapes or sizes in a different way to the actual 3d creation they are trying to replicate.
Cellotape can always come in handy – I’ll mention why a bit later on.
Then at least one pair or maybe some sets of scissors of different sizes for cutting wool. I mainly use my rose gold stork scissors.
Sticky labels are brilliant for name tags, so you don’t forget names and also to label anything else on the day (eg bags – see futher down).
Guides/ Hand-outs
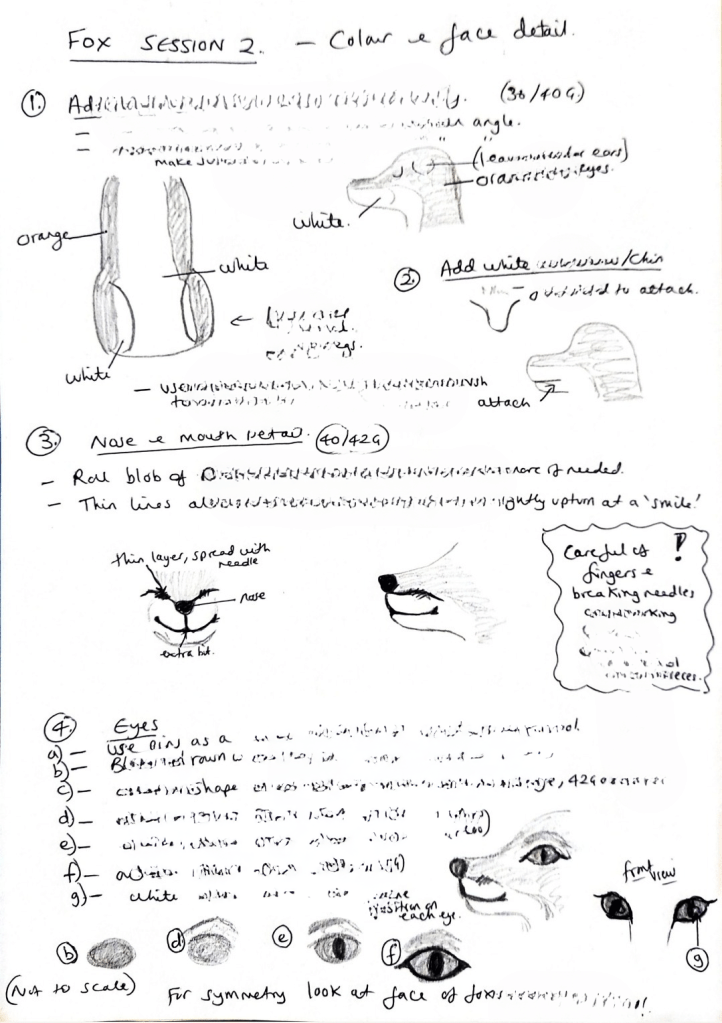
For my workshops as well as taking along the actual needle felted animal they will be making, I also provided some pre-prepared sketches, size guides and summarized step by step notes as visual tools to accompany the lesson.
I also scanned these and kept them as pdfs on file. They can be given in person and /or emailed.
One student was unfortunately ill on the second week of a three week needle felting course so they were able to catch up with my guides. Some students may also be a little slower than others so the guides enabled them to finish their creations at home if needed.
The guides also ensure I am following the steps myself too 🙂
Health and Safety Itemsand Insurance
Now when it comes to health and safety, you know how sharp those needles are so you can never be over prepared!
I took along a basic first aid kit of tissues, waterproof plasters, alcohol wipes and also some alcohol gel (the gel was particularly for those concerned about spread of germs/covid and for after touching food).
I bought some packs of finger and thumb protectors from here. Being made of leather they really do protect your finger and your thumb from being stabbed with a needle. You wear them on your less dominant hand and use dominant hand to hold the needle.
You can include these in the cost of the workshop or wash and reuse them. I found that washing them leaves them looking a bit used/worn so I did include them on my 3 weeks course and my students took them home and brought them back each week. So it is worth shopping around to get them as cheap as possible, though don’t go too cheap- some were not great quality and far too big for some of my students’ small hands.
It’s wise to keep a note of any accidents that do happen so you have them on record but with any workshop I do recommend that you take out public liability insurance cover! You can shop around to get the best deals. For me I joined the International Feltmakers Association as their annual cost is a really good price and includes the magazine, discounts on courses, a place to advertise your workshops and you can attend their meetings etc.
There’s no doubt that needles will be broken with any beginner class so I have a separate little container to collect any broken needles and they go straight in my sharps box later (you could take a sharps box along on the day of course).
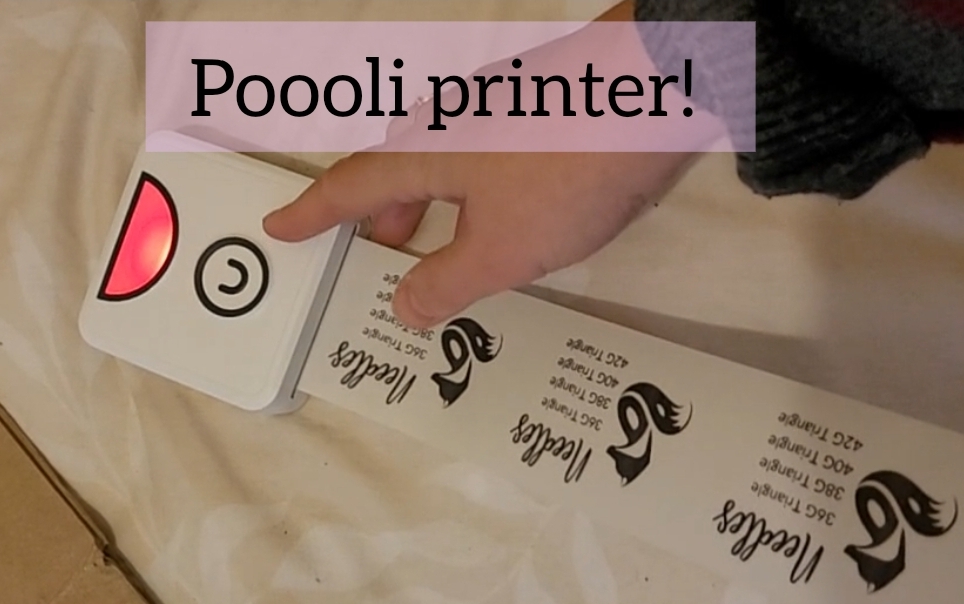
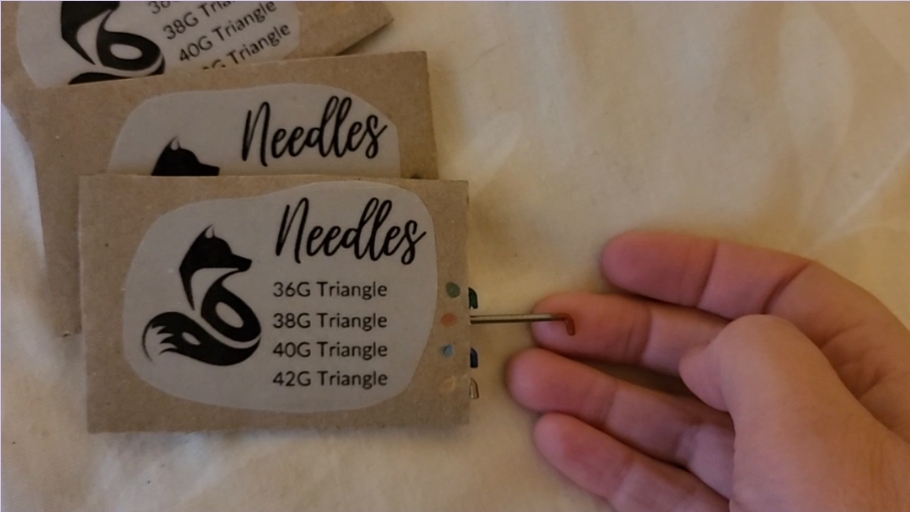
I don’t allow sharing or reusing of needles so that there’s no risk of contamination etc so I provide a corrugated cardboard piece with sticker on it to put the needles in for them to take them home. It’s a sweet way of containing the needles. The sticker on the front shows them what needles they have. This is simple to make, cost effective and reduces the need for plastic.
All I did to make then was I got some old Amazon boxes that were corrugated cardboard, cut out the size that I wanted. Used my little Poooli printer to print off some labels (I’d designed these in Canva). Then used a felt tip pen or coloured pencil to make a coloured dot where the needle will go. You quite simply pop the needle into the side. You could always add some cellotape over the tops of the needles to stop them falling out, but it’s just to get them home.
Alternatively you could use your business card, lay the needle across one side and cellotape them down.
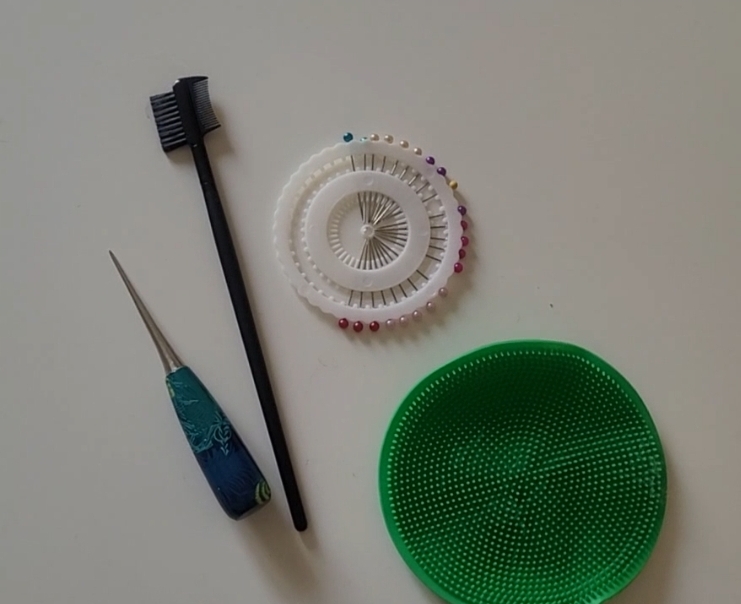
Other Tools
A few little extras that you might also want to take to the workshop:
An eyebrow brush – for brushing fur or smoothing out wool.
Colour headed pins – to mark where you’re going to put body parts eg eyes and noses.
Cleaning brush for the felting base – removes wool very well from the top of my wool pads or foam mats
Wool
Of course your students can’t felt anything without the actual wool. So I take along my bag of previously weighed wool in amounts for each student plus a little extra.
I also like to teach about the different wool types that you can get so I take some core wool, carded wool (slivers and tops), merino tops. You could include other animal fibres eg camel or some vegan fibres. I showed some Suri alpaca wool which is absolutely lovely as it’s silky and soft for using as long fur. If you’d like to learn more about wool types I have a guide on these here.
Marketing/ business promotion
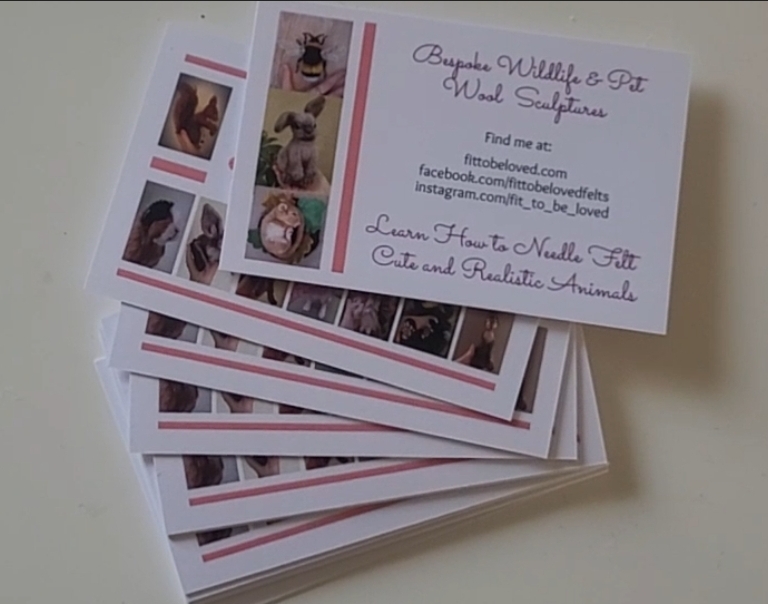
I take business cards for my students and also for the passers by who come into the wool shop where I hold my workshops.
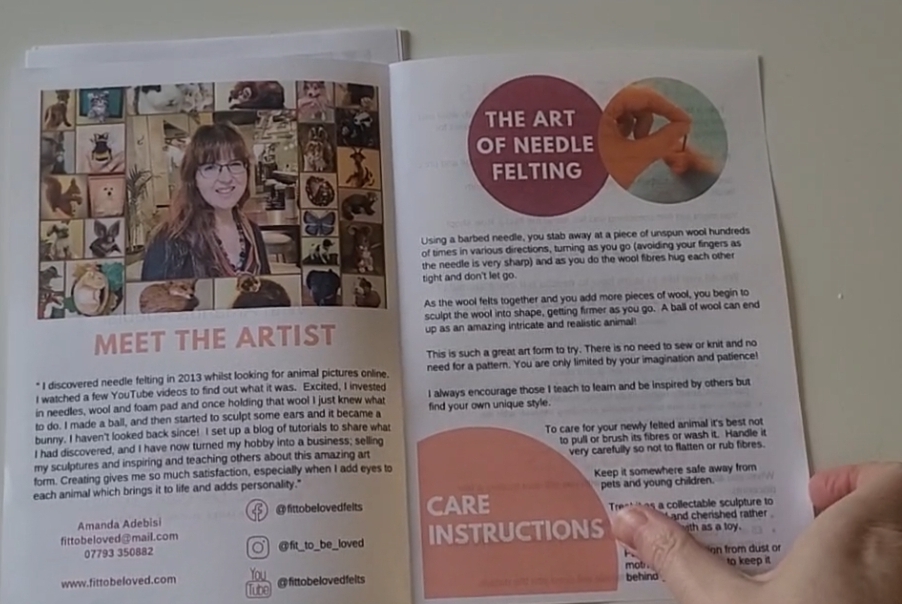
I’ve also give each student a leaflet (designed in Canva) which includes;
info about the needle felting classes,
a bit about myself and my social links,
care instructions for their needle felted animal they’ve made,
recommendations of where they can get some more wool and tools,
a list of how and where they can learn more – eg my other courses, PDFs etc, and
a section about discounts they are entitled to as an attendee of my workshop.
The workshop is the perfect opportunity to also take along some other creations that you’ve made.
This is to promote the other courses that you might be able to offer. So if they’re starting on a beginners course, they might then want to look at what they could achieve at an improver course.
So on my one day robin workshop I took along my fox. I had several students book onto my 3 week fox course.
I took along my hare to promote a hare PDF I am making and also the dog and cat head which feature on my YouTube channel. Shop customers can also see my needle felted animals and potentially book on the next workshop or take a business card.
It’s one of the very few times I get to take my creations out in public.
Refreshments
It’s nice to offer some refreshments during the break. I offer tea, coffee and biscuits for a morning break at a 3 hour workshop. You might need to consider lunch if a day workshop and factor that into your costings.
You’ll need to consider dietary requirements too.
Containers
Boxes or bags are useful to keep all your items stored tidily and organised and also safe for transporting them to the workshop. It is worth making sure you have something waterproof to cover items in case of rainy weather. I used a few boxes and bags for mine.
Paper bags – for students to take home their newly acquired wool and tools as well as their creation they’ve made at the workshop. I got these really cheaply from Asda (usually advertised as large party bags or lunch bags).
Organisationand the day itself!
I kept a checklist of everything that I needed to buy and then once bought I had a list of what I needed to take to the workshop and an ongoing to do list to make sure I hadn’t forgotten anything.
It’s wise to get to the workshop at least 20 min early to lay everything out on the table.
THEN meet the students, have lots of fun! This is a wonderful time to share your skills!
I set my alarm for various times to make sure that I kept to my timing!
Be sure to take along your enthusiasm and love for this amazing art form. I love the look on my students faces as they learn to needle felt for the first time. Its amazing to be their first step in their needle felting journey!
I hope this has given you some ideas on how you might prepare for your workshop. Please let me know in the comments what you thought of these ideas. And also, let me know how your workshop goes. I’d love to hear from you. xxx
Here is the video version of this guide if you’d like to watch it 🙂
A question I often get asked when creating my needle felted animals is ‘what type of wool did you use for your core wool?’ or ‘what wool is the dog’s long fur made of?’
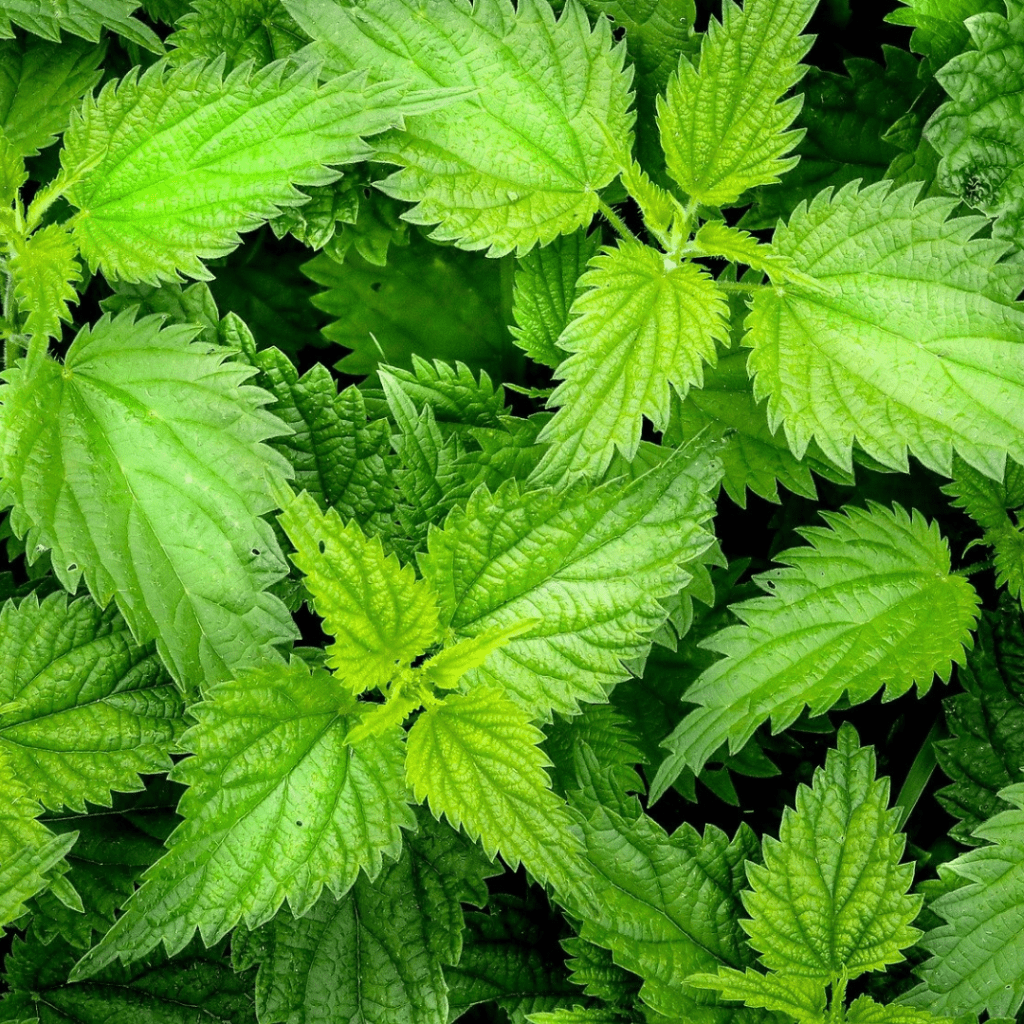
When you first start needle felting the variety of fibres out there and knowing what to start with can seem really confusing and somewhat daunting. There are not only different animal fibres you can choose from (e.g. sheep, alpaca, baby llama, camel, even dog fur etc) but there are also vegan options such as viscose, acrylic, bamboo, hemp, soybean, nettle, pineapple or banana fibres.
When felting with sheep wool there are different breeds of sheep that produce different textures. Some are delicate and soft with straight fine fibres, some are more thick, fibrous and harsher to the touch. Some are easy and quick to use as a core wool and some are better to use as a top coat. You can get natural undyed wools which come in some lovely whites, creams, greys and browns depending on the breed or you can opt for wool that is dyed (or dye it yourself) and there are numerous amazing colours to choose from.
In this guide I mention some sheep breeds that I love but my main aim is to help you understand the different preparations of wool like knowing the difference between a batt and a top. It is so useful when learning to needle felt to know what these terms mean, to save time and money and to know practically how you might use each of the different wool types at the different stages of making your needle felted animal.
I give some suggestions from my own needle felting journey that will hopefully provide some insight into the types of wool available but I’d encourage you to test different fibres for yourself. It’s very much part of the fun when learning and no doubt you will find some amazing discoveries along the way.
I have also included links in this guide for where to source the different types of needle felting wool – please see my links disclaimer in the right side panel for more details. These are all from Heidifeathers shop on Amazon. They sell a wonderful range of wool and the biggest range of barbed needles in the UK. They have excellent customer reviews and postage is usually free. If you would like to just browse all their products rather than using the links below then here is the shop link.
Carded Wool – Batts and Slivers
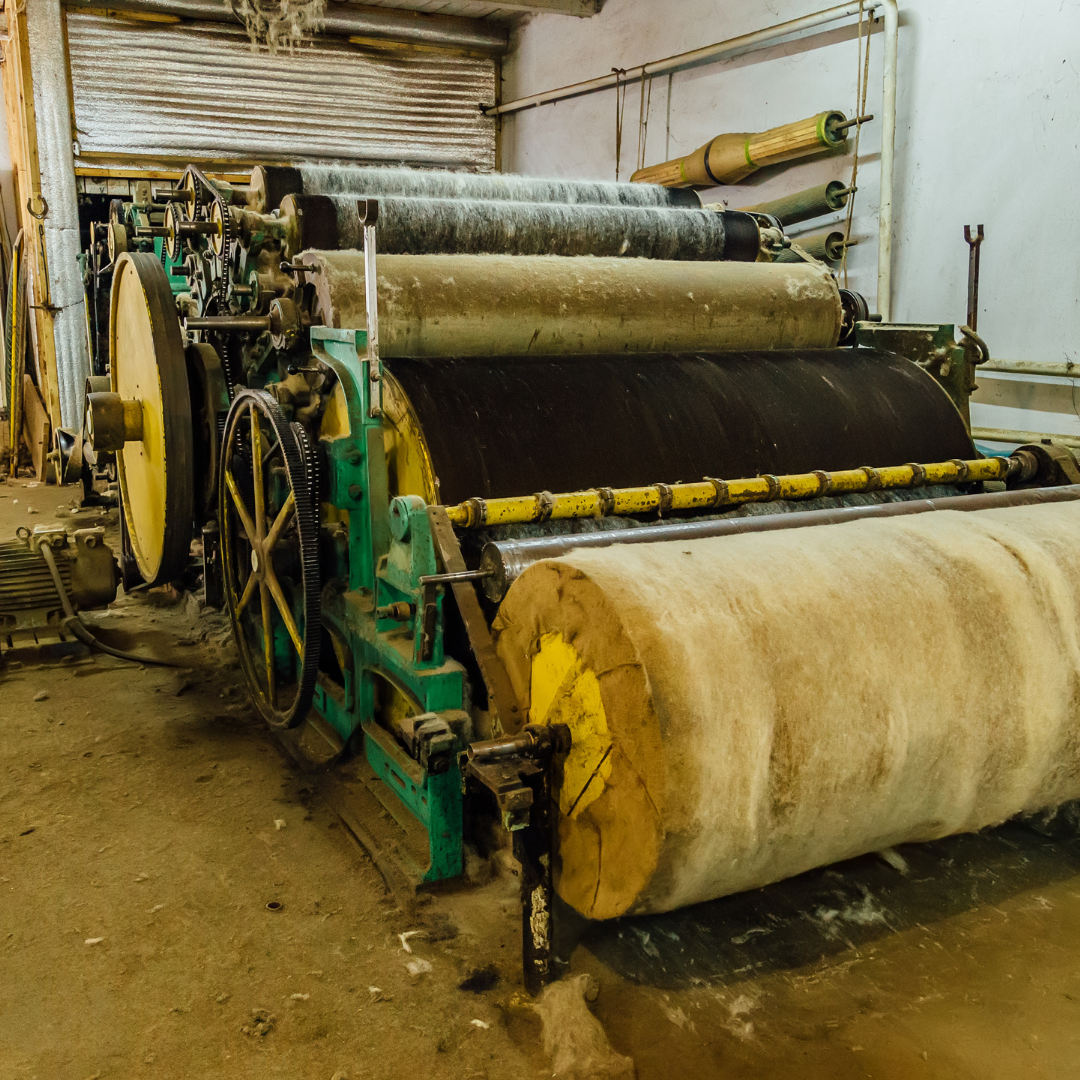
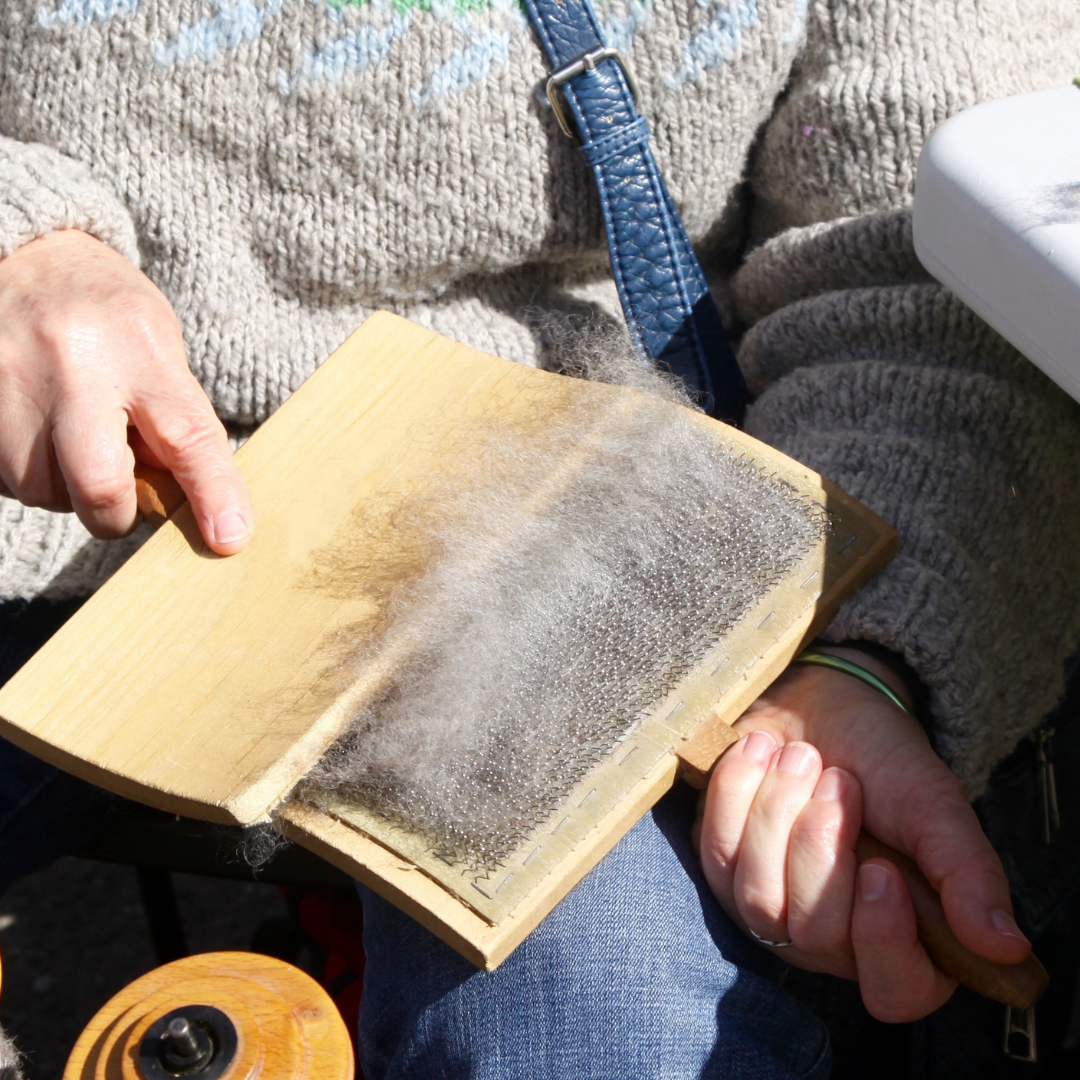
What is carded wool/carding?
The process of carding wool can be achieved with a machine (usually a drum carder) or by hand using two handheld carders (some people use dog brushes). Traditionally the wool is first of all washed, removing most of its lanolin and then passed through differentially moving surfaces so that the fibres are further cleaned of vegetable matter and are rid of any tangles or clumps. The result is a continuous mesh of mixed up fibres. They come as carded batts or slivers.
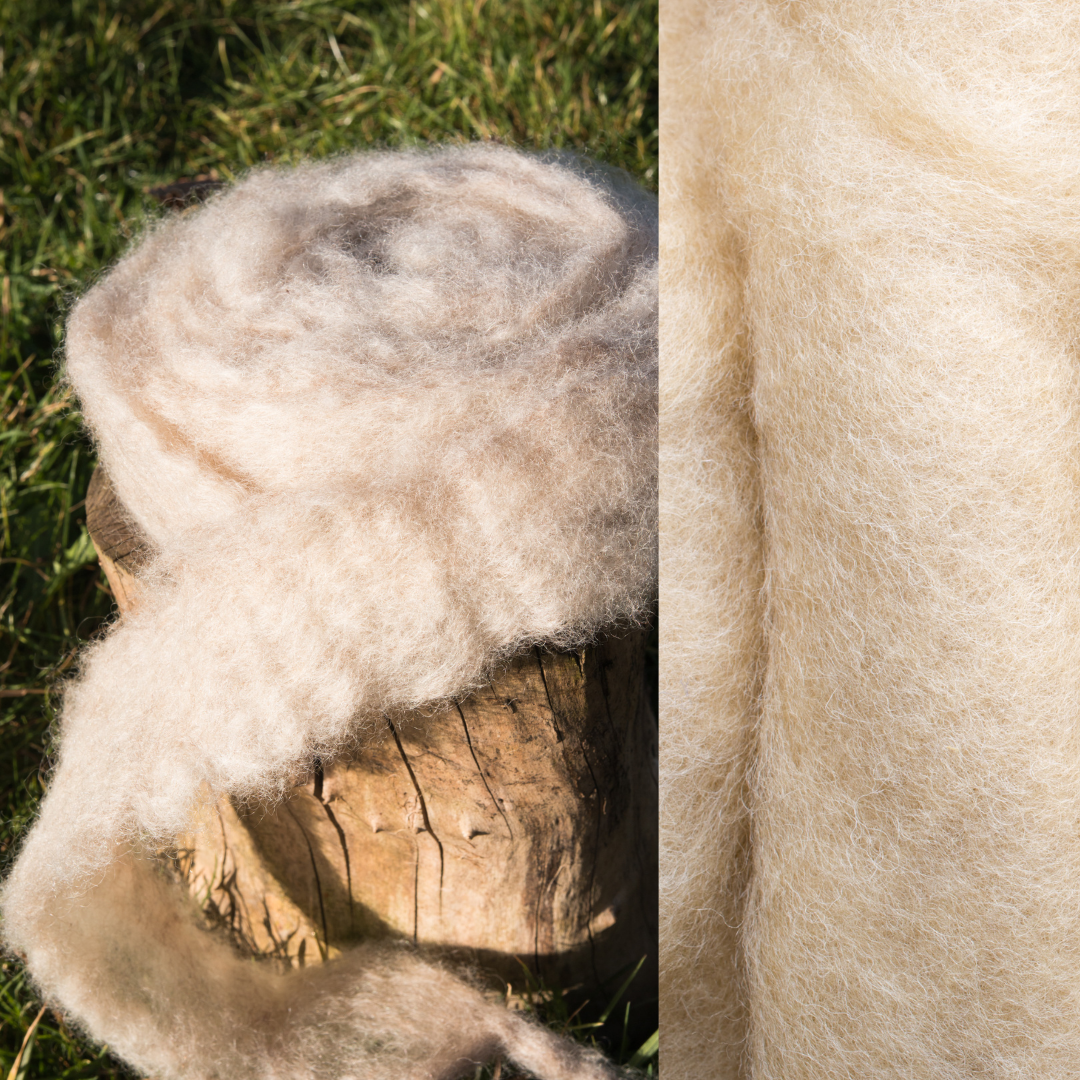
What is the difference between a batt and a sliver?
Carded wool can be bought as a carded batt – which is simply a big thick sheet of mixed up wool fibres or it can be bought as a carded sliver which is the same as a batt but it comes as a very long strip.
Both are great for most needle felting projects as you can easily pull off small pieces or long sections and start making shapes. As the fibres are short and go in various directions rather than laying in the same way, this wool type is super quick to felt with.
Here is a carded wool batts bundle of 4 natural wool shades; white, grey, dark brown and mid brown.
What would I use carded wool for?
I find carded wool is great to use as a core wool for my medium to large needle felted animals. I like using natural undyed carded corriedale, Jacob, or mixed breed wool for this.
Hereis the white Jacob wool batt which is great for the core shape of your animals. It also comes in other natural shades.
Core wool is often cheaper to buy (especially in bulk) saving the more luxurious softer wools such as merino wool for the coloured top coat. You don’t see the core wool which makes up the inside of your felted animal so it doesn’t matter if the finish looks good or if there’s a tiny bit of vegetable matter in the wool. The important thing is that you have made a good firm shape on which to attach your outer wool.
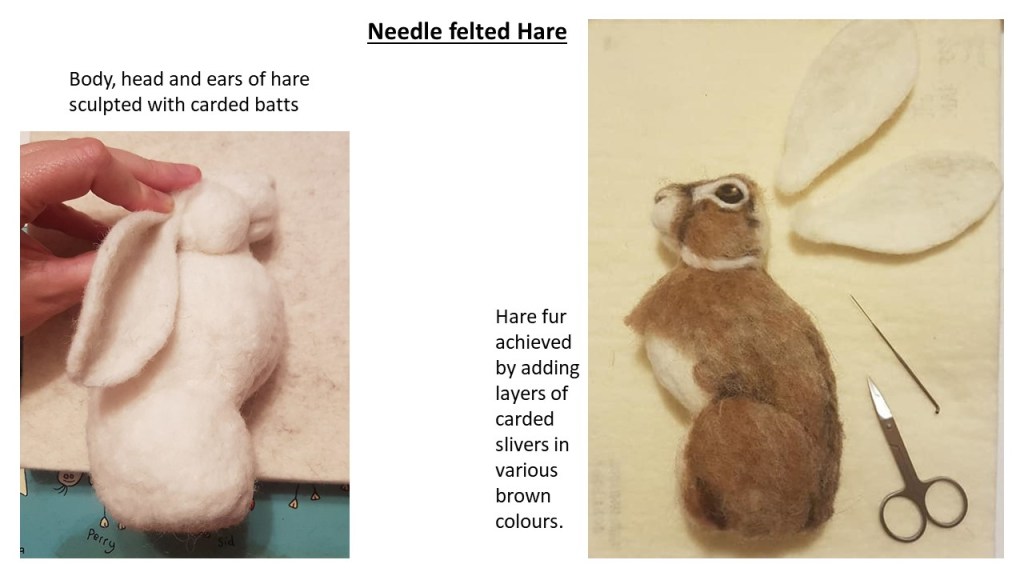
I prefer the carded batts of wool for sculpting the basic head and body shapes and for making flat features such as ears. See below for my hare.
For animals which have a wire armature I find it more practical to use the carded slivers for wrapping lengths of wool over the wire, then I use either batts or slivers to build up the shape and musculature.
Here is one of my favourites – the white corriedale wool sliver.
Batts and slivers come in a variety of colours and if you are making a small animal and not using the long fur technique you can skip the need for a core wool and just start sculpting your animal in the colour it is.
If you have started off with core wool, you can add the carded wool colours as a top coat. They are great for layering different shades of colour and blending them. You can also use the long fur technique with the coloured batts to replicate a wavy/rough coat appearance. Batts work well too if using a reverse needle to pull out fibres to achieve a fluffy coat / hairy look or for blending colours.
This ‘Creature Mix‘ has six wonderful animal shades of needle felting carded wool slivers.
Tops/Roving
What are tops/roving?
Tops and roving mean more or less the same thing when it comes to needle felting. After the wool has been washed and carded it can then be combed so that all the fibres end up going in one direction to form long lengths that can be wrapped up into a ball. They come in all sorts of sheep breeds and most often you’ll see them in merino wool in a vast array of colours to choose from.
What would I use tops/roving wool for?
As it stands this type of wool is not so easy to felt together as the carded wool due to the fibres all laying in the same direction, however it is brilliant for adding pieces of wool to your needle felted animal to resemble long fur. The merino wool tops in particular are fine, straight and soft and so I will mostly use them for straight fur. Your animals can look really realistic with a bit of patience and some beautiful merino wool tops.
This merino tops ‘Toy box mix’ has 12 colours which are perfect for needle felted animals, including the pink for the inside of ears or for the nose or paw pads on some animals.
When you look at a real animal its coat is rarely all one colour but different tones of light and dark so by using a number of tones of wool you can get your animal fur to look as realistic as possible.
The following packs (each containing 6 colours) are ideal for when you need a variety of tones of the same/similar colours. I have given examples of animals you might use these packs for as inspiration, many of which I have made myself in the past.
For making a lizard, turtle, snake, frog or parrot.
If you need an extracolour that isn’t included in the packs above you can choose single merino wool colours too here.
On some of my animals I add in tops of another sheep breed (such as corriedale/ Shetland) to the merino tops where I would like to have a more wiry/ textured looking coat for more realism. I find that the sections I add have a bit more thickness and robustness to them than just the soft merino.
If you would like to stock up on and try out some tops in a variety of sheep breeds then this ‘Animal Mix’ is a wonderful collection of soft natural mixed wool tops from 10 different breeds including blueface leicester, manx and merino.
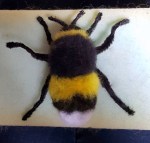
For a very tiny animal such as a needle felted bee where I want to reverse felt the colours, I don’t use a core wool but make it from the merino tops I already have to hand rather than necessarily buying new wool but I will hand shred/blend the fibres first to make it easier to felt with. My bumble bee tutorial here shows you how to make a bee from merino wool over a pipe cleaner armature.
When you need specific individual colours and types of wool, Heidifeathers also sell a variety of single colour slivers, natural sheep or alpaca wool tops in a variety of animal colours and bright colours too. Take a look here.
This photo shows the rabbit coloured carded sliver. I love this one.
Locks
You can find lovely natural curly locks in the cleaned but uncarded wool of some breeds of sheep (such as Teesdale) or from the angora goat – mohair. These can be attached to your needle felted animal to resemble curly fur / wool / hair for example when making a mane or for curly haired dog breeds or making a sheep/goat.
Heidifeathers sell these really soft curly mohair locks in a variety of colours.
This photo shows the brown mix.
I have personally found that if I need to add curls all over my animal rather than just adding a small numbers of locks e.g. to a mane or tail, then it is far cheaper and fun (though time consuming) to curl some wool tops by hand either by winding the wool round knitting needles or plaiting it, then wetting with a little water before leaving to dry. This technique also ensures every part of the wool is fully curly as some of the locks you buy may not be a perfectly formed curl or there may be matted/frizzy parts.
My favourite sheep breeds
I have mentioned some sheep breeds above that I love so here I have included some more information about the breeds and their wool.
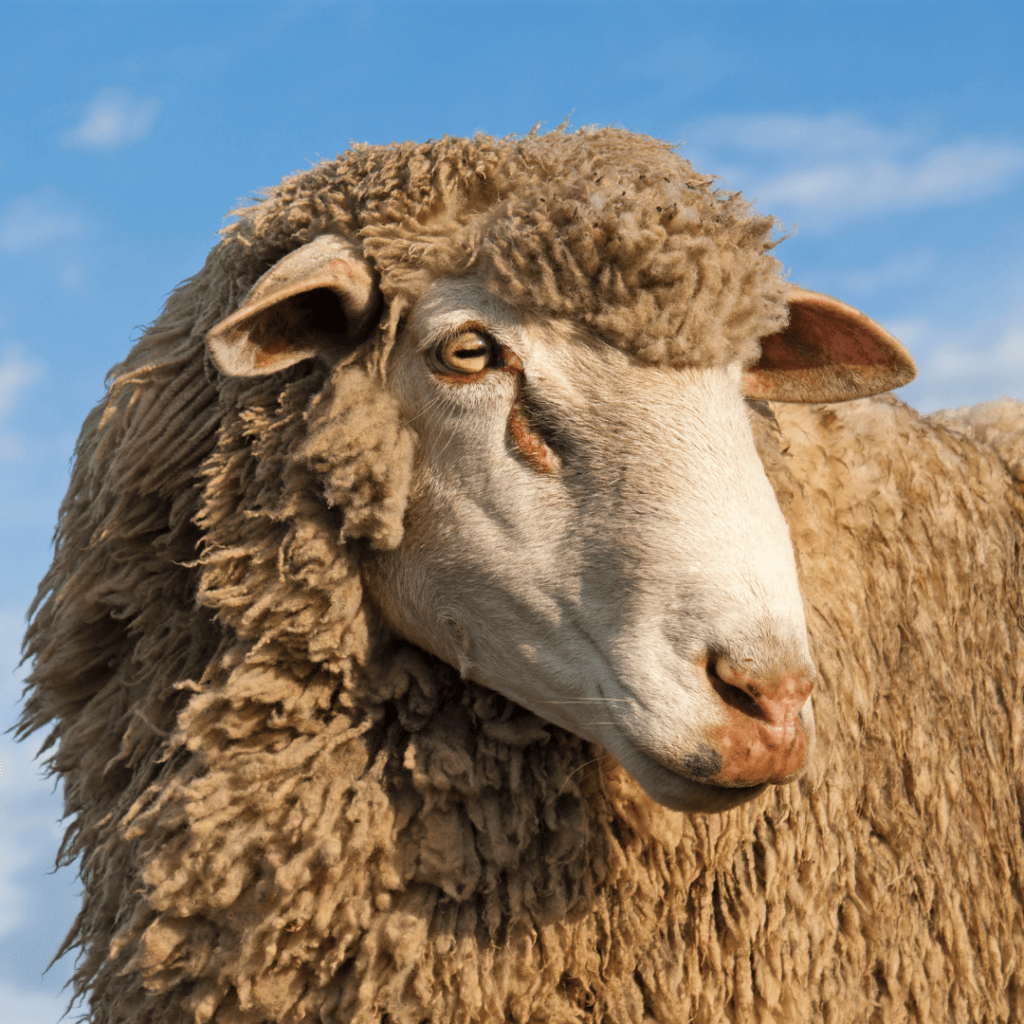
Corriedale
The corriedale sheep is a cross breed from New Zealand (merino crossed with Lincoln and Leicester) and now bred internationally.
It’s a very cute sheep to look at with its super thick wool more or less covering its entire body and over its head like a hoodie.
Corriedale wool is fairly soft to feel and great to felt with and I love its natural creamy white colour. This is the wool I started out using as a beginner and though I love the other breeds too this is one I often stock up on. I use carded and tops for my animals.
Merino
The merino is a worldwide bred sheep but originating from Spain, this is very popular across Australia and New Zealand.
Similar in looks to the corriedale sheep with its wool over its head but the wool is extremely soft and fine.
I always choose a non-mulesed merino wool as unfortunately the painful practice of mulesing still exists on some farms where some skin is also removed along with the merino wool in some places. Merino tops are brilliant for adding pieces to my animals to resemble long fur and merino batts are wonderful to reverse felt for a soft fluffy coat.
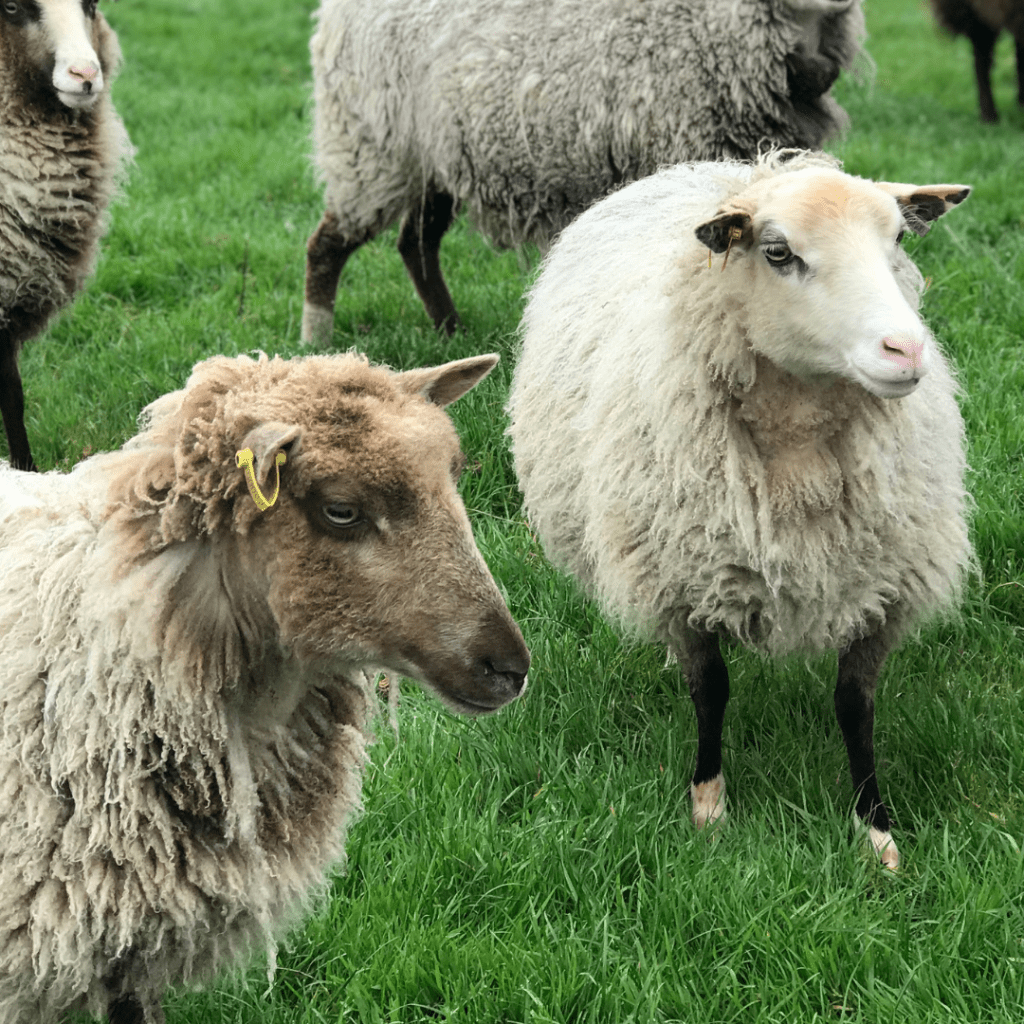
Norwegian
There are many sheep breeds in Norway but the one most often used for wool nowadays is a cross breed of the Cheviot and the Dala and Steigar.
These sheep look slightly more slender looking than the above breeds as their fleece is longer and not so springy.
The wool is really easy to felt, feels soft and comes in a lovely natural creamy white colour. I particularly love using carded Norwegian batts.
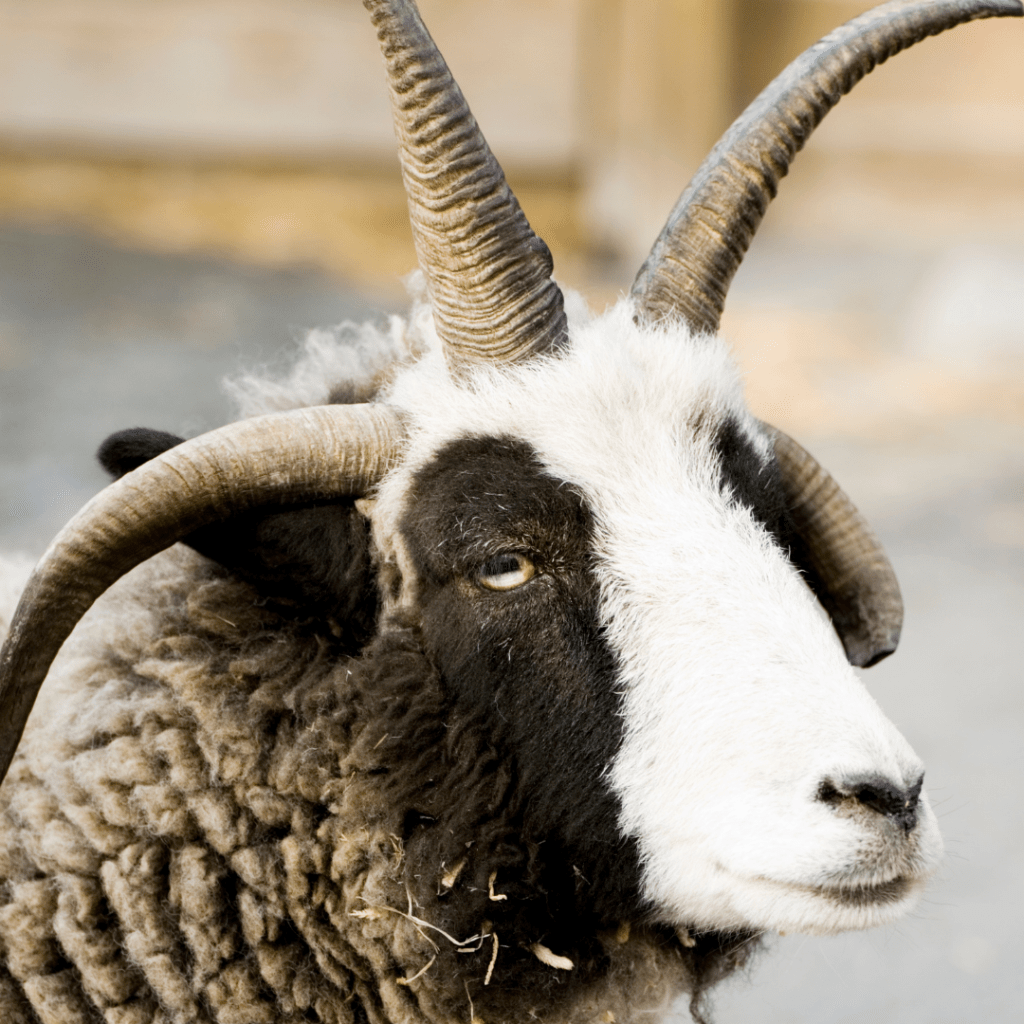
Jacob
Jacob sheep are so interesting to look at. They have some great markings, usually spots or patches of black or dark brown against a white background. They are also polycerate which means that both the ewes and rams have 2, 4 or even 6 horns.
Jacob wool comes in brown, black and white, and is quite soft and silky to feel though still quite coarse. I like the carded batts in this wool.
Shetland
This breed is the smallest of the British breeds and predominantly found on the Shetland Islands. It’s origin is not confirmed but is likely to have originated from Scandinavia.
Their wool comes in shades of white, brown grey and black making it really versatile in its natural form. It is fairly soft and fine with a more silky kind of feel than the corriedale. I love using Shetland tops as long fur for my animals.
Which sheep breeds and wool types do you love to use the most?
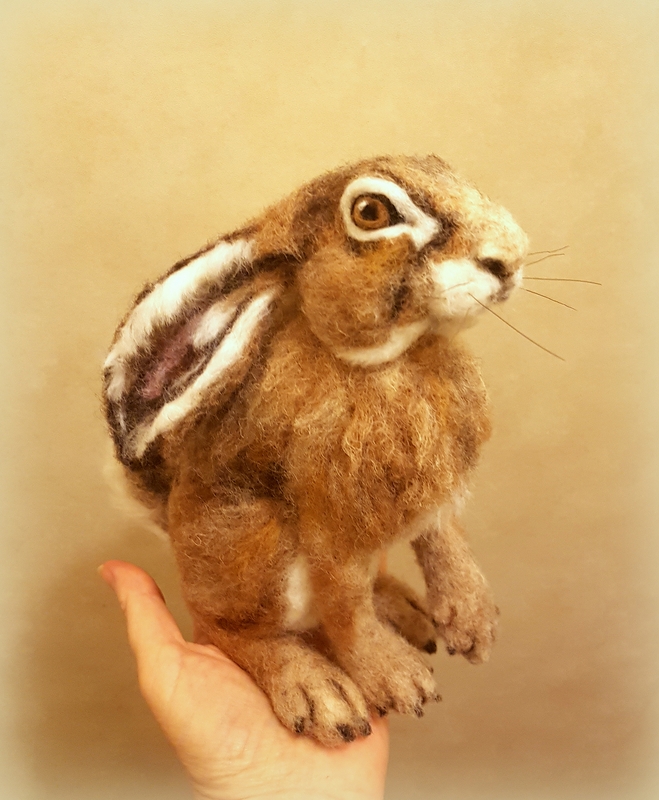
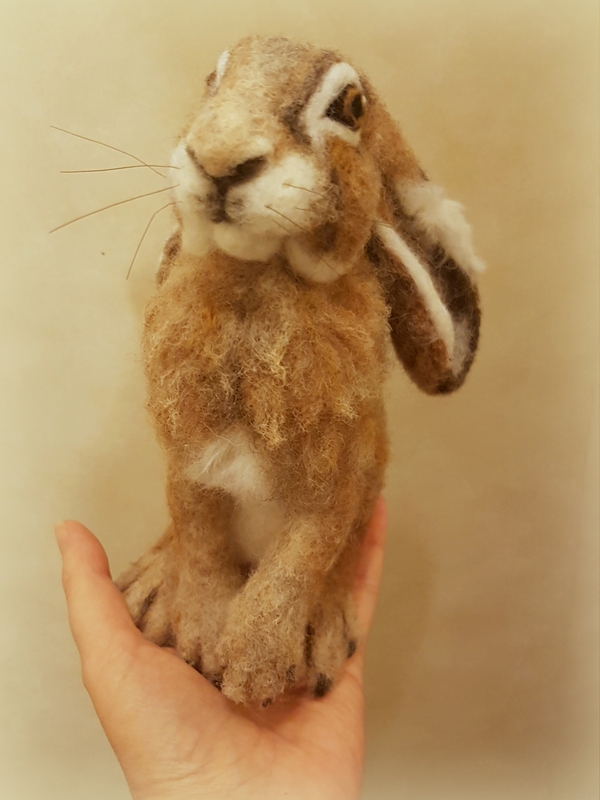
I am so excited to present to you my needle felted hare. She could be a moon gazing hare or maybe she is simply gazing up at you with those endearing eyes for some cuddles. I thought Luna was a sweet name which also means moon in Latin.
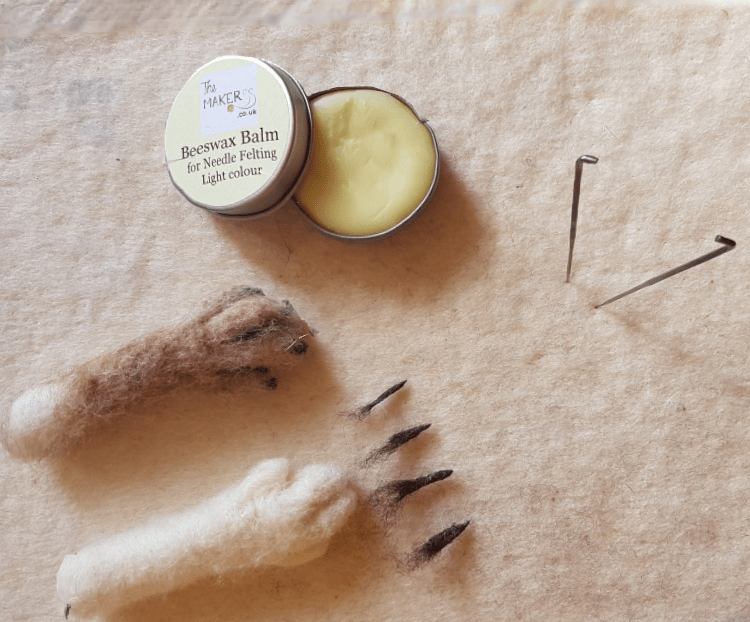
She is 100% wool except for her whiskers which are made of horse hair. Also I had some fun experimenting with wax that melts in the warmth of your hands to twist some of the wool between my fingers as a way to define the rugged and wavy texture of the hare’s fur around her neck and chest area. The wax was really effective to shape the tiny pieces of wool that I used for her claws as well.
I really love how hares have such long ears so I made these extra long for her body size, but I think that makes her even cuter, don’t you think?
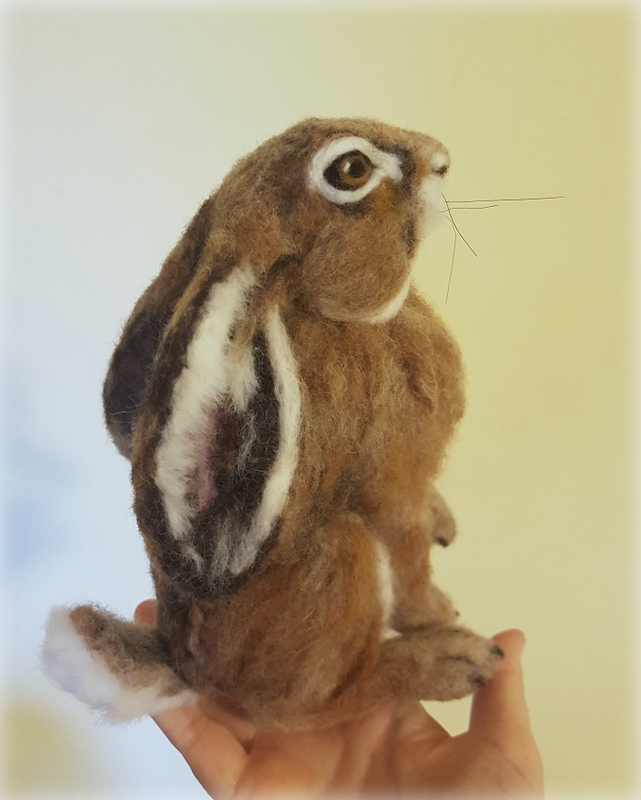
The process?
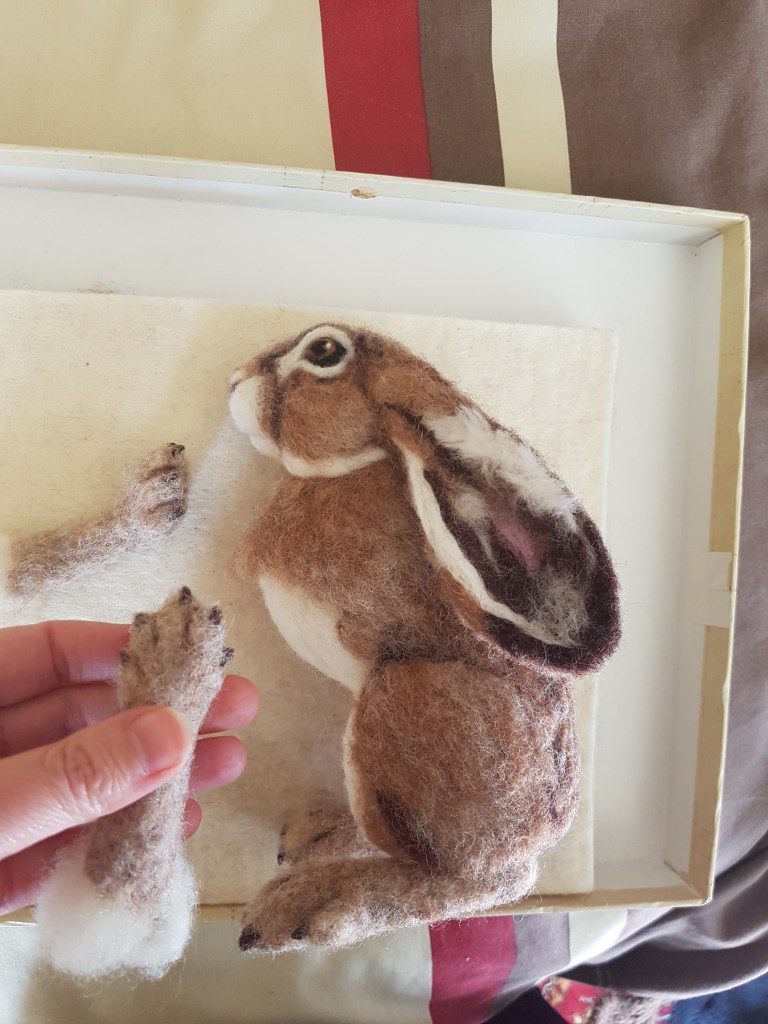
I started off making the basic shape of a hare head and body with carded core wool batts and then for her top coat I added a variety of brown carded slivers and some merino wool tops using the long fur placement technique.
This sounds strange to be using this technique with carded wool but having tried it it works well to give a rough fur coat look rather than lengths of straight wool.
I also pulled some of the core wool through with my ever faithful reverse felting needles to lighten areas (especially on the limbs) and to blend some of the colours.
I left some parts free from the top coat where I would attach the ears, limbs and tail.
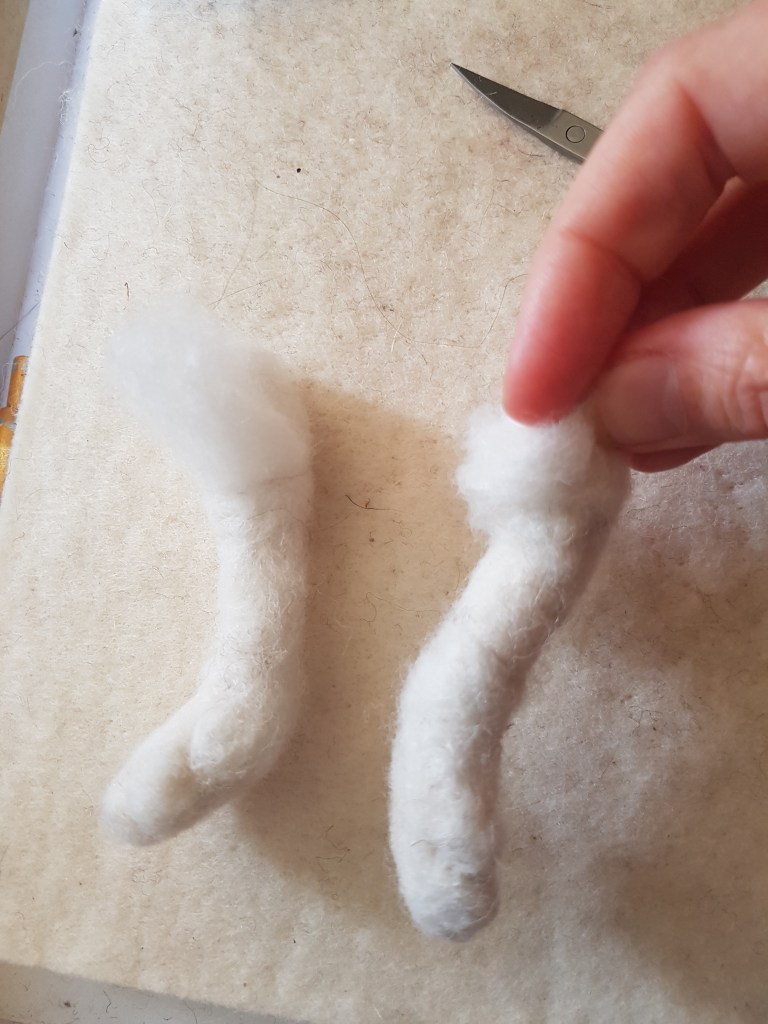
Next I made the ears and attached them, followed by the hind legs and then the front legs. Using 2 needles at once with my Clover pen style needle holder really helped to flat felt the ears and to quickly attach body parts..
Then I completed the top coat and added a tail and finally some whiskers.
I really enjoyed making Luna. I particularly loved making her as realistic as I could by taking my time to twist the wool and mimic the wavy and tousled look of the hare’s back fur.
I am pondering if to make another one and create a detailed tutorial as I go along.. I’d really value your thoughts..:-)
I have included links for where to source needle felting tools and materials. Please see Links disclaimer in the right side panel for more details.
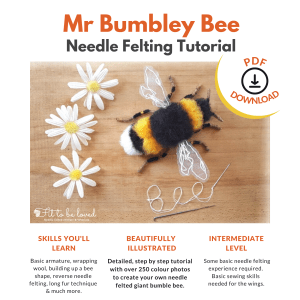
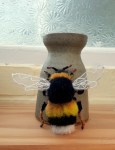
Would you like to create your very own Mr Bumbley Bee?
Now you can with this beautifully illustrated and detailed, step by step tutorial with over 250 instructional photos across 108 pages to show you 7 stages to create your own giant bumble bee.
He’s a giant fluffy gorgeousness that you can be brave to have him sit on your hand as he’s made of wool and much too much of a gentleman to sting you. His body is made of soft wool tops and his legs and antennae are shaped with pipe cleaners. His wings are made of organza with hand sewn stitching with white embroidery silks.
You’ll learn techniques including: basic armature making, reverse needle felting, long fur technique, wrapping wool and embroidery of wing patterns.
Includes Bee Anatomy diagram, Size Guides with wing template, Felting safety advice and Care instructions for your finished bee.
Mr Bumbley Bee – Needle Felting Tutorial – PDF download
Step by step tutorial to create your own giant bumble bee.
Pay by PayPal, Debit Card or Visa.
You will be taken directly to the download page when checkout is completed.
1 Digital PDF Download – £9.60
You will learn how to:
– Twist pipe cleaners together to form a basic armature structure.
– Emphasise the leg segments and antennae by adding small pieces of wool to them.
– Wrap wool over the armature and build up layers of wool to sculpt a bee shape.
– Use a reverse needle to create fluffy bumble bee hair.
– Create the bee’s white tail using a long fur technique.
– Add depth of colour to the yellow bands.
– Make wing shapes from organza material and hand sew a pattern and attach wings.
Here’s a preview of some of the pages you’ll find in the PDF tutorial;
Please contact me with any questions. I hope you have fun making your very own Mr Bumbley Bee!
I would so love to see your bee creation, so please post a photo of him on Instagram with #mrbumbleybee.
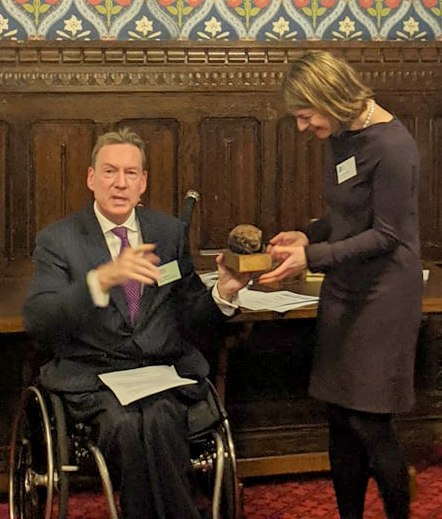
This week has been an exciting week. The needle felted pipistrelle bat I created was mounted and given as an award at the Palace of Westminster to MP Helen Hayes as she is the species champion for the common pipistrelle and won best parliamentary species champion at the Species Champions Annual awards ceremony. Well done to Helen for all her hard work!! It was presented by BBC Journalist Frank Gardner.
I am so happy that my artwork became something so special for an amazing project. The project is run by the Rethink Nature partnership, a group of seven wildlife organisations working together to make a difference to species conservation. (Amphibian and Reptile Conservation, Bat Conservation Trust, Buglife, Bumblebee Conservation Trust, Butterfly Conservation, Plantlife and the RSPB).
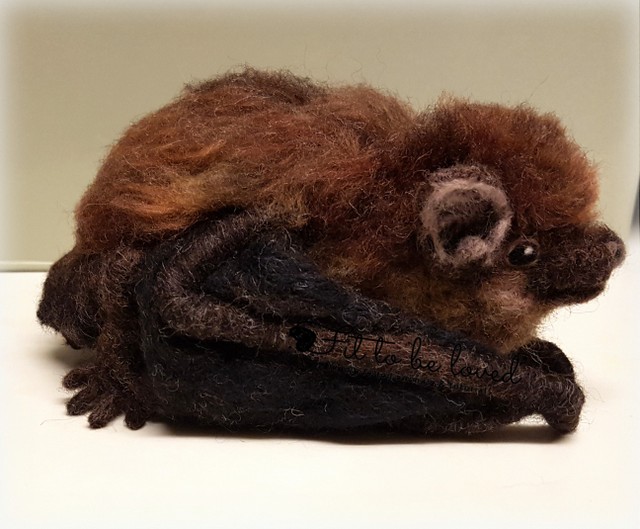
The little bat took many hours of sculpting through the art of needle felting. His body is made of core corriedale wool. His wings, legs and tail are wool wrapped over wire. His beautiful brown coat is made of a blend of corriedale and merino wool. His eyes, nose, ears and tiny feet are made of wool too.
The common pipistrelle as its name suggests is the most common bat that you might see flying in your garden on a summer night! Yet like all our bats in the UK they need our help and protection to ensure their numbers don’t decline again. They are so important to our environment! I love bats but some people don’t and this is usually as they don’t know much about them and bats are so misunderstood.
When you look at a bat close up they are actually very tiny and many times smaller than the size of my needle felted one. In fact a real pipistrelle bat weighs about 5g and their forearm length is less than 35mm in length. One of these tiny creatures can eat around 3 thousand insects in one night – how amazing is that!? Due to destruction of their natural habitat many bats now need to roost in houses and churches and rely on people to preserve these roosts.
Each bat usually has only one pup each year and too often that little pup will become lost or get caught by a local cat and so many each year don’t survive. The Bat Conservation Trust has a fantastic helpline if you find a bat in need of help. You can also find out how to support their work 🙂
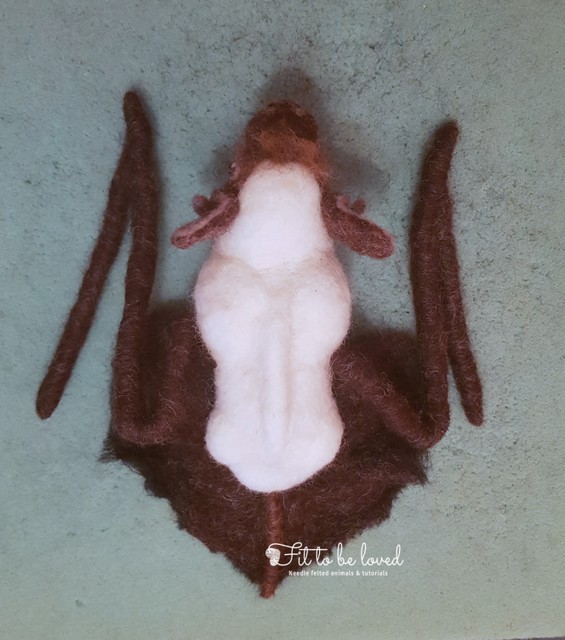
Here are a few work in progress photos of my needle felted bat…
Having worked for 12 years at the Bat Conservation Trust I have quite a good knowledge of bats but it was still a challenge to get the anatomy right. Bats are so fascinating and detailed with their tail membranes and wing membranes! I wanted to give the illusion of fully formed wings that could spread out but tucked in as if it has landed. I hope I did it justice.
As with all my needle felted animals I used lots of photos of the real animal at every angle for reference. Thankfully no needles were broken but I did remake his face at one point and a good deal of patience and chocolate rewards were needed along the way!! This aside I really did enjoy making him and I was so overjoyed to see the smile on Helen Hayes’ face too when she received him as her award !
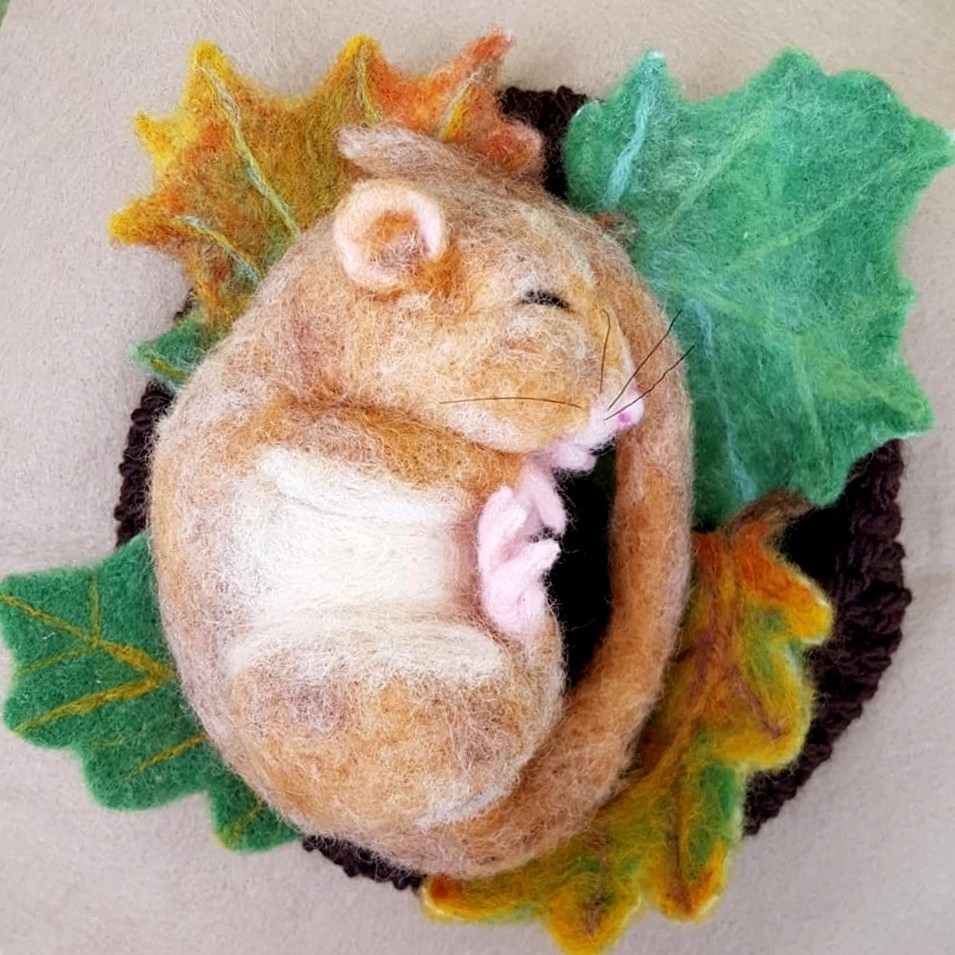
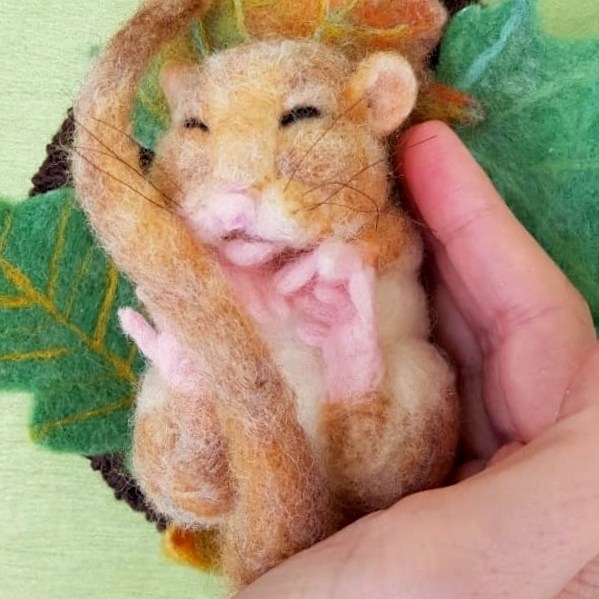
May I present to you ‘Hazel’ the sleeping hazel dormouse. She is snuggled up on her needle felted leaves in a wool nest I crocheted.
She is a mix of merino and corriedale wools with a wire in her tail and has horse hair for whiskers. Her tiny toes are all wool – I think they are the tiniest I have made yet and were very fiddly but certainly worth every minute of the process.
Hazel was such a joy to make while I have been recovering from a life changing operation. Curling up into a little ball just like she is doing in her cosy nest is something I have felt like doing a lot the past few weeks as I have needed so much sleep.
I hope you like her. I will be posting more about how I made the leaves soon too.
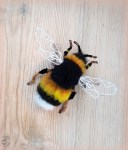
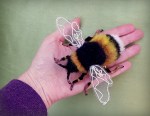
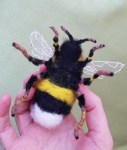
Here is my first attempt at a needle felted bumble bee. I gave it to my sister for her birthday last week. My sister’s name Melissa means ‘honey bee’ but she loves bumbley bees as they are so fluffy looking! I was brave enough to let it sit on my hand without any worries about being stung. Good job as it is much larger than life size!
I started off using black pipe cleaners as legs and antennae. I twisted them together in the middle to form the base for the body. I trimmed the pipe cleaners with small angled nail scissors to accentuate the leg segments and added tan coloured wool..
I tightly wound yellow, black and white merino wool tops over the middle section to form the head, thorax and abdomen and added more and more of the merino on top to build up the height. I needle felted the body with a barbed needle to sculpt into a bee shape. To create a furry bumble bee look I then used a reverse felting needle to pull out the fibres and added a layer of rusty orange over the yellow to give the colour more depth. (Note I didn’t use a cream colour core wool for this piece to ensure that only the pure colours I wanted came through when I used the reverse needle not any underlay of core wool fibres).
I had to get really creative for the wings. I searched my stash of crafty bits and ended up cutting out wing shapes from a silvery coloured organza bag and then hand sewed the pattern on each wing by hand with white embroidery thread.
Here are a few photos of the work in progress of how I started.
I am so pleased that my sister adored him!!
******how about creating your very own Mr Bumbley Bee? The detailed and beautifully illustrated PDF tutorial is now available here ******************
I am very excited to present to you my greatest needle felting challenge yet. He is modelled on a beautiful young Shetland sheepdog (Sheltie) called Schubert (Schubie)! The real dog is very much loved by his human mum and dad and his dad wanted a surprise gift for his wife (Schubert’s mum) for Christmas!
I rarely do commissions as I try to avoid the stress of it but having spent quite a bit of time admiring the real Schubert I had been wondering how it would be to needle felt a mini one and quite fancied a stab at it! 🙂
Schubert has so many tones to his luxurious fur so I spent quite a bit of time blending wool colours. He also has very long fur so I really put into practice my ‘adding long animal fur’ techniques.
I started off wrapping corriedale core wool over a wire armature. Then I added paw pads and then some detail on his face before starting on his belly fur and working from his tail end towards his neck with merino wool. I did his wispy feet hair and tail last. Please see the work in progress videos below for more info.
In an attempt to keep him as authentically ‘Shetland’ as possible I managed to include some brown Shetland sheep wool in his coat and his whiskers are made of black Shetland pony tail hair all the way from Scotland.
As with all my creations it took many hours of needle felting and love. I am very pleased with the way he turned out and I hope you like him too 🐶🐕😆
Here are some short videos of the process, followed by the final photos of Schubie.
Here is the process of the armature with the body shape sculpted over it in wool:
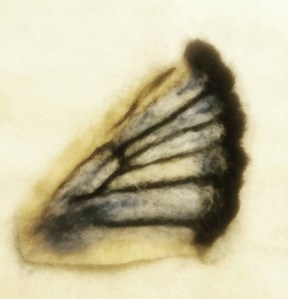
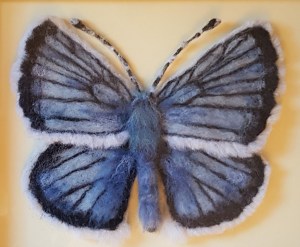
My latest needle felted project has been a challenge (nothing is ever simple with me!) but it has been so worthwhile to see the finished butterfly in its frame.
I have always loved butterflies and if you spend more than a minute with me you will notice that I have many items that are butterfly themed; stationery, cards, blouses, my wedding was adorned with feather butterflies and as you can see my Fit to be loved logo has a tiny orange butterfly.
I came across the Mazarine blue butterfly (scientific name Cyaniris semiargus which is pronounced sy-an-EYE-riss se-mee-AH-guss) over a year ago as it stood out to me not only for its beautiful markings and vibrant blue colours but also I was saddened to read that it was last recorded in the UK in 1904.
I envisioned what this beautiful creature may look like if I were to make it out of wool and to have it framed. It would be amazing to bring back an extinct butterfly with the art of needle felting!
I set myself this project and though I started a year ago with a few wing shapes and lots of imagination, life took a bit of a different turn.
Some of you who follow my Facebook posts may know that 2 years ago this week our worlds changed forever as our twin girls, Chloe and Grace, were born still at 24 weeks. Since then life has had its ups and downs as I have journeyed the hills and valleys of grief. Throwing myself into my long term full time job as a Manager of a charity helpline in South London as a way to distract from my thoughts has been a coping mechanism but this kind of life can only reach burn out. Also some of my passions including needle felting took back stage.
In April this year I realised I needed to make a change, to face my fears, start afresh, take a break. I also wanted to dare to follow my dreams of helping others on a new career path and so my husband and I decided to move out of London and I made a huge step of leaving my job. So here I am in Lincolnshire (back to my birth town of Grantham) after moving home 3 weeks ago. I have space to think, to breathe, to heal, to be, to create!
You will be pleased to know that my new career choice has enabled me to gain some free time to invest more in my needle felting.
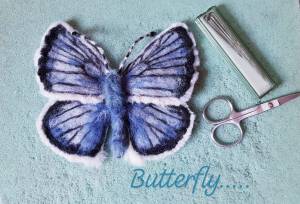
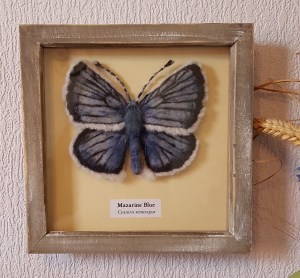
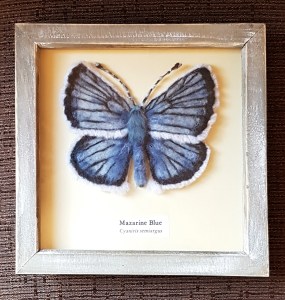
I hope you like the Mazarine blue butterfly which I have finally been able to complete. It has been lovingly handmade with soft merino wool over wire and mounted in a deep box frame to keep it dust free.
Butterflies are often a symbol of hope and life. This one is certainly the start of something new in my life. A path of hope.
What passions could you bring back? What hobbies can you start or revive? Where is your life taking you? What are you hoping for?
Just finished needle felting a beautiful black and white dog called Poppy. I wanted to capture the smiley faced playful character of the real dog Poppy who loves to fetch a ball, go for a swim and have lots of fun on her walks, sometimes with legs splashed with mud!
I am not sure what breed she is but she looks like a spaniel/collie cross.
She was a delight to make. She is made from core wool over wire and then merino wool layered over the top. Her eyes, nose and even her tiny collar with a paw print disc is made from wool. Her layers of long fur were added with my usual technique (click here for tutorial).
Once needle felted I was able to pose her with head slightly tilted, front leg bent and tail ready to wag……
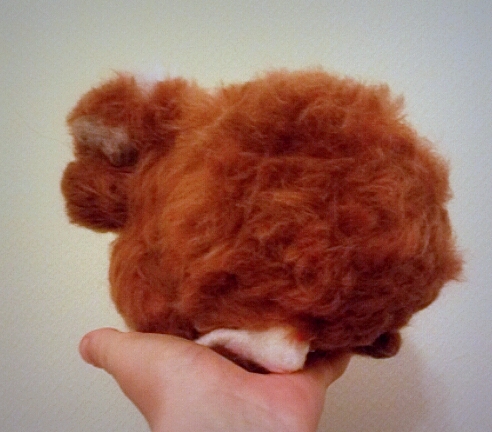
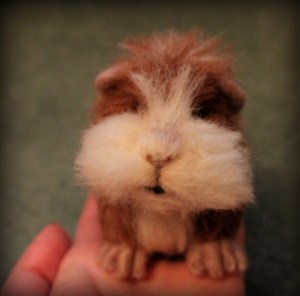
I would like to introduce you to a gorgeous needle felted guinea pig called ‘Teddy’.
As you can see he has a cheeky little face and I really tried to make sure his autumnal orange fur tones ended up looking as fluffy and soft as possible just like a real guinea pig.
He is now on his way to France to live with a lovely lady who will take good care of him.
Bon Voyage little guinea pig! You were a pleasure to create and I hope you have a wonderful life at your new furever home x
His core is made of natural undyed Corriedale wool from New Zealand. His beautiful soft fur and detail on his cute piggy paws, ears and face are of soft merino wool (non-mulesed) from South Africa (Cape). His toes have been sculpted by wool wrapped delicately onto wire.
His eyes are made of wool too, so no glass or plastic.
You can see he is life-sized from the close up of me holding him in my hand.
Hope you like him 🙂
Would you like to know how to make a guinea pig? (click on the photo to get started).
Making a needle felted animal and need some help adding layers of wool to achieve a realistic long fur look? (click the photo to learn more…)
See here for a variety of tutorials, tips and ideas to suit your project
Here are some other needle felted guinea pigs for more ideas.
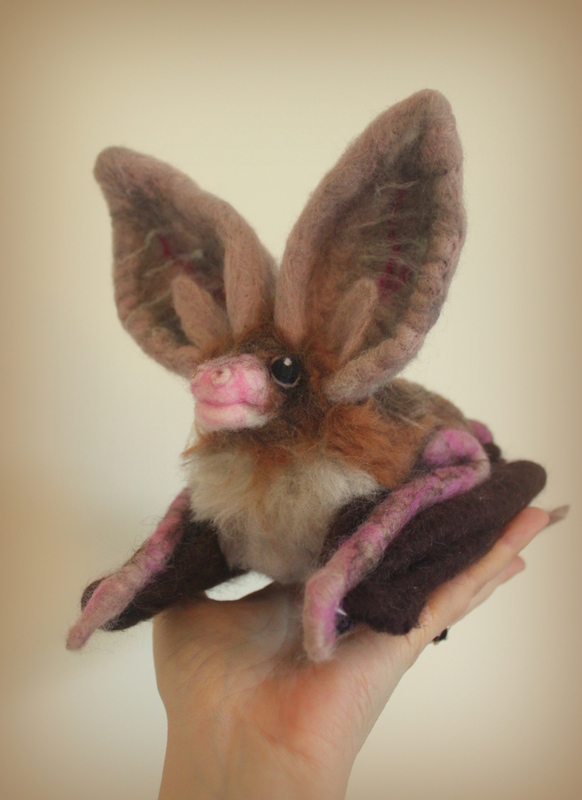
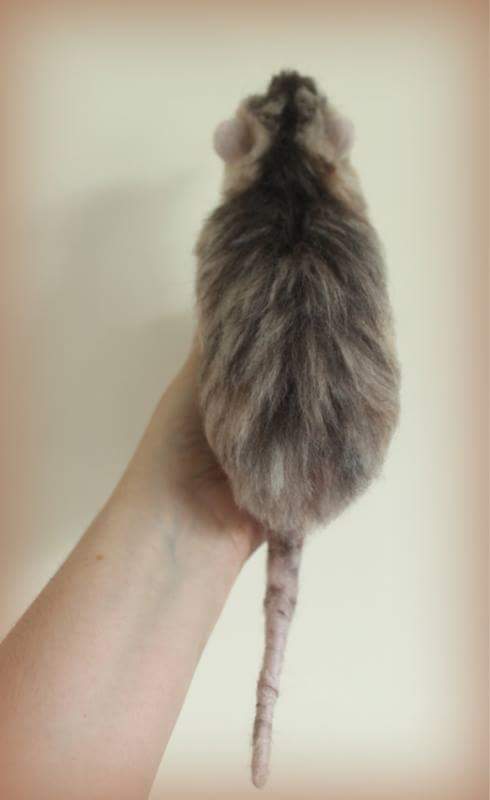
Seeing as I manage the National bat helpline (UK) as my day job it was about time I made a bat! Thankfully I was asked to make this little brown long eared bat (BLE) (Plecotus auritus) – although when I say little she is very big compared to real BLEs which have a body length of around 5cm.
She was a challenge as not only did I have to work out how to make folded wings and a tail membrane but BLEs have such massive ears as you can see. She is made of corriedale and merino wool and has wire inside her forearms, legs and ears.
BLEs can live up to 30 years, eat thousands of insects each night, have only one baby a year and these fantastic huge ears help them to listen for prey as they glean them from leaves.
This one is definitely alert and looking for a cuddle but usually at rest their ears curl back a bit like ram’s horns to show only the tragus (the pointy inner ear lobe). Hope you like her and agree that bats are amazing! 🙂
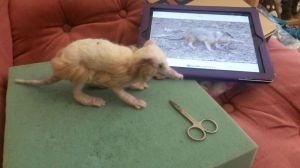
I had never heard of one until I came across this strange but interesting creature a few months ago when researching what to make my colleague for his birthday. I discovered that he had spent several years working on a conservation project for this intriguing animal in the Dominican Republic.
As soon as I saw the solenodon’s shrew-like snout, shaggy dense coat, long clumsy legs and thick scaly tail, I couldn’t wait to get started. As this was a secret birthday buddy present though I had to keep quiet..
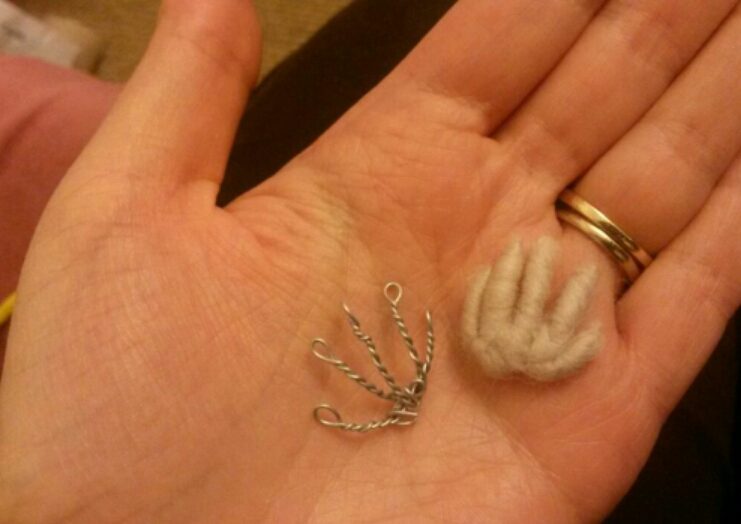
I started with a wire armature covered with pipe cleaners, then wrapped core wool (corriedale batts) over the wire to give him some shape.
Then came the layers of luxurious merino wool for his cream fur with dark brown flecks over the top. I also made tiny toes from thinner wire with merino wool wrapped over it. He has a lovely pinkish nose, ears, feet and tail and little black eyes to finish.
Not sure if many people have heard of this animal let alone needle felted one!!
Creating an animal you know is so much easier – with this one I had to keep looking at the photos frequently to ensure I captured its build and character correctly. It was a lot of fun !!
My colleague loved his surprise! yay!! 🙂
The real solenodon has a venomous bite – thankfully this one doesn’t!
Don’t ever miss out on another blog post! enter your email on the right hand panel of my about page for notifications of when the next post is up..:-)
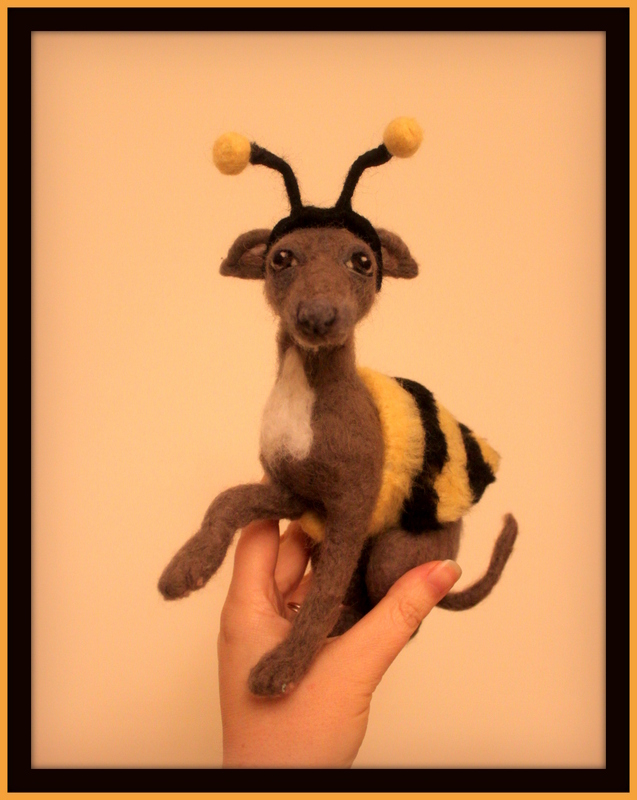
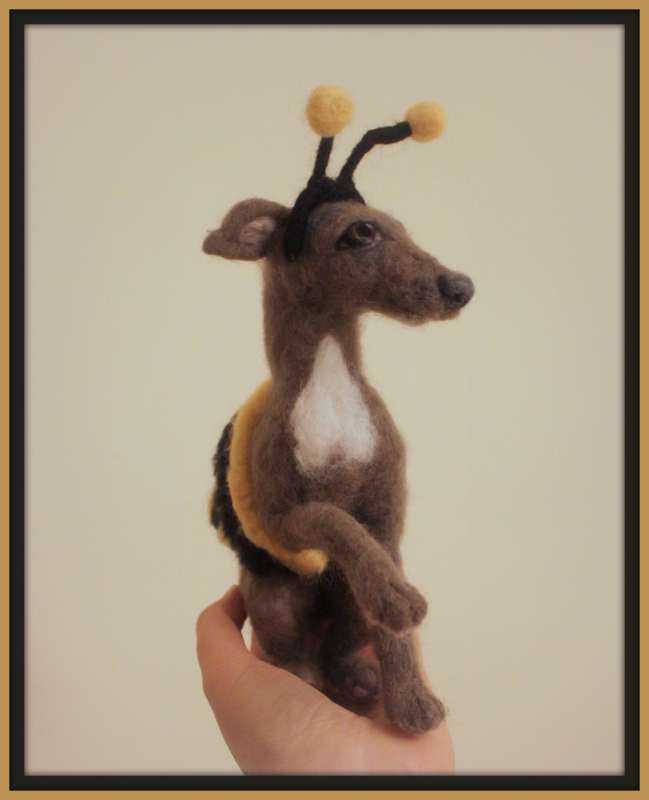
I made this cutie pie as a leaving gift for a work colleague. He is modelled on a real Italian Greyhound called Philip.
He is needle felted over a wire armature complete with a little fluffy heart shaped chest, pink paw pads and those sad puppy eyes that make you just want to take him home:-)
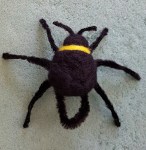
I soon learnt that my colleague also loved bee-dogs! Never heard of one of those before. There are whole websites about them!
So letting my imagine run wild I just couldn’t resist giving little Philip dog his very own bee antennae and stripey cape so he too can transform into a bee-dog!
My site includes links for where to source needle felting tools and materials. These are my personal recommendations and from my favourite suppliers who I trust and who have excellent reviews. Some are affiliate links so I may receive a small commission at no extra cost to you. This supports my website and enables me to continue to provide valuable content and for that I am so very grateful to you – Thank you!!


 with the art of needle felting")