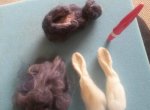
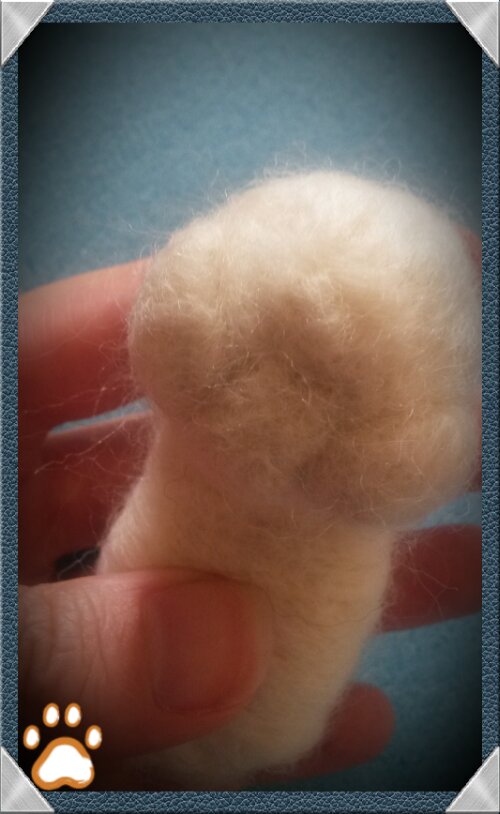
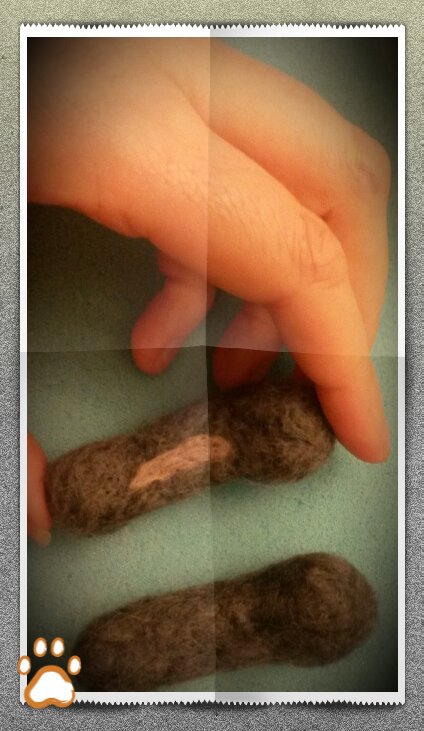
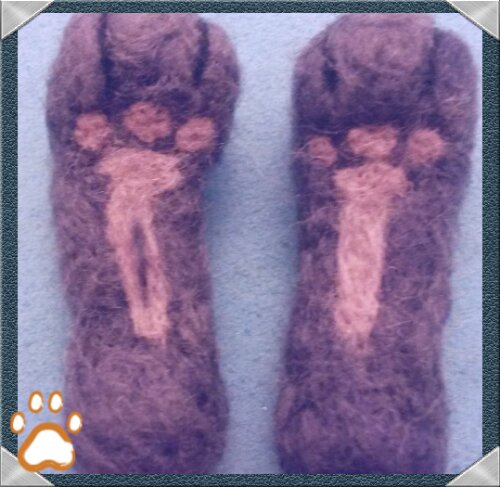
Tag Archives: felting

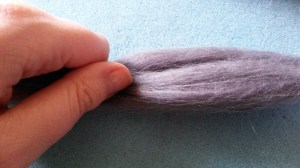
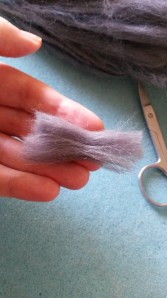
Protect long wool fibres while needle felting animals. 3 Top Tips!

So today I thought I’d answer a common question that I get asked a lot- “if I’m needle felting a long furred animal, how do I stop all of these lovely, luscious fibres from getting all matted, flattened, tangled and just looking a complete mess?”
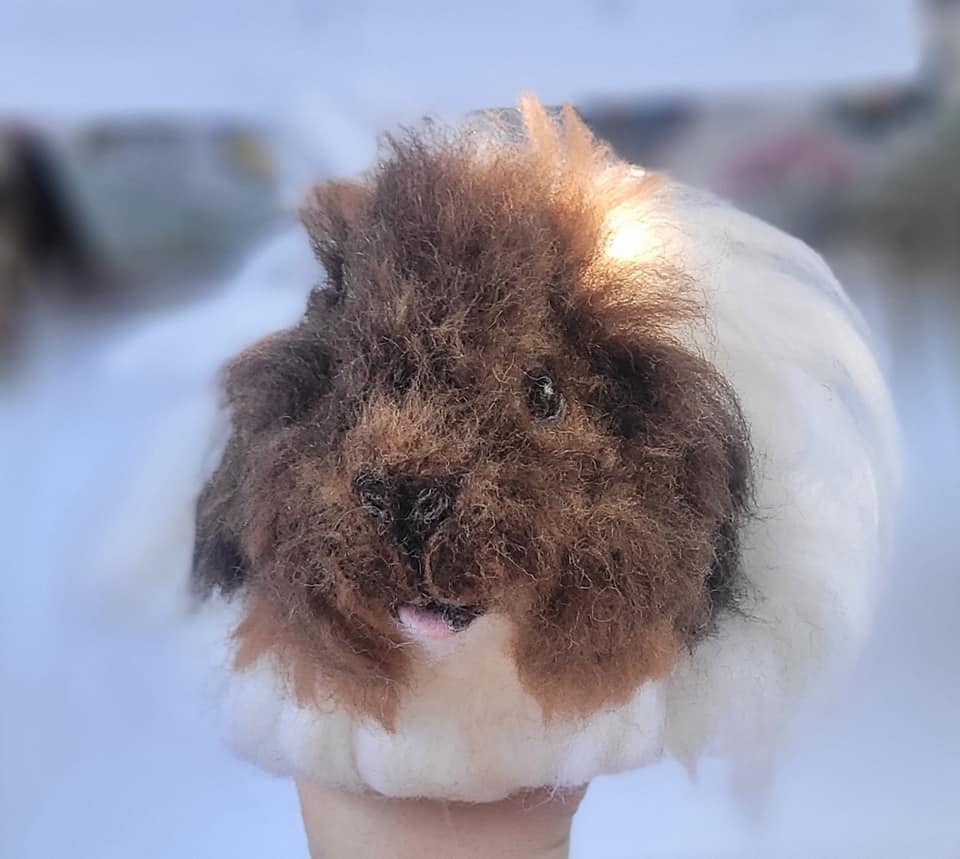
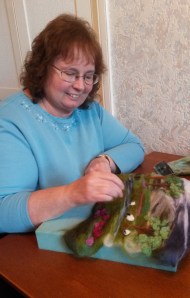
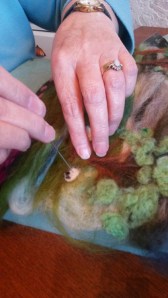
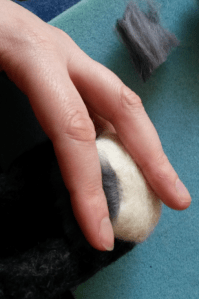
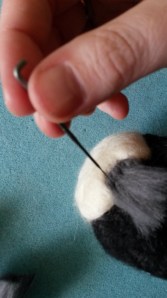
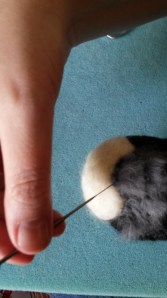
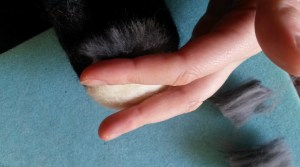
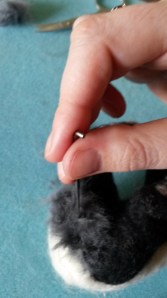
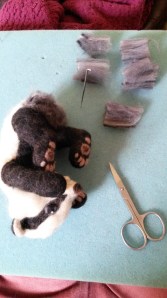
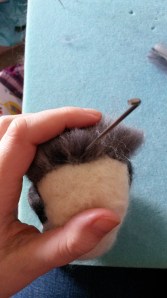
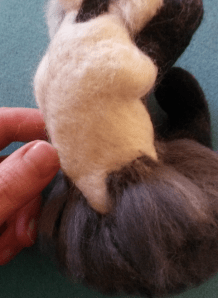
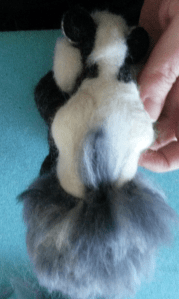
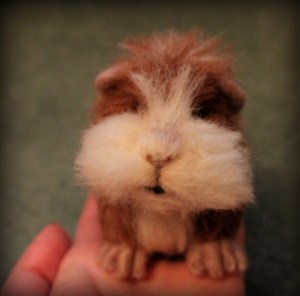
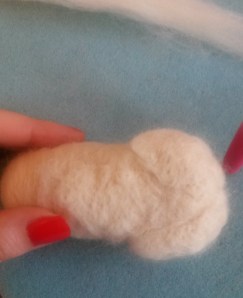
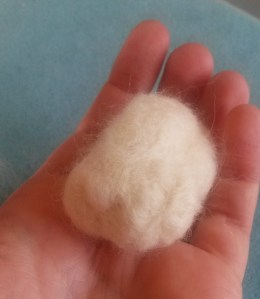
As you’re working on an animal, like this guinea pig I am making here, at some point you may have to turn it over or on its side. 

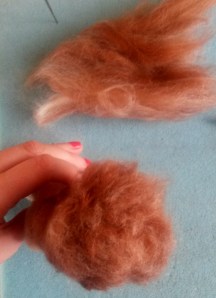
Some of it will get fluffed up a little bit and that’s just the big challenge with felting very long fibres like this, but you can eliminate some of the issues with my three tips! 

Please feel free to comment and say what you do about this because that would be really helpful to share tips and ideas with each other as well. 

3 Tips to help prevent over felting, matting, frizzing, of long animal fur

(Scroll to the bottom if you’d like to watch my video version)

  1. PLAN AHEAD

For an animal that’s upright I try to always start adding wool on the underside i.e it’s tummy and legs first so that I’m not having to turn over the lovely top layer. If I start off with the underside, that’s the bit that you’re less likely to see so if it gets a bit flattened it doesn’t matter so much.

I then turn it over and work on the top side and that’s the bit you’re mostly going to see. So you’re not going to be laying it down on all the lovely fibres and squishing them. The moment you turn your animal over, it’s going to flatten and potentially fluff up or leave the fibres looking frizzy and it’s just not going to look so great like how you added it in the first place. 

  1. CONSIDER WOOL TYPE

Think about the kind of wool that you’re going to be using. 

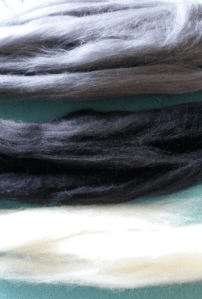
So a lot of us will use merino wool tops for long fur. These are great because they’re really well priced. They come in the kits and you can get loads of different colours. I love the range of colours for needle felted animals here.

However you do need to think about the way that the fibres lay and the way they can potentially matt and frizz up easily. 

I have been trying some other kinds of fibres recently. One I want to mention is alpaca wool (you can get some lovely alpaca tops here) and suri alpaca. They seem a lot finer and softer, but you will notice a silky like consistency to them.

So I’ve been mixing these (hand blending) with my other fibres and finding that the mix is less likely to frizz and tangle with a silkier result. 

Your animal fur can still end up flattening if you’re not planning your animal properly, but generally I’m finding that I can achieve a more natural looking fur as well as it matting less. It’s a beautiful, beautiful fibre to work with!

If you’re using a coarser natural wool top, such as a corriedale top. This is brilliant for replicating a coarse rough looking kind of animal hair rather than one that is smooth and soft looking. 

You can incorporate that into your animal fur look as well. I used this in some of the brown shades on my sheltie for example.

The only thing with it is that it is rougher in texture and so tends to felt a lot quicker. I find it’s tougher and not so soft and fine. But at the same time if you rub it against anything that is also rough, the friction will make it end up looking frizzy which may not be the look you were hoping for.. 

So think about the kind of wools that you might want to use. Try out a variety of fibres…

  1. A ‘GLIDEY’ SURFACE 

Think about what surface you’re working on. A lot of us will be using something like a felting mat or pad.  My Eco felting mat from Heidifeathers has a really nice consistency and firmness to felt on. I can do all my core work sculpting on there really well and also add shorter fur fibres.

But when I come to attach my long fur, the last thing I want to do is allow my fibres to rub against the felting mat material and felt my fibres a lot further. I want them to end up looking really lovely on the animal. I don’t want them to rough up and get tangled. 

So when you’re thinking about what you’re working on, think about something that is not going to be fraying your felted animal fur.

Once I’ve made the core animal shape base, I often move it off of my felting pad and I will use a slippery surface for the majority of my time…you’ll often see me use the inside of one of my beautiful storage box lids

This allows my piece of work and the fibres to glide against it and not rough up and felt.  It might move around a little bit but because my animal is contained in the lid area, it’s not going to slip too far. You don’t need to use a felting pad because the needle is not going to go through and stab into my knee or anything. Much of what I am felting onto is the thick body of the animal and as long as I don’t felt too deeply the hard surface is fine.

If I want to get at an angle though e.g. side of tummy, under a neck or felting fur on a leg I can still use the felting pad but lay a material over it.

A shiny smooth material like satin or silk is really good though test it out and see what you think.  You don’t want to get too much static adding to your issues so trial it. You could get a bit of this material to lay over the pad. Tightly wrap it if you can so it doesn’t slip as you felt or buy a purpose made satin or silk surfaced pillow. 

Or use a plastic bag or sheeting over the pad (I simply use the flat slippery bags that my wool come in). It can slide a little but that’s fine. 

A shiny paper like tissue papers or wrapping paper or card can also work but less likely to last as long potentially. 

The felting needle can enter the material a little but that’s ok. 

If adding long fur to a thin piece of the animal anatomy e.g an ear or tail I would rather go back to just using my felting pad and just be very careful about not messing up the fibres.  

Try a few options to see what works for you and find out what is most effective and comfortable for the process.

Whatever surface you choose, lay the animal down carefully against the surface before stabbing and ideally lay fibres in the way they should flow so they are less likely to fray at the ends or flatten or frizz from laying the wrong way. 

A few extra tips

Remember to make sure that you’re not constantly touching or pulling at the fibres. Make sure you aren’t using greasy fingers of any sort, and that you’ve washed your hands really well and you’ve got no extra oils in your skin when you need to touch them.

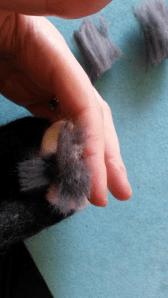
For particularly long pieces of fur you can twist the ends carefully and tuck them down before laying your animal down when you’re working on it to prevent the ends from being vulnerable to fluffing or fraying.  

To finish off your animal so it has beautiful fibres

Once you have added all the fur to your needle felted animal you can then revive the fibres if they have become a bit flat or disheveled and plump them up. 

Depending on the wool you have used and how you want the fur to look you could carefully brush them with an eyebrow brush or similar brush. For many of my animals however a brush can be too much for the delicate fibres and I don’t want to break or pull out the fibres I have taken my time to add and so I simply use a clean finger and thumb to tease fibres in the direction I want them to go and to unflatten them. 

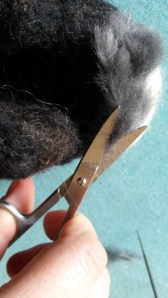
A normal sewing needle or sometimes my barbed needle is also a perfect tool to manipulate the fibres and to separate them out so they still look like realistic animal fur. Then a final trim with scissors if needing to tidy or remove any excess fluff! 

I hope these tips have been helpful. Let me know your thoughts on them. 😊

Here is a video version if you prefer to watch or listen: How to protect long wool fibres while needle felting animals.

Please let me know what you do to help protect your long fibres, I’d love to hear your hints and tips too 🙂

Needle Felting Wool: A Guide To The Different Types And How To Use Them

A question I often get asked when creating my needle felted animals is ‘what type of wool did you use for your core wool?’ or ‘what wool is the dog’s long fur made of?’

When you first start needle felting the variety of fibres out there and knowing what to start with can seem really confusing and somewhat daunting. There are not only different animal fibres you can choose from (e.g. sheep, alpaca, baby llama, camel, even dog fur etc) but there are also vegan options such as viscose, acrylic, bamboo, hemp, soybean, nettle, pineapple or banana fibres. 

When felting with sheep wool there are different breeds of sheep that produce different textures. Some are delicate and soft with straight fine fibres, some are more thick, fibrous and harsher to the touch. Some are easy and quick to use as a core wool and some are better to use as a top coat. You can get natural undyed wools which come in some lovely whites, creams, greys and browns depending on the breed or you can opt for wool that is dyed (or dye it yourself) and there are numerous amazing colours to choose from. 

In this guide I mention some sheep breeds that I love but my main aim is to help you understand the different preparations of wool like knowing the difference between a batt and a top. It is so useful when learning to needle felt to know what these terms mean, to save time and money and to know practically how you might use each of the different wool types at the different stages of making your needle felted animal. 

I give some suggestions from my own needle felting journey that will hopefully provide some insight into the types of wool available but I’d encourage you to test different fibres for yourself. It’s very much part of the fun when learning and no doubt you will find some amazing discoveries along the way. 

I have also included links in this guide for where to source the different types of needle felting wool – please see my links disclaimer in the right side panel for more details. These are all from Heidifeathers shop on Amazon. They sell a wonderful range of wool and the biggest range of barbed needles in the UK. They have excellent customer reviews and postage is usually free. If you would like to just browse all their products rather than using the links below then here is the shop link.   

Carded Wool – Batts and Slivers

What is carded wool/carding? 

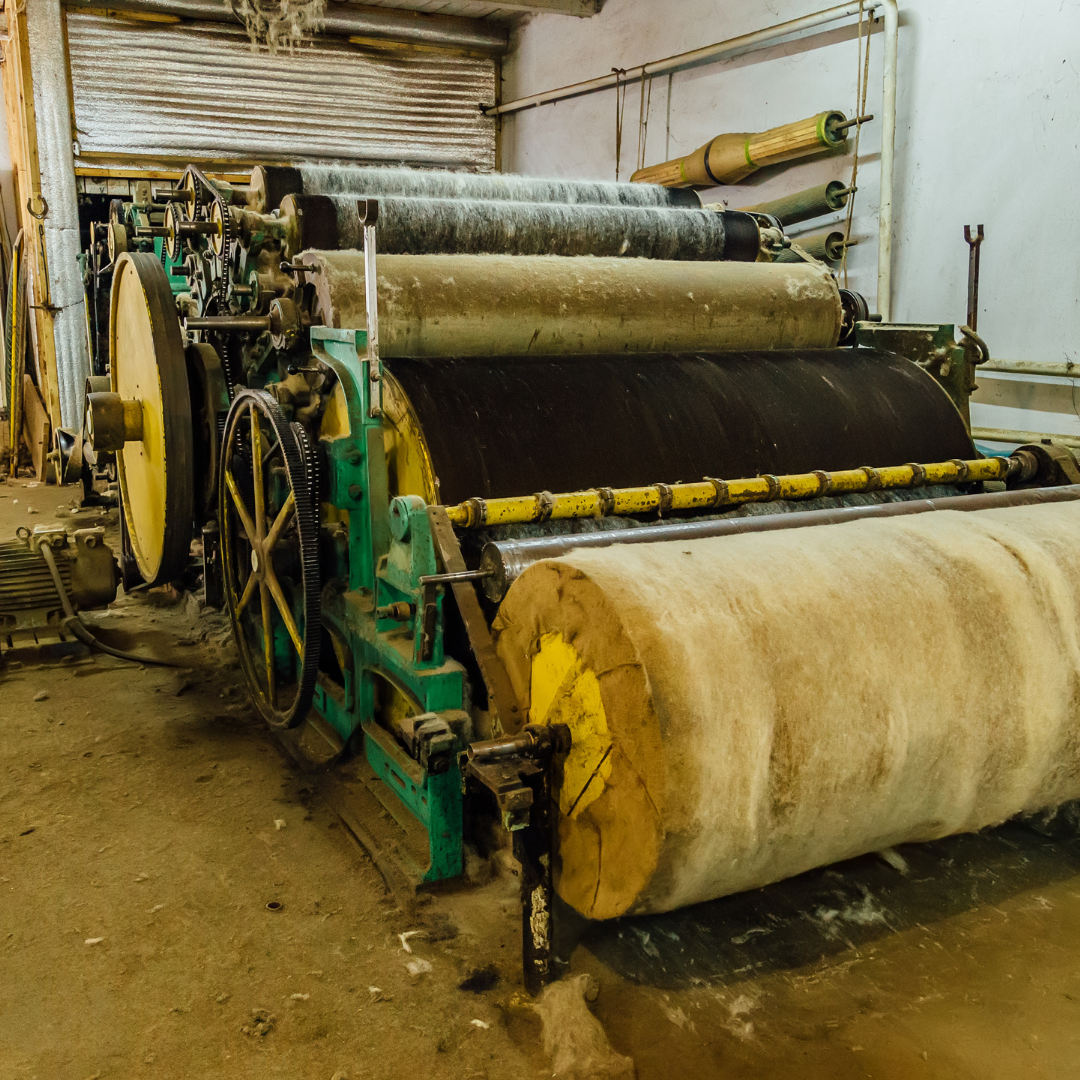
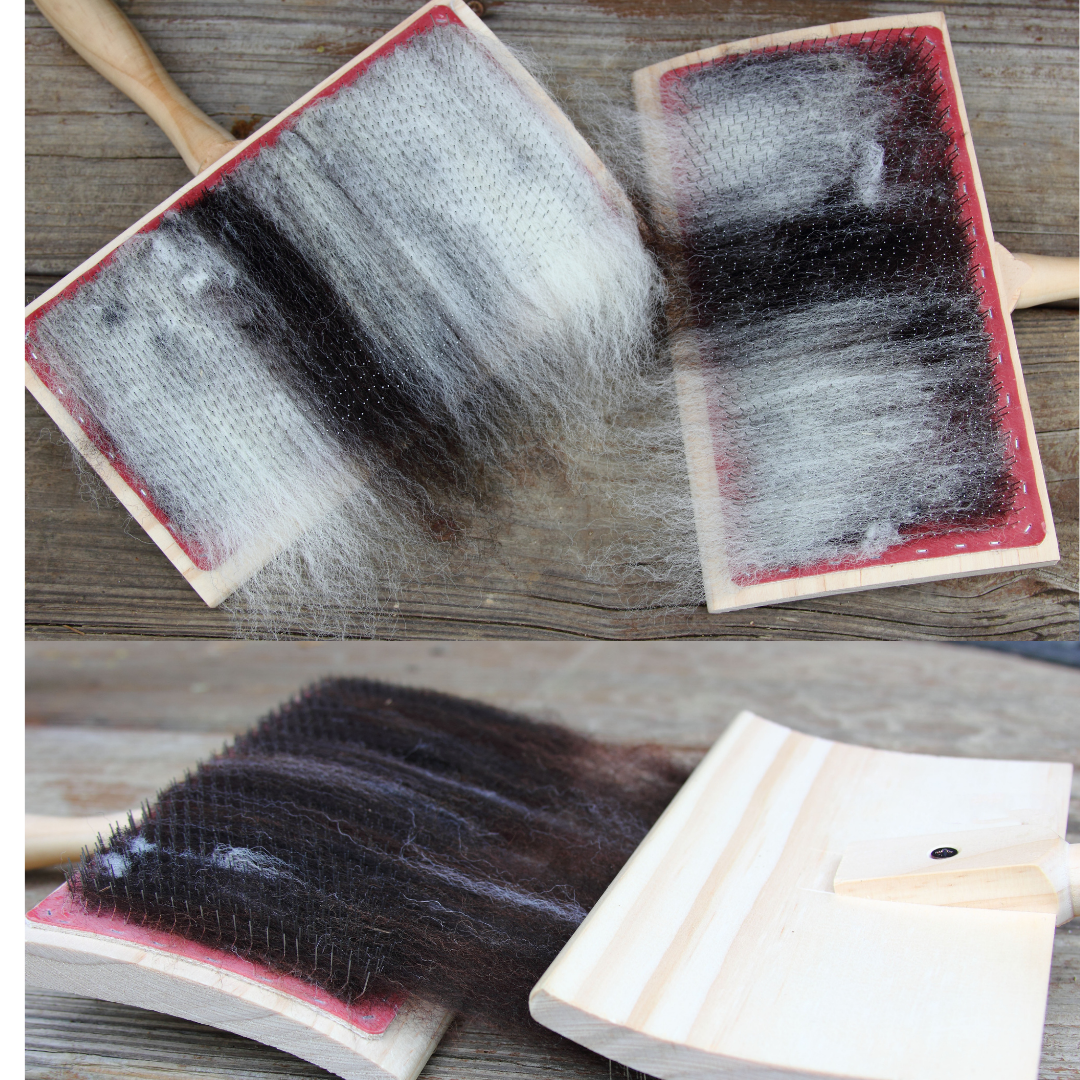
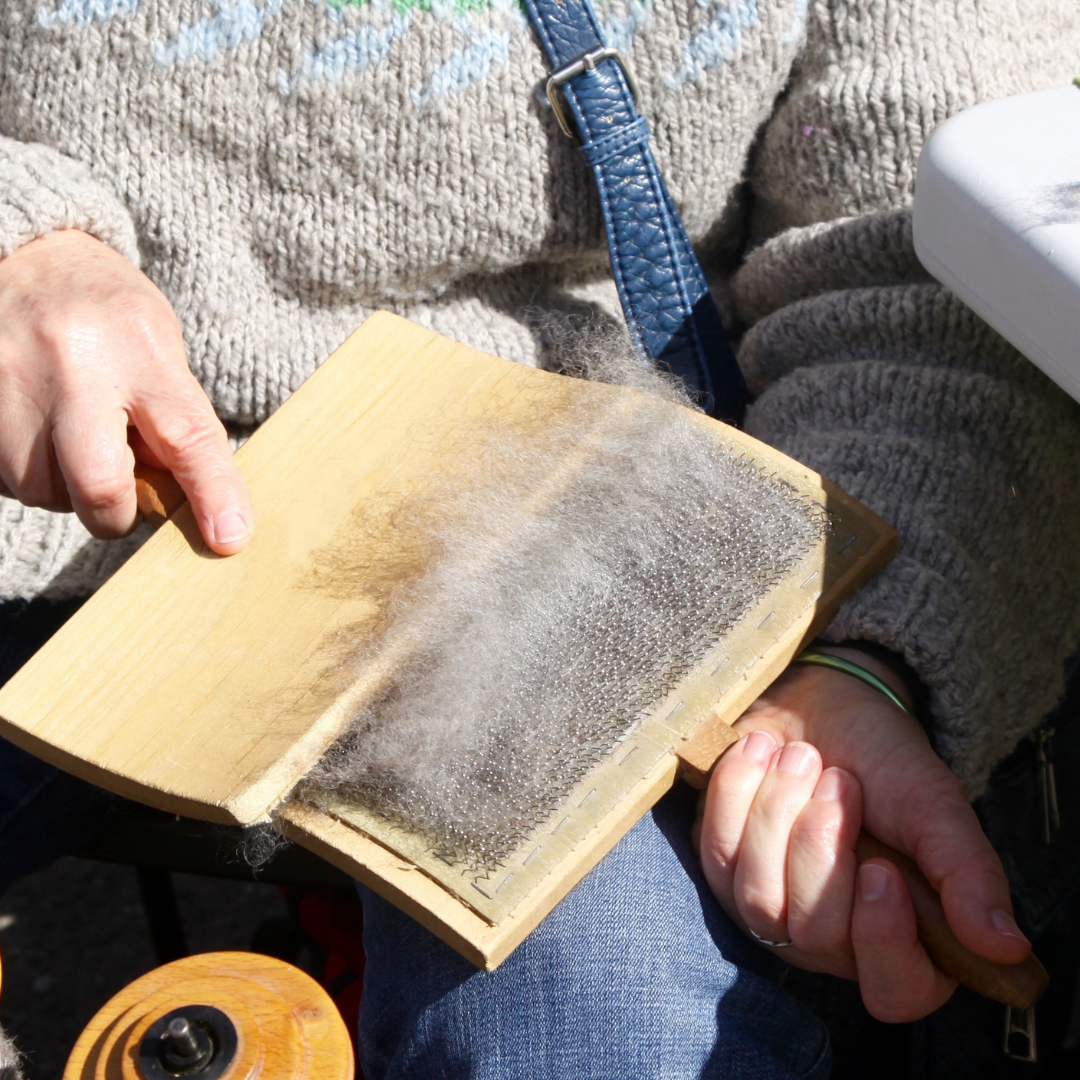
The process of carding wool can be achieved with a machine (usually a drum carder) or by hand using two handheld carders (some people use dog brushes). Traditionally the wool is first of all washed, removing most of its lanolin and then passed through differentially moving surfaces so that the fibres are further cleaned of vegetable matter and are rid of any tangles or clumps. The result is a continuous mesh of mixed up fibres.  They come as carded batts or slivers. 

What is the difference between a batt and a sliver?

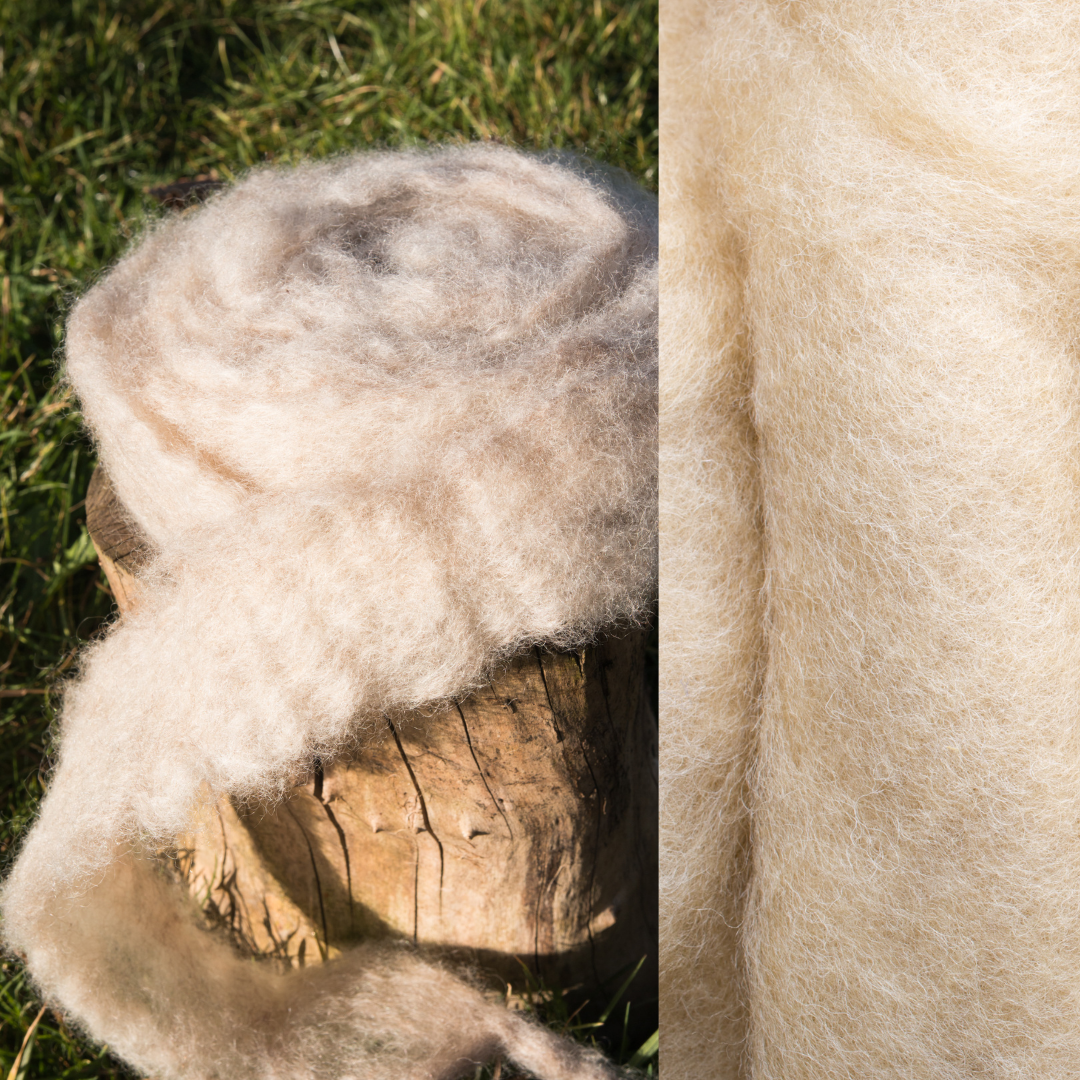
Carded wool can be bought as a carded batt –  which is simply a big thick sheet of mixed up wool fibres or it can be bought as a carded sliver which is the same as a batt but it comes as a very long strip. 

Both are great for most needle felting projects as you can easily pull off small pieces or long sections and start making shapes. As the fibres are short and go in various directions rather than laying in the same way, this wool type is super quick to felt with. 

Here is a carded wool batts bundle of 4 natural wool shades; white, grey, dark brown and mid brown.

What would I use carded wool for? 

I find carded wool is great to use as a core wool for my medium to large needle felted animals. I like using natural undyed carded corriedale, Jacob, or mixed breed wool for this. 

Here is the white Jacob wool batt which is great for the core shape of your animals. It also comes in other natural shades.

Core wool is often cheaper to buy (especially in bulk) saving the more luxurious softer wools such as merino wool for the coloured top coat. You don’t see the core wool which makes up the inside of your felted animal so it doesn’t matter if the finish looks good or if there’s a tiny bit of vegetable matter in the wool. The important thing is that you have made a good firm shape on which to attach your outer wool. 

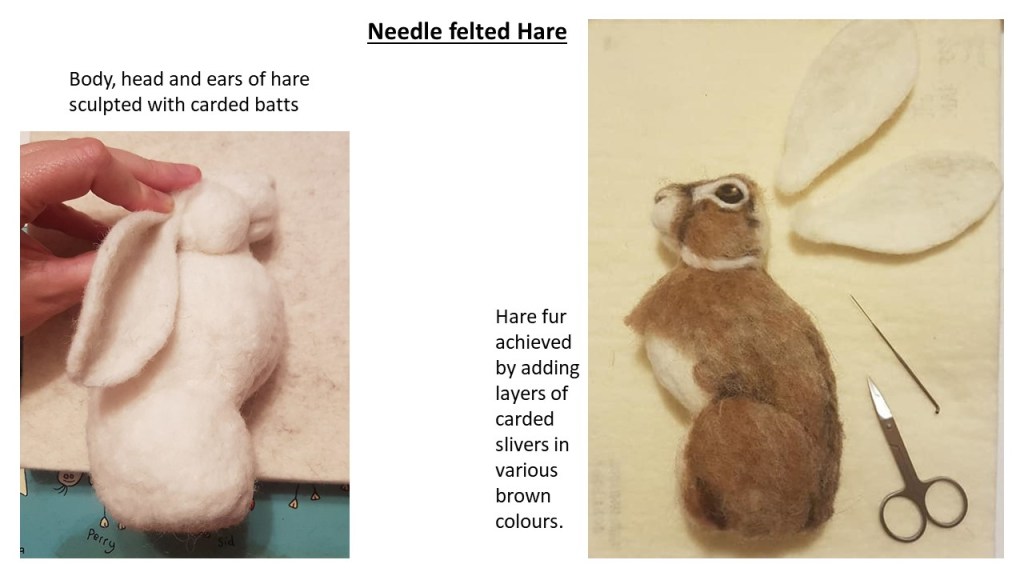
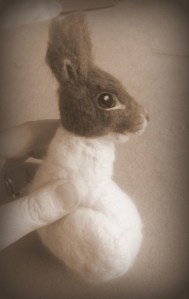
I prefer the carded batts of wool for sculpting the basic head and body shapes and for making flat features such as ears. See below for my hare.

For animals which have a wire armature I find it more practical to use the carded slivers for wrapping lengths of wool over the wire, then I use either batts or slivers to build up the shape and musculature. 

Here is one of my favourites – the white corriedale wool sliver.  

Batts and slivers come in a variety of colours and if you are making a small animal and not using the long fur technique you can skip the need for a core wool and just start sculpting your animal in the colour it is. 

If you have started off with core wool, you can add the carded wool colours as a top coat. They are great for layering different shades of colour and blending them. You can also use the long fur technique with the coloured batts to replicate a wavy/rough coat appearance. Batts work well too if using a reverse needle to pull out fibres to achieve a fluffy coat / hairy look or for blending colours. 

This ‘Creature Mix has six wonderful animal shades of needle felting carded wool slivers.

Tops/Roving

What are tops/roving?

Tops and roving mean more or less the same thing when it comes to needle felting. After the wool has been washed and carded it can then be combed so that all the fibres end up going in one direction to form long lengths that can be wrapped up into a ball. They come in all sorts of sheep breeds and most often you’ll see them in merino wool in a vast array of colours to choose from. 

What would I use tops/roving wool for? 

As it stands this type of wool is not so easy to felt together as the carded wool due to the fibres all laying in the same direction, however it is brilliant for adding pieces of wool to your needle felted animal to resemble long fur. The merino wool tops in particular are fine, straight and soft and so I will mostly use them for straight fur. Your animals can look really realistic with a bit of patience and some beautiful merino wool tops.  

This merino tops ‘Toy box mix’ has 12 colours which are perfect for needle felted animals, including the pink for the inside of ears or for the nose or paw pads on some animals.

When you look at a real animal its coat is rarely all one colour but different tones of light and dark so by using a number of tones of wool you can get your animal fur to look as realistic as possible.

The following packs (each containing 6 colours) are ideal for when you need a variety of tones of the same/similar colours. I have given examples of animals you might use these packs for as inspiration, many of which I have made myself in the past.

‘Beautiful Browns’

For making a donkey, mouse, tawny owl, mole or hare.

‘Grand Greys’

For making a badger, koala, wolf, seal or grey squirrel.

‘Outstanding Oranges and Yellows’

For making a red fox, red squirrel, bumble bee, yellow chicks or an orangutan.

Gleeful Greens’

For making a lizard, turtle, snake, frog or parrot.

If you need an extra colour that isn’t included in the packs above you can choose single merino wool colours too here.


On some of my animals I add in tops of another sheep breed (such as corriedale/ Shetland) to the merino tops where I would like to have a more wiry/ textured looking coat for more realism. I find that the sections I add have a bit more thickness and robustness to them than just the soft merino.

If you would like to stock up on and try out some tops in a variety of sheep breeds then this ‘Animal Mix’ is a wonderful collection of soft natural mixed wool tops from 10 different breeds including blueface leicester, manx and merino.

For a very tiny animal such as a needle felted bee where I want to reverse felt the colours, I don’t use a core wool but make it from the merino tops I already have to hand rather than necessarily buying new wool but I will hand shred/blend the fibres first to make it easier to felt with. My bumble bee tutorial here shows you how to make a bee from merino wool over a pipe cleaner armature.

When you need specific individual colours and types of wool, Heidifeathers also sell a variety of single colour slivers, natural sheep or alpaca wool tops in a variety of animal colours and bright colours too. Take a look here.

This photo shows the rabbit coloured carded sliver. I love this one.

Locks

You can find lovely natural curly locks in the cleaned but uncarded wool of some breeds of sheep (such as Teesdale) or from the angora goat – mohair. These can be attached to your needle felted animal to resemble curly fur / wool / hair for example when making a mane or for curly haired dog breeds or making a sheep/goat.

Heidifeathers sell these really soft curly mohair locks in a variety of colours.

This photo shows the brown mix.

I have personally found that if I need to add curls all over my animal rather than just adding a small numbers of locks e.g. to a mane or tail, then it is far cheaper and fun (though time consuming) to curl some wool tops by hand either by winding the wool round knitting needles or plaiting it, then wetting with a little water before leaving to dry.  This technique also ensures every part of the wool is fully curly as some of the locks you buy may not be a perfectly formed curl or there may be matted/frizzy parts. 

My favourite sheep breeds

I have mentioned some sheep breeds above that I love so here I have included some more information about the breeds and their wool.

Corriedale

The corriedale sheep is a cross breed from New Zealand (merino crossed with Lincoln and Leicester) and now bred internationally.

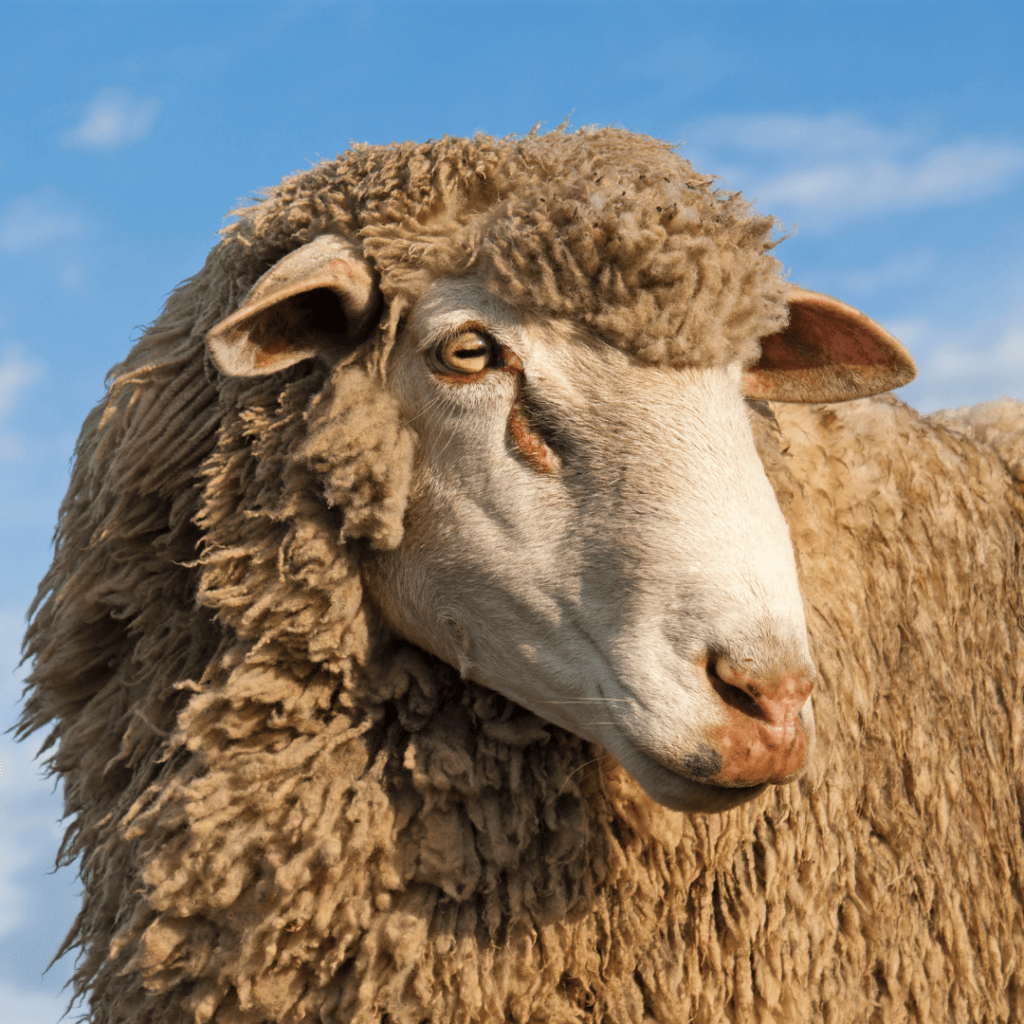
It’s a very cute sheep to look at with its super thick wool more or less covering its entire body and over its head like a hoodie.

Corriedale wool is fairly soft to feel and great to felt with and I love its natural creamy white colour. This is the wool I started out using as a beginner and though I love the other breeds too this is one I often stock up on. I use carded and tops for my animals.

Merino

The merino is a worldwide bred sheep but originating from Spain, this is very popular across Australia and New Zealand.

Similar in looks to the corriedale sheep with its wool over its head but the wool is extremely soft and fine.

I always choose a non-mulesed merino wool as unfortunately the painful practice of mulesing still exists on some farms where some skin is also removed along with the merino wool in some places. Merino tops are brilliant for adding pieces to my animals to resemble long fur and merino batts are wonderful to reverse felt for a soft fluffy coat.

Norwegian

There are many sheep breeds in Norway but the one most often used for wool nowadays is a cross breed of the Cheviot and the Dala and Steigar. 

These sheep look slightly more slender looking than the above breeds as their fleece is longer and not so springy.

The wool is really easy to felt, feels soft and comes in a lovely natural creamy white colour. I particularly love using carded Norwegian batts.

Jacob

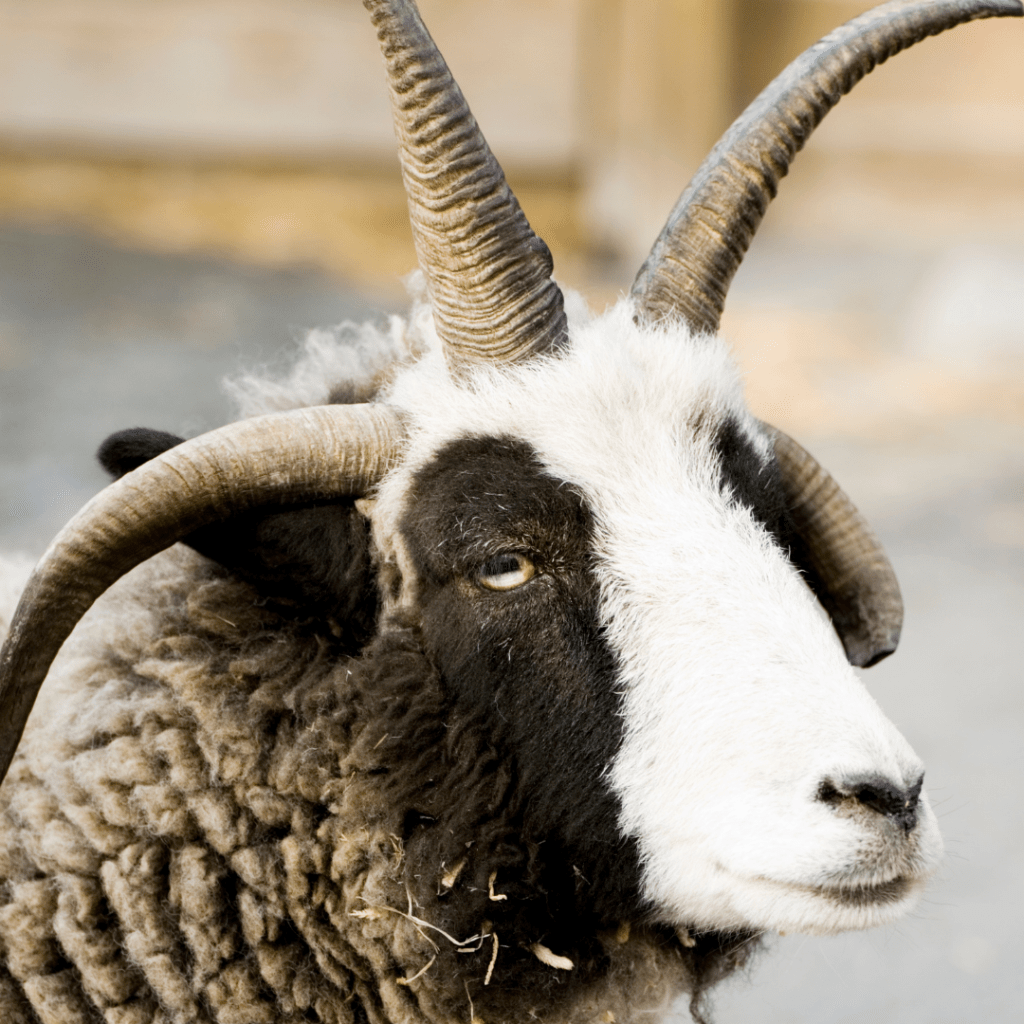
Jacob sheep are so interesting to look at. They have some great markings, usually spots or patches of black or dark brown against a white background. They are also polycerate which means that both the ewes and rams have 2, 4 or even 6 horns.

Jacob wool comes in brown, black and white, and is quite soft and silky to feel though still quite coarse. I like the carded batts in this wool.

Shetland

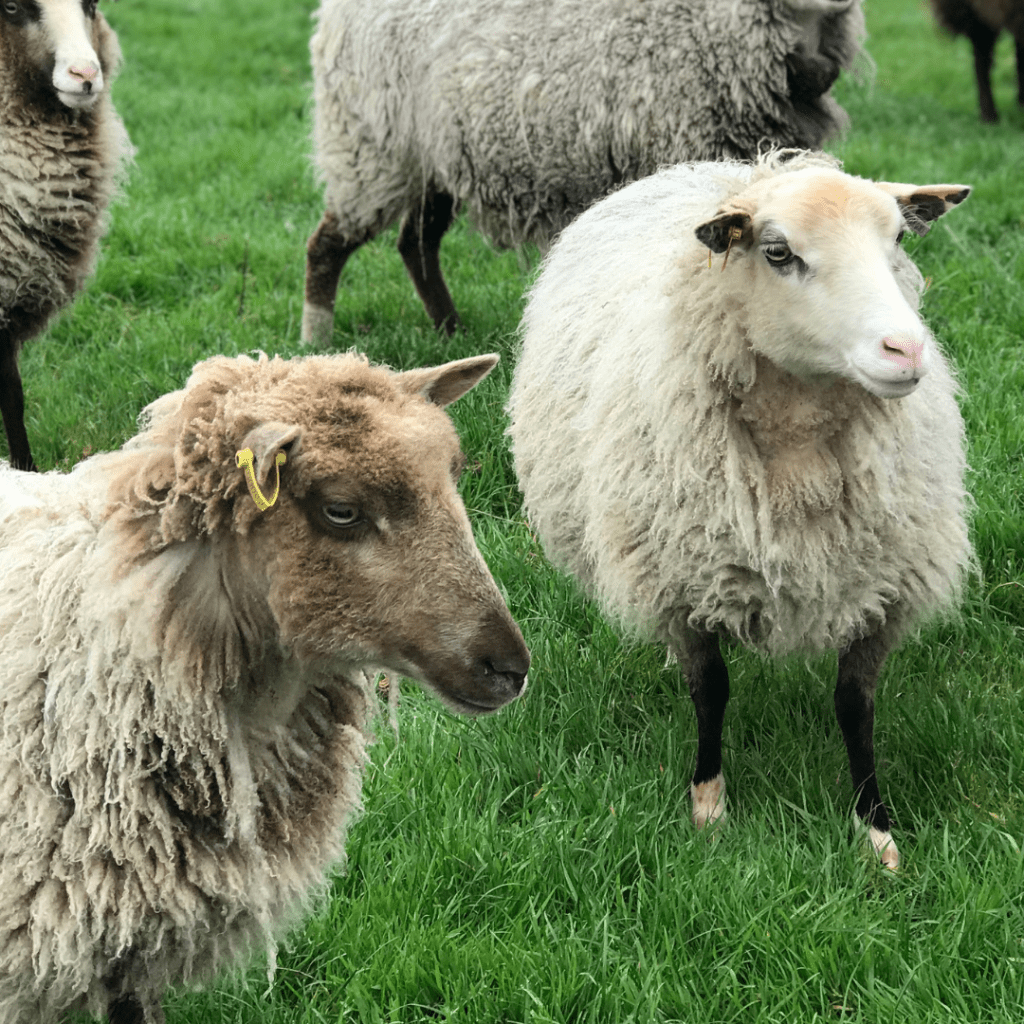
This breed is the smallest of the British breeds and predominantly found on the Shetland Islands. It’s origin is not confirmed but is likely to have originated from Scandinavia.

Their wool comes in shades of white, brown grey and black making it really versatile in its natural form. It is fairly soft and fine with a more silky kind of feel than the corriedale. I love using Shetland tops as long fur for my animals.

Which sheep breeds and wool types do you love to use the most?

Needle felted pipistrelle; Species Champion award

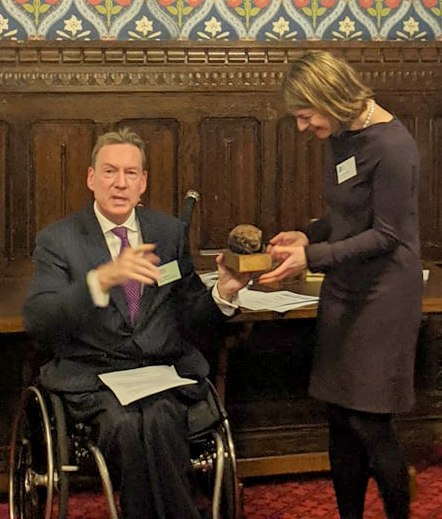
This week has been an exciting week. The needle felted pipistrelle bat I created was mounted and given as an award at the Palace of Westminster to MP Helen Hayes as she is the species champion for the common pipistrelle and won best parliamentary species champion at the Species Champions Annual awards ceremony. Well done to Helen for all her hard work!! It was presented by BBC Journalist Frank Gardner.

I am so happy that my artwork became something so special for an amazing project. The project is run by the Rethink Nature partnership, a group of seven wildlife organisations working together to make a difference to species conservation. (Amphibian and Reptile Conservation, Bat Conservation Trust, Buglife, Bumblebee Conservation Trust, Butterfly Conservation, Plantlife and the RSPB).

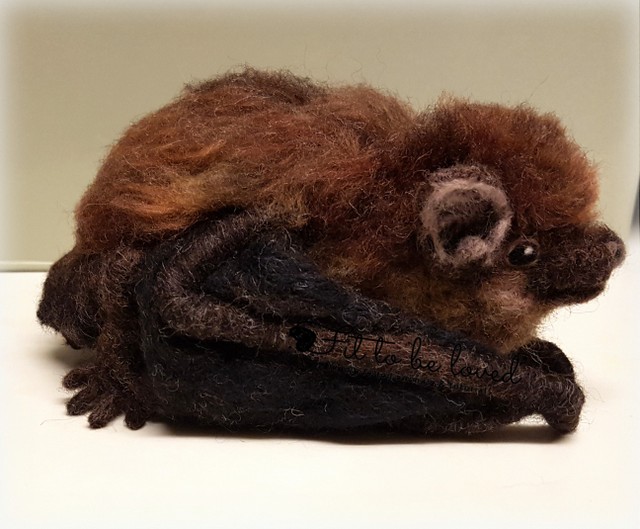
The little bat took many hours of sculpting through the art of needle felting. His body is made of core corriedale wool. His wings, legs and tail are wool wrapped over wire.  His beautiful brown coat is made of a blend of corriedale and merino wool. His eyes, nose, ears and tiny feet are made of wool too.

The common pipistrelle as its name suggests is the most common bat that you might see flying in your garden on a summer night! Yet like all our bats in the UK they need our help and protection to ensure their numbers don’t decline again. They are so important to our environment! I love bats but some people don’t and this is usually as they don’t know much about them and bats are so misunderstood.

When you look at a bat close up they are actually very tiny and many times smaller than the size of my needle felted one. In fact a real pipistrelle bat weighs about 5g and their forearm length is less than 35mm in length. One of these tiny creatures can eat around 3 thousand insects in one night – how amazing is that!? Due to destruction of their natural habitat many bats now need to roost in houses and churches and rely on people to preserve these roosts.

Each bat usually has only one pup each year and too often that little pup will become lost or get caught by a local cat and so many each year don’t survive. The Bat Conservation Trust has a fantastic helpline if you find a bat in need of help. You can also find out how to support their work 🙂

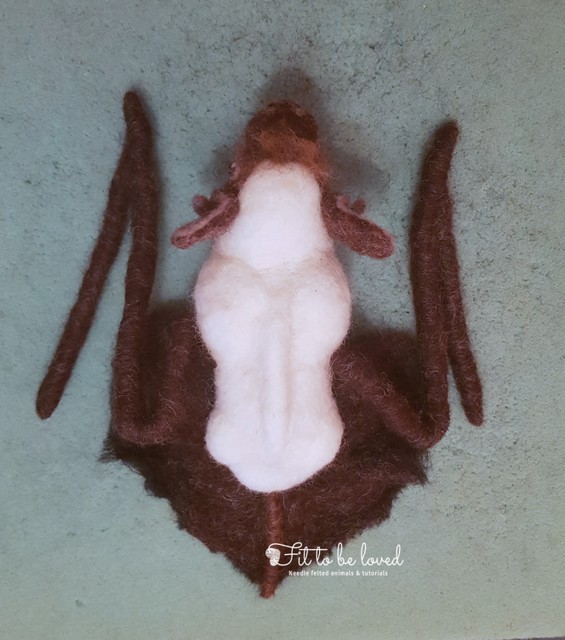
Here are a few work in progress photos of my needle felted bat…

Having worked for 12 years at the Bat Conservation Trust I have quite a good knowledge of bats but it was still a challenge to get the anatomy right. Bats are so fascinating and detailed with their tail membranes and wing membranes! I wanted to give the illusion of fully formed wings that could spread out but tucked in as if it has landed. I hope I did it justice.

As with all my needle felted animals I used lots of photos of the real animal at every angle for reference. Thankfully no needles were broken but I did remake his face at one point and a good deal of patience and chocolate rewards were needed along the way!! This aside I really did enjoy making him and I was so overjoyed to see the smile on Helen Hayes’ face too when she received him as her award !

Needle felted animal vote

Hi everyone.  I have set up a fun poll to help decide what to make next.

I have chosen 5 animals which I think will be quite a challenge to needle felt.

Which one would you like to see me make next? 🙂

I will take photos as I go to show progress as usual on my facebook page and will blog about it once finished.

Whatever I make will be one of a kind and available in my Etsy shop.

So please vote here:

https://fans.vote/v/ACjrxdvd3l4

Miniature donkey

Miniature donkey

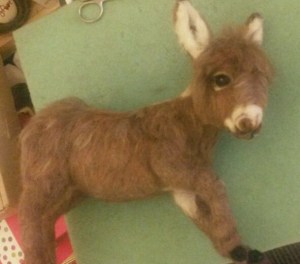
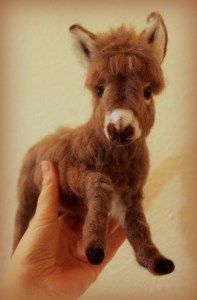
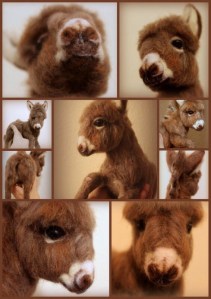
I can now reveal my latest creation, a miniature donkey!

I was sent some photos of an absolutely gorgeous real miniature donkey and asked to needle felt her as a surprise Christmas present for her loving owner. It was an absolute pleasure to create her as I looked at those cute eyes and wonderful fluffy coat.

As she is a hoofed animal I quickly realised that to stand up she would need some stability so I wrapped core Corriedale wool over a wire armature. She soon started to take shape!!

Needle felted donkey 1


Needle felted donkey 2


I made her as a young fluffy donkey with long fur rather than when she was a bit older after a summer moult but this meant I really had to think about how to get the right colour and texture for her fur. I ended up buying 4 wool colours and mixing them carefully by hand with other brown and cream colours I had to get the right shade.

image


Once I started adding the long fur I had to be so careful not to let the strands fuzz up when laying the animal down to reach all sides. I therefore had to start on the legs and tummy and do the back and face last so the fur was looking its best in these areas and I didn’t end up squashing her ears.

Needle felted donkey 8


Needle felted donkey 9


Needle felted donkey 10


Needle felted donkey 11


Needle felted donkey 12


Needle felted donkey 13


Thankfully donkey fur is slightly matted so I didn’t have to worry too much about it having to look silky smooth! I just love doing faces so this was hard for me to have to wait til the end but it was definitely worth it 🙂

Needle felted donkey 3

Needle felted donkey 4


Needle felted donkey 6

Needle felted donkey 5

How to add head and limbs onto needle felted animals

“How do I felt body parts onto my needle felted animal? How can I make them stay secure and not easily pull off?”

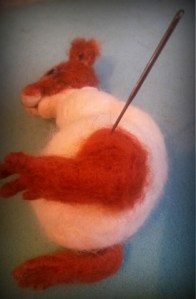
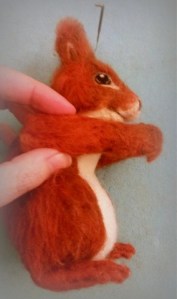
Today I want to show you some more basics of needle felting animals. In my other tutorials you will see how to make various animal parts e.g a badger head, bunny ears as well as the various stages of felting a full guinea pig, bunny etc. However one of my followers commented that it would be good to do a tutorial showing how to felt the head and limbs onto your animal. It is not so easy to demonstrate with photos but I have done my best by using the shots I took along the way when sculpting Chestnut; the little red squirrel I made.

There are many ways of felting one piece to another so you may have already found the best way for you. The method I will show you is just one way and was the easiest for my squirrel at the time. 🙂

Please note that the following tutorial will assume you know a little bit about needle felting already. See basics here.

Adding the head

01-Needle felted squirrel (5)

At this point I have felted the head more or less to completion. The body has its shape but no fur yet…

I have sometimes only got as far as the shape of the head when joining it to the body but I quite often find that it’s the head of an animal that gives its unique soulful character (especially once it has eyes).02-Needle felted squirrel (8)

I often don’t decide on exactly how the body will look until I have the head sorted. Being delighted by the cute nature of the face (as is what happened with Chestnut) often inspires me to continue on with the rest of the body. 

1) To join two felted objects together leave enough loose fibre on at least one of the objects where the join will be so that it can be felted into the other.

14-Needle felted squirrel (27)

It is a lot harder and perhaps impossible to join them if the wool is felted too firmly and the fibres cannot mix and bind with the fibres on the other object when you stab with your needle. 

As you can see, the neck at the top of Chestnut’s torso has been left loose and soft. The base of the head is soft to medium felted rather than firm to allow plenty of further stabbing..

2) Fluff the fibres up a bit before putting the head into the position you would like it to be. 

15-Needle felted squirrel (28)

3) Stab at the wool from a 45 degree angle under the chin of the animal. In effect what you are doing is poking the loose wool from the neck into the head. Insert the needle as deep as it can go and on all sides of the neck. This helps to anchor the head to the body. Remember (particularly at this stage when the head will just fall off the body if you try any other way) to lay your animal on a felting pad/brush and stab away from your fingers!

17-Needle felted squirrel (30)19-Needle felted squirrel (32)

To join body parts I use a medium width barbed needle (I find these are stronger than the finer ones for this purpose but do try out various ones to see what you are comfortable with and what works best for the wool and size of animal you are felting). If possible use one with many barbs along the length to help bind the fibres and as the needle will be inserted quite deep.

4) Once it feels like the wool fibres have attached so much so that the head no longer topples away, you can try felting at other angles at various depths. Here I laid Chestnut’s head over the edge of the felting pad as it made it easier to get the angle I wanted and also prevented me from squishing her carefully felted nose 🙂

21-Needle felted squirrel (34)23-Needle felted squirrel (36)20-Needle felted squirrel (33)

22-Needle felted squirrel (35)

5) Carefully stab a few times from the top of the head to ensure it is firmly secure. NB this is easier if the head has no fur yet but if you have (like I have) you just have to take care not to leave stab marks in the face (as you are using a slightly thicker needle).

…and there we go, head on …looking more squirrel-like although much like a shawn sheep at the moment with lack of fur 🙂

25-Needle felted squirrel (38) 24-Needle felted squirrel (37)27-Needle felted squirrel (40)

Adding limbs

This is achieved in much the same way as joining the head in that you need to stab deeply in all directions to ensure all the fibres bind to each other.

For Chestnut I started with the hind legs so that it would be easier to see how her forelegs would be positioned once she was sat upright. Note the thigh part of the leg for my squirrel has already been sculpted as part of her body shape which ends up in a sitting pose. So when I refer to adding the hind leg, it is in fact the section below her thigh bone. 

1) Needle felt each leg onto the body by stabbing the wool at the fluffed up end of the leg into the body.

28-Needle felted squirrel (41)       30-Needle felted squirrel (44)

For Chestnut I had formed her feet using wool wrapped and felted over wire (see my tutorial on tiny feet and toes here) so I had to take extra care not to break my needle by hitting the wire when stabbing.

31-Needle felted squirrel (45)        29-Needle felted squirrel (42)

2) Continue at all angles for both legs until firmly and securely in position.

12-Needle felted squirrel (21) 07-Needle felted squirrel (16)

08-Needle felted squirrel (17)  09-Needle felted squirrel (18)

Once in place I added more wool round the joins as fur and then decided to felt some of Chestnut’s back-fur too. Aw she is looking very happy and mischievous already!

33-Needle felted squirrel (48)34-Needle felted squirrel (49)32-Needle felted squirrel (46)

3) Then do the same for the forelegs.

48-Needle felted squirrel (.1) 06-Needle felted squirrel (15)   05-Needle felted squirrel (14)

04-Needle felted squirrel (13)  03-Needle felted squirrel (12)

As the shoulder part needs to be attached along the side of the torso it is not sufficient to merely stab from the outer side at the shoulder blade to keep the limb in place.

To felt at an angle under the ‘armpit’ and also to ensure the leg cannot pull away at the join, stuff some extra(fluffed up) wool into the join and stab it securely into place (not too deep to push the lighter coloured wool through to the other side of the shoulder).

36-Needle felted squirrel (51) 35-Needle felted squirrel (50)

Tip: To get the correct positioning and symmetry when adding the second foreleg(as quite often you will want to play around with this until you get it right) you may find it easier to stab the second leg into place only a tiny bit at first; enough to hold the leg in place but not so much that you can’t alter the position if you need to. You can then step away to view your animal from a distance, then adjust until happy with it.

49-Needle felted squirrel (.2) 37-Needle felted squirrel (52)

38-Needle felted squirrel (53) 40-Needle felted squirrel (55)

….then secure into place.

42-Needle felted squirrel (57)  39-Needle felted squirrel (54) 41-Needle felted squirrel (56)

Once all limbs are joined onto your animal you can then felt over the joins with fur. You wouldn’t even know your animal started out as separate appendages.

45-Needle felted squirrel (61)44-Needle felted squirrel (59)43-Needle felted squirrel (58)

Here is Chestnut as she looks now! 🙂

46-Needle felted squirrel (62) 47-Needle felted squirrel (63)

Happy Christmas everyone!

Happy Christmas everyone!

I  just wanted to say a very Merry Christmas to all my followers!

May this coming year be full of wonderful surprises for you and hopes truly becoming reality!

I have had a little go at making a Christmas poster from a photo of my original badger for you all.

Enjoy the festivities, have fun and watch out for a new year of more lovable creations from Fit to be loved! 🙂

God bless you all

Amanda xx


Ps If you haven’t already added your email address to receive updates of new exciting posts please just click on the ‘follow’ button on the right hand side of my ‘find out more’ page.

Beside quiet waters (landscape felting ideas)

Felting is relaxing and fun especially when shared!!

Last week I travelled back to where I grew up; Grantham in South Lincolnshire, to spend a week with my family and catch up with old friends.

I had a relaxing time away from my office job, walked the quaint streets of Stamford and visited the home of the Bakewell pudding in the Peak District. And… you may have guessed  –  (as I am quite addicted to my felting)-  that I also took some of my wools with me to get on with my latest creation.

I also had the opportunity to spend one of my days showing my mum some basic needle felting techniques. Felting is not just for times alone just you, the wool and needles and your imagination but is so much fun to do with others – especially for friendship craft days, and in my case family time! for me and my mum, together sharing quality time. 🙂

Haha, my dad peered in from time to time and watched and enjoyed the artistic flair (claiming I got it all from him). They are both artistic!    I think we all can be in so many different ways!

My week was sooooo relaxing and quiet away from the hustle and bustle of the city and work. Home cooked food and love and hugs and then some felting (of course)- all I could wish for in a holiday.

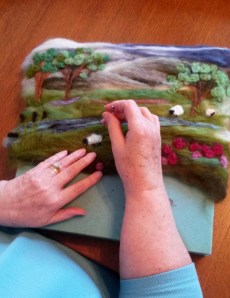
So I wanted to show you some pictures of my mum’s very first landscape piece. My mum is a painter and loves going to her art class each week and produces some beautiful water colour paintings. She loves using colour and really appreciates nature just like me which is illustrated in her work!

So here we go, she needed no help from me after I showed her a few basic hints. I think it is really great. My mum used soft luxurious merino wool from World of wool.

I have named it ‘Beside quiet waters’ as it reminds me of David’s Psalm 23 in the bible and really sums up my week with them. Thanks mum for our time together!

01-Beside quiet waters (2) 03-Beside quiet waters (4)  05-Beside quiet waters (6) 08-Beside quiet waters (9)04-Beside quiet waters (5)02-Beside quiet waters (3)

Mum then painted the sky onto her canvas and stuck the felted piece onto it…. beautiful!!

10-Beside quiet waters (11)

Of course on leaving to come back to London I left some wools and some needles with mum.. can’t wait to see what she makes next…

How to needle felt long animal fur

How to needle felt long animal fur

Ever wondered how to get those luscious layers of long fluffy fur on your needle felted animal? more importantly how can you get them to look natural and stay put!?

Whilst making a badger I took some photos of him along the way to show you. It is fairly simple to do but does take quite a long time although once done it does give you a real sense of satisfaction and the fur really does feel soft and fur-like. Of course the end result texture does depend on the type of animal you are felting and the type of wool you wish to use.

If you are new to this amazing art form then before you get started – check out my tutorial ‘what is needle felting’ for basic needle felting techniques.

What wools to choose? 

For my needle felted badger I had already made his body shape by sculpting with natural carded wool. I recommend wool batts which come in long thick sheets, making it easy to pull sections off and the wool is really fast to felt with.

Then for the top coat (which I will be demonstrating in this tutorial) I mixed grey and black merino wool tops with a few strands of some natural undyed wool tops for a rich cream colour. I particularly love the merino sheep wool as it comes in a variety of animal colour options and is lovely and soft to touch. Natural wool tops in breeds such as Jacob or corriedale are quick to felt and are a little more fibrous to the look and feel. When using wool tops the fibres all lay in one direction so they are perfect for cutting lengths and adding these to resemble long fur on your needle felted animal.  If you would like to you could use other luxurious fibres such as baby alpaca.

What tools will you need to attach the fur?

Very simple you just need:

How to needle felt long animal fur (30)

NB I didn’t want to completely flatten my fur down but allow it to stand out with some volume so only used one needle at a time rather than a multi-needle tool and changed my needle depending on detail and thickness of wool being needled. .

As you can see I have completed my badger except for his back fur and tail at this point. For how to make a badger head please see my tutorial here.

How to needle felt long animal fur (2)

How to needle felt long animal fur (30)

I love the fur on a badger’s back, it is greyish in colour but with flecks of black, brown and cream.

How to needle felt long animal fur (3)

Now you could use carding brushes or dog brushes to blend the colours of wool but I wanted to keep the fibres all going in one direction as much as possible at this point and with block strands of full colour in black / cream / grey so not fully blended.

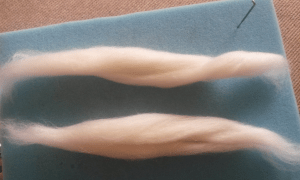
To achieve this lay lengths of each colour on top of each other and then using your thumb and first finger of each hand at each end of the wool lengths, pull your hands apart pulling the wool away from each other. Lay each layer again on top of each other (fibres all in same direction) and keep going until all the wool is blended as much as you want it to be.

How to needle felt long animal fur (28)

How to needle felt long animal fur (6)

How to needle felt long animal fur (4)

How to needle felt long animal fur (5)

How to needle felt long animal fur (8)

How to needle felt long animal fur (7)

Then take narrow strands of the mixed wool the width of one or two fingers

How to needle felt long animal fur (1)

… and cut these into small pieces, roughly the same length. The length will vary as we felt as some areas will have longer fur than others…

How to needle felt long animal fur (10)

They don’t need to be perfect as no badger will have its own hairdresser with a perfect hair cut. 🙂

How to needle felt long animal fur (11)

I will now demonstrate what you will do with each piece..

Take a piece and slightly pull in the centre in a bow-like shape

How to needle felt long animal fur (2)

To layer the fur we need to felt from the back end of the animal layer over layer until reaching the head… so place the first piece at the very bottom of the badger’s rump.

How to needle felt long animal fur (12)

Felt using your barbed needle along the centre parting of the wool piece in various directions, the depth should go down to the first few barbs but the aim is to felt shallow but in many directions for the wool to stay put.

How to needle felt long animal fur (13)

How to needle felt long animal fur (14)

You can also felted slightly below the centre line onto the bottom half of the piece to ensure it is in place.

How to needle felt long animal fur (15)

Now carefully pull down the top section

How to needle felt long animal fur (17)

How to needle felt long animal fur (19)

How to needle felt long animal fur (16)

… and ensure there are no stray edges by encouraging the wool in from both sides..

How to needle felt long animal fur (20)

Now felt along the top folded edge until it is firmly in place.

How to needle felt long animal fur (9)

Felting along the centre and then on the top edge in this way helps the wool to stay in place. Give a tiny tug to check it doesn’t easily pull out. NB a really good tug will likely pull fur out hence why these cute little animals are not meant to be toys to be pulled around…they should take cuddles and some handling though so ensure you felt well.

Again ensure you felt in many directions and then continue on to the next piece…layering the wool to create a fur look..

How to needle felt long animal fur (5)

How to needle felt long animal fur (10)

When moving up to the next layer, position the wool just above the last layer – you don’t want gaps in between of core wool showing so don’t leave too big a gap…

How to needle felt long animal fur (7)

How to needle felt long animal fur (3)

Don’t worry about the fur being too long or tufts sticking out, as you can give the end of the fur a trim as you go (time to use your hairdressing skills :-))

How to needle felt long animal fur (12)

By the way this doesn’t need too much skill and I am definitely no hairdresser, just trim in various directions for a more natural fluffy look.

How to needle felt long animal fur (13)

Any bits you trim off can be used for other felting projects or even for any areas you wish to fill in later at the edges so don’t waste them just put aside in a neat pile for later..

How to needle felt long animal fur (14)

Optional; For the back end of the badger I wanted this to be extra fluffy with the fur standing up slightly on end so to achieve this, run fingers through the strands of wool to fluff up and stab the wool all over between the strands, not to felt down but to fluff up…(

How to needle felt long animal fur (15)

As you can see we have a way to go but we are on our way !!

How to needle felt long animal fur (18)

Aw look at him waiting so patiently to be finished 🙂

How to needle felt long animal fur (17)

You may find it easier to turn his body as you go – work with whatever position you find comfortable and whatever means less squishing of his cute little nose into the felting mat..

How to needle felt long animal fur (19)

As you reach the main length of his body you may now decide to cut the lengths of wool a bit longer

How to needle felt long animal fur (20)

For a more realistic look vary the colours so that you sometimes get more black or cream in the strand you felt…mix it up a bit..

How to needle felt long animal fur (21)

How to needle felt long animal fur (28)

Keep going…

How to needle felt long animal fur (27)

How to needle felt long animal fur (26)

How to needle felt long animal fur (25)

How to needle felt long animal fur (24)

Almost there… take a breather – have a hot chocolate !!

How to needle felt long animal fur (23)

How to needle felt long animal fur (23)

How to needle felt long animal fur (22)

Specifically for the badger- when reaching the neck line, overlay some strands of black wool at the base of the ears …

How to needle felt long animal fur (24)

Then finish off with some more of the cream at the base of his head..

How to needle felt long animal fur (25)How to needle felt long animal fur (26)

You can use a normal sewing needle now if you wish to carefully fluff up the fur where it may have flattened slightly..

And there you have a gorgeous badger! fully furred waiting to be cuddled and fit to be loved!!

How to needle felt long animal fur (1)

I added his tail after this which also had several layers of wool as fur…

Here he is all completed !! so playful !!

Needle felted badger latest

Long Animal Fur video!

Find it easier to learn by watching how it is done?  

3 My ‘Long animal fur’ video tutorial is NOW AVAILABLE on my YouTube channel in 4 parts.

<<<Click the donkey picture to start watching part 1

 You’ll learn even more techniques for adding long fur (as demonstrated on this adorable miniature donkey).

Did you find this tutorial helpful? What would you like to learn about next? Please leave comments. Why not post a photo of your own creations?

Don’t ever miss out on my latest tutorials! Insert your email address and click the ‘Follow’ button on the right hand panel to receive notifications of when the next post is up..:-)

Needle felted guinea pig!

My good friend Emma recently turned 40 and she absolutely loves guinea pigs so it was very easy to decide what I should make her as a surprise present for her party..

So here he is … a cute bundle of guinea pig fluff!Needle felted guinea pig (38)

As usual I took a few pictures along the way to show you how I made him. With some time, some love, some wool and a barbed needle you too can make a felted guinea pig just like him!

If you haven’t tried needle felting before and would like to know what it is all about and see some basics first, feel free to jump to my ‘what is needle felting’ page first before trying the guinea pig..

Or if you don’t have the time but would love me to make one for you or as a present for a loved one, let me know what colour, fur length etc by sending me a bespoke order at my Etsy shop.

So, to get started you will need:

  • Foam pad or felting brush base (so not to stab your knees and to provide a firm base to work on)
  • Felting needles of various sizes; wider for initial shaping and finer for detail later on
  • A needle holder; this is optional but for making basic shapes it saves time to use 2 or 3 needles at the same time. I use the 3 needle holder pen by Clover.
  • Wool to felt with; I used natural corriedale wool to make the guinea pig’s core as I find it felts well and ends up nice and firm. I then used merino wool as the top coat as it’s soft and comes in some lovely animal fur colours. I buy my wools at a very good price from World of Wool.
  • Small scissors
  • Carding/dog brushes to blend wool (optional)

I hope the pictures will explain what I did at each phase so I haven’t gone into too much description for each picture. Feel free to ask me any questions if you are unsure of how to do anything.

Start with a basic egg shape by rolling tightly a nice length of the corriedale wool and then felting it into shape with medium firmness. This will become the torso.

Needle felted guinea pig (7).

Felt more at one end and use hands to carefully sculpt one end slightly narrower (to become the head end)Needle felted guinea pig (8)

Roll two equal sized pieces of woolNeedle felted guinea pig (16)Needle felted guinea pig (9)

Fold and felt them into doughnut shapesNeedle felted guinea pig (10)

Then felt them well onto the sides of the torso at the bottom end to become hind legs

Needle felted guinea pig (11)

Make sure they look even both sidesNeedle felted guinea pig (12)

Add and felt over some small tufts of wool to make the edges softer where the limbs join where neededNeedle felted guinea pig (13)

… especially around the rumpNeedle felted guinea pig (14)

Then turn over and do the same underneath for an even well blended finish.

Needle felted guinea pig (15)

Take two more pieces of wool but this timeNeedle felted guinea pig (16)

…fold to form two triangles

Needle felted guinea pig (17)

Felt onto the sides of the chest end and mould to form fore legsNeedle felted guinea pig (18)

Again check the legs are equal or you can position one slightly in front of the other to provide a more natural pose.Needle felted guinea pig (19)

Put the body to one side and roll another piece of wool and form a smaller egg shape. Felt medium firm again and then sculpt to make into a head shape. Score a nose and mouth using two needles at one time

Needle felted guinea pig (20)

The shape is fairly similar to a rabbit head shape…add any wool where needed to accentuate the jaw line and cheeksNeedle felted guinea pig (21)

Now attach the head firmly to the body. I felted a good piece of loosely felted wool to the bottom of the head first so when attaching there were lots of fibres to help attach it and this helped to form a neck.

Needle felted guinea pig (24)

Needle felted guinea pig (25)

Needle felted guinea pig (26)

You now have a guinea pig base!!

Now comes the fun (but tedious at times) of adding some wool colour in layers to give him his character.. I mixed some wool together to get the colours I liked, one part corriedale wool and two parts light chocolate brown merino wool. I used two dog brushes to blend the wool (so much cheaper than carding brushes and they work just the same!).

Needle felted guinea pig (27)

Start from the tail end (although guinea pigs don’t have tails)and work towards the head. Felt some wool in the same direction but some in other directions and with different lengths too to get a more natural look!

Needle felted guinea pig (28)

Needle felted guinea pig (29)

When you reach his head add two small doughnut shapes of coral coloured wool for his ears and felt them in well to fix to his head. I decided to give him a cream coloured face with cream tuft on top of his head but you choose whatever colour you fancy. For the head start at the very top with the fur layers and work down towards the chin.

Add more detail to the nose with the brown and a tiny bit of black for his mouth opening. To make him look like he has rummaged around in the hay felt a tiny fleck of brown under the cream fur on his muzzle . For any layers that are too long or for shaping the fur on the face, used nail scissors to carefully trim the wool.

Needle felted guinea pig (30)

(I went back and added a strip of the cream across his middle taking care to pull back the layers of brown already felted..)

Needle felted guinea pig (7)

Here you can see his eyes; brown overlaid with black and a few tiny white dots to give the illusion of light reflection.

Needle felted guinea pig (31)

You could leave him with no feet but I decided to give him some. Remember guinea pigs have 4 toes on each foot at the front and 3 at the back!

To achieve this use short lengths of pipe cleaners for his toes and wrap the coral coloured wool over each toe binding the pieces together at one end. Then wrap several layers of the wool over the end to form the ball of the foot. Wind more wool over the length of each foot and felt tightly to ensure all fibres are secure.. then felt them to the legs!!

Needle felted guinea pig (5)

Needle felted guinea pig (1)

Go over the entire surface of your guinea pig with a normal sewing needle if needed to liven up any flattened areas of fur!

Squeeeeeeeeeee!!

I hope you enjoyed the tutorial!! it was fun to make him and my friend Emma almost cried when she saw him at her party! 🙂

Watch out for more tutorials and creations and follow my blog to receive emails of when new posts are up so you don’t miss out.

Check out my other tutorials; how to make a bunny and how to make a badger head and view other Fit to be loved felted creations at my Etsy shop.

and please do get in touch if you have any ideas of what you would like me to make next!

Needle felting a bunny; Photo tutorial

Needle felting a bunny; Photo tutorial

Today I just want to share some photos with you to give you a taster of the various stages that went in to needle felting my latest bunny. I haven’t photographed everything but stopped at various times along the journey to take a shot. Please also see here for more detail of how I made his ears. It doesn’t matter too much about what order you add each limb or ears or facial features. It is fun to experiment with different ways of doing things. You will soon find out what works best for you.

I have found though that whenever you add the eyes your creation immediately gains personality and you also get a tiny break from all the time consuming needle action. I love doing the eyes and ears best.

imageBasic ball to start for bunny head. Core corriedale wool.

imageAdding cheeks and face shape

imageAdded torso.

imageAdditional layer in mink coloured merino wool to form base fur.

imageShoulders and thighs firmly felted

imageBlue and grey merino wool mixed then shallow felted to become bunny fur.

image

imageLeaving his tummy in mink.

image

Preparing feet

imageCute bunny paw detail

imageFeet firmly attached

imageMore Wool added to give shape and smooth contours

image

Nose and mouth coming to life

imageComparing with my original bunny to check size and proportions, angle of feet etc

image

Forming ears.  See more about making ears in a tutorial here.

image

image

image

imageEars fixed

image

imageEyes alert

image

Can’t resist a cuddle

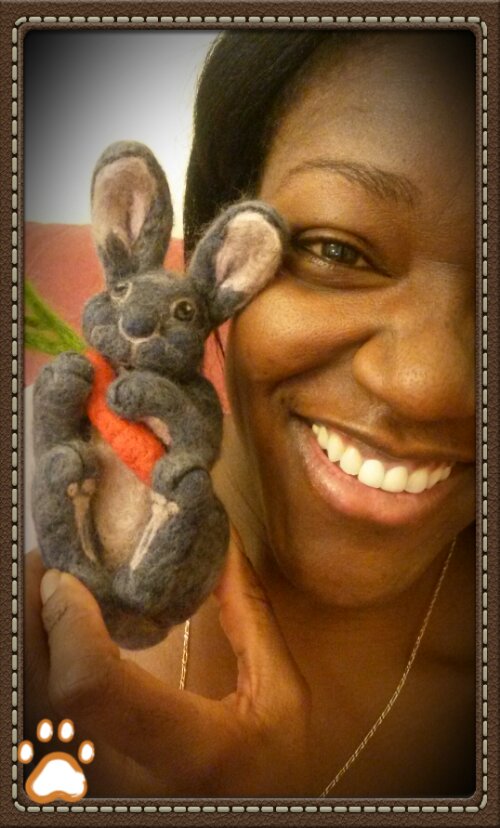
imageFront paws and holding a carrot.

imageMy sister in law popped by, bunny made her smile 🙂

imageAdventure for bunny in the garden for nature’s backdrop!

To see more pictures of this cute bunny and to order one as a gift just like him for someone you love, please visit my Etsy shop.

To follow my blog and receive email updates about latest fit to be loved creations and tutorials, simply enter your email address on the top right panel of my ‘find out more’ page.

How to needle felt bunny ears!

How to needle felt bunny ears!

See here for more pictures or to order one just like him

See here for more pictures or to order one just like him

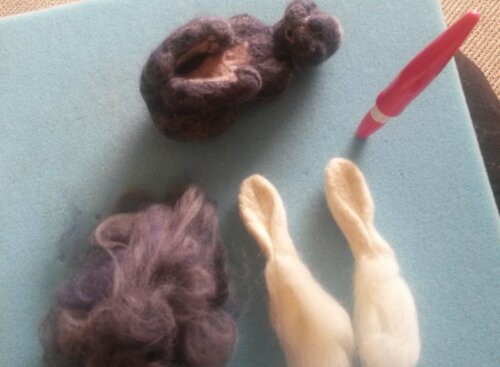
Now that I have revealed my latest needle felted bunny in my most recent post, I can share with you how I made his cute bunny ears. The real bunny, owned by Pete and his wife, had the most incredibly gorgeous long ears and I really wanted to take the time to detail their every curve and beauty. As I created them I took pictures at each phase to document how I made them for my own reference when making other ears in future and also to share with you now on my blog..

For those of you who have some experience of needle felting I am sure you have your own preferred technique but please do take a look – your ideas are very welcome as I am still fairly new to this and so far it has been trial and error but most enjoyable. For those who haven’t tried yet , I hope this inspires you to have a ‘stab’ at it!

This is specifically to show you how to create ears for the bunny I made above, but some of the methods are very similar for other animal ears so feel free to follow them for other projects..

To get started you will need:

  • Foam pad or felting brush base (so not to stab your knees and to provide a firm base to work on)
  • Felting needles of various sizes; wider for initial shaping and finer for detail later on
  • A needle holder; this is optional but for making basic shapes it saves time to use 2 or 3 needles at the same time. In the pictures you will see I use the 3 needle holder pen by Clover.
  • Wool to felt with; I used natural corriedale wool to make the basic ear shapes as I find it felts well and ends up nice and firm (especially to keep in alert bunny position). I then used merino wool as the top coat as it’s soft and comes in some lovely animal fur colours. I buy my wools at a very good price from World of Wool.
  • Finally…   some time, some love, some patience, a drink and bar of chocolate for long sitting periods, perhaps some music (not tv as you may be distracted and stab your finger) and don’t forget a photo or drawing of what you would like to make…

So…. on to the tutorial!

By the way….. the point at which I am about to felt the ears I will already have my head sculpted, I can then at any time measure up the ears to the head to ensure I am getting the right proportion.

Step 1: take two equal lengths (and density) of your core wool (corriedale in this case). Bear in mind that you will need the two ears to end up the same size so keep comparing them. I find it works better if I do a bit on one then do a bit on the other as I go along rather than finish one and then start the other afterwards.

2013-08-10 19.00.33

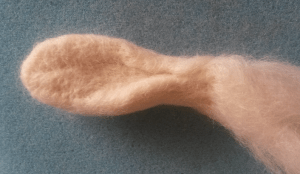
Step 2: fold the piece in half in an oval shape (you can see already this is forming a long  ear shape before you even use the needle!)

2013-08-10 19.27.05

Step 3: using the thicker felting needle/s start stabbing the wool to go through to the other side as well as shallower stabs to the first few barbs of the needle in many directions (ensure you lift the needle in the same direction as you placed it so not to break any needles). Then turn over and do the other side

20130810_101806

Step 4: now you have a basic flat shape you need to make it more 3d and ear-like so roll the sides in to form thicker edges and stab at 90 degrees but also inwards at an angle keeping the edges rounded where the ear edges need to curve. Do this on both ears as you go..

2013-08-10 18.58.02

Step 5: Use fingers to knead the wool and stab with your needle/s and give shape on both sides. NB I have left a long unfelted end at the bottom of my work to make it easier to fix my ears on to the bunny head later on…

2013-08-10 18.55.43

Step 6: keep pulling edges in and hollowing the middle section with your needle/s

2013-08-10 19.28.59

………and turn over to felt the other side as you go…

2013-08-10 18.57.10

…. remember to turn your work and use various angles to insert your needle/s to mould the wool into the desired shape.

2013-08-10 19.28.102013-08-10 18.54.492013-08-10 18.59.10

Step 7: Keep felting and keep checking your photo or drawing to see how big the edges are and which areas should be flatter.

2013-08-10 18.54.02

On a real bunny one edge of the ear is thicker than the other so I had to make sure this was the opposite way round on the other ear (as it is in real life) for a mirror effect. You may want to use one needle or just two needles to make more defined lines..

20130810_104445

And there we have some bunny ears (err… minus some colour and texture!)

So then comes the exciting part …..have your finer needles and bunny fur colours at the ready for the final step….

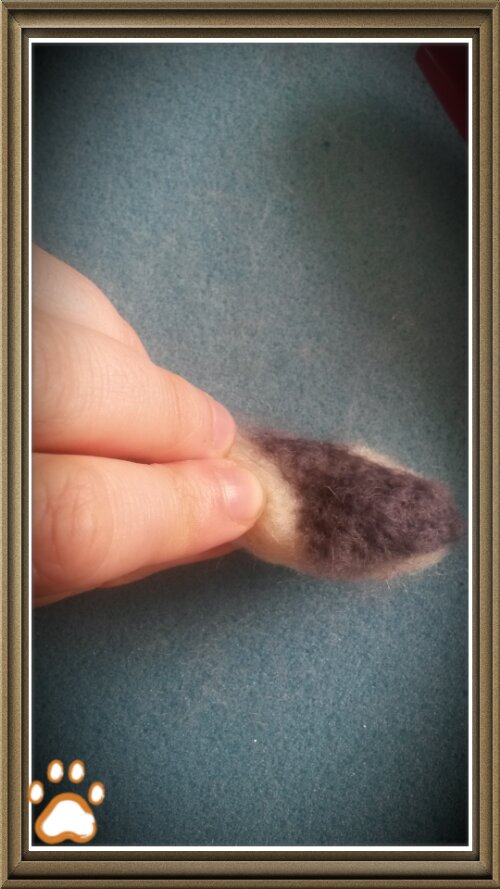
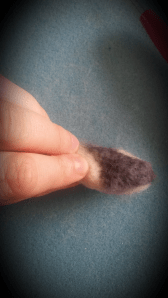
Step 8: carefully shallow felt the ears with your coloured merino wools (just to a depth of first 1 or 2 barbs on your finer needles) to fix the wool in place but not allow the wool to go through to the other side. You don’t want the darker colours to be seen through the lighter colours on the other side! and vice versa  (it would be a medley of pink and grey in this case).

2013-08-10 15.35.55

2013-08-10 15.34.51

……..where needle holes can be seen – you can use fingers or a normal sewing needle to gently fluff up fibres

20130810_110028

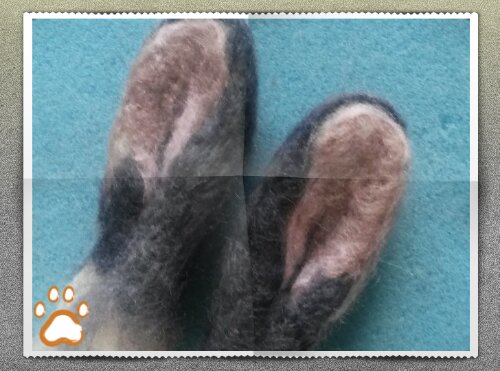
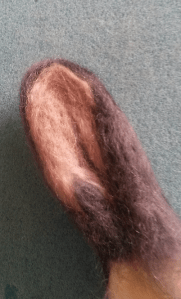
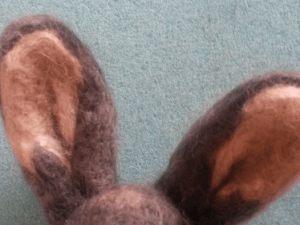
…. add different shades of colour to give a more realistic look. I mixed my greys and blues to get the bluey-grey colours. Then I  used a mink colour for the middle of the ear with lighter pinks around the edges. Finally a strand of grey down the very centre for light and shadow and 3d effect…

2013-08-10 15.32.44

2013-08-10 15.28.09

Then your ears are ready to fix on to your bunny head for full bunny character!!

2013-08-13 13.44.37

I hope you found this useful. Let me know what you would like me to write about and what you would like me to make!

My next post will be a photo gallery of how I made my bunny creation from start to finish….so you will get to see me fixing the ears in place…!

Please enter your email address here for notifications of new posts to my blog and follow me on facebook, twitter, pinterest to see what I am up to next! 🙂

What is needle felting?

Are you new to this amazing form of art?

So was I back in 2013, but we all need to start somewhere. Once I started I just couldn’t stop and no doubt you will feel the same way too as it is very addictive.

You have probably seen some of my needle felted animals in my Gallery but what is it that I do to get from a piece of wool to a detailed sculpted animal?

Here I will show you the basics..

Have you ever had a woollen jumper? … loved it, worn it ..and then oh dear..washed it in too hot a wash and failed to read the washing instructions properly? or maybe you have heard of others doing that…Well that happened to me when I went to uni and didn’t have my mum to show me how it should be done!. My new favourite jumper shrunk to about a 5th of the size it started out as!!. Lets just say my teddy bear (I know I took a teddy to uni!) had his very own jumper which fit him perfectly… sadly though it would never reshape back to my size..

Needle felting felting is not putting wools in the machine or adding soapy water (although there is a technique known as ‘wet felting’ which does just this!) but the concept of how wool fibres latch on to each other and don’t want to let go is what I am trying to demonstrate here.

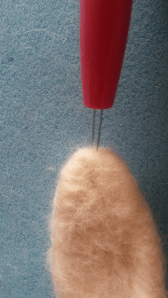
With needle felting you use a single barbed needle or several at the same time to cause the wool to felt..

First of all you choose your wools. These are some of the delicious coloured merino wools I used to make a fox.

Image

You pull off a piece (pull sections with hands far apart rather than too close).

Image

Roll or fold your wool tightly to form the shape you need. Here I am forming a spherical shape to demonstrate. You can take the wool off of the foam pad (used here to ensure I don’t stab myself) and roll in a ball in your hands too if you like – just like a piece of play dough as the ‘squishing’ action helps bind it into the shape you need as well.

Image

Then using your barbed needle you stab away at the wool hundreds of times in various directions, turning as you go (avoiding your fingers as the needle is extremely sharp) and as you do the wool fibres hug each other tight and don’t let go 🙂

Make sure the needle exit at the same angle as it entered so not to bend to bend or break it. start off slow at first until you get used to it and you will speed up in no time.

2013-07-29 14.21.06

The more you stab (which is quite therapeutic by the way after a hard day at work) the firmer and more compact the wool becomes so you can sculpt shapes. 2013-07-29 14.22.13

It is like modelling clay but with wool and a needle. Instead of moulding an area with your fingers you work it with a needle.

What I love is that there is no sewing involved (all the facial features such as eyes and noses can be needle felted too!) you just stab wool into shapes and add shapes to other shapes… and hey presto!! you have an animal.

There is of course a lot more to it than this. If you take a look at my Tutorials, tips and ideas page you will find further techniques.

Some animals can be made by simply needle felting basic body parts and felting them together.

For some you could felt the wool onto a wire armature to give the animal more structure and poseability (is that a word?). For example for the fox, cat, dog and donkey I  wrapped the wool tightly around wire which I had first prepared (after looking at photos of skeletal structures) and used my needle to fix the wool in place, firm up and blend in loose edges. Then I added more wool shapes to build up anatomy parts onto the base structure.

Here I have just started to give the fox his shape before adding his head and fuller tail and torso.

20130718_1431366

I tend to start off with core wool (usually corriedale batts) using my thicker needles to get started. Then for adding layers of realistic looking fur and to get the colours I love I use a blend of soft merino wool roving. Thinner sized needles are used for needle felting the details especially for the face and ears. I use no beads or buttons for eyes and noses…. just beautiful 100% wool!!

Did you find this tutorial helpful? What would you like to learn about next? Please leave comments. Why not post a photo of your own creations?

For more tutorials please visit my Tutorials, tips and ideas page.

Don’t ever miss out on my latest tutorials! Insert your email address and click the ‘Follow’ button on the right hand panel to receive notifications of when the next post is up..:-)

Don’t have time to make one but would love a one of a kind needle felted animal by Fit to be loved for yourself or for that special someone? Visit my Etsy shop today to see my latest creations. Or like my facebook page to see what I am making next.