
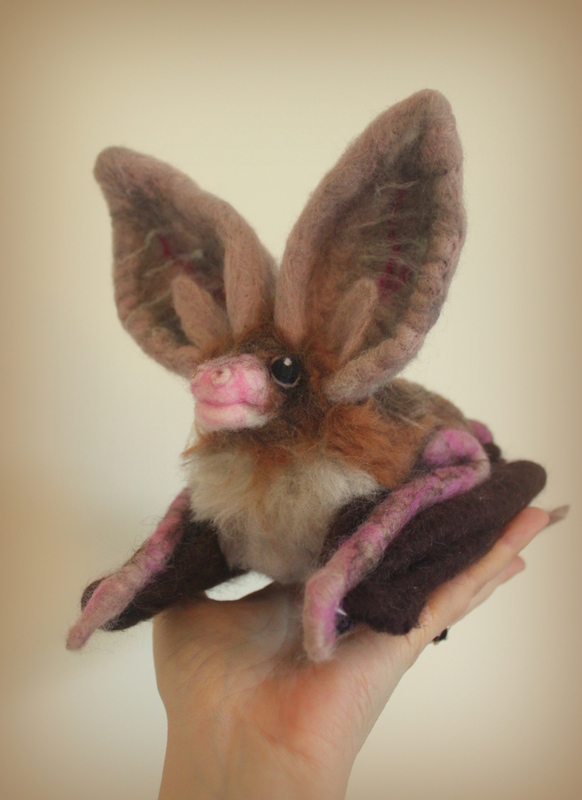
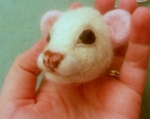
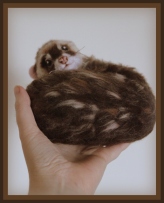
See here for more pictures or to order one just like him
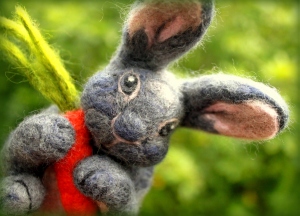
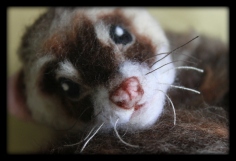
Now that I have revealed my latest needle felted bunny in my most recent post, I can share with you how I made his cute bunny ears. The real bunny, owned by Pete and his wife, had the most incredibly gorgeous long ears and I really wanted to take the time to detail their every curve and beauty. As I created them I took pictures at each phase to document how I made them for my own reference when making other ears in future and also to share with you now on my blog..
For those of you who have some experience of needle felting I am sure you have your own preferred technique but please do take a look – your ideas are very welcome as I am still fairly new to this and so far it has been trial and error but most enjoyable. For those who haven’t tried yet , I hope this inspires you to have a ‘stab’ at it!
This is specifically to show you how to create ears for the bunny I made above, but some of the methods are very similar for other animal ears so feel free to follow them for other projects..
To get started you will need:
- Foam pad or felting brush base (so not to stab your knees and to provide a firm base to work on)
- Felting needles of various sizes; wider for initial shaping and finer for detail later on
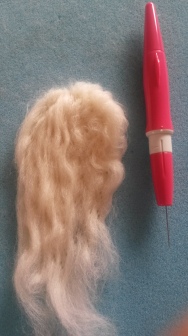
- A needle holder; this is optional but for making basic shapes it saves time to use 2 or 3 needles at the same time. In the pictures you will see I use the 3 needle holder pen by Clover.
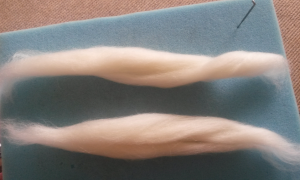
- Wool to felt with; I used natural corriedale wool to make the basic ear shapes as I find it felts well and ends up nice and firm (especially to keep in alert bunny position). I then used merino wool as the top coat as it’s soft and comes in some lovely animal fur colours. I buy my wools at a very good price from World of Wool.
- Finally… some time, some love, some patience, a drink and bar of chocolate for long sitting periods, perhaps some music (not tv as you may be distracted and stab your finger) and don’t forget a photo or drawing of what you would like to make…
So…. on to the tutorial!
By the way….. the point at which I am about to felt the ears I will already have my head sculpted, I can then at any time measure up the ears to the head to ensure I am getting the right proportion.
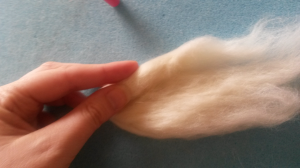
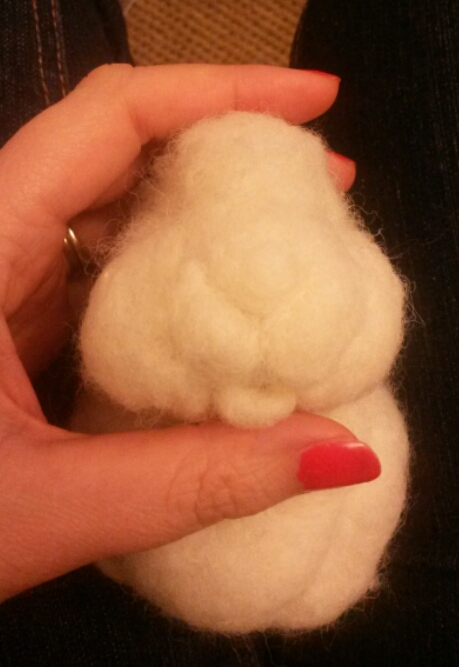
Step 1: take two equal lengths (and density) of your core wool (corriedale in this case). Bear in mind that you will need the two ears to end up the same size so keep comparing them. I find it works better if I do a bit on one then do a bit on the other as I go along rather than finish one and then start the other afterwards.
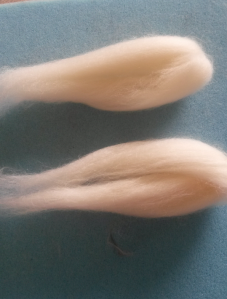
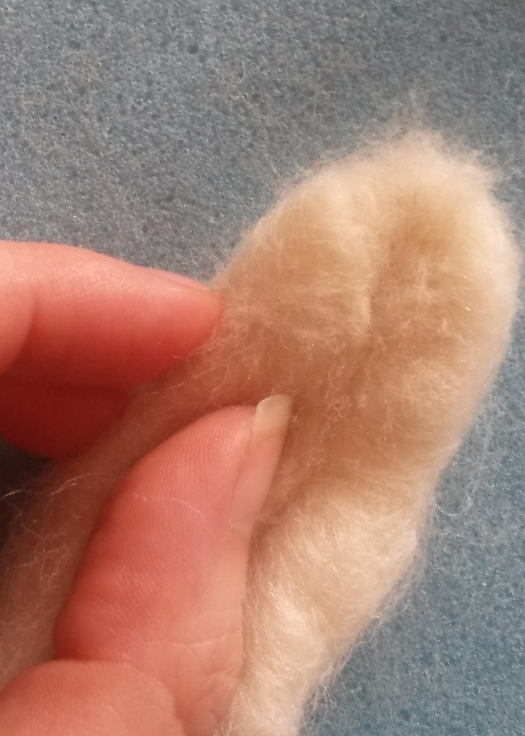
Step 2: fold the piece in half in an oval shape (you can see already this is forming a long ear shape before you even use the needle!)
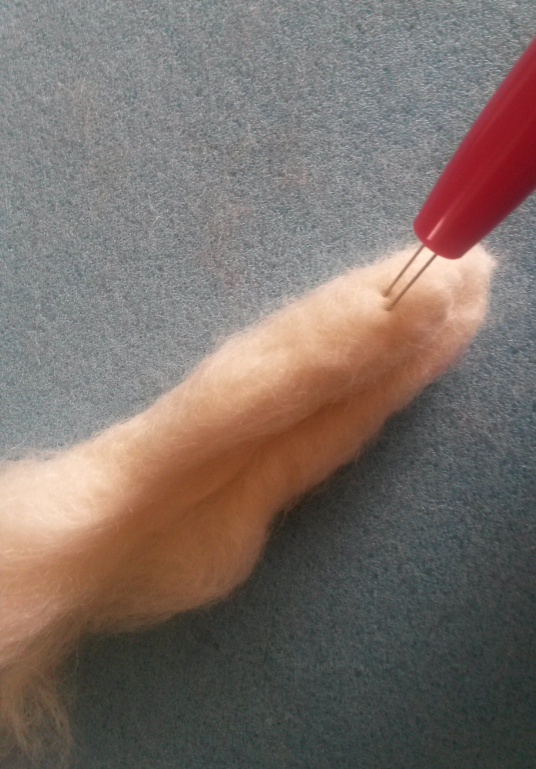
Step 3: using the thicker felting needle/s start stabbing the wool to go through to the other side as well as shallower stabs to the first few barbs of the needle in many directions (ensure you lift the needle in the same direction as you placed it so not to break any needles). Then turn over and do the other side
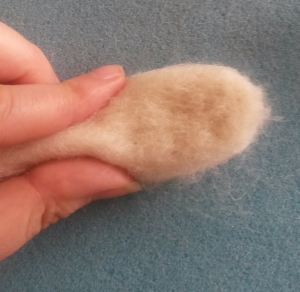
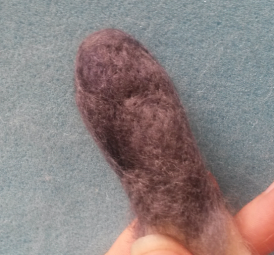
Step 4: now you have a basic flat shape you need to make it more 3d and ear-like so roll the sides in to form thicker edges and stab at 90 degrees but also inwards at an angle keeping the edges rounded where the ear edges need to curve. Do this on both ears as you go..
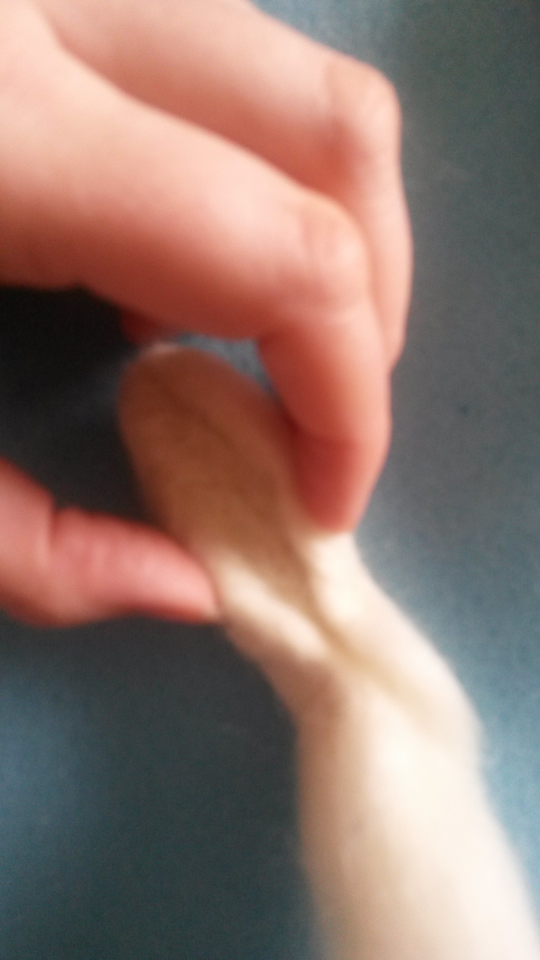
Step 5: Use fingers to knead the wool and stab with your needle/s and give shape on both sides. NB I have left a long unfelted end at the bottom of my work to make it easier to fix my ears on to the bunny head later on…

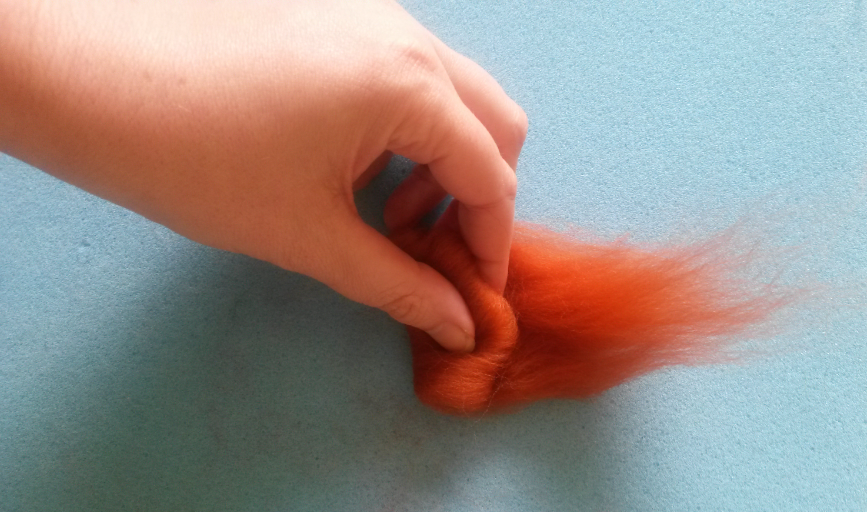
Step 6: keep pulling edges in and hollowing the middle section with your needle/s

………and turn over to felt the other side as you go…
…. remember to turn your work and use various angles to insert your needle/s to mould the wool into the desired shape.

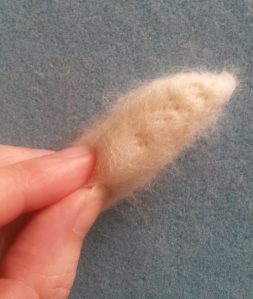
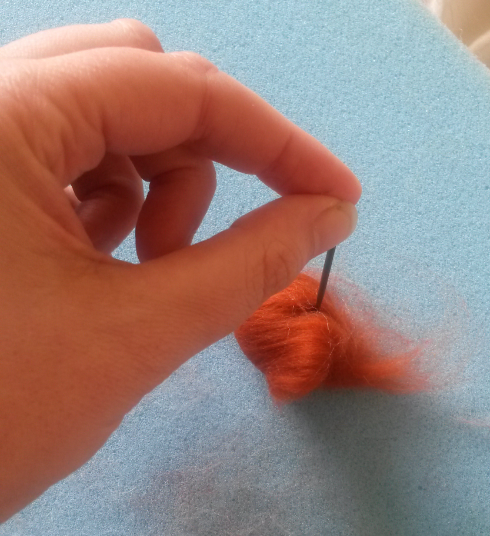
Step 7: Keep felting and keep checking your photo or drawing to see how big the edges are and which areas should be flatter.
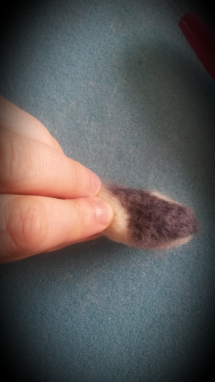
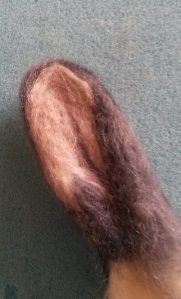
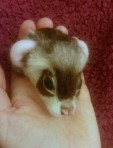
On a real bunny one edge of the ear is thicker than the other so I had to make sure this was the opposite way round on the other ear (as it is in real life) for a mirror effect. You may want to use one needle or just two needles to make more defined lines..

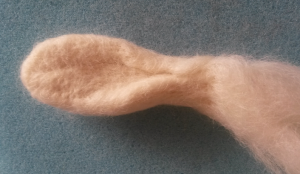
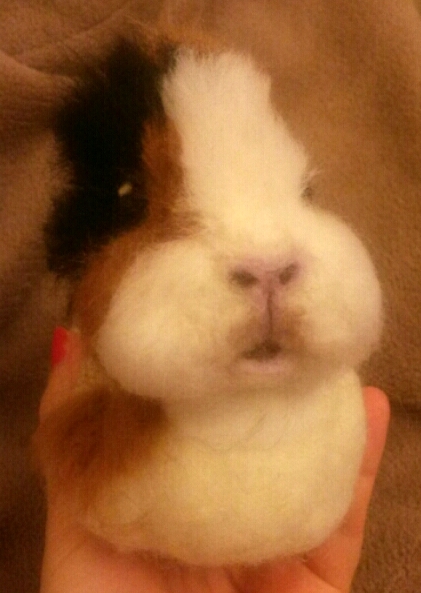
And there we have some bunny ears (err… minus some colour and texture!)
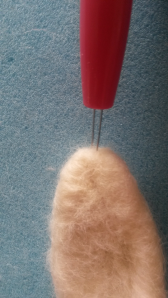
So then comes the exciting part …..have your finer needles and bunny fur colours at the ready for the final step….
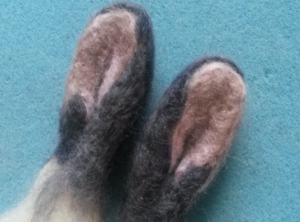
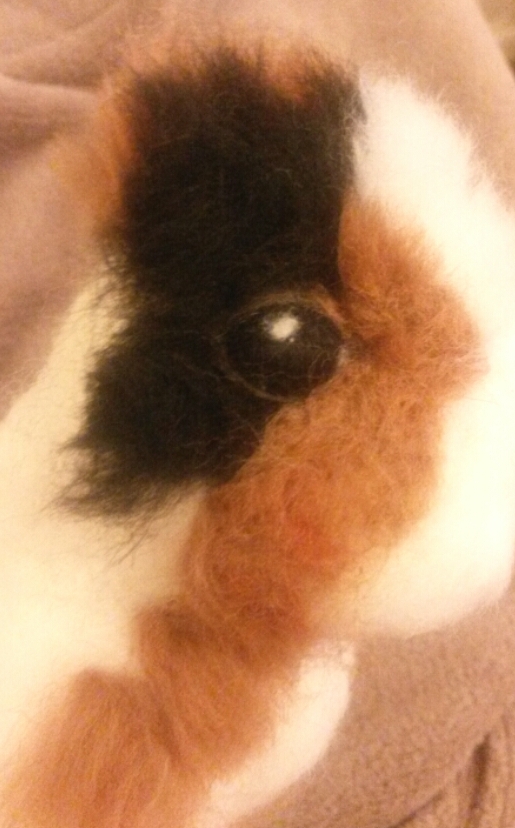
Step 8: carefully shallow felt the ears with your coloured merino wools (just to a depth of first 1 or 2 barbs on your finer needles) to fix the wool in place but not allow the wool to go through to the other side. You don’t want the darker colours to be seen through the lighter colours on the other side! and vice versa (it would be a medley of pink and grey in this case).
……..where needle holes can be seen – you can use fingers or a normal sewing needle to gently fluff up fibres
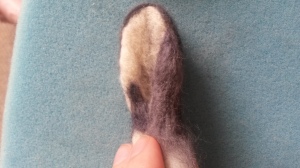
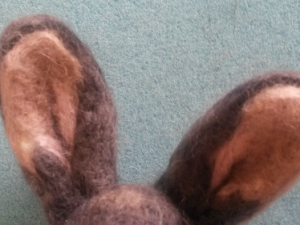
…. add different shades of colour to give a more realistic look. I mixed my greys and blues to get the bluey-grey colours. Then I used a mink colour for the middle of the ear with lighter pinks around the edges. Finally a strand of grey down the very centre for light and shadow and 3d effect…
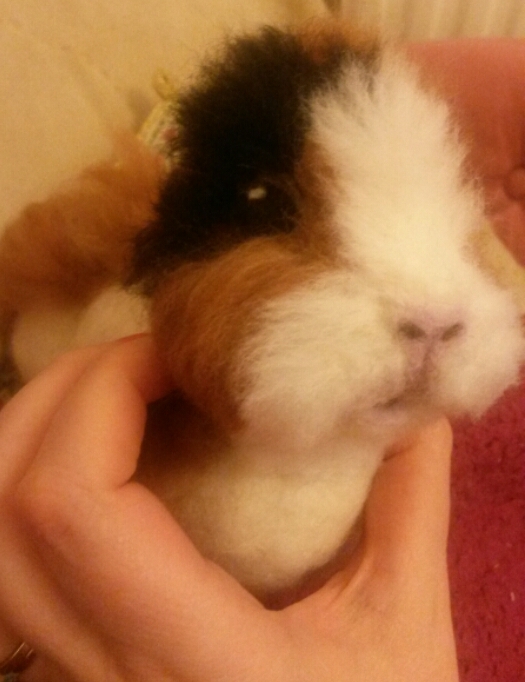
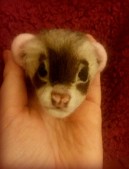
Then your ears are ready to fix on to your bunny head for full bunny character!!
I hope you found this useful. Let me know what you would like me to write about and what you would like me to make!
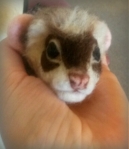
My next post will be a photo gallery of how I made my bunny creation from start to finish….so you will get to see me fixing the ears in place…!
Please enter your email address here for notifications of new posts to my blog and follow me on facebook, twitter, pinterest to see what I am up to next! 🙂


