Would you like to know how to needle felt dog eyes?
Maybe you aren’t sure where to start or having trouble getting the eyes to look realistic? or maybe you’ve always used glass or plastic eyes but would like to try wool?
I’ve created a video to show you how I make them. It has everything you’ll need for planning and creating wool dog eyes that are detailed and realistic. This is the first in the series of my Needle Felted Eyes Tutorials (see here for tutorial 1 on cat eyes).
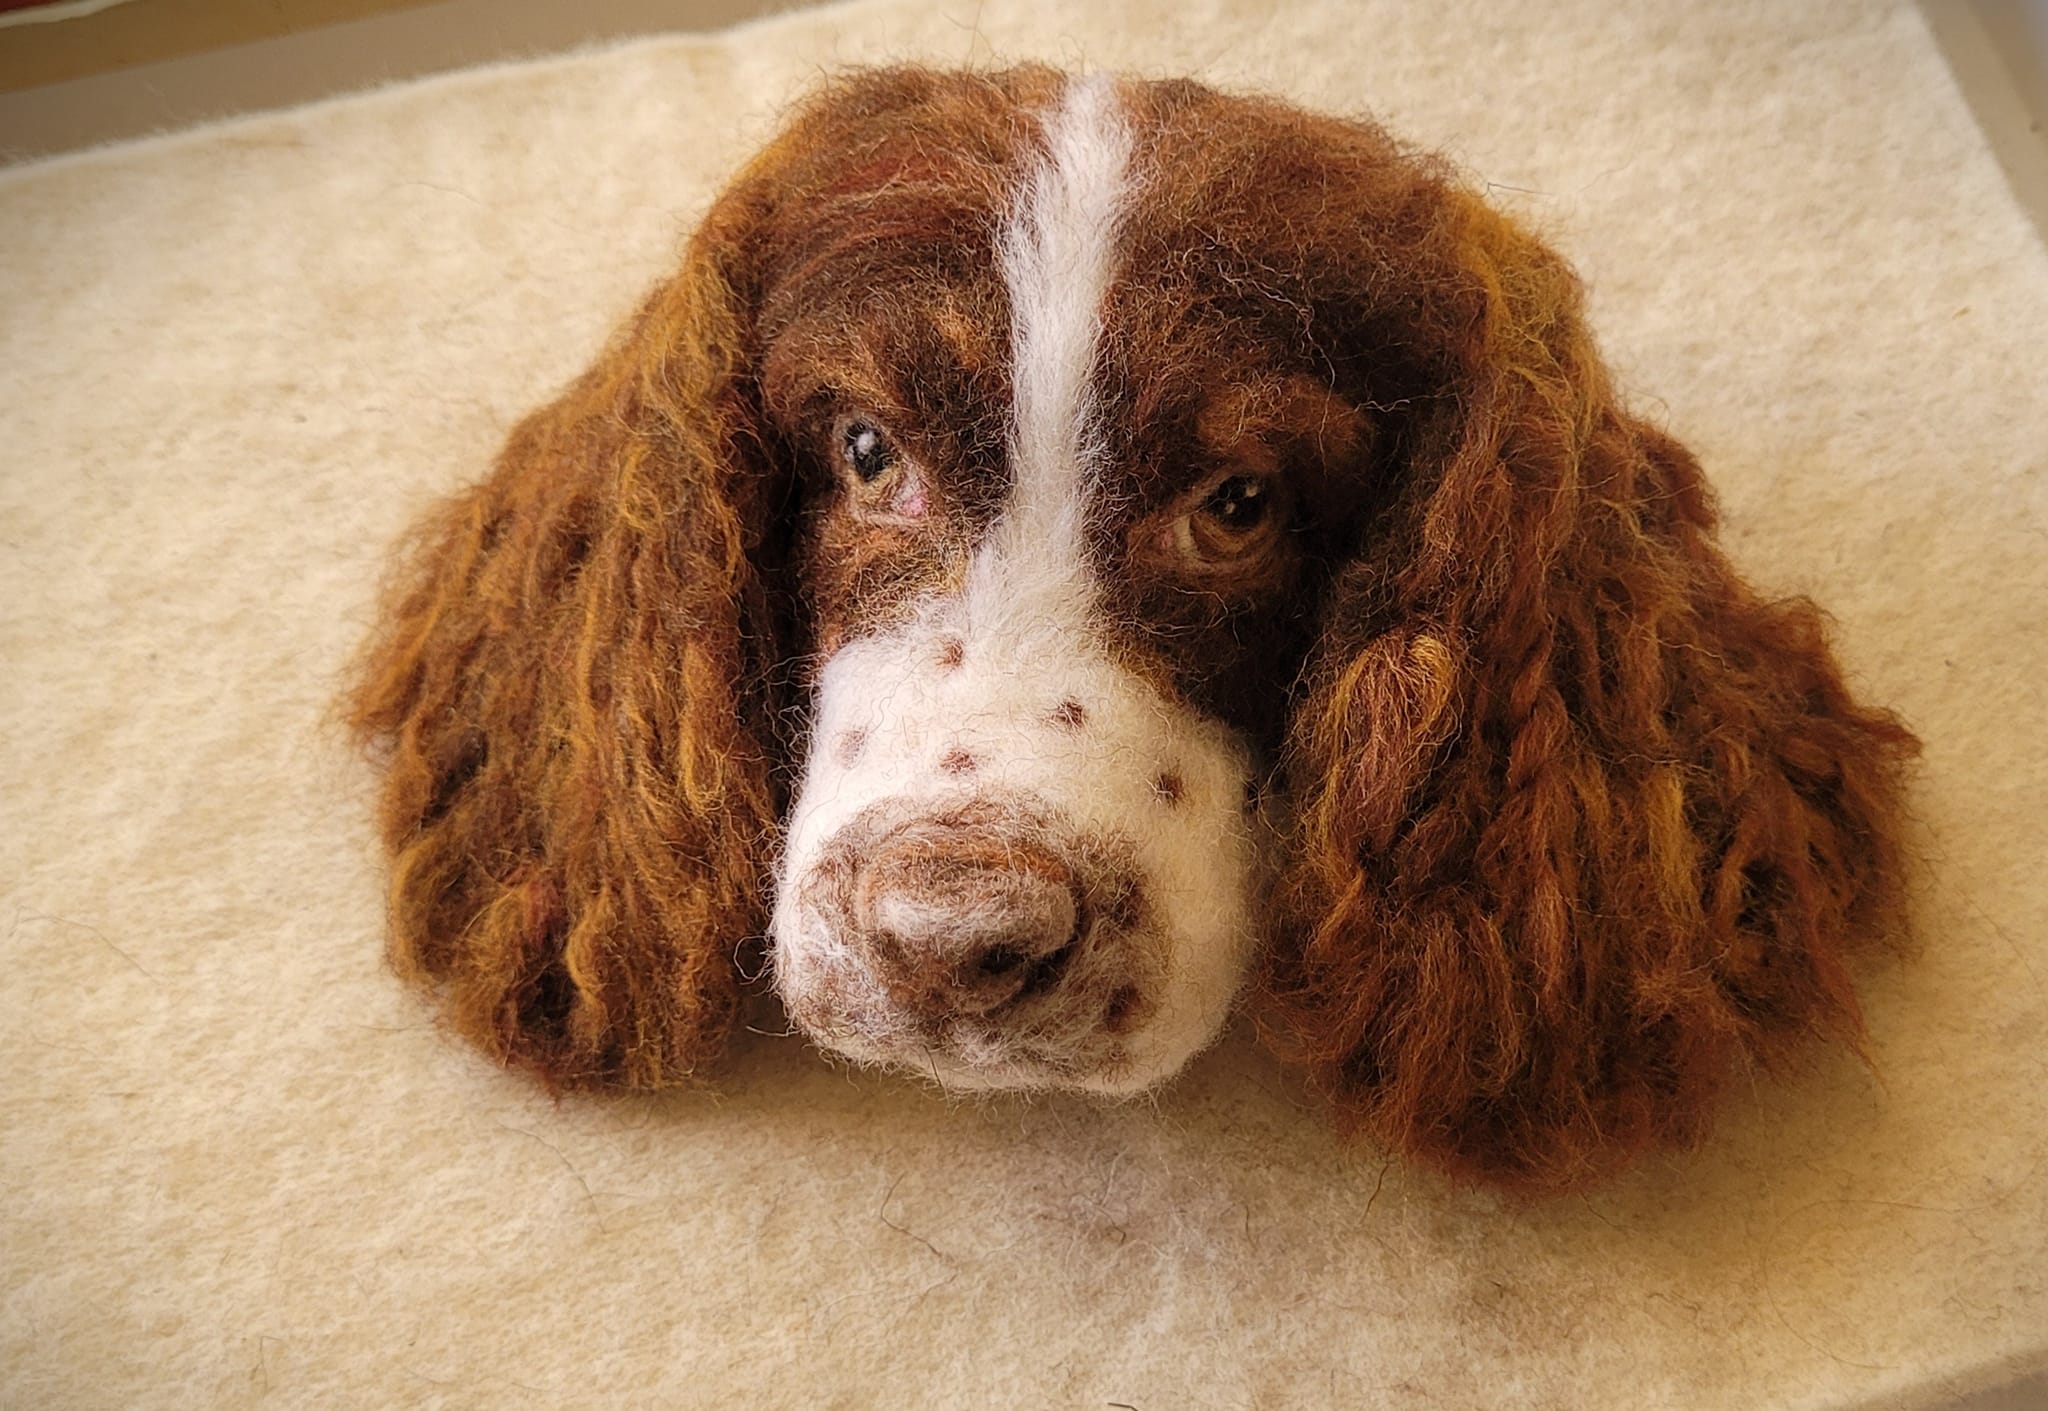
I first go over the theory – eye size and position, eye anatomy, eye colours, mood and expression, before then demonstrating how I needle felted the eyes on my recent springer spaniel.
People often remark and ask how I make the eyes. For me the eyes are my favourite part – I love a challenge and often spend a long time on eyes to get them right. It is so worth that feeling of satisfaction.
When I have created the eyes I feel that is the moment my animal is complete and when they look back at you they have almost become alive.
The eyes are like the windows to the soul and give character to your animal.
I’ve never tried glass or other materials. They look great too and that may be your preference. I like to aim for realism as much as possible whilst still using wool. In more practical terms I do love that you can get the exact size, shape, colours and expression that you want for that particular animal.
I encourage you to have a go, follow the steps in this tutorial, experiment and see what you think. .
Thanks for watching 🙂
For what breed of dog are you going to try to needle felt the eyes?
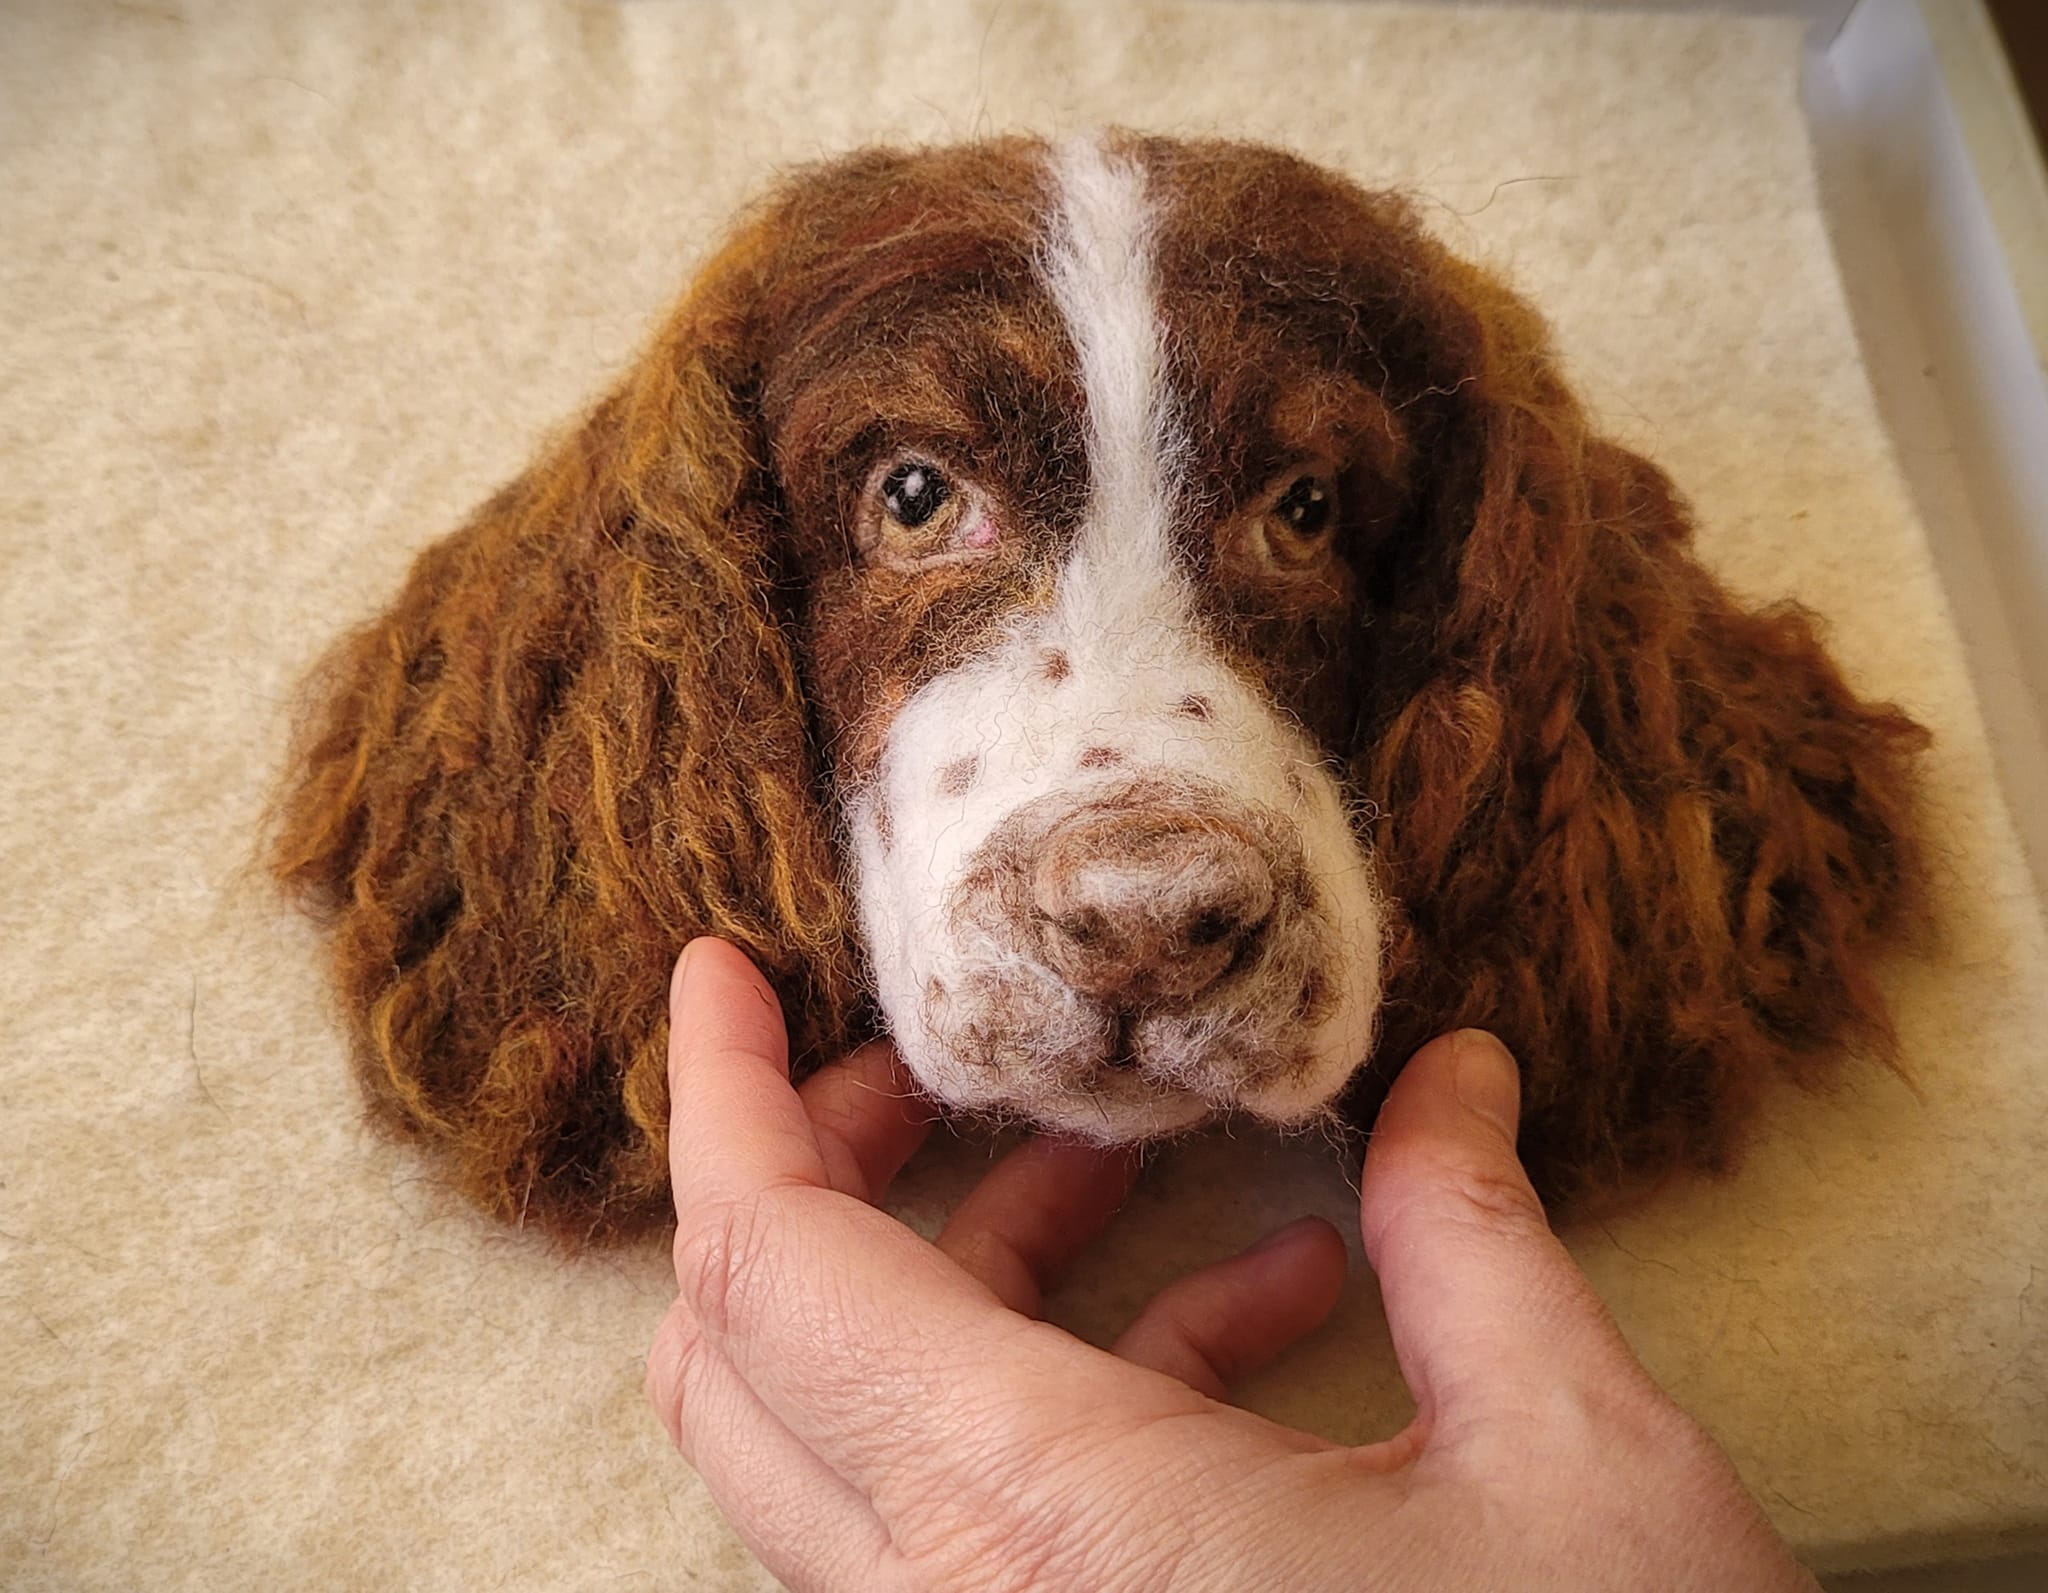
Would you like to know how to quickly and easily needle felt wavy/curly fur?
In this video tutorial I show you how to create realistic luscious, textured waves of fur as seen on my spaniel’s floppy ears!
There’s no need to use curling tongs or make plaits or wind wool around knitting needles, waiting hours for wet curls to dry or even having to buy additional locks of curly wool. In fact all you need is just your wool (I use merino tops), your barbed needle and your fingers to make a twist!
I’ll also give you additional tips on blending wool colours!
This technique can be used on many needle felted animals. I hope you have fun with it like I did!
Here are the time stamps to easily navigate to the bits you would like to watch most :
0:00 Intro
01:41Adding darker colour wool as base fur
03:21 Blending wool colours: to prepare lighter tones
04:25 Let’s do the twist!
04:55 Stabbing into a wave shape
08:45 Trimming and finishing
I hope you enjoyed it and it gave you some new ideas.
What animal do you think are you going to add wavy fur to? please let me know in the comments – I’d love to know. 🙂
In my next video I’ll show you how I made his eyes.
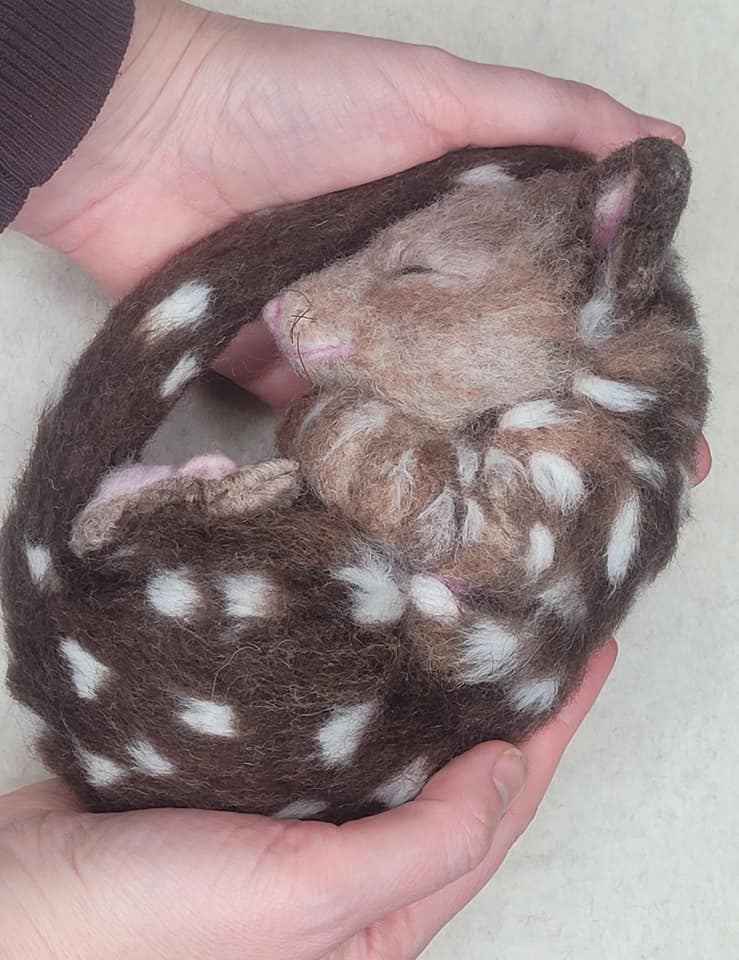
I’m so excited to show you my latest needle felted quoll. He’s curled up fast asleep and looking rather cuddly don’t you think?
It’s been a few years since I made my first one and I absolutely loved making one again.
Quolls are incredibly unique animals. They are spotted marsupials from Australia and my do they have interesting feet too!! I think they look almost like an imaginary creature rather than a real one.
I made his core out of Norwegian wool batts, his top coat is a mix of merino tops and corriedale slivers. I added the long fur with the long fur technique (see here for how you can do this) and also did some reverse needle felting to create a blend of lighter colours on his face. He also has wire in his tail and toes and horse hair for whiskers.
If you are wondering how to felt eyes that are closed or sleeping – here is a tutorial on how I made the quoll’s eyes. This is great for all sorts of sleeping animals 🙂 It also shows my quoll when he didn’t have any fur (just his core base).
If you are stuck on how you might needle felt spots on your spotted creations – here is a tutorial showing 4 ways you can achieve this from simple spots to more detailed long furred spots.
What are you currently making or planning to needle felt next? any interesting looking animals like the quoll maybe?
How do I create spots on my needle felted animals?
Here is a video tutorial demonstrating how to needle felt animal spots in 4 ways.
If you are a beginner you might just want to know how to add quick easy simple spots to start with to get a feel for your needles and wool.
Or you might be looking at how you can add more realistic felted fur on your spotted animal.
I also show you how a reverse felting needle can be useful to pull the wool fibres from your core base through your top layer of wool to form a spot.
Whether you are an absolute beginner or a more advanced learner, I hope you find these tips helpful on your needle felting journey. My aim is to teach you how to needle felt animals that are detailed and realistic.
Here are the time stamps to help you find the sections you may be looking for:
0:00 Intro to animal spots
1:47 Adding simple spots – this is great for beginners, a quick easy spot
5:35 Reverse felted spots – using a reverse felting needle to create spots
7:44 Long Layered spots – how to felt realistic fur on your spotted animal
15:31 Parallel planted spots – for fur that stands up (medium/short fur animals
So here is the video. I hope you enjoy it 🙂
What is your favourite spotted animal? There are so many to amazing animals out there to choose from but please let me know in the comments – I’d love to know.
NEEDLE FELTING TOOLS AND WOOLS:
****** Best NEEDLES I use for quality are from Heidifeathers. They all come colour coded so you’ll never forget which needle you are working with.
It’s well worth getting a set of 30 Mixed Felting Needles – Triangular, Star, Reverse and Twisted Needles – here
Clover Multi Needle Tool which holds 1 to 3 needles and really helps to speed up your felting: here
Have your 5 favourite needles in holders- 5 x Long Wooden Needle Felting Handle – keep as they are or decorate them? here
****** SCISSORS ******
Beautifully designed rose gold embroidery scissors – handy small size, sharp for cutting strands of wool for long furred animals and for trimming stray fibres –here
****** WOOL ******
Heidifeathers provides a wonderful variety of quality wools.
CARDED Wools – quick and easy to felt with Carded wool batts bundle of 4 natural wool shades; white, grey, dark brown and mid brown here
Carded wool batts, Carded Jacob Wool batts In Natural Shades here
‘Creature Mix’ Carded Wool Slivers HF – 6 wonderful animal shades of needle felting carded wool slivers, here
Or buy individual colours Heidifeathers Single colour Slivers, Natural sheep or alpaca wool tops – choose from a variety of animal colors and bright colours too here
Merino TOPS selection: Heidifeathers Merino Wool Tops Toy Box Mix (animal colours – 12 – total 300g) – here
PERFECT COLOUR PACKS for when you want to add fur to a particular animal – Merino Wool Tops :
Pack of 6 ‘Beautiful Browns’ here – donkey, mouse, tawny owl, mole, hare.
Pack of 6 ‘Grand greys’ here badger, koala, grey squirrel
Pack of 6 ‘Outstanding Oranges and Yellows’ here fox, red squirrel, autumn leaves, bumble bee, yellow chicks, orangutan
Pack of 6 ‘Gleeful Greens’ – here leaves, lizards and frogs, parrots
(Please see links disclaimer in the right hand panel)
Would you like to know how to make needle felted eyes that are closed or sleeping?
I am making another baby tiger quoll at the moment and when it came to felting the eyes I thought I’d take the opportunity to film the process so I could show you.
In this video tutorial I teach you the stages of sculpting the eyelids, adding a dark eye line and attaching fur around the eye, plus other tips such as which needle to use for detail including the star, twisted and reverse felting needles.
My last quoll ‘Freckle’ pictured here went all the way to Australia where these fascinating marsupials are from.
My new one is going to California once finished!
You may also remember ‘Hazel’ the hazel dormouse I made too? Again she had those sweet sleeping eyes.
Needle felting eyes that are closed or sleeping are quite simple to make. It is more or less needle felting a line but there’s a little more to it to as well to make them look as realistic as possible.
Whether you are an absolute beginner or a more advanced learner I hope this video inspires you to get out your needles and wool and felt your own sleeping animal. 🙂
Would you like to learn how to attach long fur to your needle felted animal? not sure how to firmly add the wool or where to begin?
You have likely seen my photo tutorial with basic techniques for adding long fibres onto a badger. Well here is a video series for those of you who learn best by watching how it’s done. These are far more in depth with more techniques and tips along the way! You too can create a detailed and realistic fur effect!
This was available as a paid tutorial for some years but I have decided to offer it for free. I have embedded all 4 parts on this page for you to watch and have included chapter start time stamps, so feel free to start at the beginning or skip to the parts you feel would be most useful 🙂
Difficulty ranking: Intermediate level or beginners looking for a challenge.
The result: Amazing detail; the look of a real animal with layers of fur.
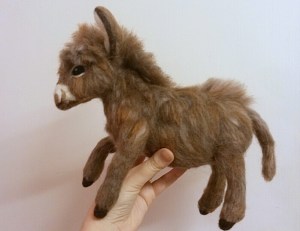
In this series of videos I demonstrate how I create a realistic fur look by attaching lengths of wool to my miniature donkey. These techniques can be adapted for any long furred animal. Join me on my journey from preparation to finish; starting with carefully ‘needle brushed’ leg fibres, then fluffy tummy and long textured back fur. You will also see how I create a middle parting on the donkey’s muzzle, add a long fluffy fringe and a beautiful flowing mane.
Skills you will master across the 4 parts:
Simple hand blending of wool roving for natural, textured colour tones
Preparing wool lengths and a test/sample piece
Knowing how firm to felt your core base
Two easy methods to firmly attach various lengths of wool fibre
The art of layering and trimming fibres
Specific skills for adding fur to various body parts including legs, tummy, back, ears, tail, face and mane
How to prevent over felting or flattening of long fibres
Finishing techniques for defining strands or fluffing them up
Music is by two artists; Jahzzar and Slainte (full use rights).
Details of where you can get my tools are at the end of this page.
Please note: this tutorial series assumes you will have already felted the basic animal shape. My demonstration donkey already has a wire armature with core wool wrapped over it plus facial features and hoofs. I show the advanced techniques beyond this.
PART 1: Hand blending wool, attaching fur to legs (time stamps included below for chapter begin times)
Intro (0:00)
What you will learn in part 1 (01:05)
Where to start? (02:00)
Preparing and blending wools (03:30)
What tools do I need? (11:56) (links to the tools can be found at the end of this page)
Shorter fur – layering on the legs (I show the basics of the 2 techniques) (13:30)
PART 2: Attaching fur to tummy, torso & rump (time stamps included below for chapter begin times)
Intro (0:00)
What you will learn in part 2 (0:52)
Soft tummy fur (technique 1) (01:28)
Continuing the tummy (and a few ways of blending colour) (07:03)
How firm should the core wool be? (11:10)
Lots of thick fur layers (across the torso) (technique 1) (13:13)
Tips for preventing fluffing up and positioning animal whilst felting (18:02)
Adding fur on rump (techniques 1 and 2) (19:20)
PART 3: Adding fur to back, muzzle and fringe (time stamps included below for chapter begin times)
Intro (0:00)
What I’ll cover in part 3 (00:52)
Long fluffy back fur (technique 2) (01:24)
Ears and tail (brief overview for ideas) (09:18)
Fluffy textured muzzle and fringe (very long fur pieces) (technique 2 plus other tips) (10:56)
PART 4: Donkey mane, defining and finishing (time stamps included below for chapter begin times)
Intro (0:00)
What I’ll cover in part 4 (00:52)
Making a mane (an extra attachment method) (01:21)
Attaching the mane (08:05)
Finishing off your animal; defining etc (14:28)
Final donkey photos (what a cutie!) (18:58)
************* LINKS TO THE TOOLS: ***********************
Best NEEDLES I use for quality are from Heidifeathers (all come colour coded for easy identification too)
Well worth getting a set of 30 Mixed Felting Needles:
– 10 Colour Coded Different types – Triangular, Star, Reverse and Twisted Needles – get here.
Don’t ever miss out on my latest tutorials! Insert your email address and click the ‘Follow’ button on the right hand panel to receive notifications of when the next post is up..:-)
Whether you are a Needle Felting beginner or a more advanced learner, sometimes you can lack confidence. I want to encourage you and show you how to become a confident Needle Felter. I share practical tips as well as mindset strategy to boost confidence in yourself and your abilities. If I can do it then so can you. 🙂
Now I sometimes hear some of you say that you’re actually embarrassed by what you’ve created, you compare yourself to others and you just don’t have the confidence in your felting abilities.
Some of you have started projects, you’ve been doing all the basics, but then you just feel like you haven’t reached a level of where you want to be, and some of you may even be trying to sell your creations but you just don’t feel that anybody would buy your work.
I want to encourage you all with 5 ways to become a more confident felter.
In no time I hope you’ll go from being self doubter to confident felter. 🙂
If you prefer to listen or watch videos then I have covered all this in this video below, if not and you prefer to read then please scroll down past the video and continue to read on.
So here are 5 ways to Needle Felt with confidence:
Recognize, and remember that you are on a journey.
That might sound a little bit strange, but this just helps me to realize where I’ve come and where I’m going.
It doesn’t matter if you’ve just bought some wool and you haven’t even started stabbing or whether you’ve actually done a few projects and you have learnt some basics or maybe you’re a professional at this and you sell your work.
We all start somewhere, and there’s always room wherever you are to LEARN and GROW and IMPROVE.
So I remember when I first started, I had no idea what needle nothing was. I’d been online and I found these amazing animals that people have made out of wool. And I was like, “what? how do people do that?” So I went online and I saw how they did it. -just some brief clips about it, and I made a decision right there and then to pick up my wool and my needles, I just got them online and I just sat, and I made a cute little cream bunny, which I still have today,
I’ve never sold it. To be honest, it’s my first work so not up to my standard now, but that little bunny as cute as he is and as simple as he was he is a reminder now of my journey so far. I can look back, and I can think of where I started all those years ago with some real basic techniques and now look at me now and see how far I’ve come. If I hadn’t started and got stuck in, I wouldn’t have probably had the confidence that I have today.
I can also encourage you today because I have been the starter where you might be today. I’ve been at the edge of whether I can sell my animals.
If that’s what you want to do, you know you absolutely can with a bit more confidence, a bit more skill, and that’s something that you want to do go for it. I did, and I’ve sold some lovely pieces, and I’ve received so much lovely feedback from people as well.
Yes, I’ve experimented on this journey, and I’ve very much learned through trial and error, and yes, I completely aspire to become better and improve my work all the time, and I absolutely am inspired by and admire those people who make the most beautiful creatures. But at the same time, I recognize I’m on my own journey.
Wherever you are on your journey right now, it’s completely fine. It’s ok to be where you are but know that there is so much more to come.
Get to know and love your wool and your needles.
If you’re not confident in what the different wools can do and what the different needles can do, then you may not be confident in what you as a felter can do.
So what I always suggest is that you get to know and get really familiar with the different fibers that are out there, and also get to know what the different needles can do,
So, the wool actually is very forgiving. It doesn’t judge you (I’m not saying that people judge you either).
Often in fact, the wool has its own mind. Sometimes you’ll find when you start a project you’ve got this great plan of what you want to make, and as you make something, it molds into something else and becomes a different animal. I’m sure many of you have had that happen!
Think about it as you are a potter with your clay, but in needle felt terms – you are a needle felter with your wool, and you’re going to be sculpting with that wool to make something beautiful.
This is your material that you’re using. So get to be familiar with the different types and look at the different sheep breeds if you’re using wool and maybe even other non sheep species like alpaca or camels. If you’re using non wool types such as vegan friendly fibers, that’s brilliant as well. There’s so many different fibers out there.
Maybe you’ll start off with certain wool like core wool that’s more abrasive and easier and quicker to felt then later on add a more softer finer wool for the detail.
If you’d like to delve deeper into what the different wool types do e.g know the difference between wool tops and wool batts, or would like a quick guide to the sheep breeds, then head over to my wool guide here.
You’ll get to know which fibers you like and you’ll be more confident in knowing what you’re doing for each project and you’ll become more confident in your abilities overall.
What I would suggest is that when you start out you always start a little bit smaller and then build the layers on top. It is so much easier to add wool than to take away. Although I have to say on occasion I’ve had to cut things off, and I know that’s a big no no in the needle felting world. But sometimes it’s easier to cut something. I’ve cut a head or a nose off before.
This is what needle felting is all about, you get to work with the fibers, you have your favorites for the different sculptures you’re making and you make it work for you.
In the same way with the needles, get to know different types of needle, try them out, experiment. Feel comfortable with what you’re using. These are your tools to use, so if you’re using the right needles, the quicker more efficient that you will become. You can easily add the detail to your animals as well. Again, you’ll probably find that you have a favorite that you love to use.
When you feel confident in your wool and your needles, you will find that your overall confidence will build up, and you can then just let your imagination flow.
Learn from others and be part of the community.
So I don’t know if you’re on social media, but I certainly am, and i’ve really found some of the felting groups out there to be the most encouraging places to be. You can learn from other people, you can be inspired by those more experienced than you and you can also get tips and learn techniques from others as well. I found it to be really encouraging. It gives you that kind of confidence boost when people say that they like your work. Now it shouldn’t be all about that, but I really think it does help. You can get little tips on maybe how to improve as well if you want to.
If you’re not on social media, that’s completely fine, too. You might find that there’s a local group where you can learn alongside other people in person, which is even better
Remember that COMPETENCE leads to CONFIDENCE, so the more that you do something and get good at it, the more confident you will become. So keep practicing and learning.
So there’s loads of free and paid for resources:
Youtube to watch videos to understand how to needle felt and improve your techniques. Please do subscribe to my needle felting channel here. I have many more tutorials planned.
There’s also online tutorials like on my website here so you can learn from picture tutorials.
PDF tutorials that you can download, needle felting kits and books to buy out there too.
As I mentioned earlier, you could find a local community group that is doing a workshop, learning alongside a friend can really encourage you and build your confidence when your learning to needle felt.
There’s also online workshops, which you can find if you do a really good Google search.
I suggest when you’re learning, not to try everything all at once, master those little projects first before you leap into something more complicated. Once you’ve become confident in the basic techniques, then you can move on something far more challenging.
Embrace the mistakes along the way,
So learning and practicing is great , but don’t be afraid of making those mistakes along the way. Those mistakes will drive you forward so you can make even better creations. When you make the mistakes, you remember them and the next time you’re less likely to do it, yeah. You’re more likely to improve when you experience those mistakes. You can then hone your skills and become a better and more confident needle felter.
Sometimes I find too that making mistakes enables me to find a completely new technique that I hadn’t even thought of before, and that is all part of experimentation and trial and error.
If you break a needle, for example, you will soon learn. You don’t want to break more needles and buy more needles and have more expense, so you will soon learn how to achieve the pressure that you should be stabbing with and what angle to stab at.
Reading a book or watching a video is good for learning but the true meaning happens when you physically try it and do it by yourself. Having those personal mistakes happen to you will mean you soon learn, even though it can seem like learning the hard way.
I can look back at all the mistakes I made and realise that if I didn’t make that mistake I may not have honed my skills the way I have and be where I am today
Another mistake that people often make (and I am very guilty of this as well) is starting off making something that ends up being too big or certain parts of the animal are completely out of proportion. Yet you thankfully soon learn to plan a little bit better, take your time, and make a better proportioned animal.
Sometimes you might feel when you make that mistake that it’s all gone wrong, and you don’t feel confident at all. Well, I just want to reassure you, MISTAKES ARE OK to make!!. I’m pretty sure that when you speak to anyone no matter how experienced they are that they still make mistakes.
If you make a mistake, – don’t let that affect your confidence, just see it as something that’s part of your journey, take a deep breath, you’re not going to make as many mistakes moving forward as maybe you will in the beginning. So just see that as an experiment, see it as a learning curve and then move on! 🙂
Discover and follow your individual style.
You have your own inbuilt style, and this is what DIFFERENTIATES you and makes you UNIQUE from any other artist!
Of course it’s really important to learn, so if you want to go and follow kits or you want to follow youtube videos or read blogs posts like this, then that’s completely fine. You can really improve your skill and obviously being competent makes you more confident. Yet at the same time it’s really, really important to find your own unique style.
When looking through Google images of needle felted animals or when browsing social media it’s really amazing how you can look at those pictures, and you can recognize straight away who the artist is because they have their own style, and so this is what will happen for you.
Maybe you’ve already found your style – that’s brilliant, please follow it!
But if you haven’t yet just again, get to know what you love, get to know what really makes you happy in your hobby and find your individual style.
Personally. I love the tiny detail and the realism and making animals to be as lifelike as I can. I have to say that I’ve been really frustrated in the past when I’ve seen other people make animals, and they can do them really quickly. They can maybe do a whole animal in like a day or even a couple of hours. I thought to myself, “oh. If only I could make things quicker, I could also sell things quicker”.
But then when I think about what my unique style is and what it is that I appreciate in art, – I appreciate the detail, and if I’m going to create the detail and if I’m going for something realistic, – then of course, it’s going to take me time.
So don’t get stuck in the mindset that you need to be like someone else or do the same thing as someone else. Don’t compare yourself in that way, find your own style, and then follow that style and be the needle felter that you were meant to be!
Yes, be inspired by other artists, but be confident in yourself, don’t come under any pressure to be like anyone! Express yourself and who you are through your needle felted creations!
So, are you a self doubter or a confident felter? Please let me know in the comments.
So you’ve got your felting base, some needles and some wool, BUT what about a wooden letter opener? or some hair straighteners? ..(huh? I might hear you say..)
The video below walks you through my top 15 favourite Needle Felting Tools and Materials and I explain how I use each of them to create detailed and realistic animals. These take you beyond the beginner basics so if you are looking for the best felting equipment to advance your skills then I hope this list will help.
I include felting tools (like needles and their holders, scissors and my favourite felting mat) as well as materials like wire, clay and wax. There are some supplies you may not have thought of so I hope to inspire you.
My demonstrations feature a range of felted animals such as my sparrow, cat, dog, bumble bee, hare, bunny and more.
I hope you enjoy it 🙂 Let me know which was your favourite?
I’ve included the links on where to find the supplies below the video too.
======================================
Here is more info about the Mr Bumbley Bee PDF Tutorial.
Draper Flat Nose Mini Pliers with Soft Grip, 115mm – here
*** STRAIGHTENERS
I would go for this more budget version of the ones I have if buying some just for needle felting, very similar to mine in what they can do but less pricey – Remington Ceramic Straight 230 Hair Straighteners, 15 Seconds Heat Up Time with Variable Temperature Setting – here
*** SCISSORS
Professional Thinning Shears Hair Cutting Teeth Scissors – here
(For the Amazon affiliate links I may receive a small commission at no extra cost to you. This supports my art and enables me to continue to provide valuable content and for that I am so very grateful to you – Thank you!!)
A question I often get asked when creating my needle felted animals is ‘what type of wool did you use for your core wool?’ or ‘what wool is the dog’s long fur made of?’
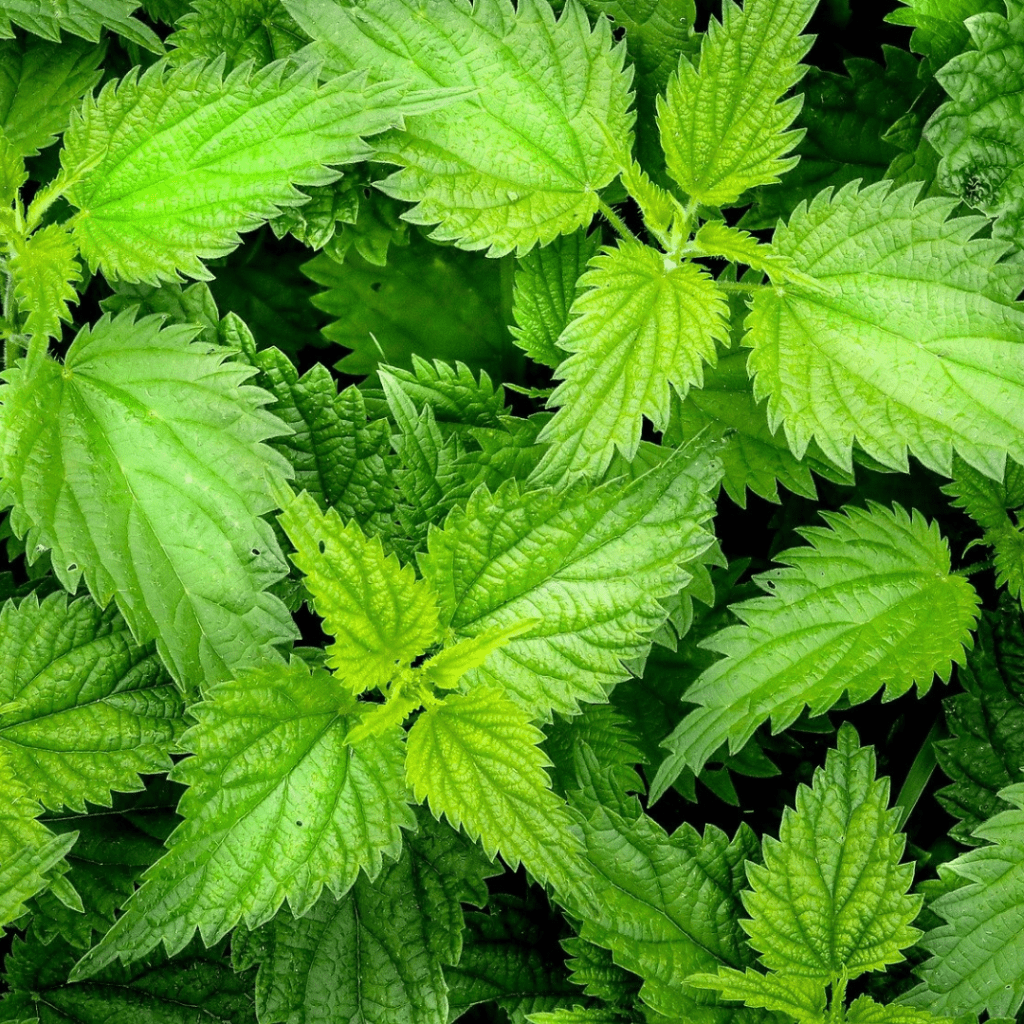
When you first start needle felting the variety of fibres out there and knowing what to start with can seem really confusing and somewhat daunting. There are not only different animal fibres you can choose from (e.g. sheep, alpaca, baby llama, camel, even dog fur etc) but there are also vegan options such as viscose, acrylic, bamboo, hemp, soybean, nettle, pineapple or banana fibres.
When felting with sheep wool there are different breeds of sheep that produce different textures. Some are delicate and soft with straight fine fibres, some are more thick, fibrous and harsher to the touch. Some are easy and quick to use as a core wool and some are better to use as a top coat. You can get natural undyed wools which come in some lovely whites, creams, greys and browns depending on the breed or you can opt for wool that is dyed (or dye it yourself) and there are numerous amazing colours to choose from.
In this guide I mention some sheep breeds that I love but my main aim is to help you understand the different preparations of wool like knowing the difference between a batt and a top. It is so useful when learning to needle felt to know what these terms mean, to save time and money and to know practically how you might use each of the different wool types at the different stages of making your needle felted animal.
I give some suggestions from my own needle felting journey that will hopefully provide some insight into the types of wool available but I’d encourage you to test different fibres for yourself. It’s very much part of the fun when learning and no doubt you will find some amazing discoveries along the way.
I have also included links in this guide for where to source the different types of needle felting wool – please see my links disclaimer in the right side panel for more details. These are all from Heidifeathers shop on Amazon. They sell a wonderful range of wool and the biggest range of barbed needles in the UK. They have excellent customer reviews and postage is usually free. If you would like to just browse all their products rather than using the links below then here is the shop link.
Carded Wool – Batts and Slivers
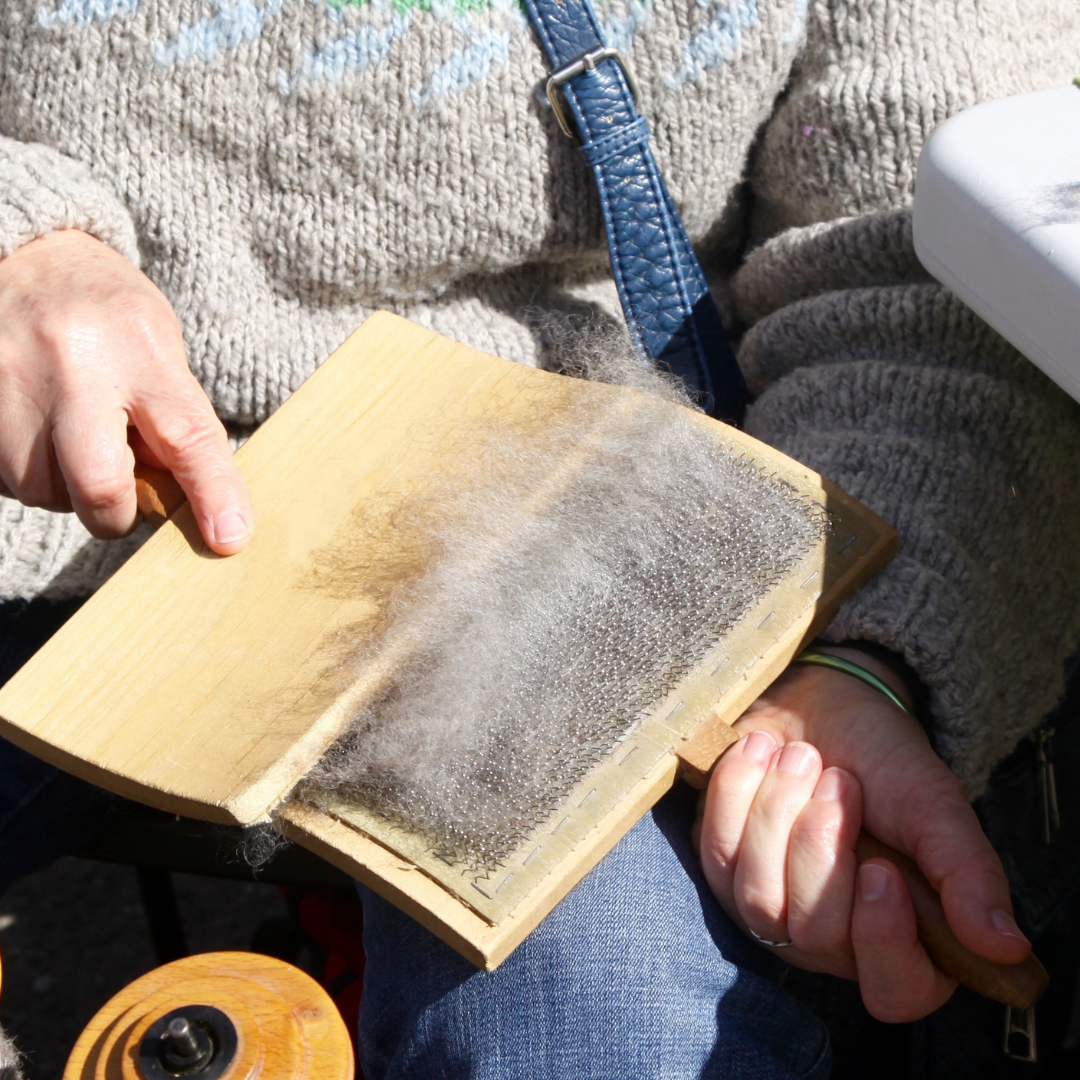
What is carded wool/carding?
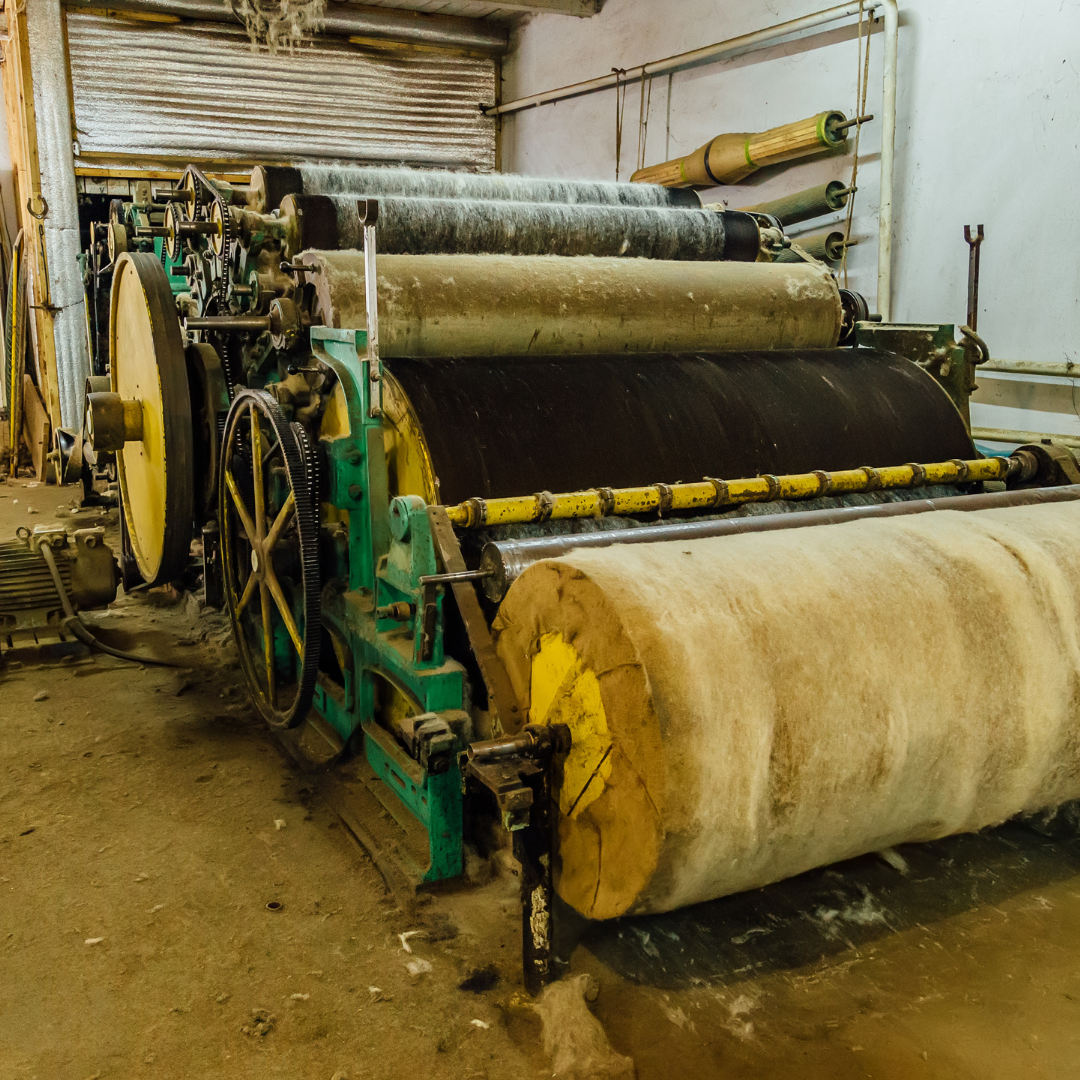
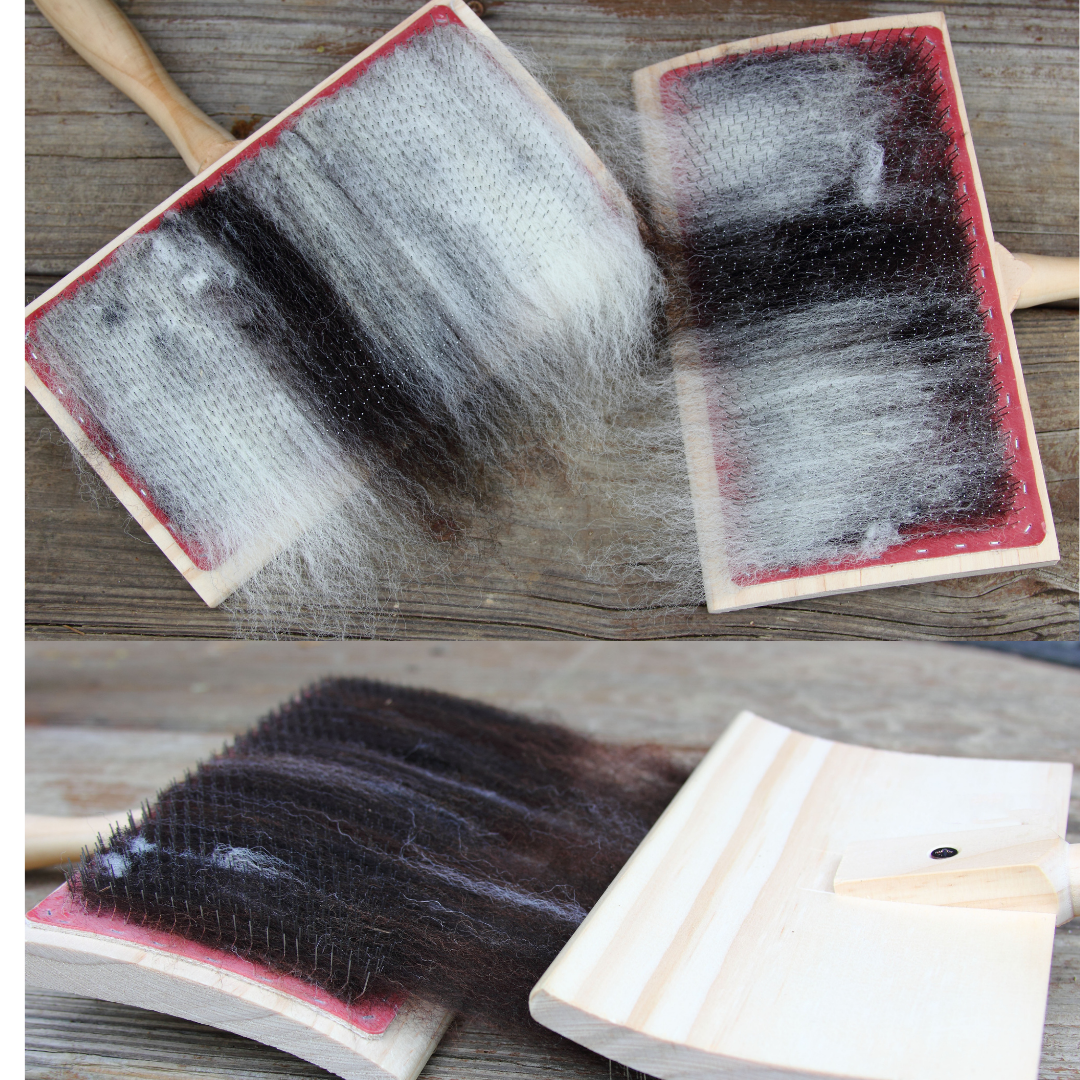
The process of carding wool can be achieved with a machine (usually a drum carder) or by hand using two handheld carders (some people use dog brushes). Traditionally the wool is first of all washed, removing most of its lanolin and then passed through differentially moving surfaces so that the fibres are further cleaned of vegetable matter and are rid of any tangles or clumps. The result is a continuous mesh of mixed up fibres. They come as carded batts or slivers.
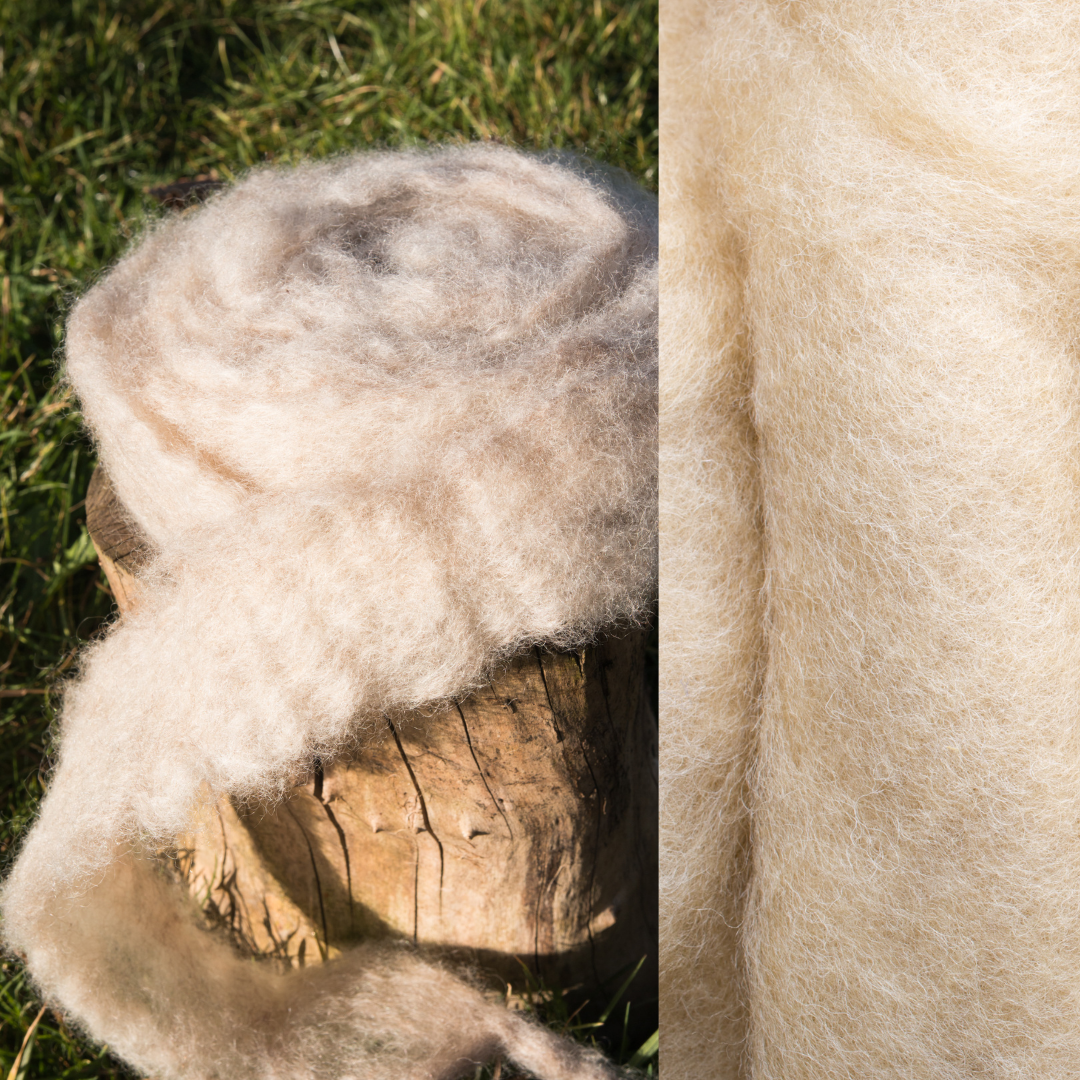
What is the difference between a batt and a sliver?
Carded wool can be bought as a carded batt – which is simply a big thick sheet of mixed up wool fibres or it can be bought as a carded sliver which is the same as a batt but it comes as a very long strip.
Both are great for most needle felting projects as you can easily pull off small pieces or long sections and start making shapes. As the fibres are short and go in various directions rather than laying in the same way, this wool type is super quick to felt with.
Here is a carded wool batts bundle of 4 natural wool shades; white, grey, dark brown and mid brown.
What would I use carded wool for?
I find carded wool is great to use as a core wool for my medium to large needle felted animals. I like using natural undyed carded corriedale, Jacob, or mixed breed wool for this.
Hereis the white Jacob wool batt which is great for the core shape of your animals. It also comes in other natural shades.
Core wool is often cheaper to buy (especially in bulk) saving the more luxurious softer wools such as merino wool for the coloured top coat. You don’t see the core wool which makes up the inside of your felted animal so it doesn’t matter if the finish looks good or if there’s a tiny bit of vegetable matter in the wool. The important thing is that you have made a good firm shape on which to attach your outer wool.
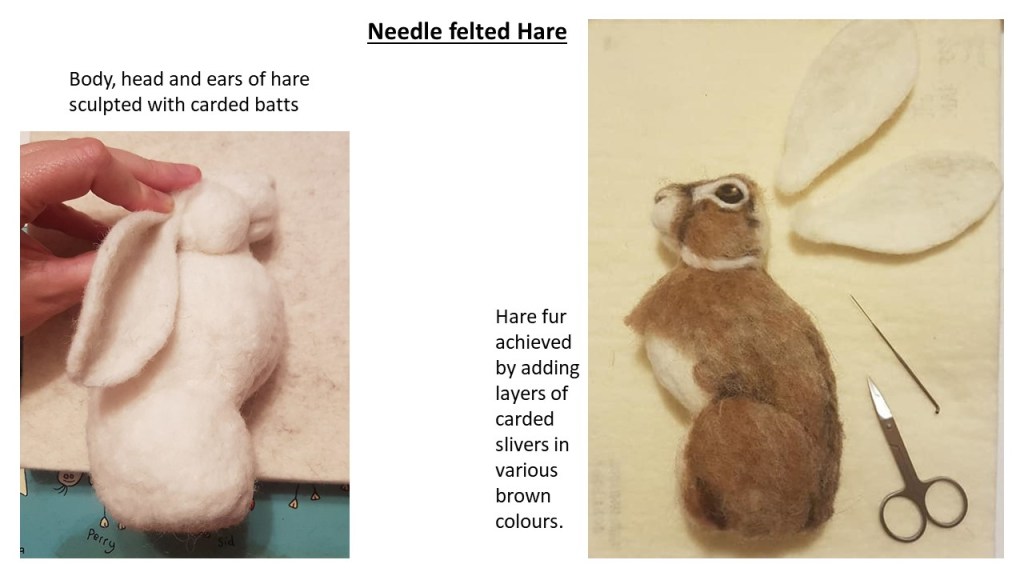
I prefer the carded batts of wool for sculpting the basic head and body shapes and for making flat features such as ears. See below for my hare.
For animals which have a wire armature I find it more practical to use the carded slivers for wrapping lengths of wool over the wire, then I use either batts or slivers to build up the shape and musculature.
Here is one of my favourites – the white corriedale wool sliver.
Batts and slivers come in a variety of colours and if you are making a small animal and not using the long fur technique you can skip the need for a core wool and just start sculpting your animal in the colour it is.
If you have started off with core wool, you can add the carded wool colours as a top coat. They are great for layering different shades of colour and blending them. You can also use the long fur technique with the coloured batts to replicate a wavy/rough coat appearance. Batts work well too if using a reverse needle to pull out fibres to achieve a fluffy coat / hairy look or for blending colours.
This ‘Creature Mix‘ has six wonderful animal shades of needle felting carded wool slivers.
Tops/Roving
What are tops/roving?
Tops and roving mean more or less the same thing when it comes to needle felting. After the wool has been washed and carded it can then be combed so that all the fibres end up going in one direction to form long lengths that can be wrapped up into a ball. They come in all sorts of sheep breeds and most often you’ll see them in merino wool in a vast array of colours to choose from.
What would I use tops/roving wool for?
As it stands this type of wool is not so easy to felt together as the carded wool due to the fibres all laying in the same direction, however it is brilliant for adding pieces of wool to your needle felted animal to resemble long fur. The merino wool tops in particular are fine, straight and soft and so I will mostly use them for straight fur. Your animals can look really realistic with a bit of patience and some beautiful merino wool tops.
This merino tops ‘Toy box mix’ has 12 colours which are perfect for needle felted animals, including the pink for the inside of ears or for the nose or paw pads on some animals.
When you look at a real animal its coat is rarely all one colour but different tones of light and dark so by using a number of tones of wool you can get your animal fur to look as realistic as possible.
The following packs (each containing 6 colours) are ideal for when you need a variety of tones of the same/similar colours. I have given examples of animals you might use these packs for as inspiration, many of which I have made myself in the past.
For making a lizard, turtle, snake, frog or parrot.
If you need an extracolour that isn’t included in the packs above you can choose single merino wool colours too here.
On some of my animals I add in tops of another sheep breed (such as corriedale/ Shetland) to the merino tops where I would like to have a more wiry/ textured looking coat for more realism. I find that the sections I add have a bit more thickness and robustness to them than just the soft merino.
If you would like to stock up on and try out some tops in a variety of sheep breeds then this ‘Animal Mix’ is a wonderful collection of soft natural mixed wool tops from 10 different breeds including blueface leicester, manx and merino.
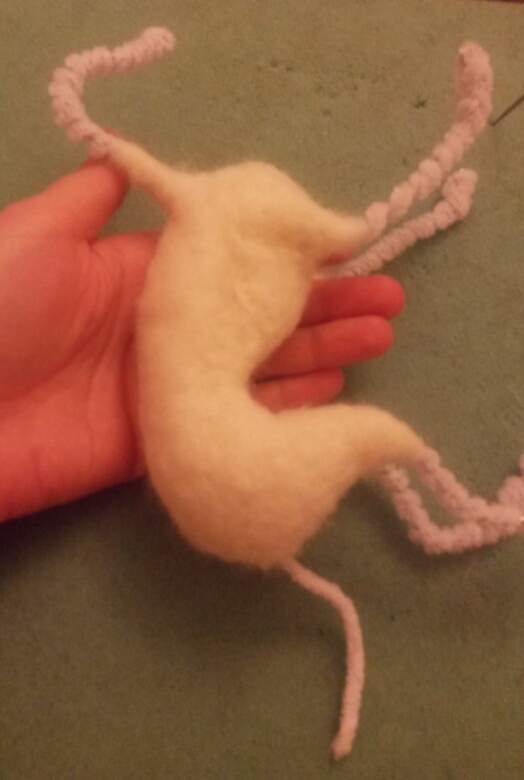
For a very tiny animal such as a needle felted bee where I want to reverse felt the colours, I don’t use a core wool but make it from the merino tops I already have to hand rather than necessarily buying new wool but I will hand shred/blend the fibres first to make it easier to felt with. My bumble bee tutorial here shows you how to make a bee from merino wool over a pipe cleaner armature.
When you need specific individual colours and types of wool, Heidifeathers also sell a variety of single colour slivers, natural sheep or alpaca wool tops in a variety of animal colours and bright colours too. Take a look here.
This photo shows the rabbit coloured carded sliver. I love this one.
Locks
You can find lovely natural curly locks in the cleaned but uncarded wool of some breeds of sheep (such as Teesdale) or from the angora goat – mohair. These can be attached to your needle felted animal to resemble curly fur / wool / hair for example when making a mane or for curly haired dog breeds or making a sheep/goat.
Heidifeathers sell these really soft curly mohair locks in a variety of colours.
This photo shows the brown mix.
I have personally found that if I need to add curls all over my animal rather than just adding a small numbers of locks e.g. to a mane or tail, then it is far cheaper and fun (though time consuming) to curl some wool tops by hand either by winding the wool round knitting needles or plaiting it, then wetting with a little water before leaving to dry. This technique also ensures every part of the wool is fully curly as some of the locks you buy may not be a perfectly formed curl or there may be matted/frizzy parts.
My favourite sheep breeds
I have mentioned some sheep breeds above that I love so here I have included some more information about the breeds and their wool.
Corriedale
The corriedale sheep is a cross breed from New Zealand (merino crossed with Lincoln and Leicester) and now bred internationally.
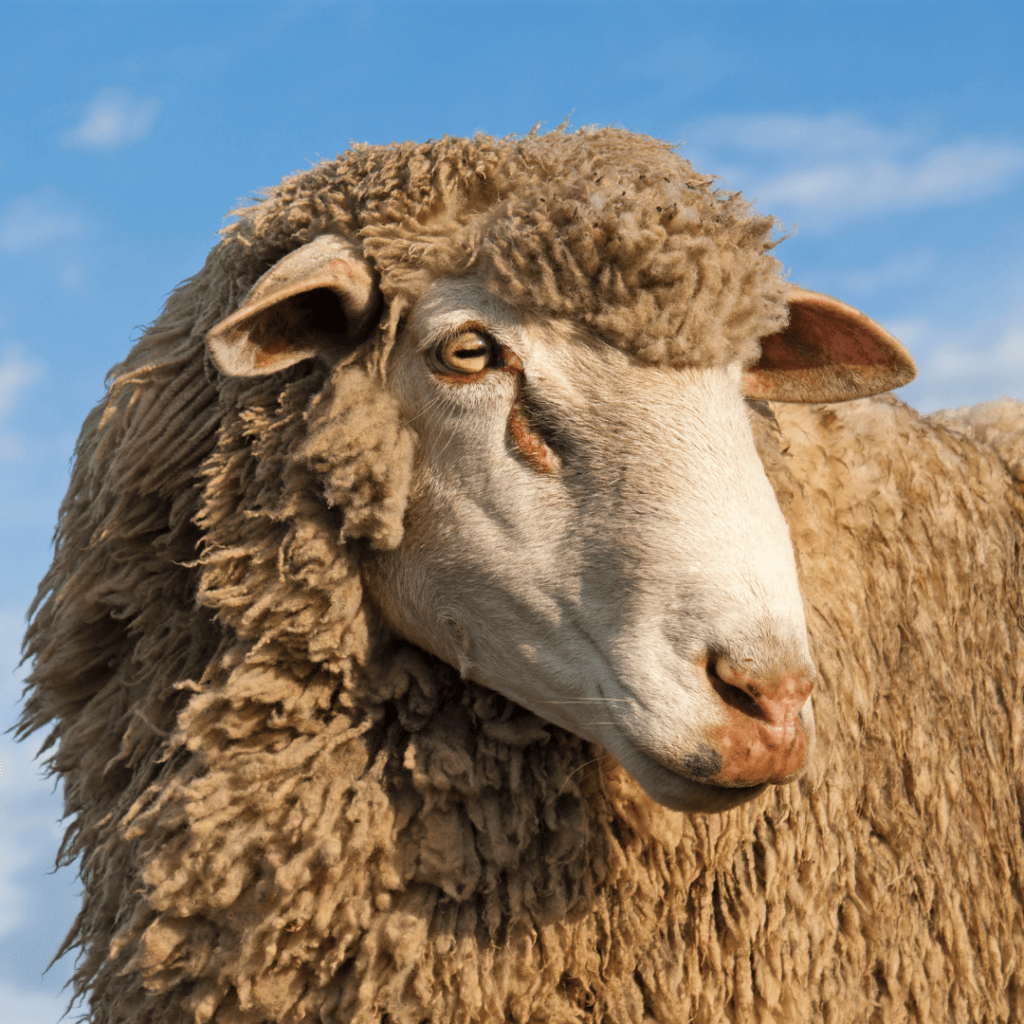
It’s a very cute sheep to look at with its super thick wool more or less covering its entire body and over its head like a hoodie.
Corriedale wool is fairly soft to feel and great to felt with and I love its natural creamy white colour. This is the wool I started out using as a beginner and though I love the other breeds too this is one I often stock up on. I use carded and tops for my animals.
Merino
The merino is a worldwide bred sheep but originating from Spain, this is very popular across Australia and New Zealand.
Similar in looks to the corriedale sheep with its wool over its head but the wool is extremely soft and fine.
I always choose a non-mulesed merino wool as unfortunately the painful practice of mulesing still exists on some farms where some skin is also removed along with the merino wool in some places. Merino tops are brilliant for adding pieces to my animals to resemble long fur and merino batts are wonderful to reverse felt for a soft fluffy coat.
Norwegian
There are many sheep breeds in Norway but the one most often used for wool nowadays is a cross breed of the Cheviot and the Dala and Steigar.
These sheep look slightly more slender looking than the above breeds as their fleece is longer and not so springy.
The wool is really easy to felt, feels soft and comes in a lovely natural creamy white colour. I particularly love using carded Norwegian batts.
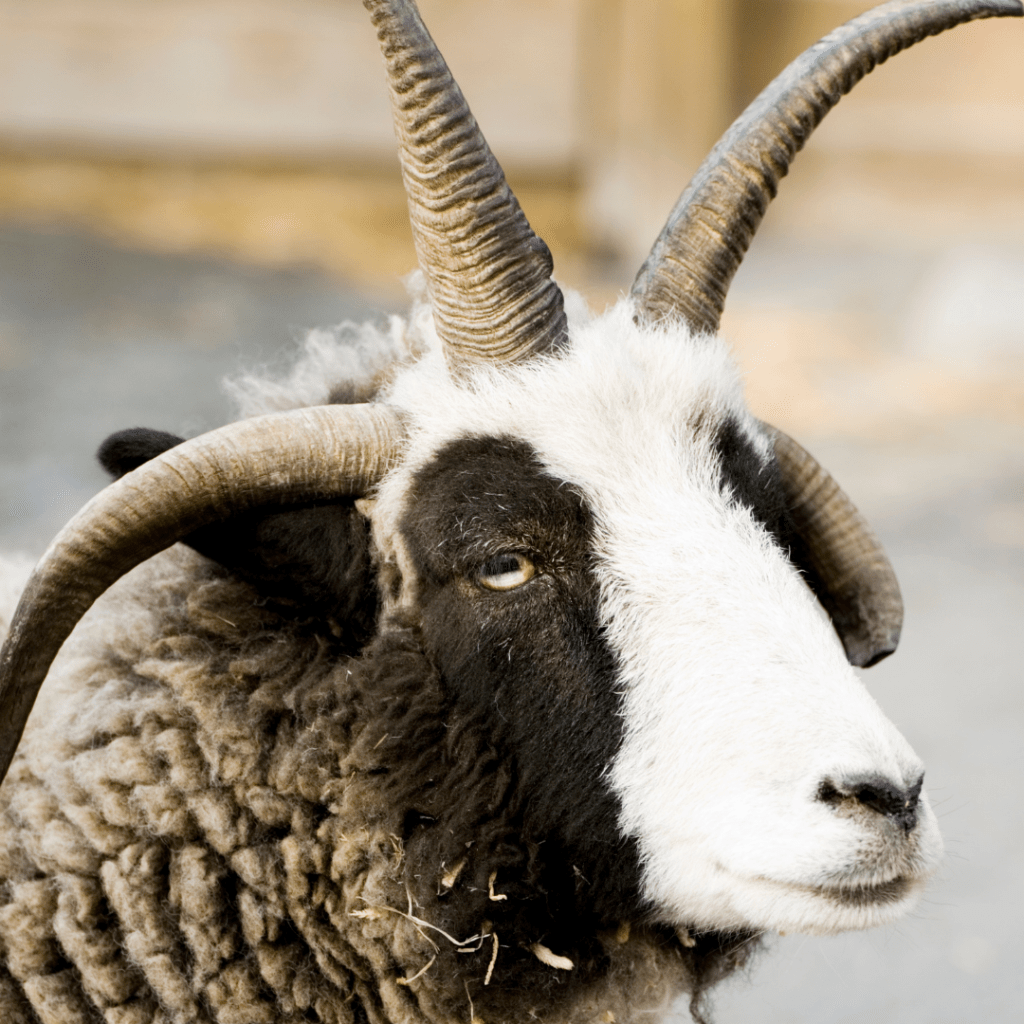
Jacob
Jacob sheep are so interesting to look at. They have some great markings, usually spots or patches of black or dark brown against a white background. They are also polycerate which means that both the ewes and rams have 2, 4 or even 6 horns.
Jacob wool comes in brown, black and white, and is quite soft and silky to feel though still quite coarse. I like the carded batts in this wool.
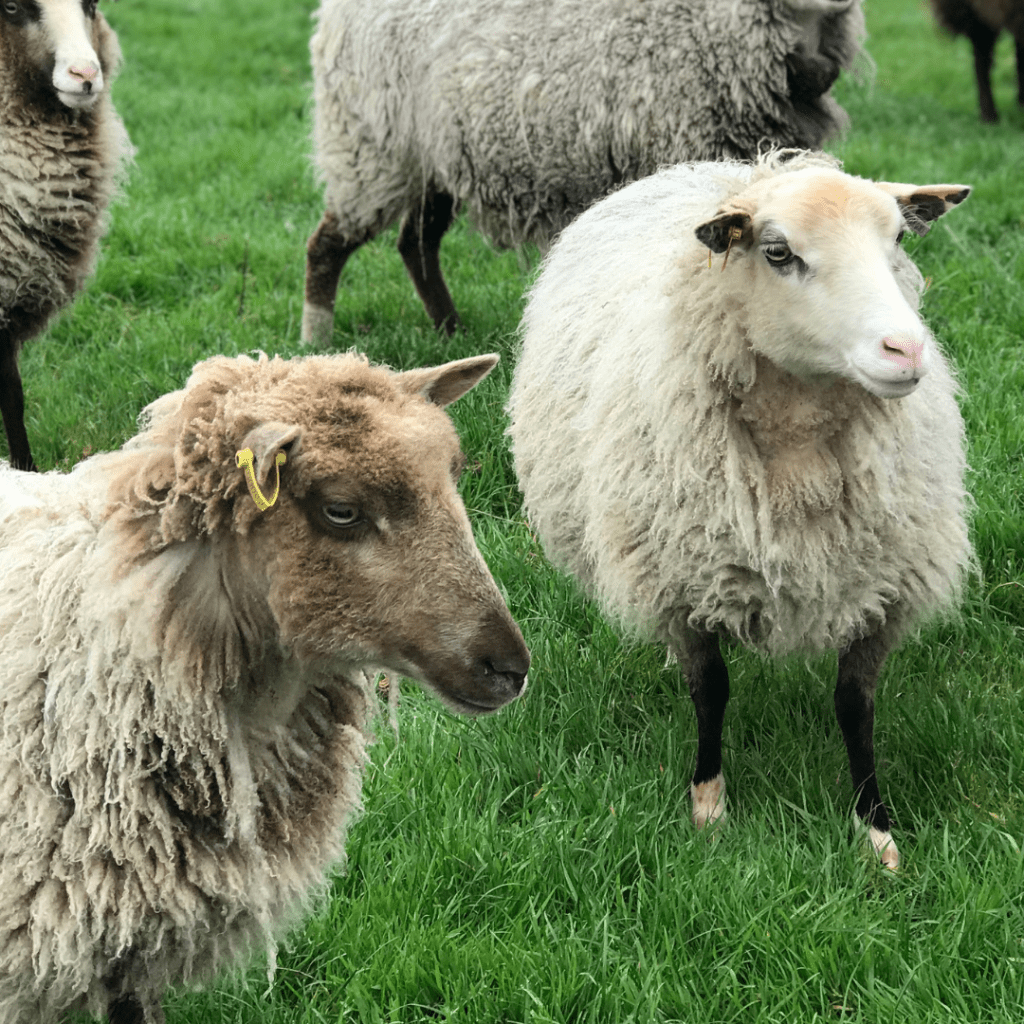
Shetland
This breed is the smallest of the British breeds and predominantly found on the Shetland Islands. It’s origin is not confirmed but is likely to have originated from Scandinavia.
Their wool comes in shades of white, brown grey and black making it really versatile in its natural form. It is fairly soft and fine with a more silky kind of feel than the corriedale. I love using Shetland tops as long fur for my animals.
Which sheep breeds and wool types do you love to use the most?
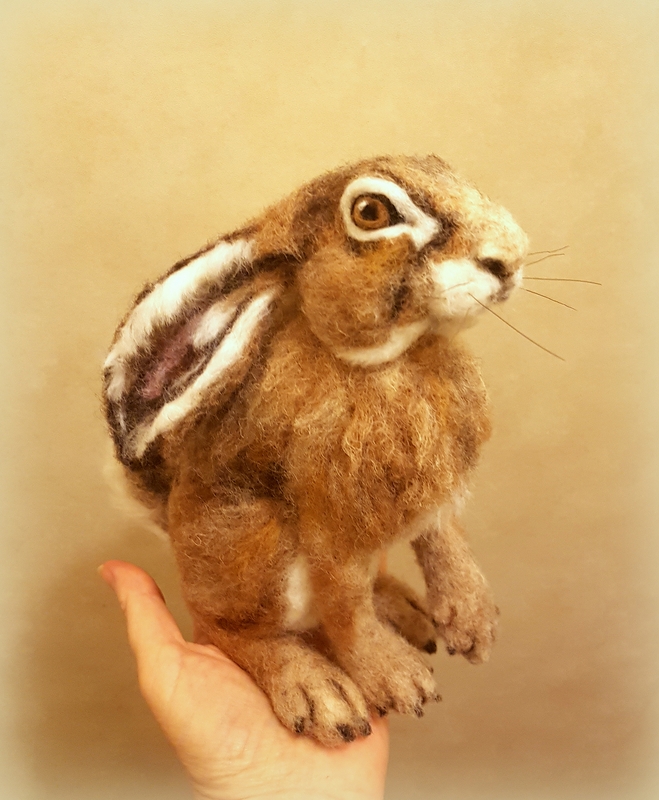
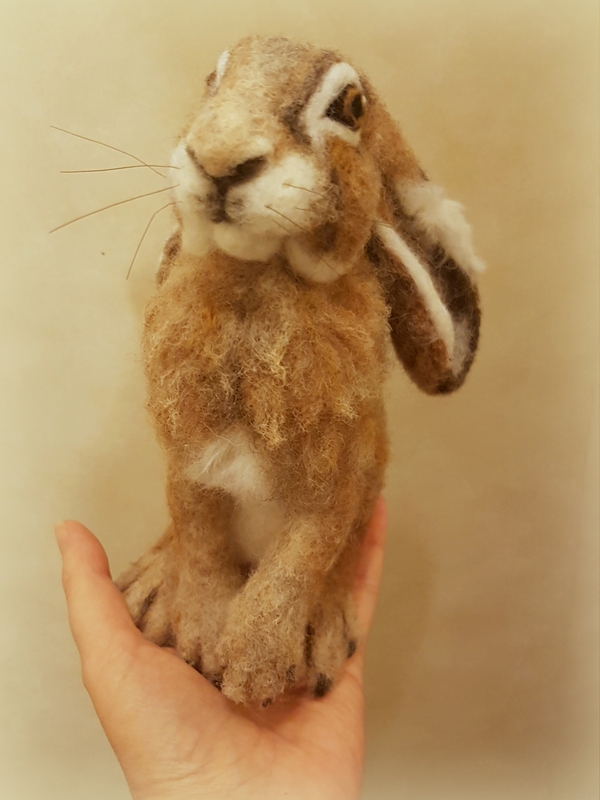
I am so excited to present to you my needle felted hare. She could be a moon gazing hare or maybe she is simply gazing up at you with those endearing eyes for some cuddles. I thought Luna was a sweet name which also means moon in Latin.
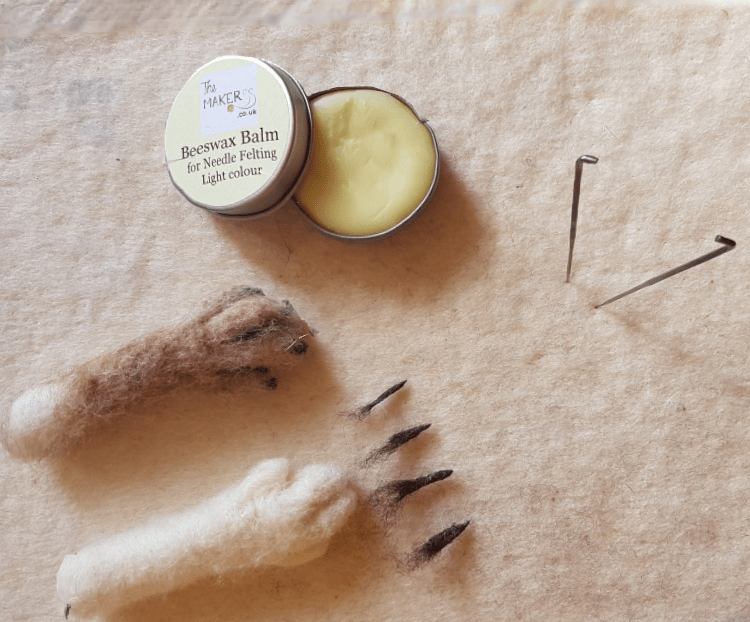
She is 100% wool except for her whiskers which are made of horse hair. Also I had some fun experimenting with wax that melts in the warmth of your hands to twist some of the wool between my fingers as a way to define the rugged and wavy texture of the hare’s fur around her neck and chest area. The wax was really effective to shape the tiny pieces of wool that I used for her claws as well.
I really love how hares have such long ears so I made these extra long for her body size, but I think that makes her even cuter, don’t you think?
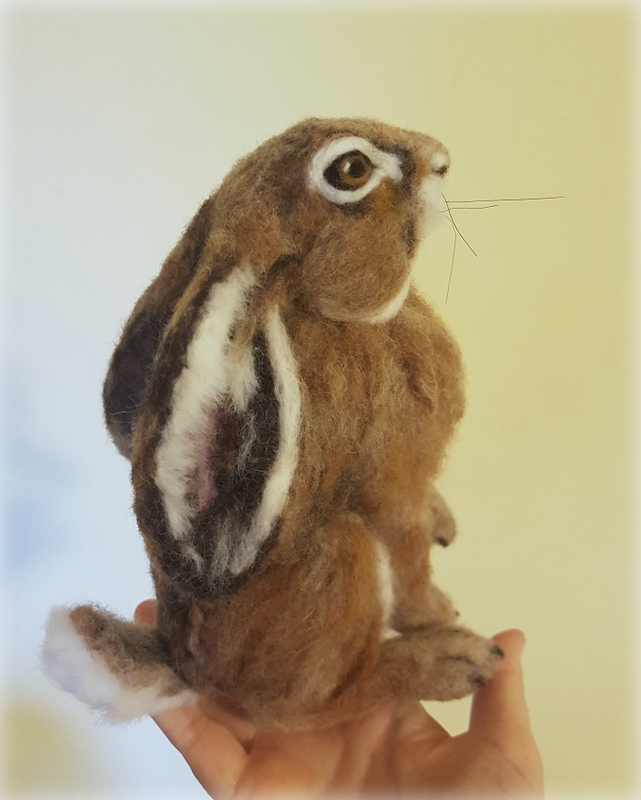
The process?
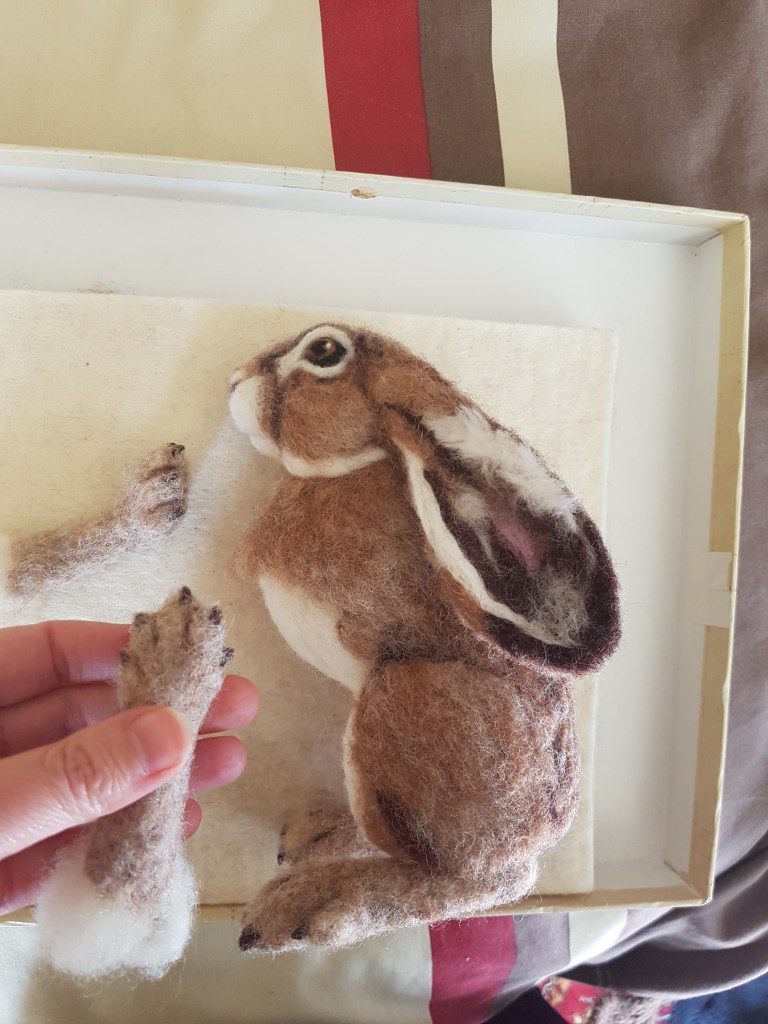
I started off making the basic shape of a hare head and body with carded core wool batts and then for her top coat I added a variety of brown carded slivers and some merino wool tops using the long fur placement technique.
This sounds strange to be using this technique with carded wool but having tried it it works well to give a rough fur coat look rather than lengths of straight wool.
I also pulled some of the core wool through with my ever faithful reverse felting needles to lighten areas (especially on the limbs) and to blend some of the colours.
I left some parts free from the top coat where I would attach the ears, limbs and tail.
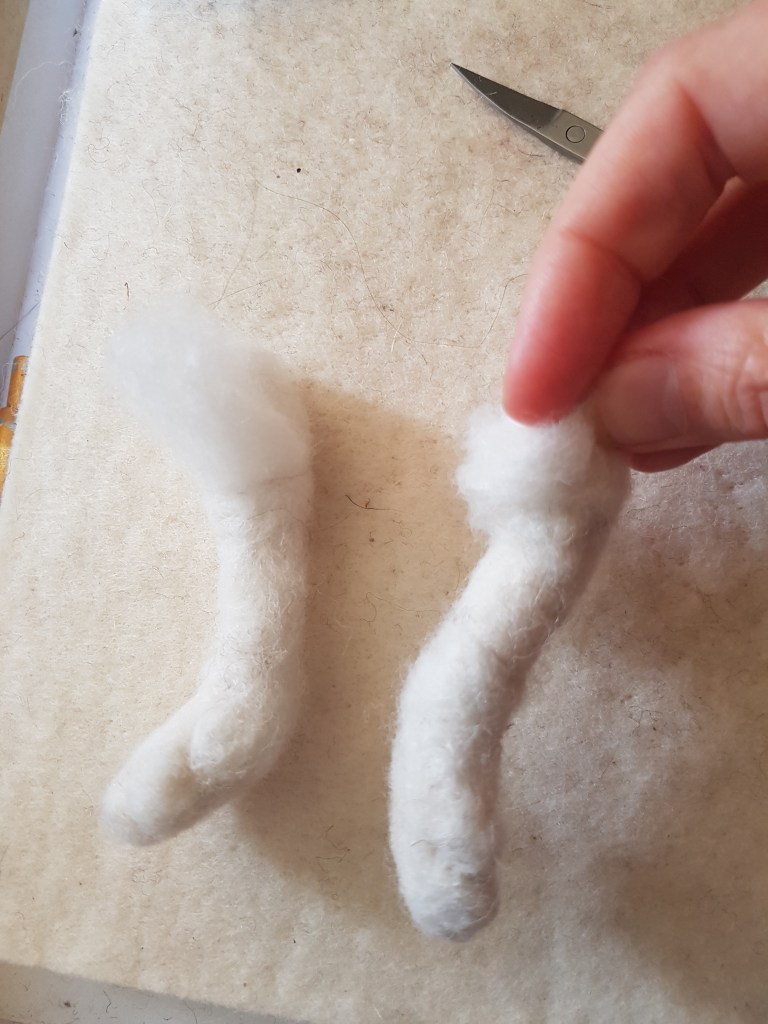
Next I made the ears and attached them, followed by the hind legs and then the front legs. Using 2 needles at once with my Clover pen style needle holder really helped to flat felt the ears and to quickly attach body parts..
Then I completed the top coat and added a tail and finally some whiskers.
I really enjoyed making Luna. I particularly loved making her as realistic as I could by taking my time to twist the wool and mimic the wavy and tousled look of the hare’s back fur.
I am pondering if to make another one and create a detailed tutorial as I go along.. I’d really value your thoughts..:-)
I have included links for where to source needle felting tools and materials. Please see Links disclaimer in the right side panel for more details.
Have you ever tried using a wool mat as your base for needle felting your wool animal sculptures? ….Hmm felting wool on wool? Surely that can’t work?
Well I can tell you that surprisingly it does work and really quite well. For the past month I have been using the Earth Mat by the Makerss and I can honestly say that I don’t think I will go back to using a foam pad! As much as my foam pad has been my old faithful ‘go to’ felting base for so long, I am really loving the new wonderful experience of this new wool mat!
There are many kinds of felting bases out there such as rice bags, foams, brushes, wool pads and more, but what you end up using really is down to personal preference and what you get used to and comfortable with.
Over the years I have tried a few different bases includingmaking my own rice bagbut I just kept going back to my foam. I found the brushes too small for the sculptures I make, the rice pads work well but I needed something more lightweight for when I am on the move and a piece of foam just did the job! But what about those annoying bits of foam you get in your wool? Yes they often frustrate me! And what about the impact to the environment when I need to get rid of an old foam pad? ..hmm not so great!!
So let me tell you more about this new kid on the block, the Earth Mat (full name ‘Earth Friendly Felting Mat’) which solves these issues straight away and is a joy to use.
As I have been so accustomed to my foam pad and it is the usual base that people buy, I will be reviewing the Earth Mat and comparing it to my old blue foam pad. Please note that these are my opinions and you may have a different experience but I would definitely encourage you to try the Earth Mat for yourself. I am not affiliated in any way with the Earth Mat or receiving any gains from it I just thought I would blog about it 🙂
My Felting Experience
I have a firm Earth Mat as the base and a softer one on top (as suggested by the Makerss). The idea is to replace the softer one or add another soft one on top as it wears down. Both are large (A4 size) and each one is 10mm thick.
They came with easy to follow instructions with pictures and tips for how to get the best use out of them.
First impressions?
Felting on a wool mat felt a bit strange at first, because I was so used to a foam pad. A foam pad is one thick base but with the Earth Mats there are two mats together (the firm and the soft). It is recommended to use two like this but you can just use one mat or two or even more if you prefer.
The two mats can slip apart whilst working or when moving them so you do need to felt the two together at the corners as per the instructions to keep them in place when you first start using them. Over time they naturally keep together anyway.
The Earth Mats are a tiny bit heavier than my foam pad but still really light and easy to transport. They are a thinner base to work on than my foam pad (mats together are 20mm vs foam pad at around 50mm) and they bend more easily.
This is completely fine when working on a table but you may want to put something firm underneath them if working on your lap – I use a lap tray.
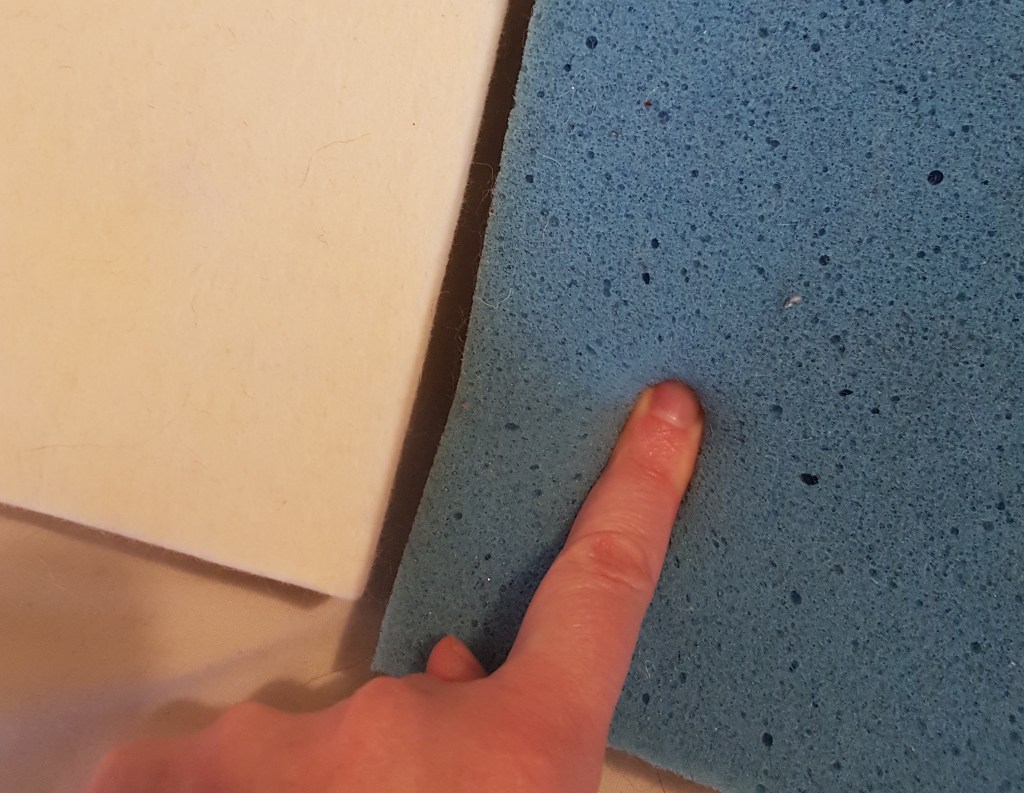
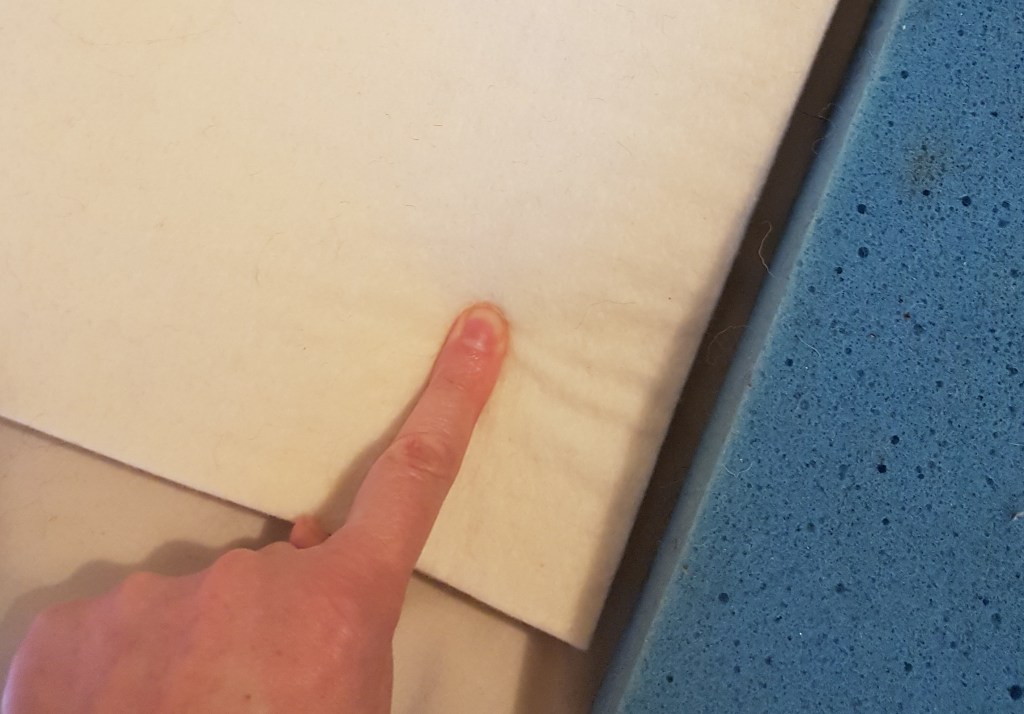
When feeling the Earth Mat and comparing it with a foam pad it’s a little bit like comparing bed mattresses. Not that I’m going to lay on these and sleep on them (haha). My foam pad feels quite springy to the touch so if I press my finger into it, the surface will spring back. When pressing a finger into the soft top mat of the Earth Mat combo it feels like there is some resistance and it feels firmer. Though it doesn’t spring back there’s a slight indent.
Being made of wool, the Earth Mat has a nice natural wool smell. I love this! It doesn’t feel like you’re using something artificial. It looks, smells and feels very natural to use.
I actually quite like that it’s a light colour. This is great for when I’m photographing my work in progress for social media or making a step by step tutorial. The most common colours for foam pads I have found seem to be black or blue. My blue foam is not always great for photos. There are different coloured foam pads out there but they are not always easy to source.
Crunch factor?
For me, I quite like the crunching sound whilst felting as long as it’s not too loud for conversation and doesn’t drown out the sound of my music or tv. Thankfully the Earth Mat still makes a nice crunchy sound, though the tone is a little deeper than my foam pad.
Wool sticking to the base?
I mainly needle felt 3D animal sculptures rather than 2D pictures but I still make flat components such as animal ears. So a real test for the Earth Mat was to see if there were any issues with wool getting stuck to it. I was surprised that even when felting a dark colour wool on the light coloured mat (which would more obviously show up), not much of the wool was left adhering to the base as with my foam pad. The surface of my wool ears actually looked a lot neater and without loose pieces of wool hanging from them. So often I would have to re-felt the surface to neaten it when using a foam pad.
As I felt all over a flat piece (even when stabbing with multiple needles at the same time) it doesn’t feel like my work is sticking to the mat, and when I pull it away after felting this feels easier. When stabbing the wool with the usual foam pad, it easily sticks to the foam and it’s much harder to pull off.
It is also easy to remove any fibres that remain on the Earth Mat and the instructions suggest some practical and easy ways to do this routinely to keep it clean.
Durability?
I’ve not used the Earth Mats for long so I can’t really say how long they will last but the fact that I can replace the top soft one or add another one to it as the original one flattens down and they say that you may never need to replace the firm one, sounds like they will last quite some time.
After stabbing for a while, you will see on the Earth Mat that there are indent marks from the constant stabbing of the barbed needles. You don’t tend to get this so much with the foam pad material which enables the needles to penetrate through it far more easily. This is more an observation and doesn’t seem so far seem to affect its use as a base. However I can see that after some time this will flatten the mat. After all, being made of wool, the mat will eventually become more and more compact – hence the need to replace or add another one.
Needle safety?
What I do like is if you leave your barbed needles in the Earth Mat they are more firmly inserted since the material is so compact, whereas when you stick your needles into the foam pad, the needle holder wobbles from side to side easily and it feels like you could snap a needle.
I would however dissuade you from inserting a reverse barbed needle directly into your Earth Mat. A reverse needle is designed to pull out fibres from inside a wool sculpture so as expected, when you pull it out, it will pull out some wool from your mat. As the wool in the mat is so densely felted down it is not so easy to retrieve the needle as it would in a foam pad.
Fragments of the base coming off?
The bit that I love the most about the Earth Mat is that tiny fragments of my blue foam don’t end up on my needle felted animal as I am working, which so often happens with the foam pad especially when it is getting old and starts to disintegrate. Apart from it being annoying, it is very important to be able to say for certain to my customers that my products are made of pure wool. So even if a tiny bit of wool from the Earth Mat attaches itself to my felted animal then it is still fully wool and this is not a major issue.
Environment
A foam pad is usually made of some sort of polyethylene which can in theory be recycled but lots still end up going to landfill. So although they are fairly long lasting, eventually (especially if you needle felt often) they will need to be disposed of.
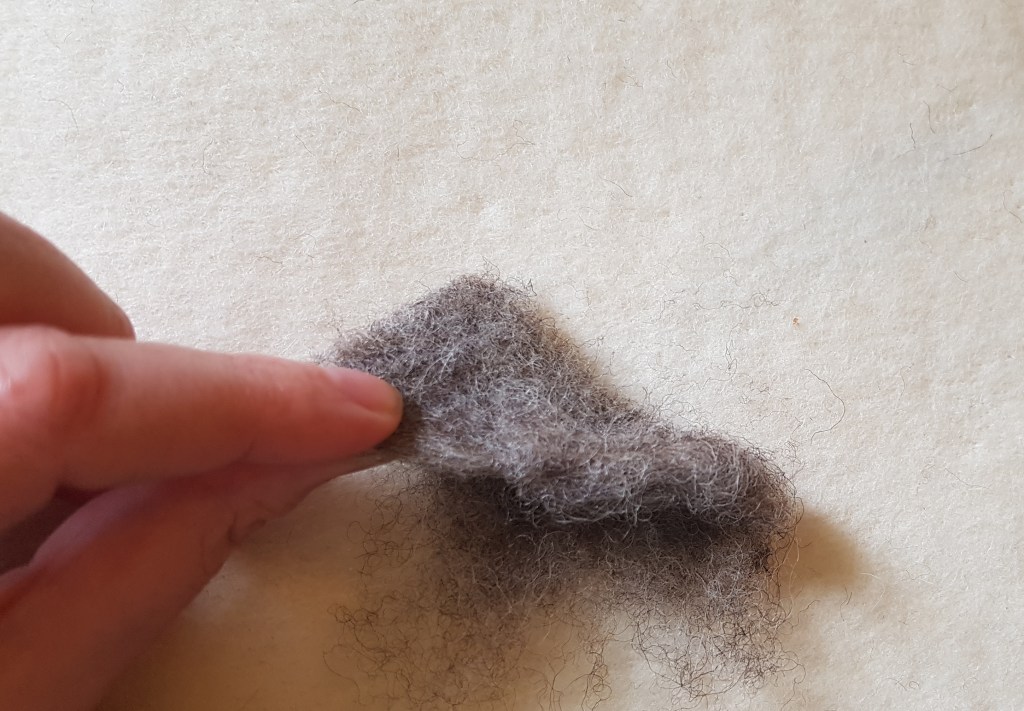
The soft top Earth Mat which will need to be disposed of at some point is 100% wool and so is totally compostable, and therefore very environmentally friendly.
Here you can see that the soft top is simply just layers and layers of natural wool.
The firm base is partially compostable, but is not fully compostable. I would need to eventually throw it away but I am mostly using the soft one and probably won’t need to dispose of it for a very very long time, which is great.
Additionally when I received my Earth Mats they came in a biodegradable bag -another win for the environment!
Cost
Foam pads are really cheap to get hold of. They often come in a starter kit if you are new to needle felting or you can purchase one on its own for as little as £3 and as much as £8 off Ebay/Amazon. Price usually depends on size and quality.
A pack of two (soft top and firm base) Earth Mats are £14 for the small A6 size and £23 for the large A4 size. A replacement soft top A4 is also £14.
Though these prices are more than a foam pad I think for what you get it is a pretty reasonable price and worth the investment for a good quality, long lasting felting material. It is a lovely natural felting base to work on and is far less costly to the environment.
The Earth Mat is well worth considering if you are starting out on your needle felting venture and looking for the right tools or if like me you have been felting for a while and your old base has come to the end of its life and you need to replace it. 🙂
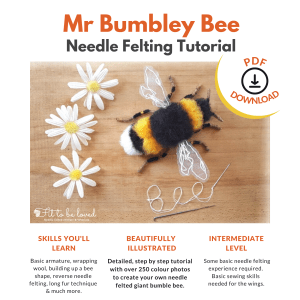
Would you like to create your very own Mr Bumbley Bee?
Now you can with this beautifully illustrated and detailed, step by step tutorial with over 250 instructional photos across 108 pages to show you 7 stages to create your own giant bumble bee.
He’s a giant fluffy gorgeousness that you can be brave to have him sit on your hand as he’s made of wool and much too much of a gentleman to sting you. His body is made of soft wool tops and his legs and antennae are shaped with pipe cleaners. His wings are made of organza with hand sewn stitching with white embroidery silks.
You’ll learn techniques including: basic armature making, reverse needle felting, long fur technique, wrapping wool and embroidery of wing patterns.
Includes Bee Anatomy diagram, Size Guides with wing template, Felting safety advice and Care instructions for your finished bee.
Mr Bumbley Bee – Needle Felting Tutorial – PDF download
Step by step tutorial to create your own giant bumble bee.
Pay by PayPal, Debit Card or Visa.
You will be taken directly to the download page when checkout is completed.
1 Digital PDF Download – £9.60
You will learn how to:
– Twist pipe cleaners together to form a basic armature structure.
– Emphasise the leg segments and antennae by adding small pieces of wool to them.
– Wrap wool over the armature and build up layers of wool to sculpt a bee shape.
– Use a reverse needle to create fluffy bumble bee hair.
– Create the bee’s white tail using a long fur technique.
– Add depth of colour to the yellow bands.
– Make wing shapes from organza material and hand sew a pattern and attach wings.
Here’s a preview of some of the pages you’ll find in the PDF tutorial;
Please contact me with any questions. I hope you have fun making your very own Mr Bumbley Bee!
I would so love to see your bee creation, so please post a photo of him on Instagram with #mrbumbleybee.
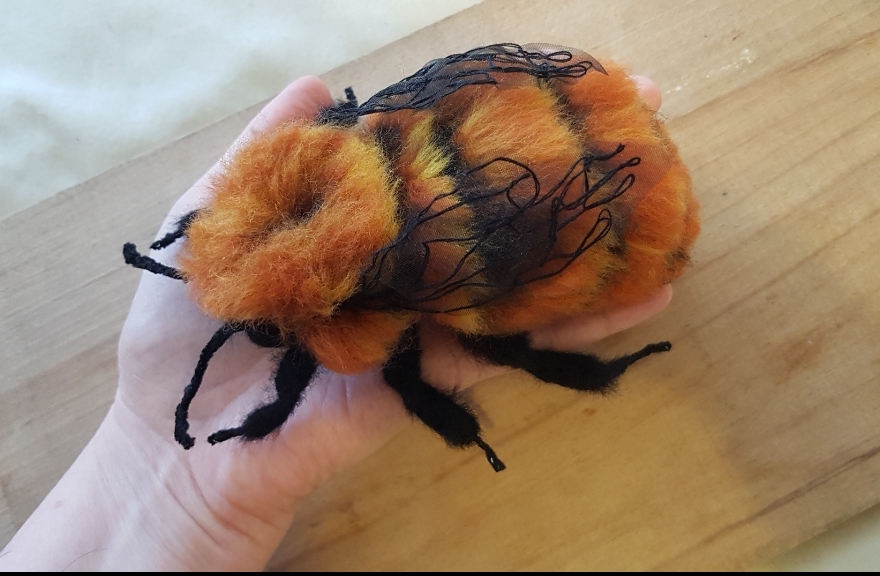
I have recently had the wonderful privilege of being asked to needle felt some unusual Bumble Bees; two species I had never heard of until a few weeks ago – so I have had to do quite a bit of research. As many of you know I love discovering new animals and can’t wait to get started with my wool but when the person asking me to make a special bee for them is also a bee keeper of that species it does add to the pressure of getting it just right! As with all my creations I really do get to know so much about the colour, shape, anatomy and fine detail of whatever I am making. I have to say I have completely fallen in love with these precious bees! I hope you like them too!
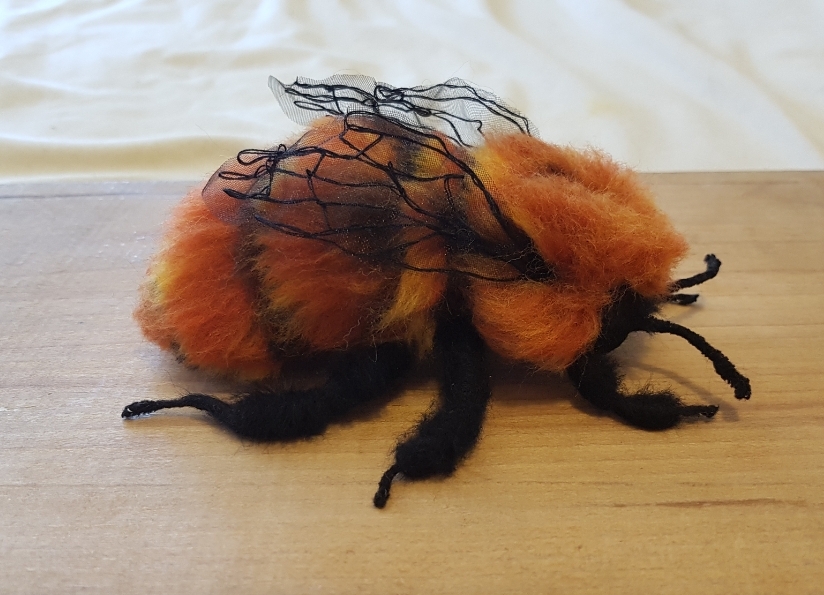
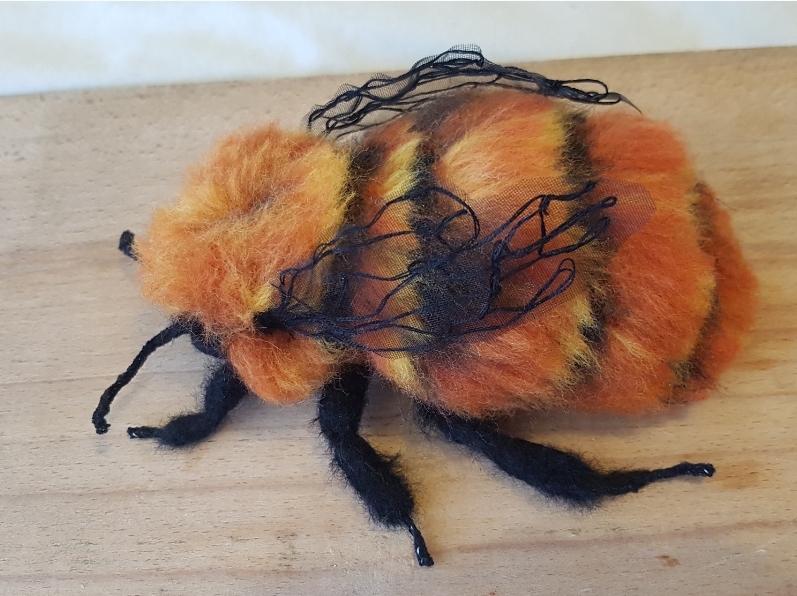
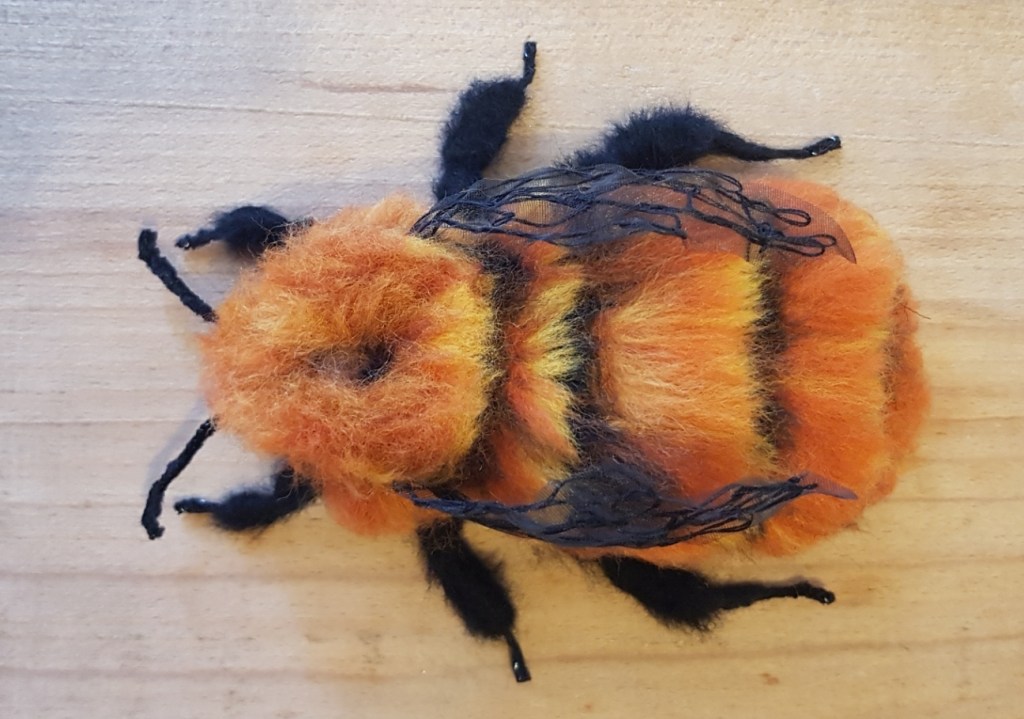
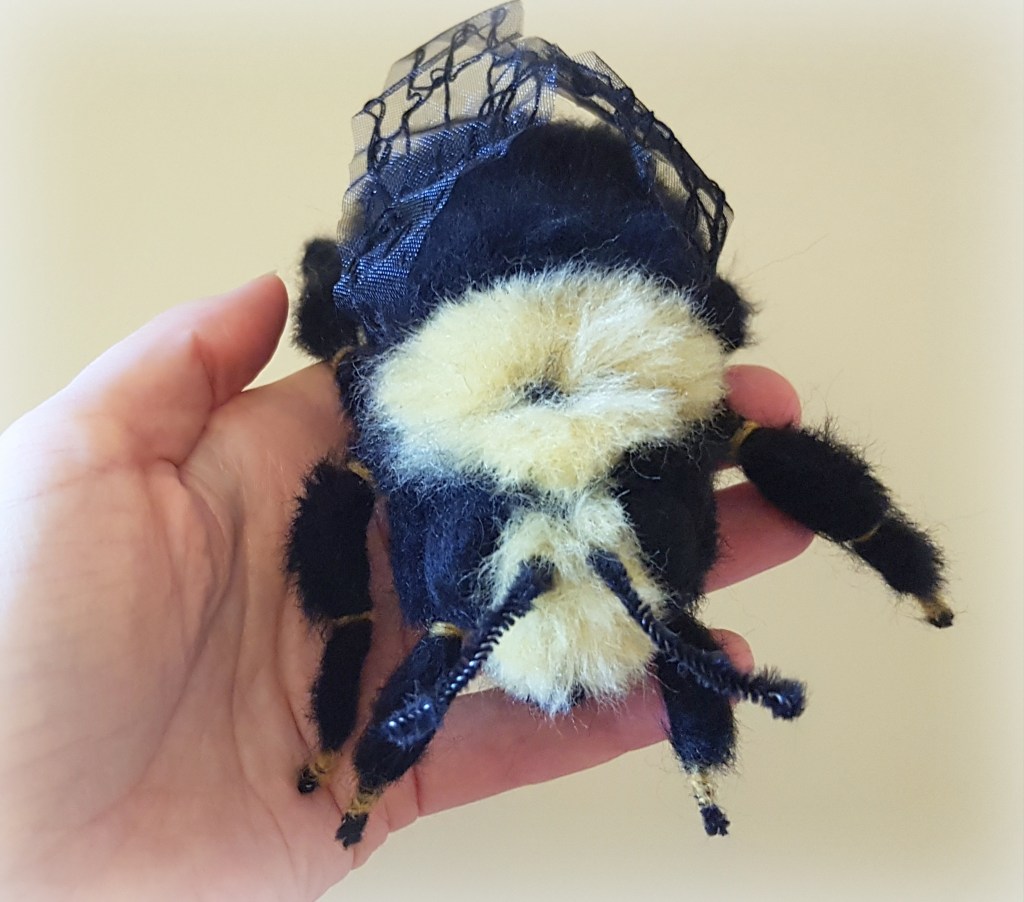
So here is the first bumble bee. This gorgeous fluffy orange cuteness is a Patagonian Giant Bumble Bee (Bombus dahlbomii), one of the biggest and rarest in the world. His new owner calls them ‘fluffy puppies’ and you can see why!
He was very different from my usual felted bumble bee (Mr Bumbley Bee). Instead of adding wool to my pipe cleaner frame I added the legs last after building up the body. His legs were proper chunky and hairy too so I added more wool to the legs and used my reverse needle to pull out fibres to replicate hairy legs. Instead of white organza material with white thread for the wings I used black organza with black thread.
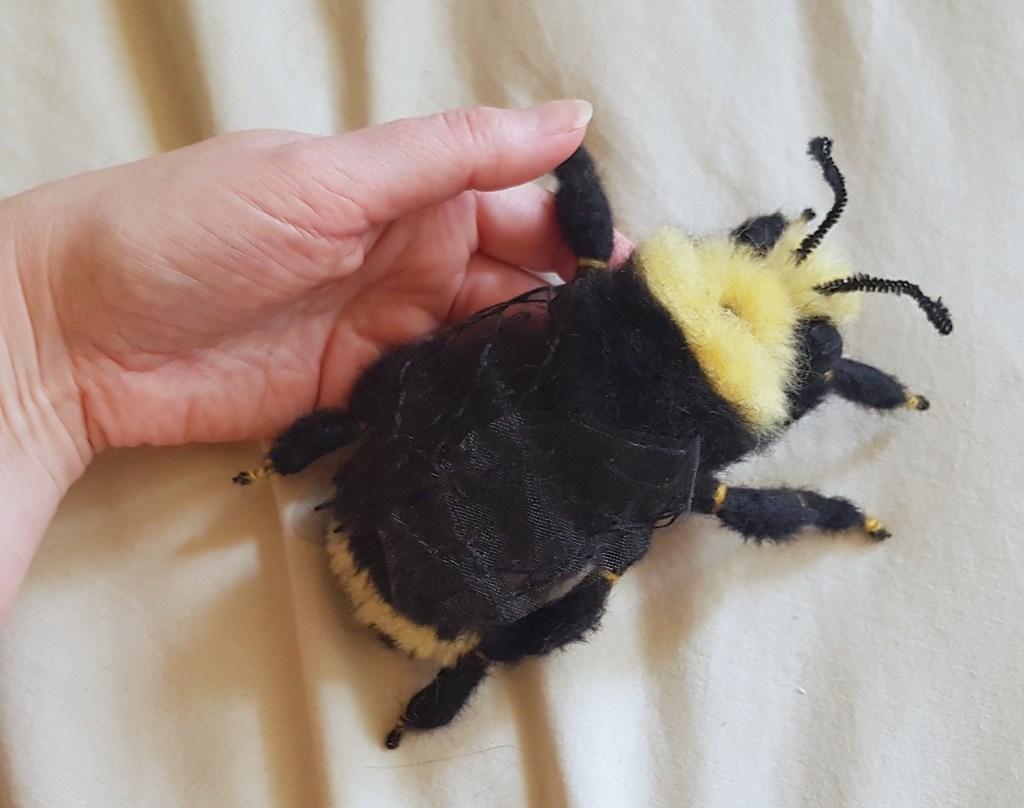
The second is this striking Yellow-Faced Bumble Bee (Bombus vosnesenskii) I made for the lovely beekeeper who wanted me to make one of her ‘girls’. I was amazed that in the photos she sent me that she was carefully holding a whole handful of these cute bees in her hand and one photo was of one sat on her nose! she reassured me they don’t ever sting her 🙂
Thankfully my needle felted ones won’t ever sting and it’s a good job with the size I make them!
Again I created the legs separate from the body and made the wings black. Isn’t she a lovely bundle of bee fluff…
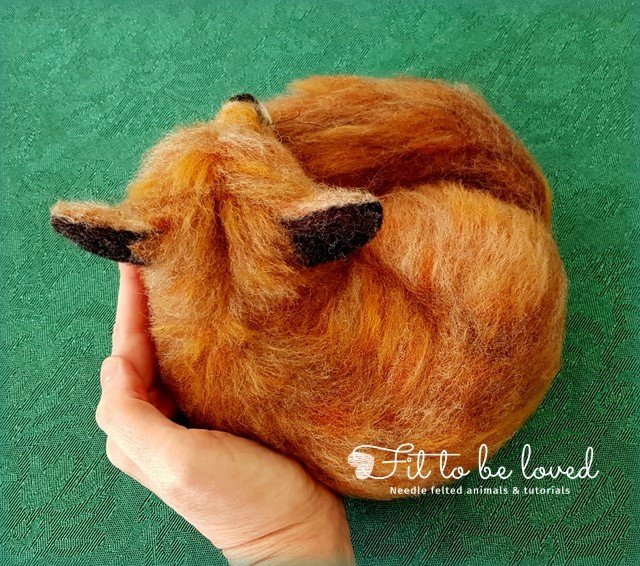
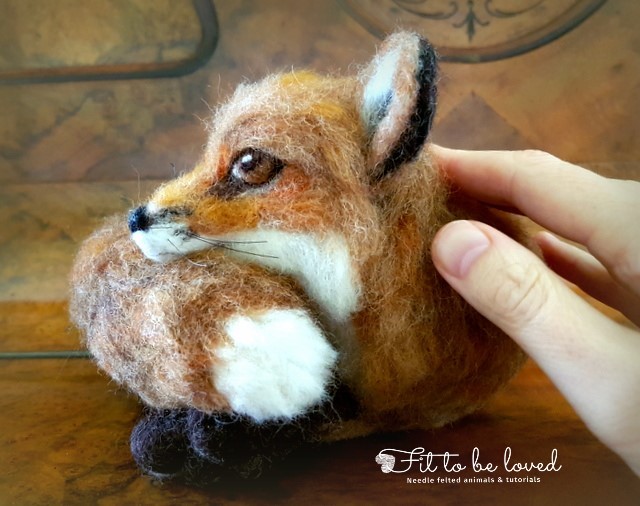
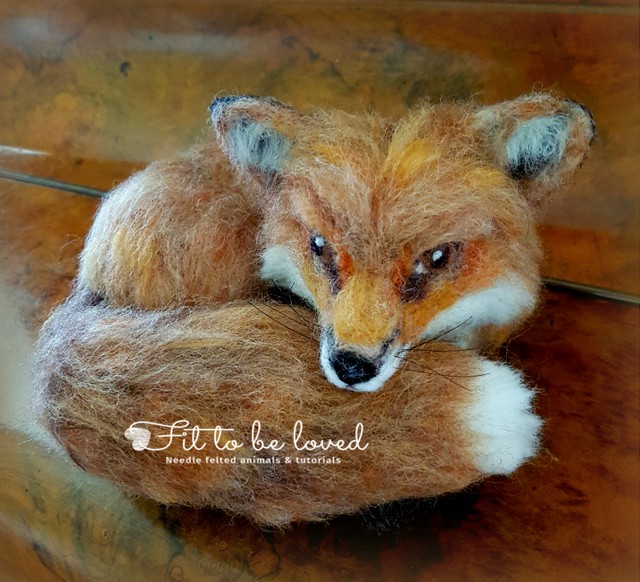
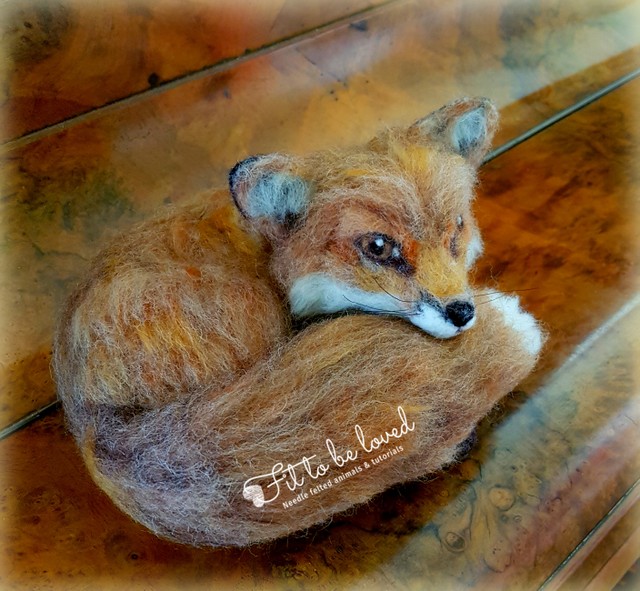
I so love foxes. For many they are a real pest and I can understand how heart breaking it can be for a fox to take a beloved chicken (we live with 3 beautiful chickens and are often on fox watch!). However I will never stop being amazed at how in the UK we actually have wild dogs (almost mini wolves) roaming around. Not only that, they are a vibrant orange colour that matches the autumn leaves! I don’t know about you but I think they are stunning animals!!
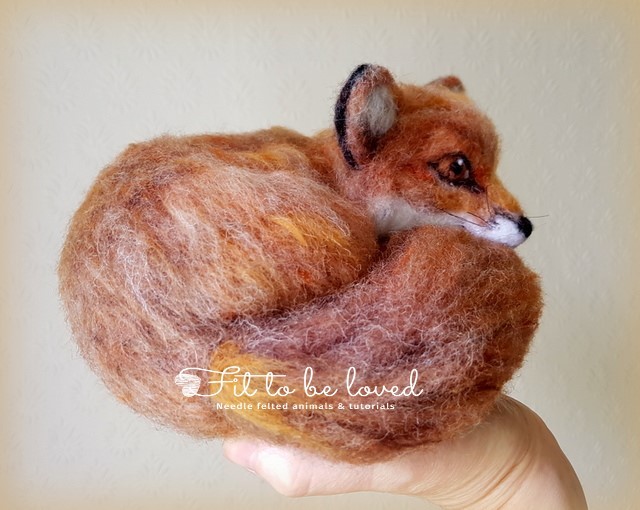
Back in September I was so delighted to receive a commission from a lovely lady in California to needle felt a curled up fox. My second ever felted animal was a fox but I have learned so much since then and couldn’t wait to get started.
This photo of a beautiful real fox was my inspiration.
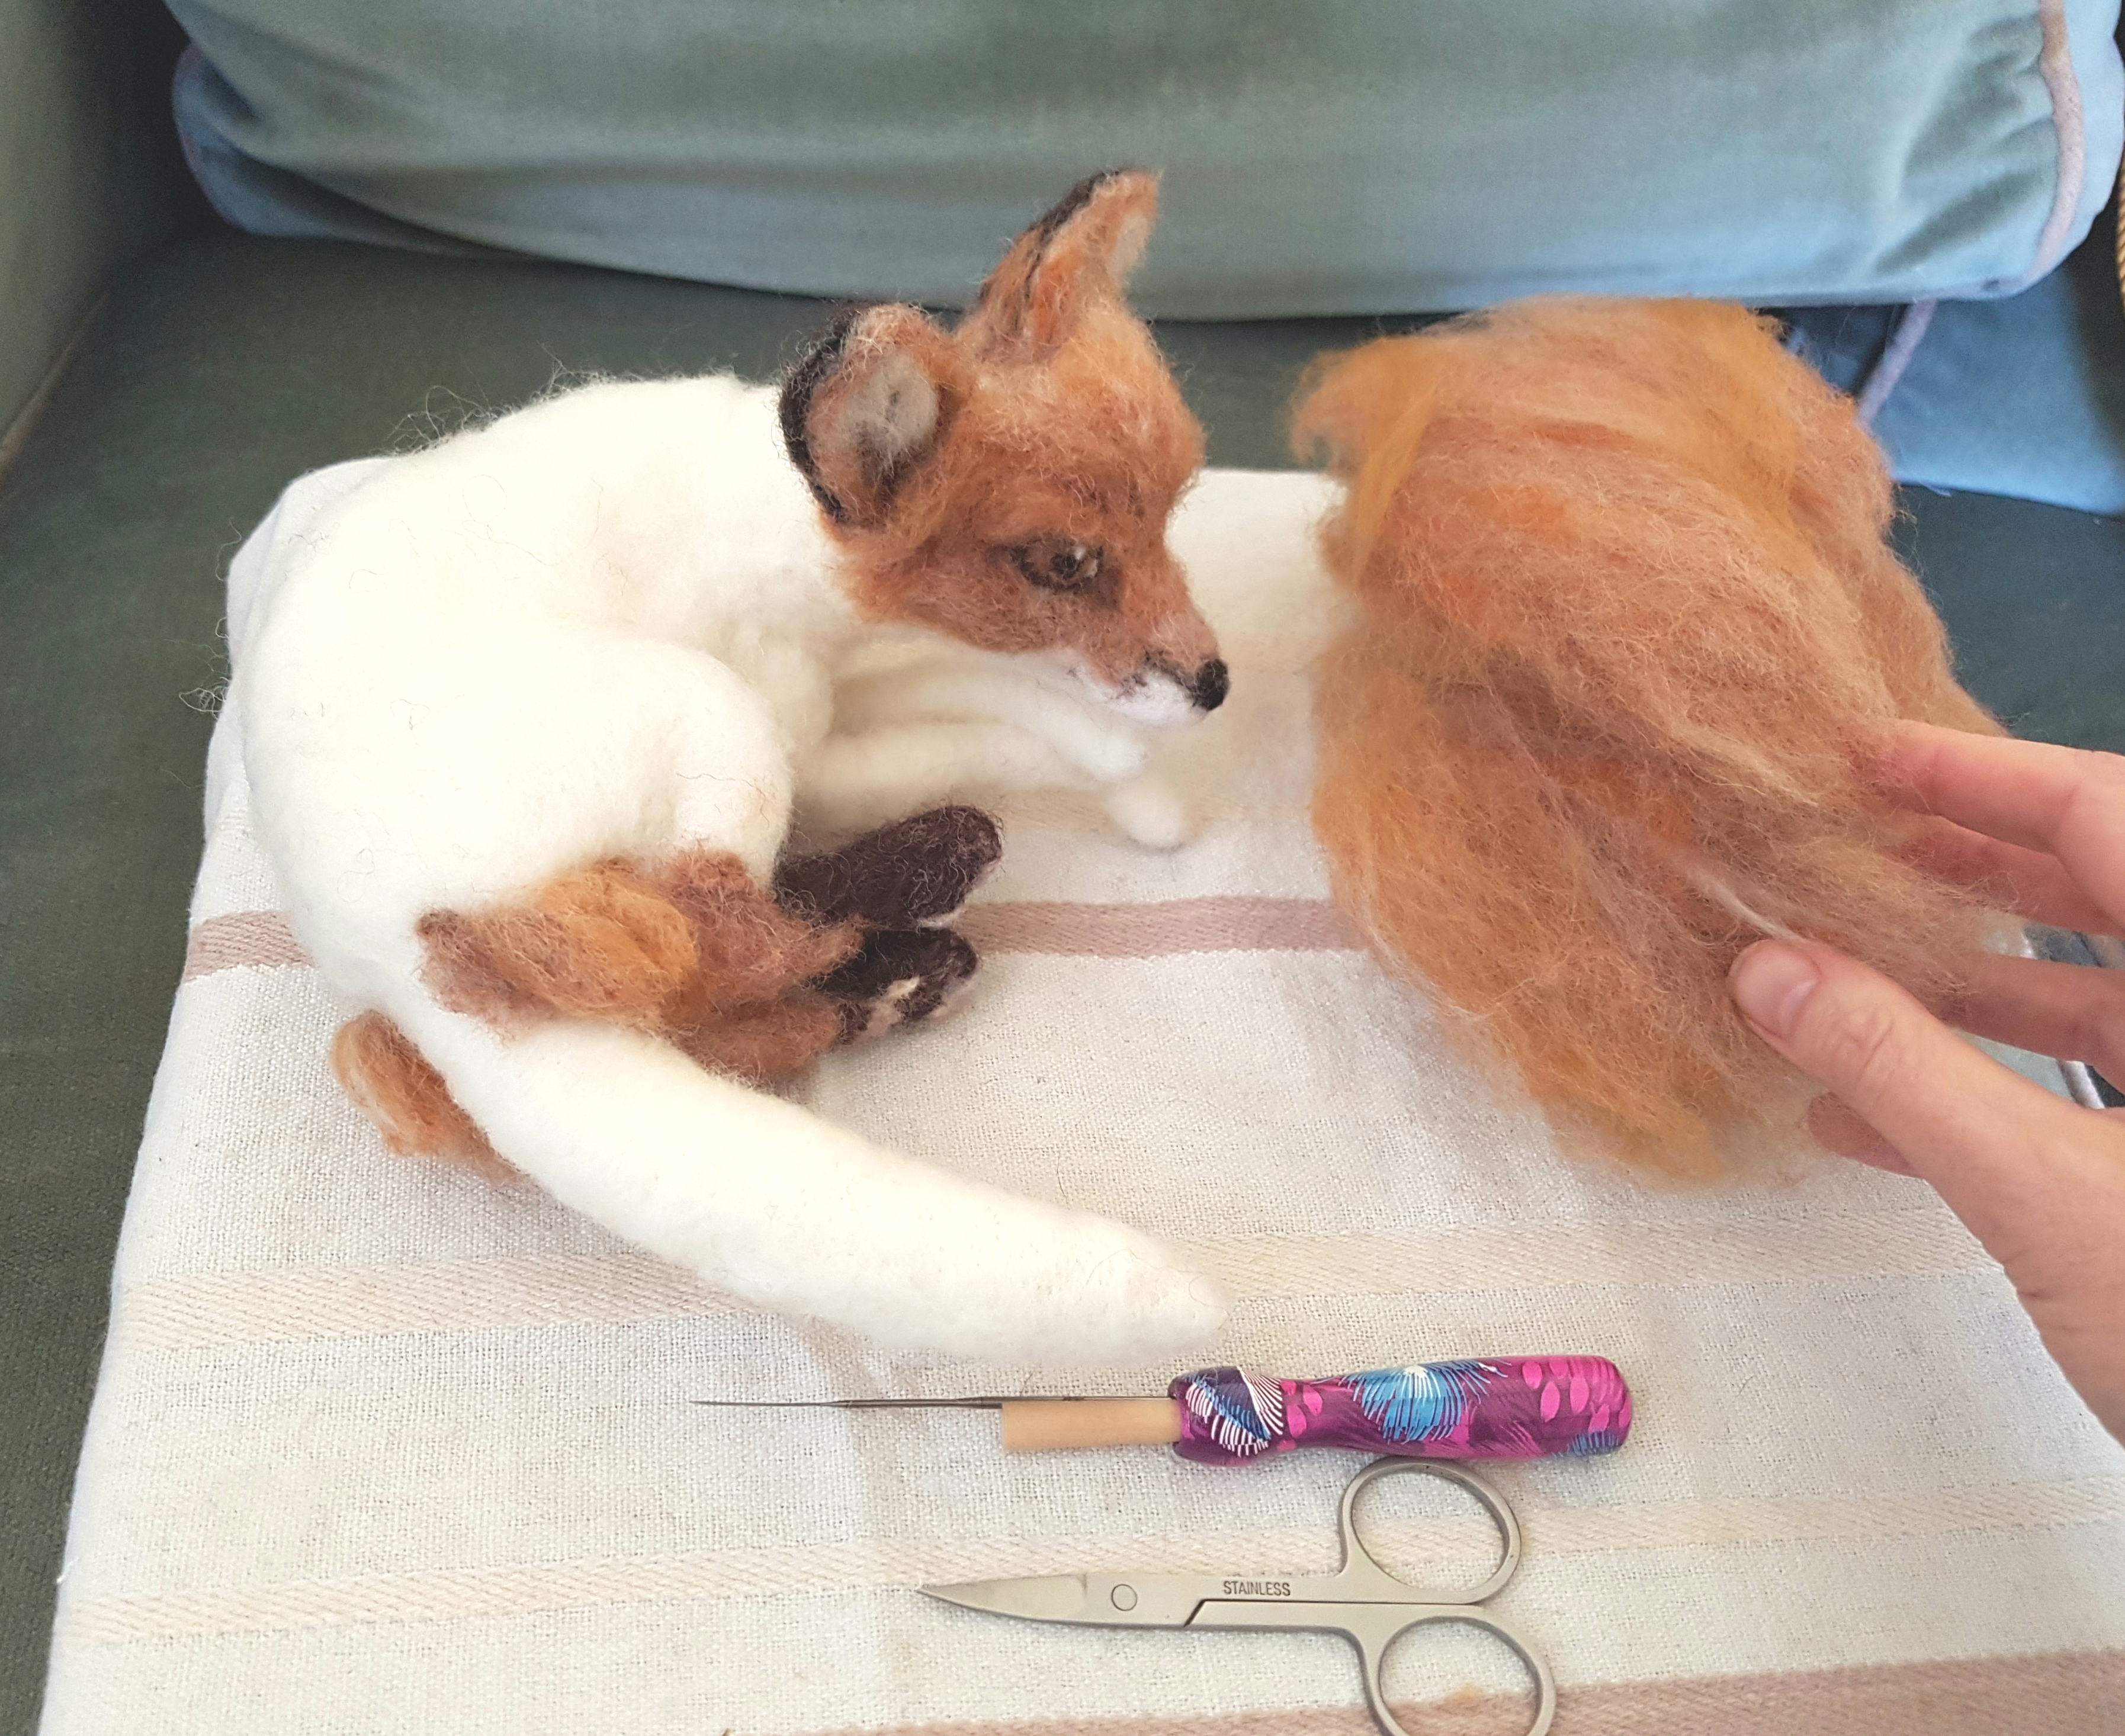
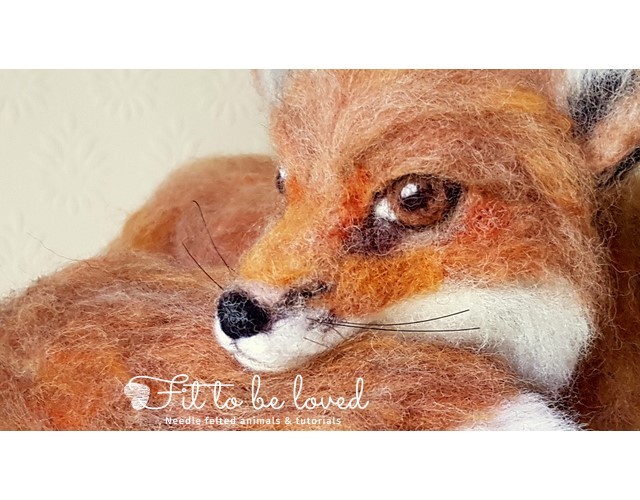
Fox fur is far from being one colour but a mix of brown, cream, yellow and orange tones which are accentuated by black and white. I love to make my wool sculptures as realistic as possible so I chose and hand blended a lovely colour palette in merino and corriedale wools.
I started off with a wire armature and wrapped corriedale wool over it using fox anatomy and skeletal pictures on line for reference. I then shaped the head, added the ears, eyes and nose and then added the paw pads to the feet. Then, using the long fur technique, I attached the foxy coat. I used black horse hair for the whiskers!
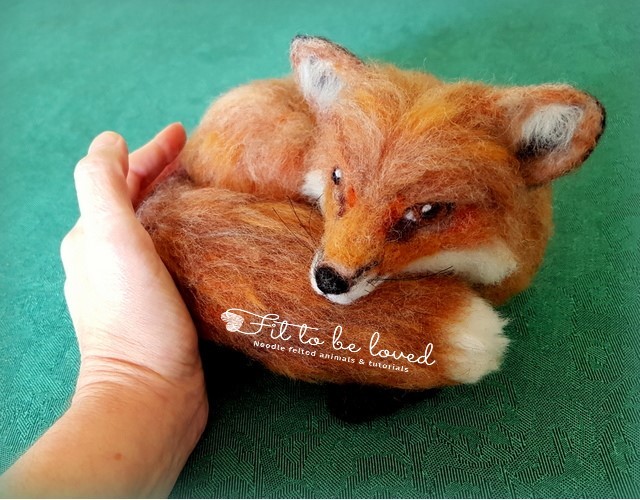
I hope you like this sweet little fox. Here are some photos of the finished sculpture. Such a bushy tail 🙂
Perfect autumnal (fall) setting for this little needle felted fox made by its new owner in California. Can you spot the fox? 🙂
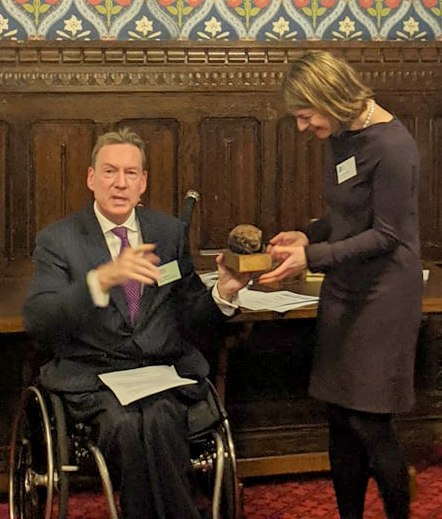
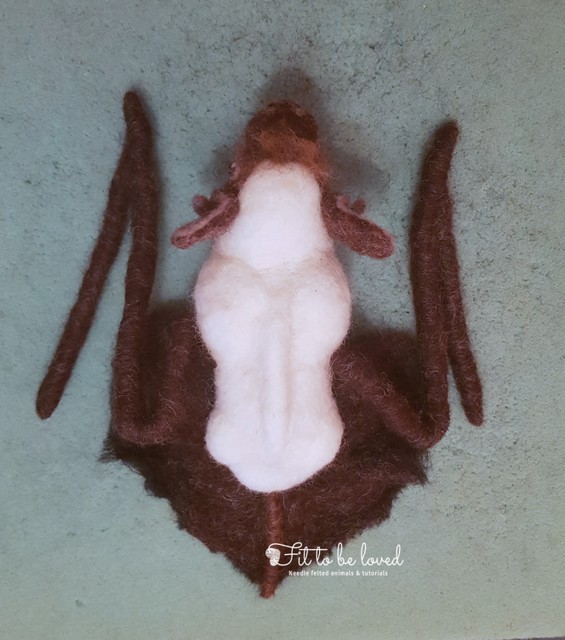
This week has been an exciting week. The needle felted pipistrelle bat I created was mounted and given as an award at the Palace of Westminster to MP Helen Hayes as she is the species champion for the common pipistrelle and won best parliamentary species champion at the Species Champions Annual awards ceremony. Well done to Helen for all her hard work!! It was presented by BBC Journalist Frank Gardner.
I am so happy that my artwork became something so special for an amazing project. The project is run by the Rethink Nature partnership, a group of seven wildlife organisations working together to make a difference to species conservation. (Amphibian and Reptile Conservation, Bat Conservation Trust, Buglife, Bumblebee Conservation Trust, Butterfly Conservation, Plantlife and the RSPB).
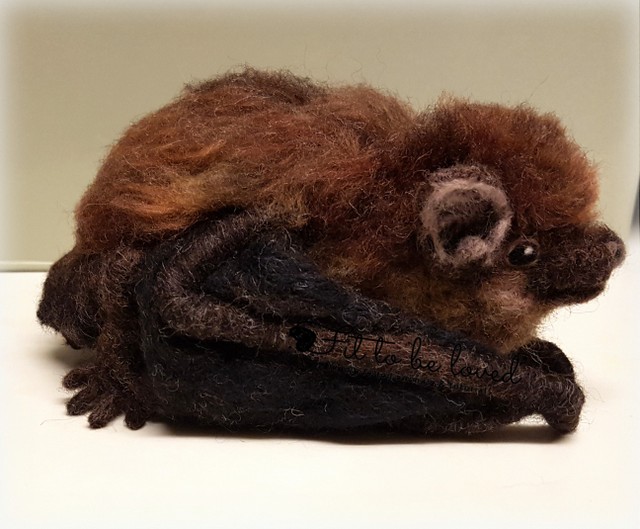
The little bat took many hours of sculpting through the art of needle felting. His body is made of core corriedale wool. His wings, legs and tail are wool wrapped over wire. His beautiful brown coat is made of a blend of corriedale and merino wool. His eyes, nose, ears and tiny feet are made of wool too.
The common pipistrelle as its name suggests is the most common bat that you might see flying in your garden on a summer night! Yet like all our bats in the UK they need our help and protection to ensure their numbers don’t decline again. They are so important to our environment! I love bats but some people don’t and this is usually as they don’t know much about them and bats are so misunderstood.
When you look at a bat close up they are actually very tiny and many times smaller than the size of my needle felted one. In fact a real pipistrelle bat weighs about 5g and their forearm length is less than 35mm in length. One of these tiny creatures can eat around 3 thousand insects in one night – how amazing is that!? Due to destruction of their natural habitat many bats now need to roost in houses and churches and rely on people to preserve these roosts.
Each bat usually has only one pup each year and too often that little pup will become lost or get caught by a local cat and so many each year don’t survive. The Bat Conservation Trust has a fantastic helpline if you find a bat in need of help. You can also find out how to support their work 🙂
Here are a few work in progress photos of my needle felted bat…
Having worked for 12 years at the Bat Conservation Trust I have quite a good knowledge of bats but it was still a challenge to get the anatomy right. Bats are so fascinating and detailed with their tail membranes and wing membranes! I wanted to give the illusion of fully formed wings that could spread out but tucked in as if it has landed. I hope I did it justice.
As with all my needle felted animals I used lots of photos of the real animal at every angle for reference. Thankfully no needles were broken but I did remake his face at one point and a good deal of patience and chocolate rewards were needed along the way!! This aside I really did enjoy making him and I was so overjoyed to see the smile on Helen Hayes’ face too when she received him as her award !
My site includes links for where to source needle felting tools and materials. These are my personal recommendations and from my favourite suppliers who I trust and who have excellent reviews. Some are affiliate links so I may receive a small commission at no extra cost to you. This supports my website and enables me to continue to provide valuable content and for that I am so very grateful to you – Thank you!!