If you’ve not already got a copy, the 4 day Easter sale on my Mr Bumbley Bee PDF Tutorial starts Today over in my Etsy shop! You’ll get a 30% discount. Grab it while you can as the offer ends on Sunday 🐝
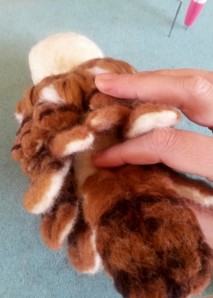
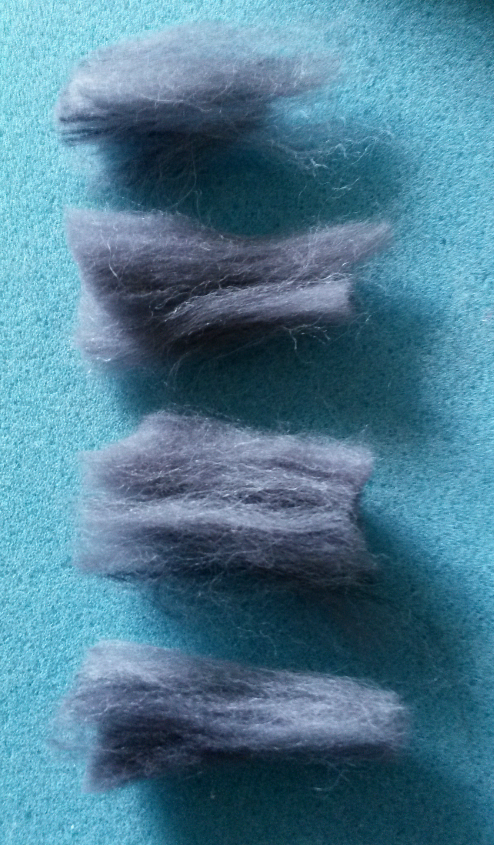
So today I thought I’d answer a common question that I get asked a lot- “if I’m needle felting a long furred animal, how do I stop all of these lovely, luscious fibres from getting all matted, flattened, tangled and just looking a complete mess?”
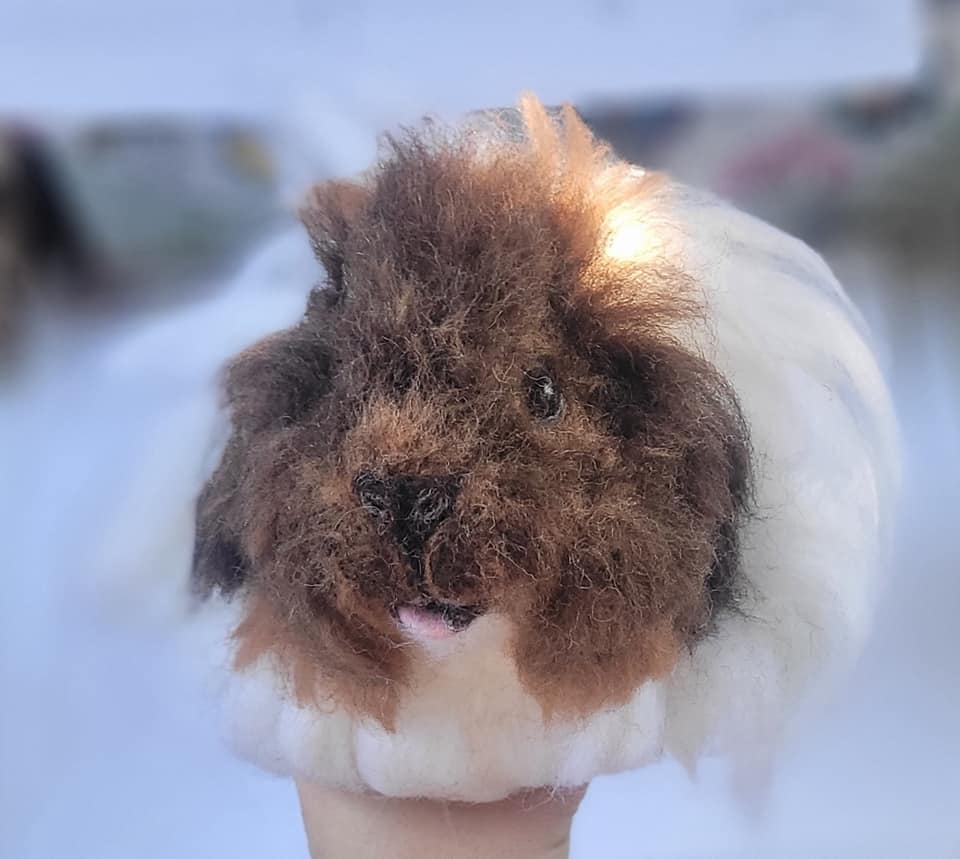
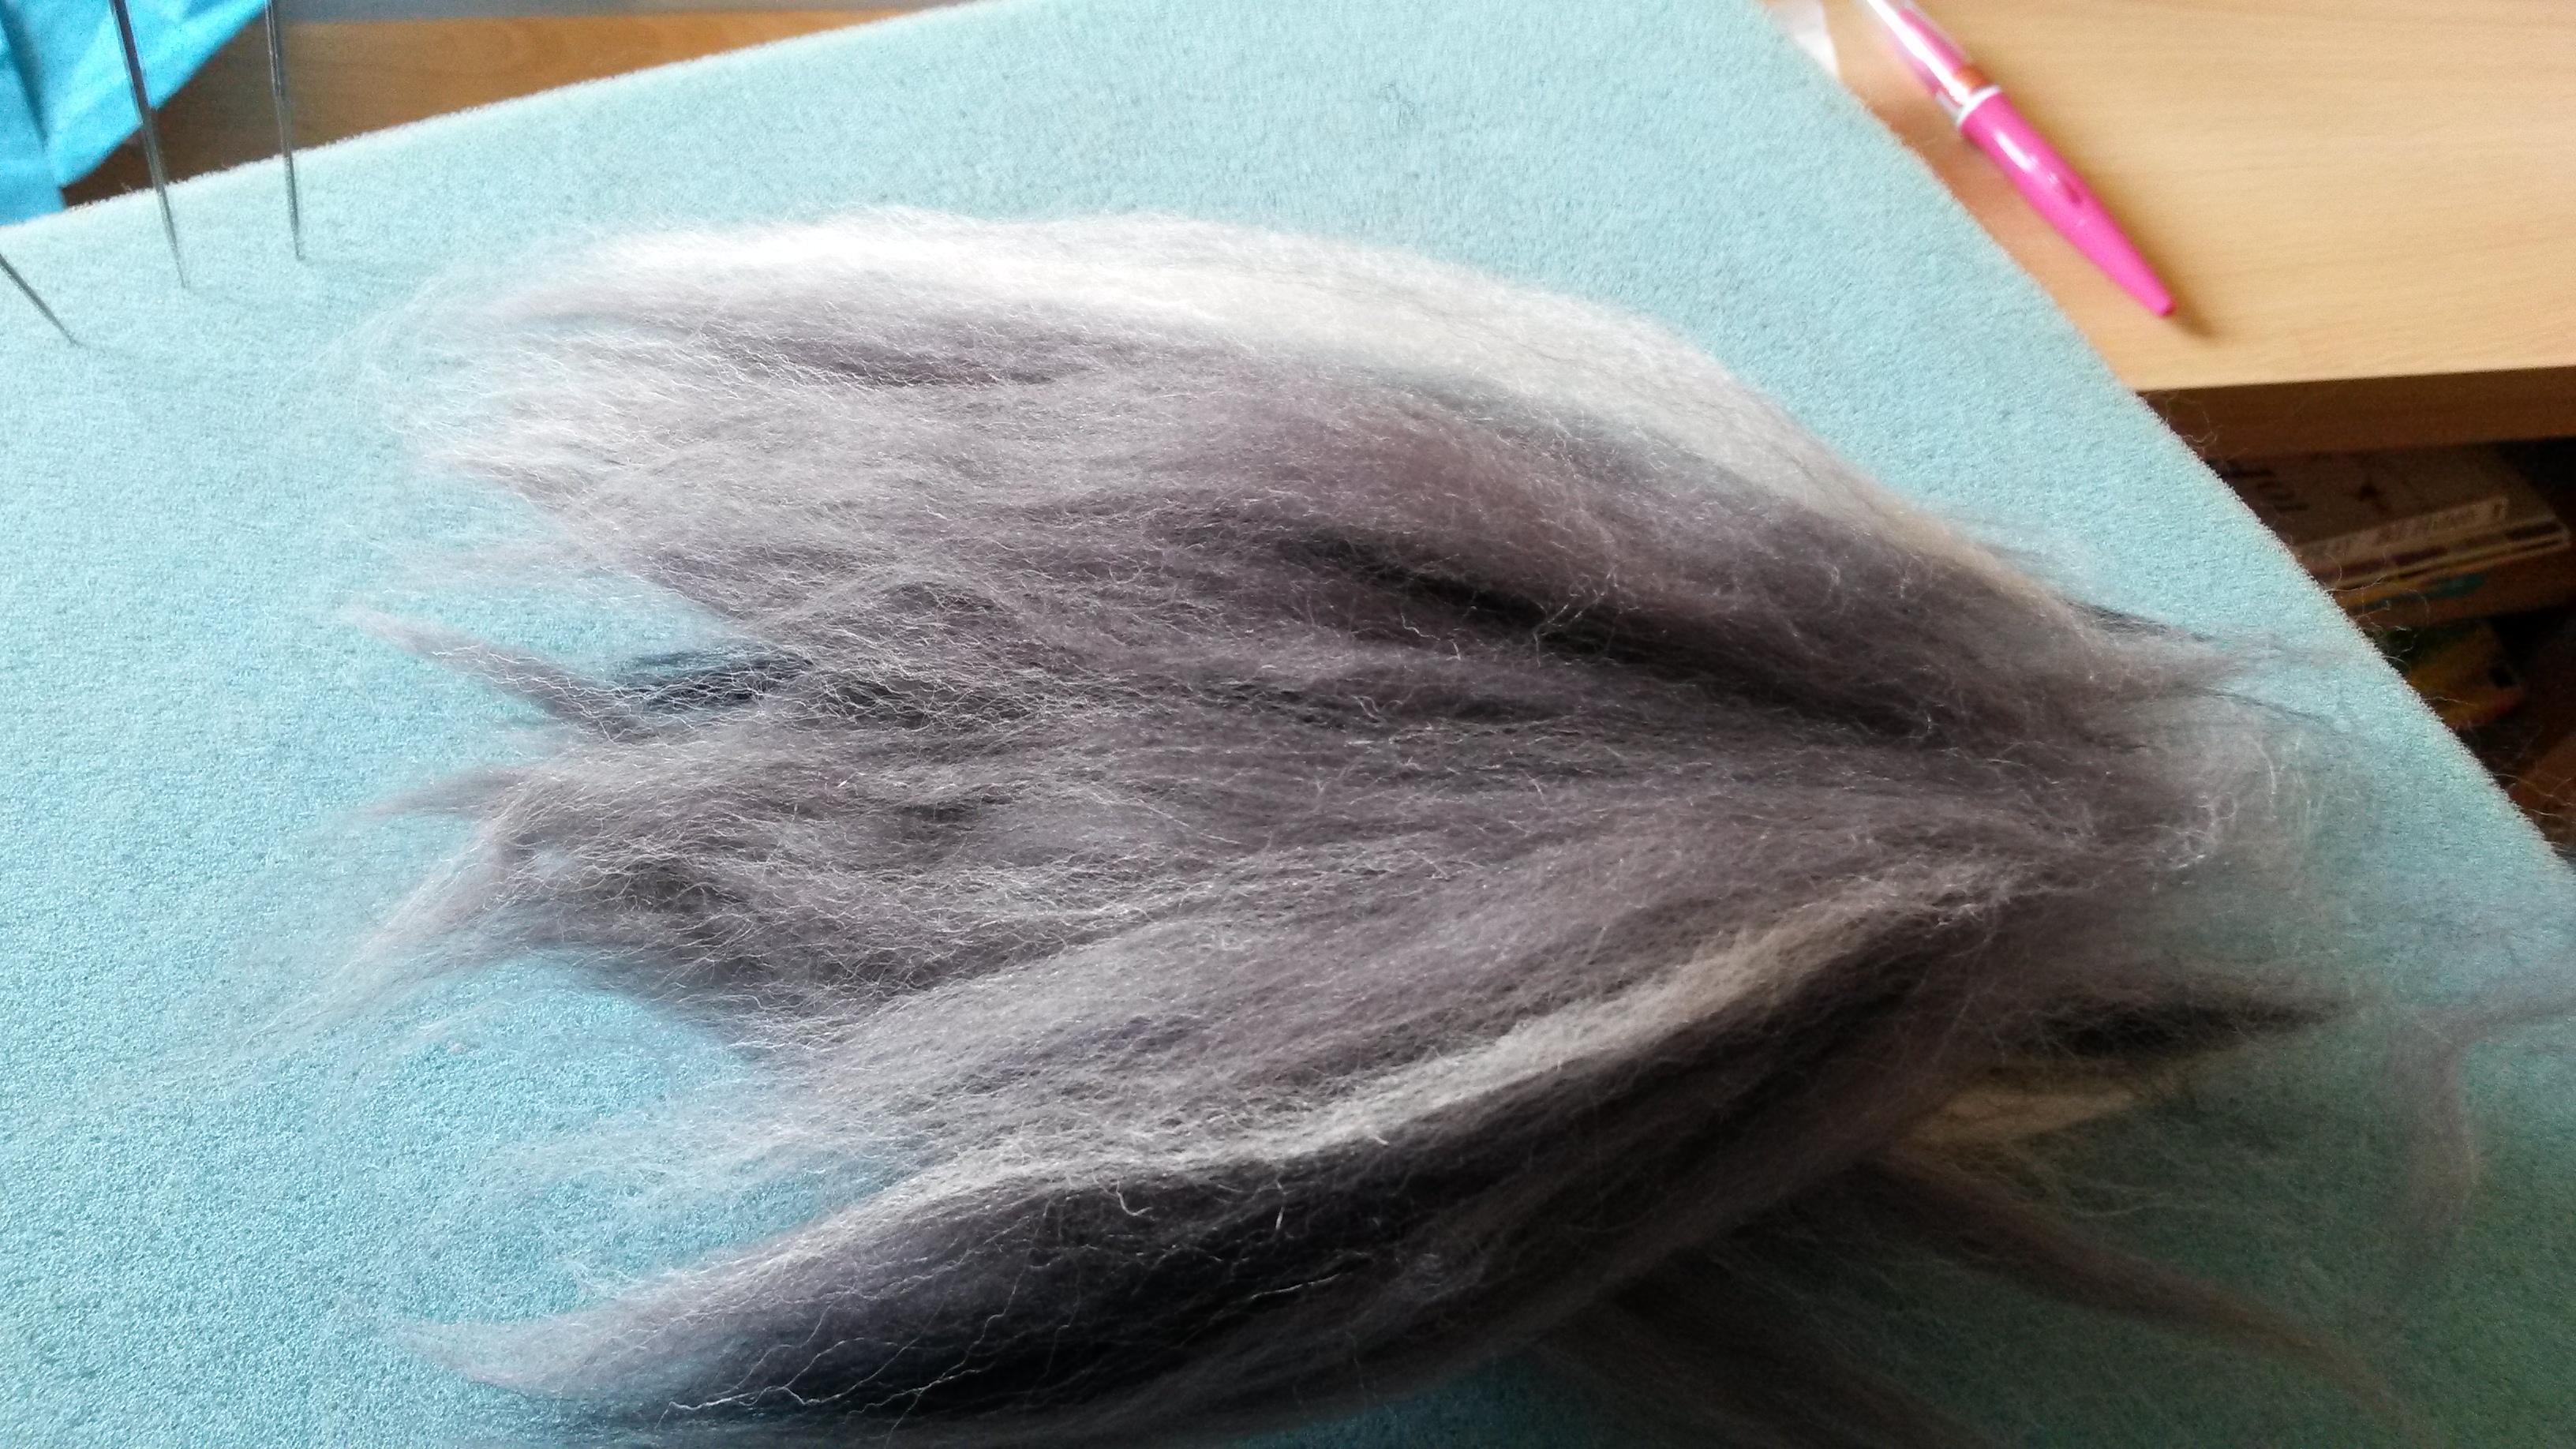
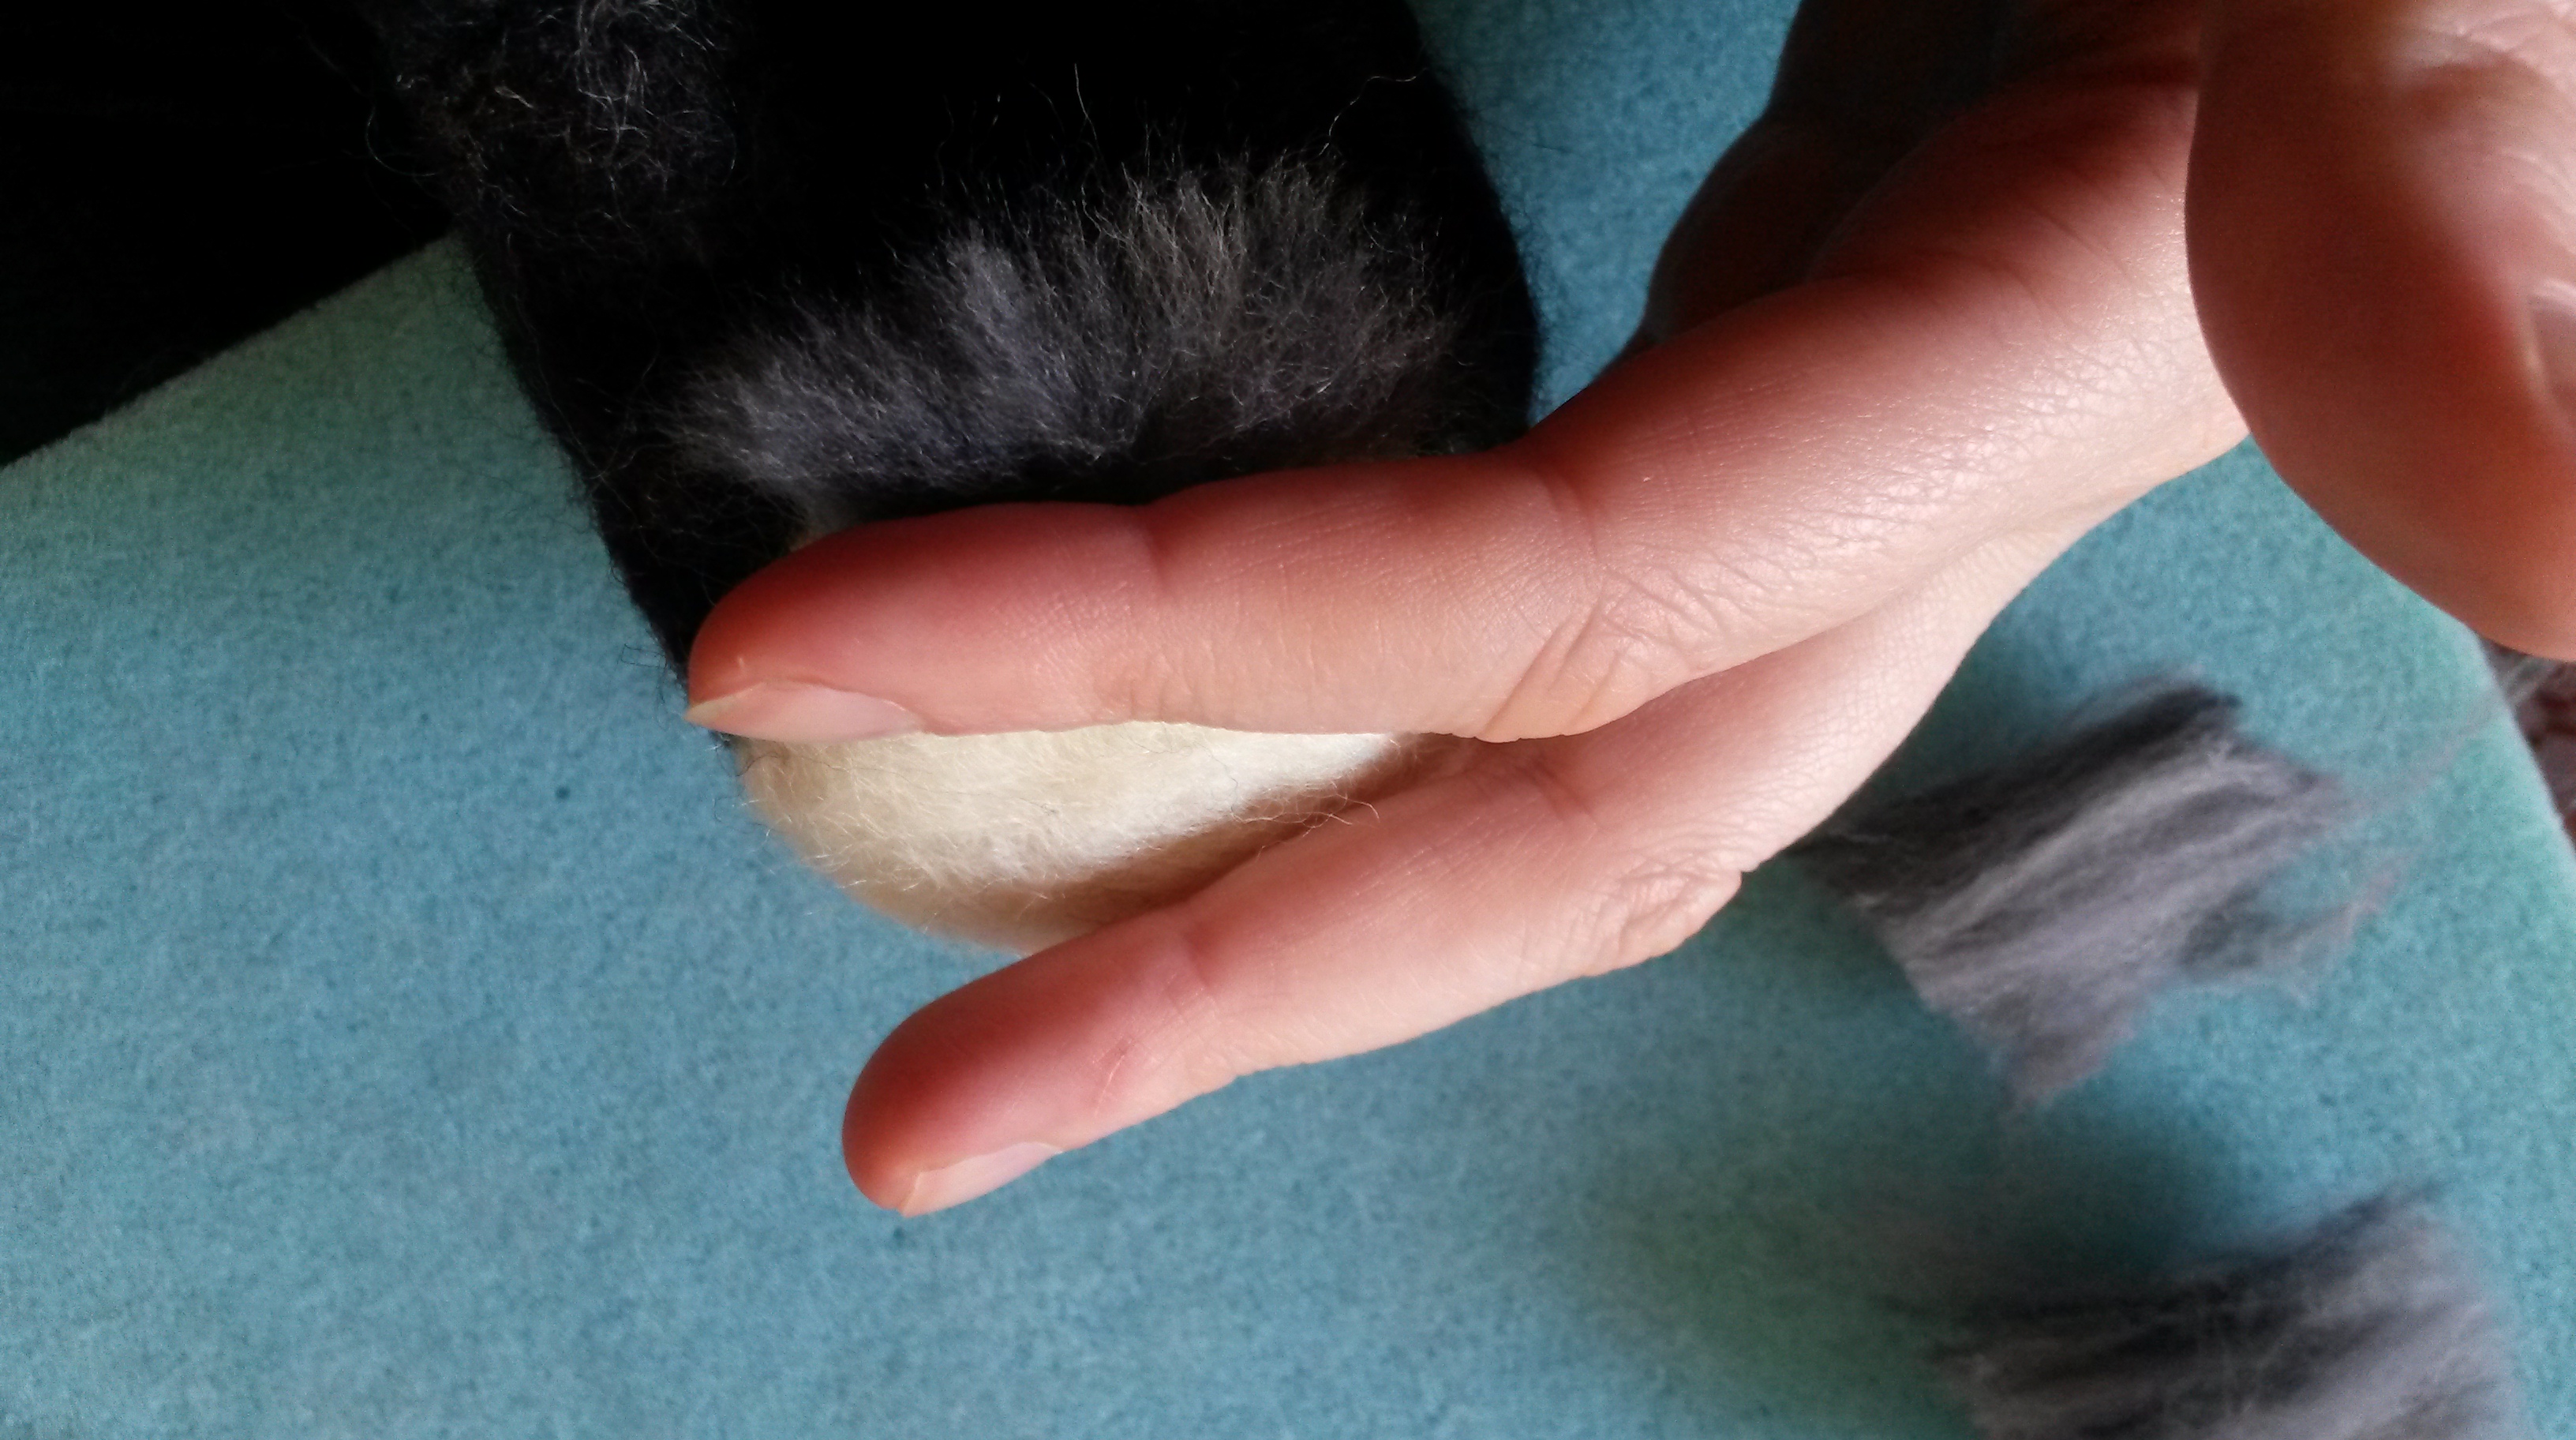
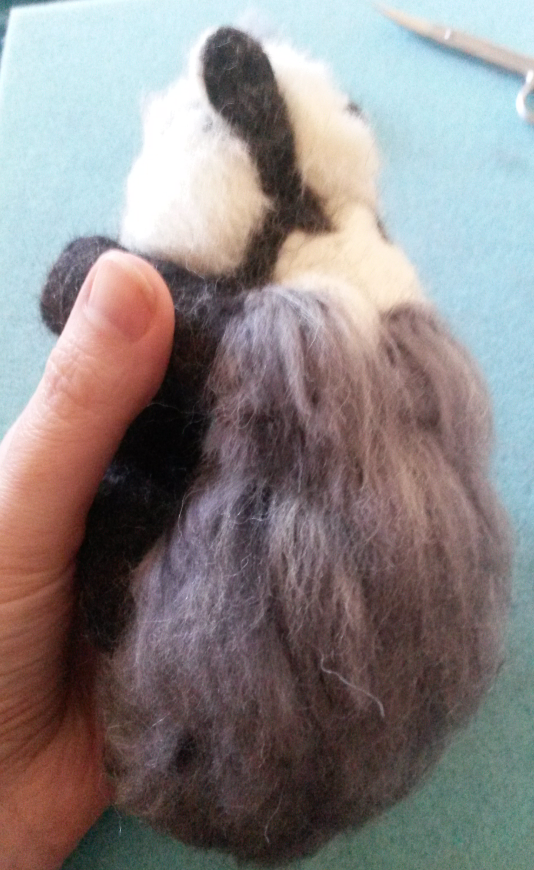
As you’re working on an animal, like this guinea pig I am making here, at some point you may have to turn it over or on its side.
Some of it will get fluffed up a little bit and that’s just the big challenge with felting very long fibres like this, but you can eliminate some of the issues with my three tips!
Please feel free to comment and say what you do about this because that would be really helpful to share tips and ideas with each other as well.
3 Tips to help prevent over felting, matting, frizzing, of long animal fur
(Scroll to the bottom if you’d like to watch my video version)
PLAN AHEAD
For an animal that’s upright I try to always start adding wool on the underside i.e it’s tummy and legs first so that I’m not having to turn over the lovely top layer. If I start off with the underside, that’s the bit that you’re less likely to see so if it gets a bit flattened it doesn’t matter so much.
I then turn it over and work on the top side and that’s the bit you’re mostly going to see. So you’re not going to be laying it down on all the lovely fibres and squishing them. The moment you turn your animal over, it’s going to flatten and potentially fluff up or leave the fibres looking frizzy and it’s just not going to look so great like how you added it in the first place.
CONSIDER WOOL TYPE
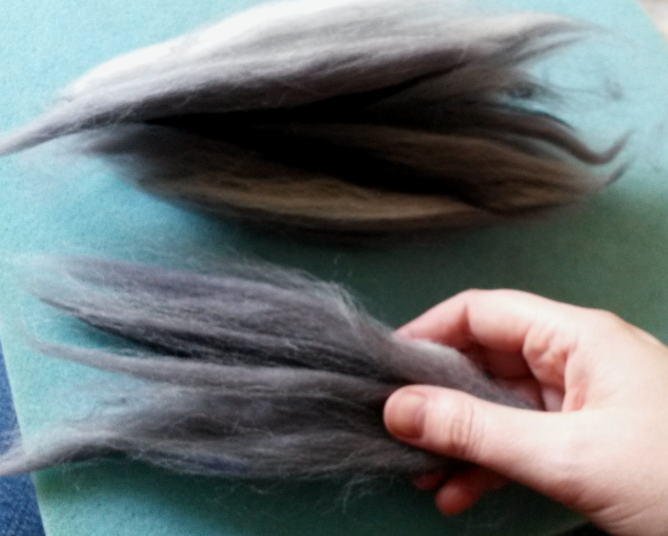
Think about the kind of wool that you’re going to be using.
So a lot of us will use merino wool tops for long fur. These are great because they’re really well priced. They come in the kits and you can get loads of different colours. I love the range of colours for needle felted animals here.
However you do need to think about the way that the fibres lay and the way they can potentially matt and frizz up easily.
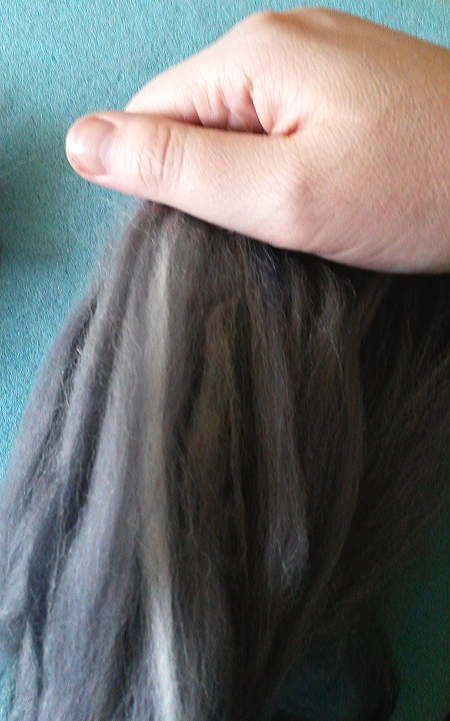
I have been trying some other kinds of fibres recently. One I want to mention is alpaca wool (you can get some lovely alpaca tops here) and suri alpaca. They seem a lot finer and softer, but you will notice a silky like consistency to them.
So I’ve been mixing these (hand blending) with my other fibres and finding that the mix is less likely to frizz and tangle with a silkier result.
Your animal fur can still end up flattening if you’re not planning your animal properly, but generally I’m finding that I can achieve a more natural looking fur as well as it matting less. It’s a beautiful, beautiful fibre to work with!
If you’re using a coarser natural wool top, such as a corriedale top. This is brilliant for replicating a coarse rough looking kind of animal hair rather than one that is smooth and soft looking.
You can incorporate that into your animal fur look as well. I used this in some of the brown shades on my sheltie for example.
The only thing with it is that it is rougher in texture and so tends to felt a lot quicker. I find it’s tougher and not so soft and fine. But at the same time if you rub it against anything that is also rough, the friction will make it end up looking frizzy which may not be the look you were hoping for..
So think about the kind of wools that you might want to use. Try out a variety of fibres…
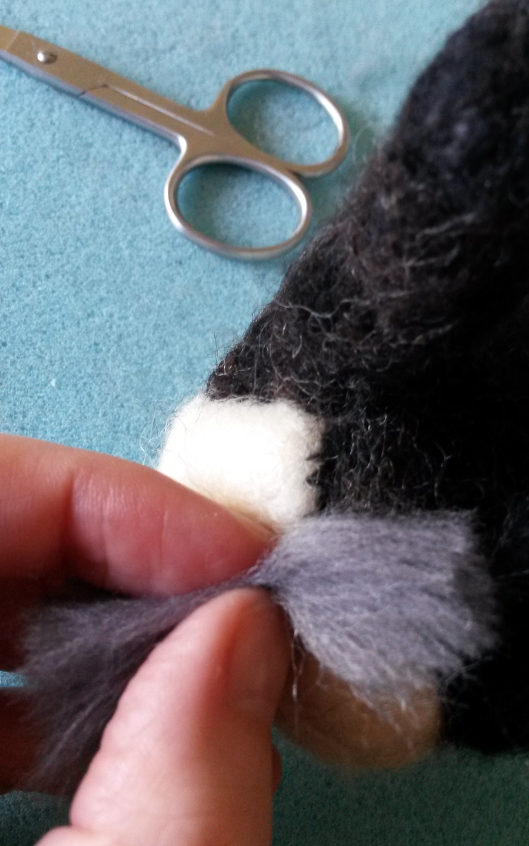
A ‘GLIDEY’ SURFACE
Think about what surface you’re working on. A lot of us will be using something like a felting mat or pad. My Eco felting mat from Heidifeathers has a really nice consistency and firmness to felt on. I can do all my core work sculpting on there really well and also add shorter fur fibres.
But when I come to attach my long fur, the last thing I want to do is allow my fibres to rub against the felting mat material and felt my fibres a lot further. I want them to end up looking really lovely on the animal. I don’t want them to rough up and get tangled.
So when you’re thinking about what you’re working on, think about something that is not going to be fraying your felted animal fur.
Once I’ve made the core animal shape base, I often move it off of my felting pad and I will use a slippery surface for the majority of my time…you’ll often see me use the inside of one of my beautiful storage box lids.
This allows my piece of work and the fibres to glide against it and not rough up and felt. It might move around a little bit but because my animal is contained in the lid area, it’s not going to slip too far. You don’t need to use a felting pad because the needle is not going to go through and stab into my knee or anything. Much of what I am felting onto is the thick body of the animal and as long as I don’t felt too deeply the hard surface is fine.
If I want to get at an angle though e.g. side of tummy, under a neck or felting fur on a leg I can still use the felting pad but lay a material over it.
A shiny smooth material like satin or silk is really good though test it out and see what you think. You don’t want to get too much static adding to your issues so trial it. You could get a bit of this material to lay over the pad. Tightly wrap it if you can so it doesn’t slip as you felt or buy a purpose made satin or silk surfaced pillow.
Or use a plastic bag or sheeting over the pad (I simply use the flat slippery bags that my wool come in). It can slide a little but that’s fine.
A shiny paper like tissue papers or wrapping paper or card can also work but less likely to last as long potentially.
The felting needle can enter the material a little but that’s ok.
If adding long fur to a thin piece of the animal anatomy e.g an ear or tail I would rather go back to just using my felting pad and just be very careful about not messing up the fibres.
Try a few options to see what works for you and find out what is most effective and comfortable for the process.
Whatever surface you choose, lay the animal down carefully against the surface before stabbing and ideally lay fibres in the way they should flow so they are less likely to fray at the ends or flatten or frizz from laying the wrong way.
A few extra tips
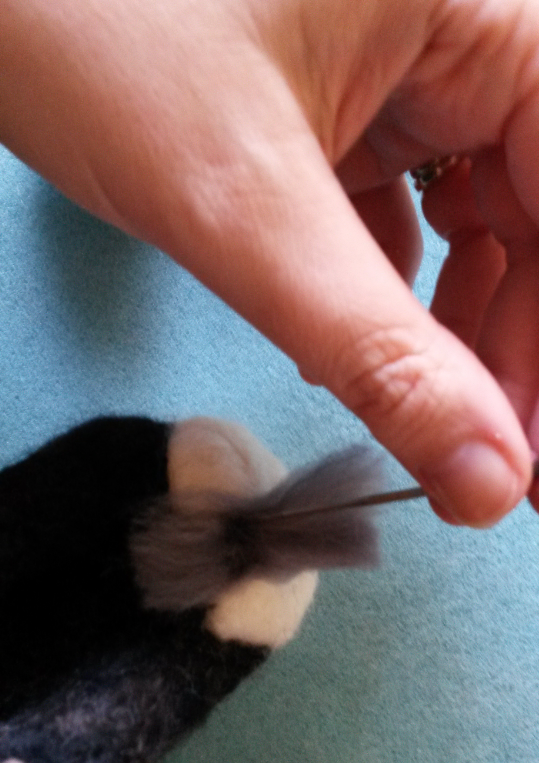
Remember to make sure that you’re not constantly touching or pulling at the fibres. Make sure you aren’t using greasy fingers of any sort, and that you’ve washed your hands really well and you’ve got no extra oils in your skin when you need to touch them.
For particularly long pieces of fur you can twist the ends carefully and tuck them down before laying your animal down when you’re working on it to prevent the ends from being vulnerable to fluffing or fraying.
To finish off your animal so it has beautiful fibres
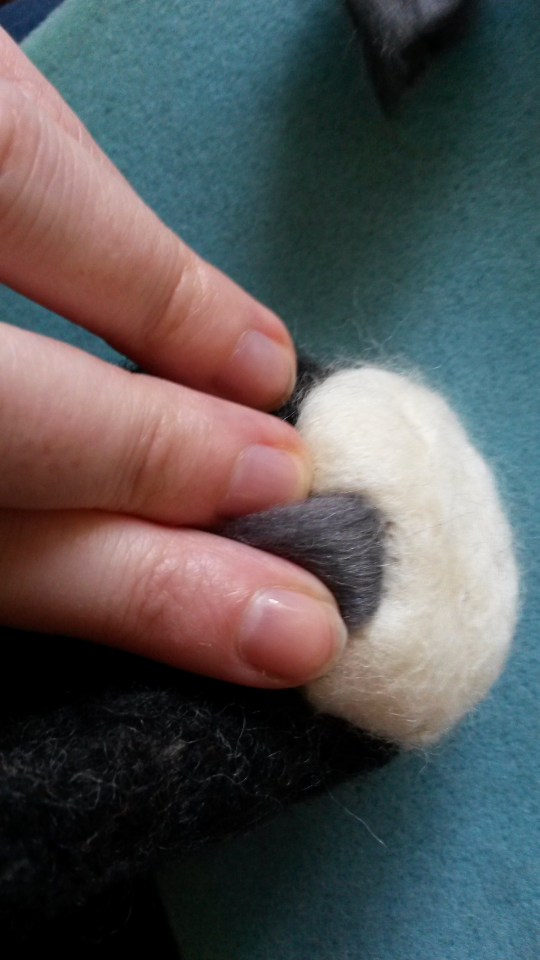
Once you have added all the fur to your needle felted animal you can then revive the fibres if they have become a bit flat or disheveled and plump them up.
Depending on the wool you have used and how you want the fur to look you could carefully brush them with an eyebrow brush or similar brush. For many of my animals however a brush can be too much for the delicate fibres and I don’t want to break or pull out the fibres I have taken my time to add and so I simply use a clean finger and thumb to tease fibres in the direction I want them to go and to unflatten them.
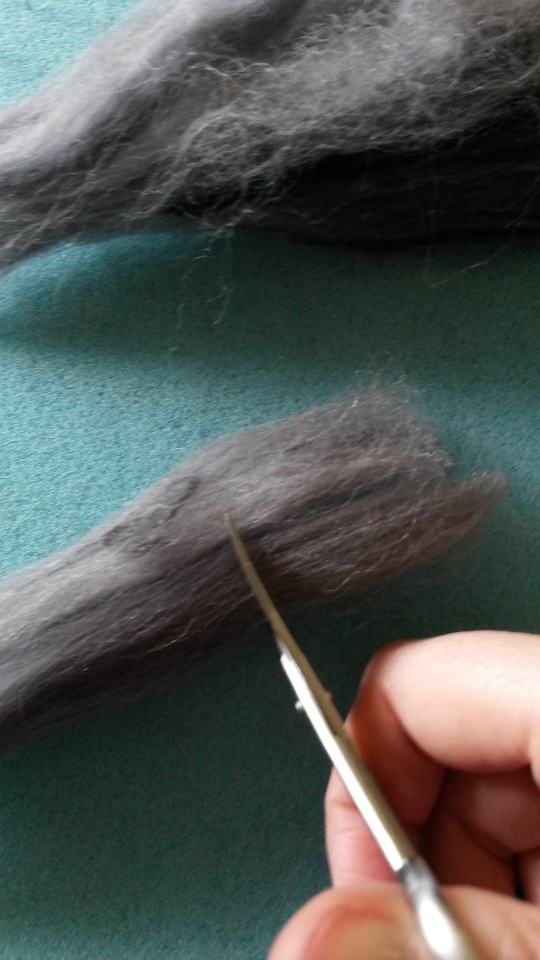
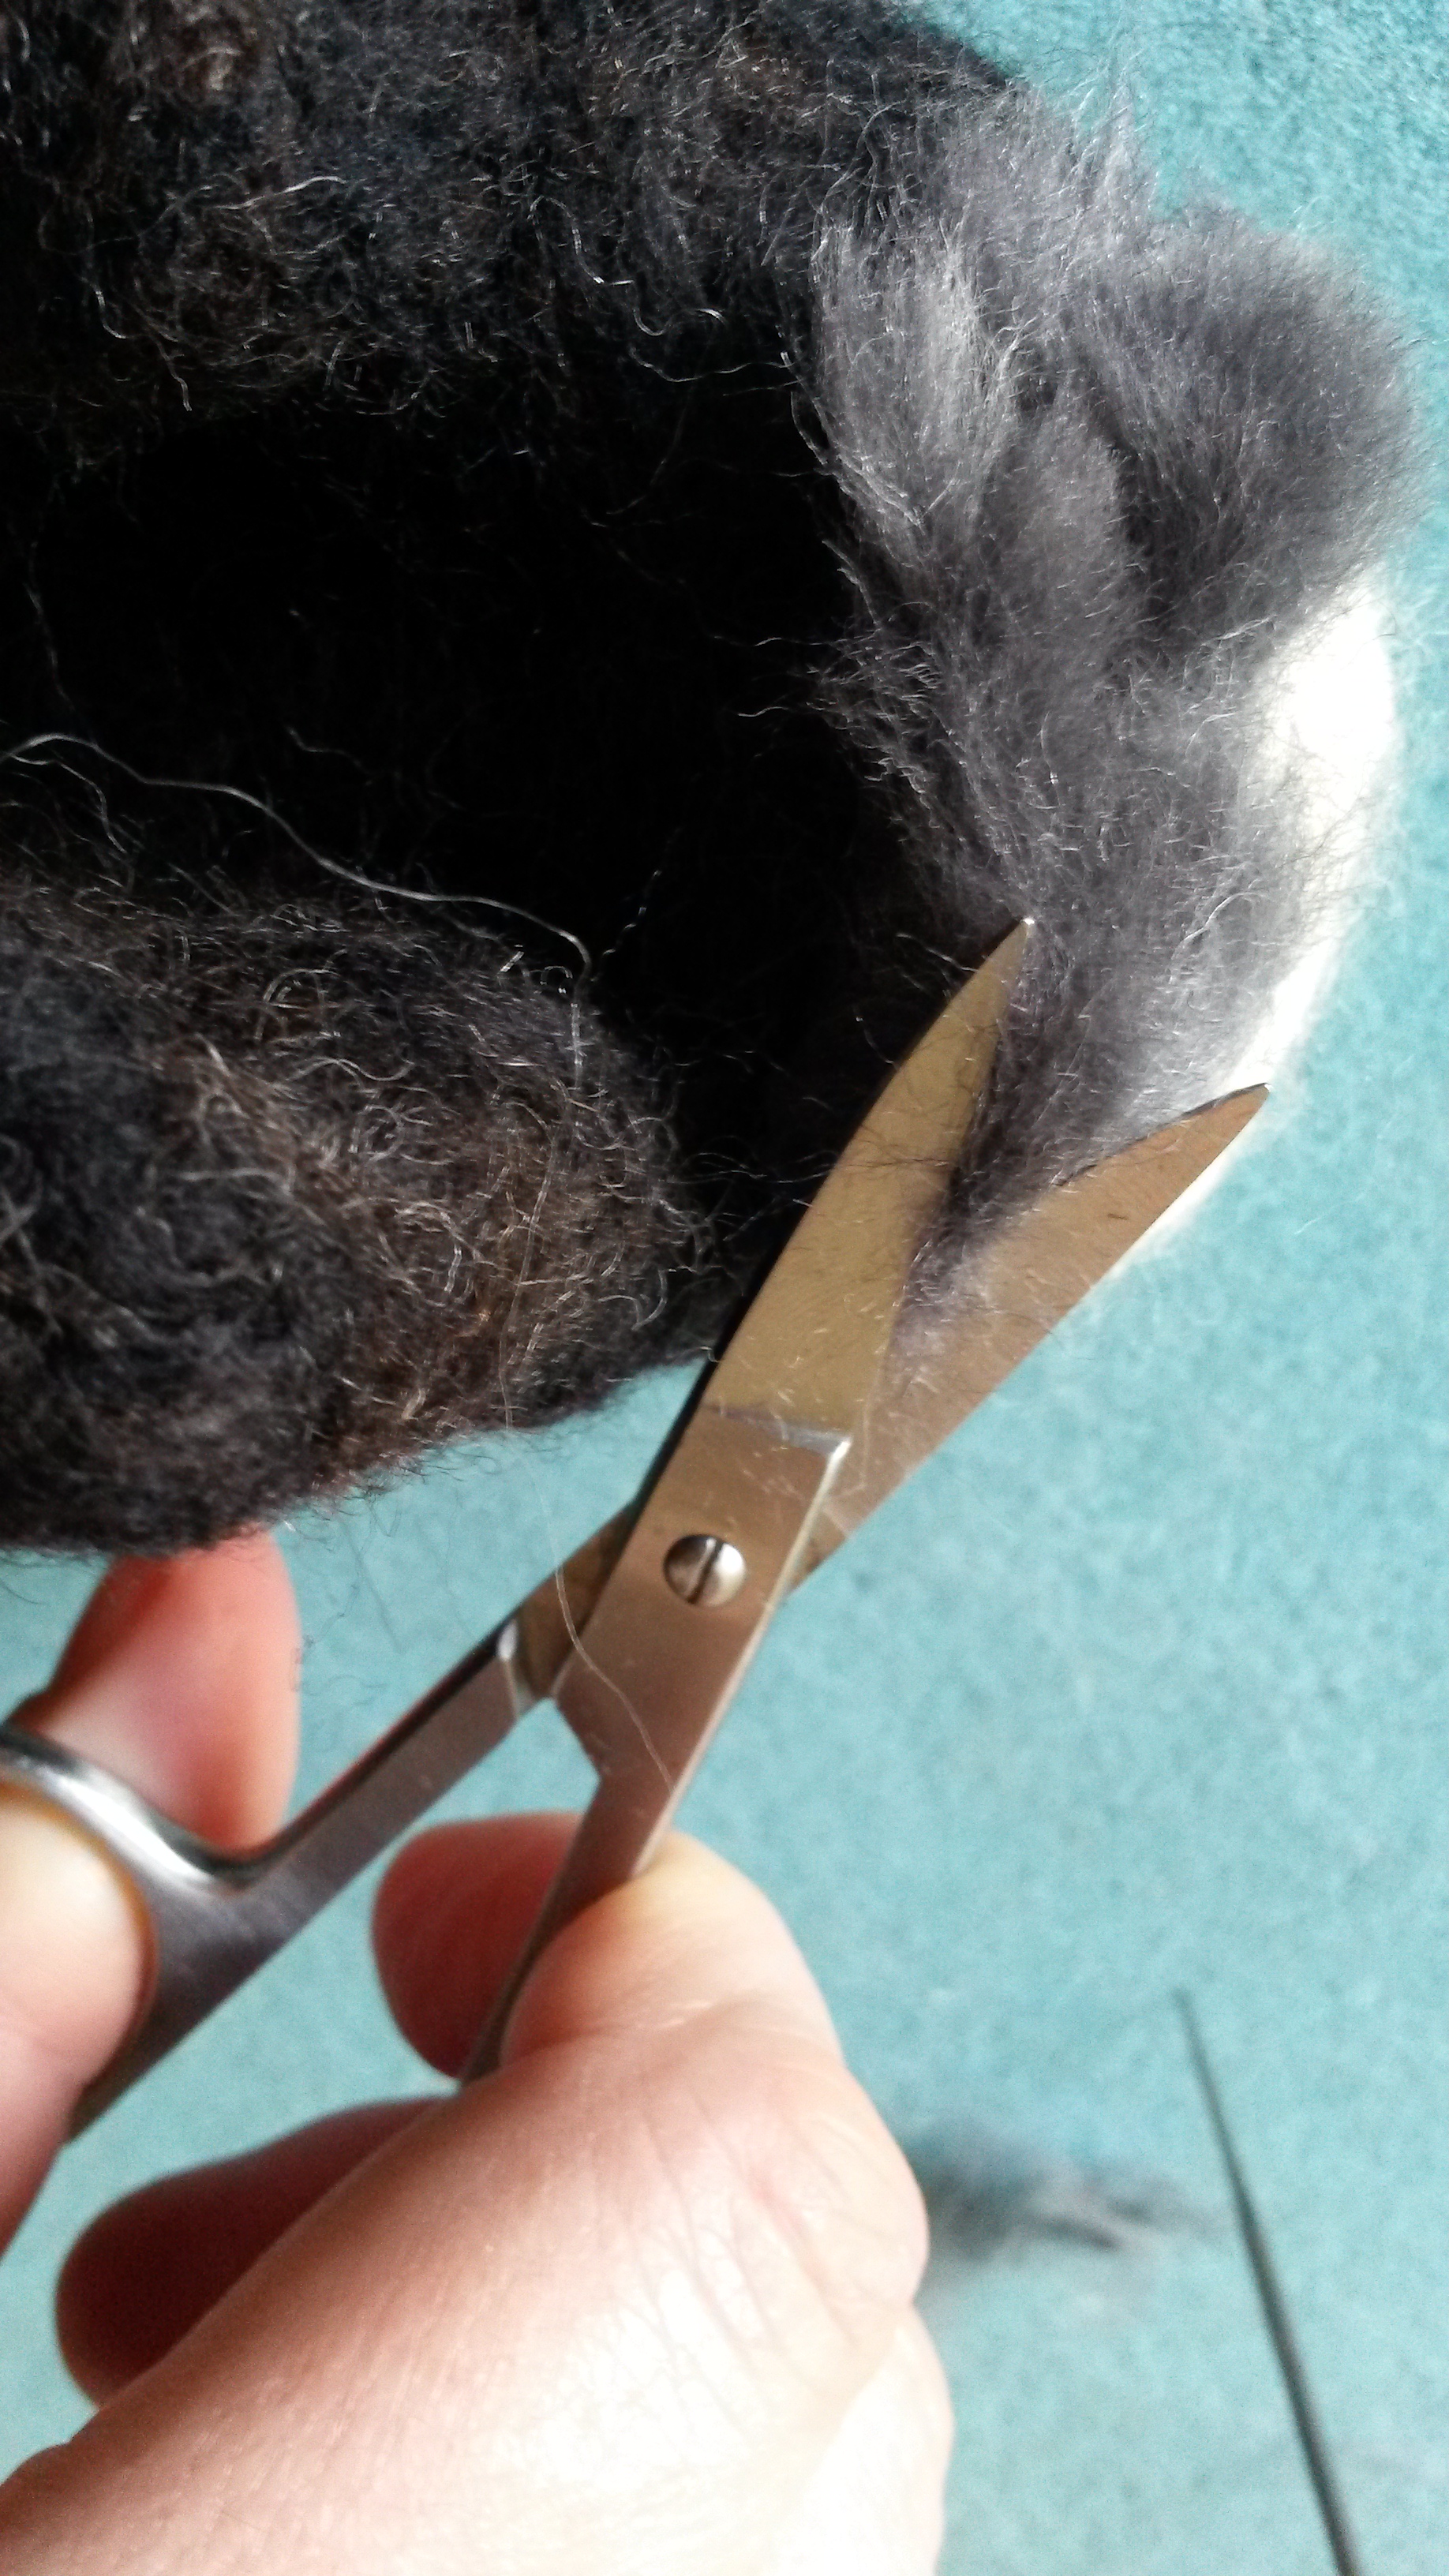
A normal sewing needle or sometimes my barbed needle is also a perfect tool to manipulate the fibres and to separate them out so they still look like realistic animal fur. Then a final trim with scissors if needing to tidy or remove any excess fluff!
I hope these tips have been helpful. Let me know your thoughts on them. 😊
Here is a video version if you prefer to watch or listen: How to protect long wool fibres while needle felting animals.
Please let me know what you do to help protect your long fibres, I’d love to hear your hints and tips too 🙂
Would you like to know how I needle felted the long fur on my Tabby Birman cat?
Here is a video tutorial with techniques of how to blend wool colours, plant (attach) long fur to your cat head, layer the wool pieces, reverse felt wool in some areas (for blending, gradients and fluffy fur), create tabby marking patterns and trim wool.
It’s great if you would like to make realistic cat fur!
This is part 3 of 5 in my series of Needle Felted Cat Head tutorials.
I hope you enjoy it
Here is the next tutorial for making the cat ears.
Or if you would like to know how to do the whiskers then that part is here.
If you missed the previous 2 videos or would like to rewatch them:
Tutorial one for Needle Felting a Cat Head Shape is here.
Whether you are a Needle Felting beginner or a more advanced learner, sometimes you can lack confidence. I want to encourage you and show you how to become a confident Needle Felter. I share practical tips as well as mindset strategy to boost confidence in yourself and your abilities. If I can do it then so can you. 🙂
Now I sometimes hear some of you say that you’re actually embarrassed by what you’ve created, you compare yourself to others and you just don’t have the confidence in your felting abilities.
Some of you have started projects, you’ve been doing all the basics, but then you just feel like you haven’t reached a level of where you want to be, and some of you may even be trying to sell your creations but you just don’t feel that anybody would buy your work.
I want to encourage you all with 5 ways to become a more confident felter.
In no time I hope you’ll go from being self doubter to confident felter. 🙂
If you prefer to listen or watch videos then I have covered all this in this video below, if not and you prefer to read then please scroll down past the video and continue to read on.
So here are 5 ways to Needle Felt with confidence:
Recognize, and remember that you are on a journey.
That might sound a little bit strange, but this just helps me to realize where I’ve come and where I’m going.
It doesn’t matter if you’ve just bought some wool and you haven’t even started stabbing or whether you’ve actually done a few projects and you have learnt some basics or maybe you’re a professional at this and you sell your work.
We all start somewhere, and there’s always room wherever you are to LEARN and GROW and IMPROVE.
So I remember when I first started, I had no idea what needle nothing was. I’d been online and I found these amazing animals that people have made out of wool. And I was like, “what? how do people do that?” So I went online and I saw how they did it. -just some brief clips about it, and I made a decision right there and then to pick up my wool and my needles, I just got them online and I just sat, and I made a cute little cream bunny, which I still have today,
I’ve never sold it. To be honest, it’s my first work so not up to my standard now, but that little bunny as cute as he is and as simple as he was he is a reminder now of my journey so far. I can look back, and I can think of where I started all those years ago with some real basic techniques and now look at me now and see how far I’ve come. If I hadn’t started and got stuck in, I wouldn’t have probably had the confidence that I have today.
I can also encourage you today because I have been the starter where you might be today. I’ve been at the edge of whether I can sell my animals.
If that’s what you want to do, you know you absolutely can with a bit more confidence, a bit more skill, and that’s something that you want to do go for it. I did, and I’ve sold some lovely pieces, and I’ve received so much lovely feedback from people as well.
Yes, I’ve experimented on this journey, and I’ve very much learned through trial and error, and yes, I completely aspire to become better and improve my work all the time, and I absolutely am inspired by and admire those people who make the most beautiful creatures. But at the same time, I recognize I’m on my own journey.
Wherever you are on your journey right now, it’s completely fine. It’s ok to be where you are but know that there is so much more to come.
Get to know and love your wool and your needles.
If you’re not confident in what the different wools can do and what the different needles can do, then you may not be confident in what you as a felter can do.
So what I always suggest is that you get to know and get really familiar with the different fibers that are out there, and also get to know what the different needles can do,
So, the wool actually is very forgiving. It doesn’t judge you (I’m not saying that people judge you either).
Often in fact, the wool has its own mind. Sometimes you’ll find when you start a project you’ve got this great plan of what you want to make, and as you make something, it molds into something else and becomes a different animal. I’m sure many of you have had that happen!
Think about it as you are a potter with your clay, but in needle felt terms – you are a needle felter with your wool, and you’re going to be sculpting with that wool to make something beautiful.
This is your material that you’re using. So get to be familiar with the different types and look at the different sheep breeds if you’re using wool and maybe even other non sheep species like alpaca or camels. If you’re using non wool types such as vegan friendly fibers, that’s brilliant as well. There’s so many different fibers out there.
Maybe you’ll start off with certain wool like core wool that’s more abrasive and easier and quicker to felt then later on add a more softer finer wool for the detail.
If you’d like to delve deeper into what the different wool types do e.g know the difference between wool tops and wool batts, or would like a quick guide to the sheep breeds, then head over to my wool guide here.
You’ll get to know which fibers you like and you’ll be more confident in knowing what you’re doing for each project and you’ll become more confident in your abilities overall.
What I would suggest is that when you start out you always start a little bit smaller and then build the layers on top. It is so much easier to add wool than to take away. Although I have to say on occasion I’ve had to cut things off, and I know that’s a big no no in the needle felting world. But sometimes it’s easier to cut something. I’ve cut a head or a nose off before.
This is what needle felting is all about, you get to work with the fibers, you have your favorites for the different sculptures you’re making and you make it work for you.
In the same way with the needles, get to know different types of needle, try them out, experiment. Feel comfortable with what you’re using. These are your tools to use, so if you’re using the right needles, the quicker more efficient that you will become. You can easily add the detail to your animals as well. Again, you’ll probably find that you have a favorite that you love to use.
When you feel confident in your wool and your needles, you will find that your overall confidence will build up, and you can then just let your imagination flow.
Learn from others and be part of the community.
So I don’t know if you’re on social media, but I certainly am, and i’ve really found some of the felting groups out there to be the most encouraging places to be. You can learn from other people, you can be inspired by those more experienced than you and you can also get tips and learn techniques from others as well. I found it to be really encouraging. It gives you that kind of confidence boost when people say that they like your work. Now it shouldn’t be all about that, but I really think it does help. You can get little tips on maybe how to improve as well if you want to.
If you’re not on social media, that’s completely fine, too. You might find that there’s a local group where you can learn alongside other people in person, which is even better
Remember that COMPETENCE leads to CONFIDENCE, so the more that you do something and get good at it, the more confident you will become. So keep practicing and learning.
So there’s loads of free and paid for resources:
Youtube to watch videos to understand how to needle felt and improve your techniques. Please do subscribe to my needle felting channel here. I have many more tutorials planned.
There’s also online tutorials like on my website here so you can learn from picture tutorials.
PDF tutorials that you can download, needle felting kits and books to buy out there too.
As I mentioned earlier, you could find a local community group that is doing a workshop, learning alongside a friend can really encourage you and build your confidence when your learning to needle felt.
There’s also online workshops, which you can find if you do a really good Google search.
I suggest when you’re learning, not to try everything all at once, master those little projects first before you leap into something more complicated. Once you’ve become confident in the basic techniques, then you can move on something far more challenging.
Embrace the mistakes along the way,
So learning and practicing is great , but don’t be afraid of making those mistakes along the way. Those mistakes will drive you forward so you can make even better creations. When you make the mistakes, you remember them and the next time you’re less likely to do it, yeah. You’re more likely to improve when you experience those mistakes. You can then hone your skills and become a better and more confident needle felter.
Sometimes I find too that making mistakes enables me to find a completely new technique that I hadn’t even thought of before, and that is all part of experimentation and trial and error.
If you break a needle, for example, you will soon learn. You don’t want to break more needles and buy more needles and have more expense, so you will soon learn how to achieve the pressure that you should be stabbing with and what angle to stab at.
Reading a book or watching a video is good for learning but the true meaning happens when you physically try it and do it by yourself. Having those personal mistakes happen to you will mean you soon learn, even though it can seem like learning the hard way.
I can look back at all the mistakes I made and realise that if I didn’t make that mistake I may not have honed my skills the way I have and be where I am today
Another mistake that people often make (and I am very guilty of this as well) is starting off making something that ends up being too big or certain parts of the animal are completely out of proportion. Yet you thankfully soon learn to plan a little bit better, take your time, and make a better proportioned animal.
Sometimes you might feel when you make that mistake that it’s all gone wrong, and you don’t feel confident at all. Well, I just want to reassure you, MISTAKES ARE OK to make!!. I’m pretty sure that when you speak to anyone no matter how experienced they are that they still make mistakes.
If you make a mistake, – don’t let that affect your confidence, just see it as something that’s part of your journey, take a deep breath, you’re not going to make as many mistakes moving forward as maybe you will in the beginning. So just see that as an experiment, see it as a learning curve and then move on! 🙂
Discover and follow your individual style.
You have your own inbuilt style, and this is what DIFFERENTIATES you and makes you UNIQUE from any other artist!
Of course it’s really important to learn, so if you want to go and follow kits or you want to follow youtube videos or read blogs posts like this, then that’s completely fine. You can really improve your skill and obviously being competent makes you more confident. Yet at the same time it’s really, really important to find your own unique style.
When looking through Google images of needle felted animals or when browsing social media it’s really amazing how you can look at those pictures, and you can recognize straight away who the artist is because they have their own style, and so this is what will happen for you.
Maybe you’ve already found your style – that’s brilliant, please follow it!
But if you haven’t yet just again, get to know what you love, get to know what really makes you happy in your hobby and find your individual style.
Personally. I love the tiny detail and the realism and making animals to be as lifelike as I can. I have to say that I’ve been really frustrated in the past when I’ve seen other people make animals, and they can do them really quickly. They can maybe do a whole animal in like a day or even a couple of hours. I thought to myself, “oh. If only I could make things quicker, I could also sell things quicker”.
But then when I think about what my unique style is and what it is that I appreciate in art, – I appreciate the detail, and if I’m going to create the detail and if I’m going for something realistic, – then of course, it’s going to take me time.
So don’t get stuck in the mindset that you need to be like someone else or do the same thing as someone else. Don’t compare yourself in that way, find your own style, and then follow that style and be the needle felter that you were meant to be!
Yes, be inspired by other artists, but be confident in yourself, don’t come under any pressure to be like anyone! Express yourself and who you are through your needle felted creations!
So, are you a self doubter or a confident felter? Please let me know in the comments.
Thinking of needle felting an owl and need some ideas on where to start? Not sure how to make a feather effect from wool?
This was one of my most challenging project , but also extremely enjoyable and rewarding! Owls are beautiful birds with so much character and you can really express this in your sculpture, so I encourage you to get stabbing and have a go!
So why did I choose to make an owl? Well to be honest an owl was on my to do list for ages as I am a big fan of owls but it just so happened that the Manager at ‘Found’ (my favourite charity shop in Harrow which supports the needs of the local community) asked me if I could make an owl to overlook their new library. Of course I flew at the chance!!
But why a tawny owl? I noticed a number of gorgeous needle felted barn owls out there (which I will likely make at some point) but hardly any tawny owls and for me the tawny is an iconic woodland owl from the story books (remember the owls in Winnie the Pooh and The animals of Farthing wood?) This owl looks very wise but has the cutest expression, plump rounded body when its feathers are fluffed up and I just love the medley of browns and creams in its colouring! Such an owl would be perfect at the library!
Wow from photos of real tawny owls they look so detailed – where do I begin? Yes it can look daunting when you first look at the feathered detail. Even if you felted a single feather every day for the next year you would probably never finish it so the idea is to show detail with lots of layers but still keep it fairly simple. It will take some hours and this is probably not a project for you to start with if you have no felting experience at all but if you do want a challenge then go for it!
By making one section at a time – starting from the core wool base shape and then adding facial features, then tummy feathers, wings, then tail, then head feathers and talons to finish- you too can sculpt an owl of your very own.
As with most of my creations I took some photos along the way to show you the various stages and a few techniques to give you that inspiration you need. Please do contact me if you are unsure of how I did something! Also you may find my other tutorials useful.
What will I need?
Somewhere to work- most of the time this is indoors for me but on the odd occasion I manage to work outside in my garden 🙂 just make sure your back is supported!
Barbed needles of various sizes; thicker for initial shaping and finer for detail (I buy from Heidifeathers who sell a wide range of good quality needles)
Wool to felt with; I love using natural undyed wool, either a corriedale, Norwegian or Jacob carded wool or tops to make the core of my owl as I find this type of wool felts quickly and ends up nice and firm. I then used merino wools over the top for feathers as they are soft and come in some lovely colours. This pack of 6 ‘beautiful browns‘ is perfect for this project.
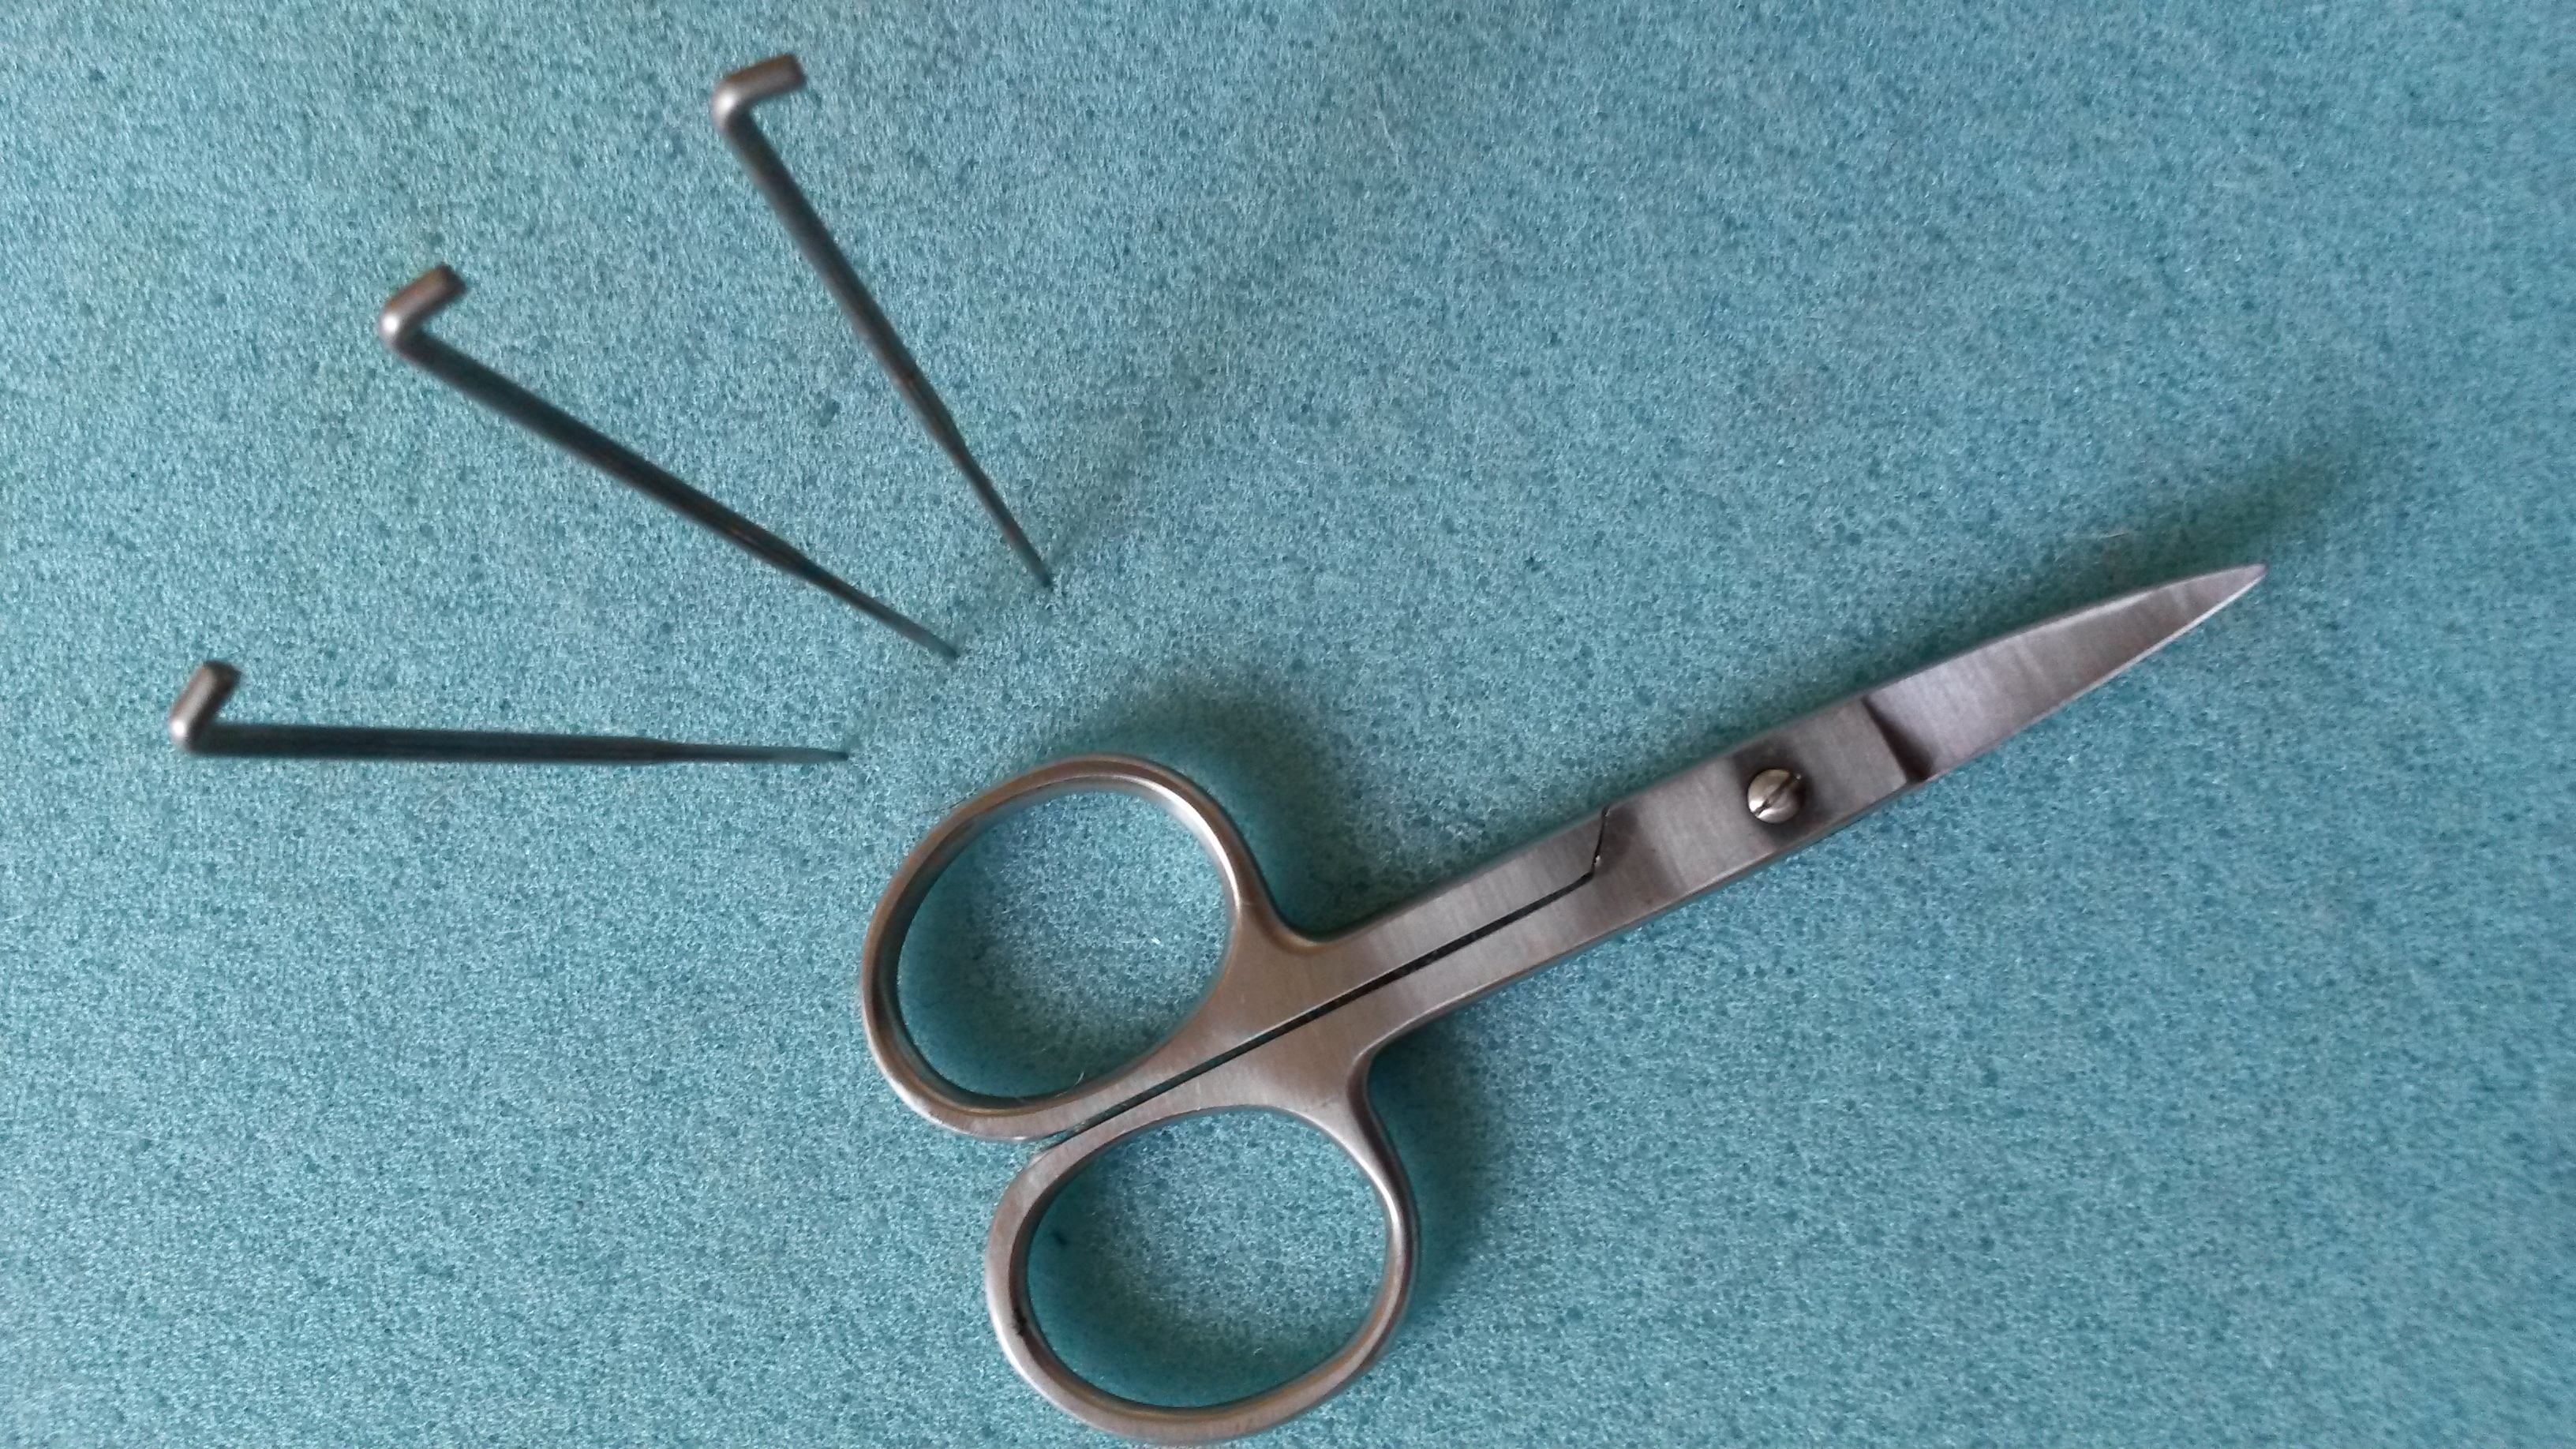
Small pair of scissors to cut lengths of wool for feather making, plus also to trim any loose strands to finish off. I use my old faithful curved nail scissors but you could also buy some cute stork shaped embroidery ones.
Pipe cleaners (I used two 30cm length pipe cleaners – it’s worth buying a large pack to use in other future projects) on which to wrap wool over for the talons
A small pair of pliers to twist wire ‘claws’ into shape. These are great quality long lasting ones at a low price.
Photos or art work of tawny owls, some time, some love and lots of imagination!!
I have included links for where to source needle felting tools and materials. Please see Links disclaimer in the right side panel for more details.
1) Building the core; head and abdomen
As with most projects where I don’t use a wire armature, the owl will start off as basic shapes made from core wool;
Start off by needle felting two basic shapes to a medium firm consistency using your thicker needles(use the clover pen tool if you find it easier); you will need one round ball (with a flat side for the face) and an oval shape (as in above photo) for the abdomen. Join these two shapes together. If needle felting is new to you, you may wish to look at my other tutorials for some felting basics and attaching body parts.
Sculpt a typical owl heart shape face by adding small pieces of wool and concentrate your stabbing to hollow out two disc shaped cheeks within which the eyes will go. Emphasise the brow line and the centre where its beak will go and form a ridge around the cheeks.
Add more wool to the abdomen to enhance its cute rounded owl chest.
2) Facial features
Refer to the photos and annotated picture below…
For the beak; roll a small piece of merino wool in your palms and felt firmly on your foam pad/brush leaving one end softer (soft end is to attach the beak to the face) and the other end felted to a point (owls have a curved beak). Attach the beak to the face.(NB read this whole tutorial before starting – you will see what I mean later on)
Next add two blobs of dark wool as a guide to where the eyes will be located (the eyes will be finished off once the rest of the face is finished.
Add some dark brown wool to follow the ridge around the cheeks.
Layer some beautiful warm and light browns to form the owl’s cheeks; each piece radiates out from the eyes. the same colours are also used for the forehead but with some darker wool overlaying it.
For the bristles on the inside of the eye, around the beak and up to the brow; use tiny cut pieces of cream/white wool fixed well at the base.
Felt the eyes (see tutorial about eyes here); in the photos above you can see the right eye is complete and the left is under construction 🙂 I made a dark brown iris with black pupil and white dot to mimic where light would reflect. The eyes are lined with a cream wool and I stabbed an area above the eye to shape the eye lids.
3) Building up the tummy feathers
For the basics of how to add longer lengths of wool to your sculpture I suggest you first take a look at my tutorial on how to felt long fur here, as although there will be some variation in making feathers, I will be using the same techniques throughout to ensure the wool is firmly secure.
With your scissors cut strips of wool in preparation – I used a variety of creams and browns.
Start from the bottom and work your way up in layers, fixing each piece securely.
The difference between an animal fur look (like with my badger, fox or squirrel) and a feathery look for your owl is that for the feathery look each piece should be defined and not overly blended into the neighbouring pieces. To achieve this the base of each section fixed to the core should be narrower, don’t line the pieces up in a straight line but stagger them randomly and for some sections cut the ends at an angle or in a ‘V’ shape!
The main overall look is cream for the bottom half and rich warm browns (matching the cheeks) for the top half. Then add some more cream at the top near the neck.
Add some thin strips of dark brown for extra flecks to finish this section off.
” OH the beak has changed!!” Yes I decided that a lighter and slightly longer beak would look better! One of the wonders of needle felting is that you can change things part way through- careful though as chopping off parts is not the best thing!
I also added some white to define the forehead.
4) Wing feathers
I chose to felt the wings for my owl in a fixed closed position with feathers laying close to the body rather than the wings being spread open. So I looked at lots of pictures of wing anatomy to see which feathers would show and how they should be positioned. I have included an annotated picture of my owl from the side to illustrate the various wing parts we will tackle next. To make layering easier we will start with the primary, then do the secondary, and finish off with an overlay of feathery wing coverts.
It is up to you how many of the feathers you make; I made 4 primary and 5 secondary feathers for each wing.
a) Primary feathers
Flat felt each piece into shape. I used the clover pen tool for faster felting. To keep straight edges I traced an outline onto the wool with two needles in my clover pen and then folded the wool over to the middle and felted well on both sides. Make sure you felt at an angle along the edges to keep them smooth and well shaped. My tutorial on making bunny ears (second part of step 6) may help get this technique right.
Make each piece roughly the same width but gradually getting longer in length. You can see the longest and shortest together in this picture below. The ends should taper to a curve. The fibres at the other end should remain fluffy and loose to be fixed to your owl’s body later on.
Ensure the pieces match the sizes of the pieces on the opposite wing. To help do this lay your piece on top of the wool and score around the edge with two needles in the clover pen.
Remove the piece and you will see an outline. Again fold the edges over and felt until you get a rough replica..
When attaching these feathers later on they will end up positioned a bit like a concertina fan; you can test how they will look together at this point (see right photo)
On each feather felt alternate layers of the light and dark browns starting from the tip
Define a central line along the length of each feather by turning the feather over and felting deeply along the centre so that the core wool goes through to the other side. Then needle it down flat.
b) Secondary feathers
Make 5 pieces for each wing, each getting slightly wider and longer each time. These pieces should be shorter than the primary feathers (roughly half the length). This time make the ends more rounded rather than tapering to a point.
One edge will be felted to the next feather with smallest at the top (see left photo).
You can see that they look quite big compared to your owl at this stage. Once on the owl though they will felt into position (fluffy ends will felt into the body) and you will want the owl to be 3D not a flattened piece so the wings will protrude outwards.
Felt some colour on to the edge that will be seen (I am demonstrating how this is done for the left wing). I used a base of the lighter brown and added band of darker brown. If you have time you can felt layers like you did with the primary feathers ((in hind sight I would have preferred to have done this as the finished effect looks more feather-like but decided to try out an alternative method).
Felt the pieces together by stabbing all the way along the edge.
Continue to add as much detail into the feathers as you like; I added a tiny strip of cream underneath the dark brown bands and a line down the centre of the top feather.
Here you can see the feathers all layed out for what will be the right wing.
Trim the fluffy ends so they are of equal length, then turn over and pull down some of the strands so they stand out at the back of the feathers ready to felt to your owl.
It doesn’t matter about how messy the back of the feathers ends up as you won’t see this side once fixed to the owl. 🙂
c) Attaching the primary and secondary feathers
Starting with the primary feathers, fix each feather at the base (longest at the outer edge nearest to tummy, sshortest toward what would be the back bone). Attach each feather over the previous as per the photo earlier that showed the feathers as a concertina fan.
Then attach the secondary feather section over the primary feathers where the shoulder blade would be.
For help with attaching body parts see my tutorial here.
Attach the right wing in the same way using the left as a guide to ensure you fix the feathers symmetrically (mirroring the opposite side)
d) Wing Coverts
You could now felt even more individual feathers but to give the illusion of small feathers I simply added more tufts of wool much like with the tummy feathers.
Cut and fix small pieces starting from the bottom (just at the top of the secondary feathers) and working in layers towards the neck. The bottom row should overhang the secondary feathers. Try to keep the overall shape as a ‘V’. I also added a few random white tufts which you will see if you look at pictures of real tawny owls.
Add a fine strip of dark brown wool along the centre of each of brown wool pieces.
5) Tail
Felt a larger feather for the tail in much the same way as you layered the colours for the primary feathers. The tail should be roughly twice the width of the primary feathers but with a rounded end.
Optional – add more light brown over the top of the banded pattern to make a slightly mottled effect.
Attach the tail firmly to the owl, then add some light brown wool around the base so you can’t see any of the core wool showing.
You may find you need to squeeze the two wings into the centre to mould to the shape you need them to be in. .
6) Head Feathers
Alternating various shades of light browns, layer tiny pieces of wool from the back of the head up towards the face.
Use the annotated picture as a guide- the feathers should follow the red lines which radiate from the back of the head to the cheek ridges. I found that it helped to felt the centre line first.
To give a feather look – twizzle the ends with your fingers as you go.
Add thin flecks of dark brown wool randomly to finish as seen above (bottom right) and below.
Take a moment to say ‘squee!!’ Well done you are almost there!
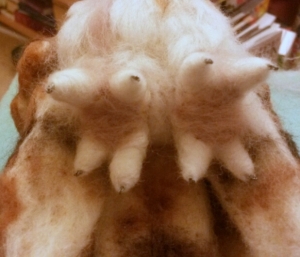
7) Talons
Owls have four toes on each foot and when standing on a flat surface three will usually be at the front and one at the back but when clinging onto a branch they have the amazing ability for one toe to move to the back. So you will need to decide on how your owl will sit. My owl is to be sat perched on some wood with its tail and primary feathers hanging down so I will position the toes with two at the front and two at the back for each foot.
There are many ways to make talons but I will show how to make simple talons from just two cotton coated pipe-cleaners (one for each foot) and wool. Bare wire (kept blunt – don’t worry) will form the claws.
Fold a pipe-cleaner in half then in half again in quarters. The bends will serve as a guide to where the next fold will take place.
Straighten out the piece slightly (you will still see the bends from where you folded) Starting at one end, fold the end up to your first quarter bend. Once folded twist the segment along its length.
Then pull the remaining pipe-cleaner at the next bend towards your previous quarter. Think of it a bit like how you may make a flower with four petals.. twisting as you go…
Continue with your other quarters, bending towards the middle…and twisting the middle too to make a crisscross shape (looks like a kiss?or perhaps an x chromosome? 🙂 )
Then do the other foot in the same way.
If you wanted 3 toes at the front you can easily make this shape at this stage too.
You can keep the toes as they are or define the claws. To do this cut the bend on each toe so that the ends become two pieces. Then pluck away the pipe cleaner material to reveal bare wire. Mind your fingers as these can be sharp!
Then using pliers, twist the two wires together and bend the end(so not sharp to touch)
This will take a little while, but do this on all toes. Trim the cotton on the pipe-cleaners to make a nice shape. You can see they are now looking more like owl talons..
For skinny toes you could leave these as they are but for this owl I wanted to pad them out a bit.
Take a thin length of merino wool and wrap from the middle of each the foot out to each toe and back to the center again. You may need several of these lengths. Watch that your wool doesn’t get stuck over the claw. Each toe should taper to a thinner end near to the claw and be bulkier in the middle of the toe and towards the main foot. Achieve this by wrapping only once near to the claw and twice round for the rest of the toe. The tighter you wrap the less felting will be needed.
Secure the wool into place all over and sculpt into shape with a fine needle taking care not to break the needle by hitting the wire. Once felted, bend the foot into shape.
Add a slightly darker shade of wool (I used a mink colour) to the underneath of the foot.
Scrunch a small handful of wool and felt onto the top of each foot (this will be used to anchor the foot onto the owl’s body. Then thicken up the foot around this with some more wool to make the foot look fluffy.
Use a thicker stronger needle to fix your feet to your owl. Felt deep into the owl at all angles until well secure.
To finish off I added a few layers of wool feathers in the cream and mink round the feet 🙂
After a bit of tidying up and a trip to the park…….:-)
It was so lovely to see this little owl meet his new owner in his forever home at the charity shop library!!
Did you find this tutorial helpful? What would you like to learn about next? Please leave comments. Why not post a photo of your own creations?
Don’t ever miss out on my latest tutorials! Insert your email address and click the ‘Follow’ button on the right hand panel to receive notifications of when the next post is up..:-)
Don’t have time to make one but would love a one of a kind needle felted animal by Fit to be loved for yourself or for that special someone? Visit my Etsy shop today to see my latest creations. Or like my facebook page to see what I am making next.
Thinking of making a simple needle felted bird? not sure where to start or need some ideas of how to finish your creation with some extra detail?
Last week I had the pleasure of making a little needle felted bird for my sister as a birthday present. She asked me for a simple teal bird to go with her newly decorated room once it is finished but as soon as I started I couldn’t help but let my imagination take over.
I absolutely love my sister so I expressed this by forming heart shaped wings that have beautiful button and thread embellishments. I also tried to make his facial features come to life by giving him adorable eyes and a little tuft of wool on his head(much like a woodpecker or crested tit) 🙂
Last night I got to see my sister’s face as she opened up her parcel through the wonder of ‘facetime’ on our ipads. So pleased she likes him!! I hope you like him too..
So where did I start? As you can see I twisted some cotton felt covered pipe cleaners to make a birdie shape…
I then wrapped lengths of core wool over the structure and needle felted until I got the right shape. (Be careful not to stab the wire in the centre of the pipe cleaners by felting along the edge of the pipe cleaner only).
I then used softer merino wools for the teal and blue birdie colours – light and dark shades of teal and denim blue (the beige you see under the label is for another project coming soon).
I carefully wrapped and felted the denim blue colour wool over his legs and feet. I did the same with his beak later on. (See here for other ideas on how to felt tiny animal feet and toes).
I chose the lighter teal wool for the underneath, face, wings and flecks of colour on the tail. I used the darker teal for the back, top of head with tuft, eye stripe and tail. I felted simple eyes in black with a white dot placed to mimic where the light would reflect and added a thin strip of white around the eyes. (see how to felt animal eyes here).
I made the tail and wings separately before felting them on to the body (see here for how to add body parts). I chose some pearly flower shaped button which I sewed onto the wings and stitched a pattern along the length of each wing with a teal and a glittery white embroidery thread. I didn’t fully felt the wings to a perfect shape at this stage as I completed this once attached to the body..
Once on the body I then used the denim blue wool to emphasise the shape of the heart wings by felting around the edge..
Here is the finished little teal birdie ready to send to my sister..:-)
……and of course no creation can go to is new owner without a bit of ‘fit to be loved’ wrapping..
Don’t miss out on another post from Fit to be loved, click ‘follow’ on the right hand side of my find out more page.
“How do I felt body parts onto my needle felted animal? How can I make them stay secure and not easily pull off?”
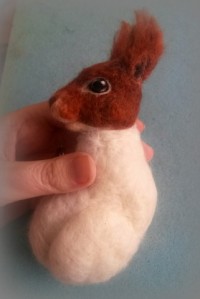
Today I want to show you some more basics of needle felting animals. In my other tutorials you will see how to make various animal parts e.g a badger head, bunny ears as well as the various stages of felting a full guinea pig, bunny etc. However one of my followers commented that it would be good to do a tutorial showing how to felt the head and limbs onto your animal. It is not so easy to demonstrate with photos but I have done my best by using the shots I took along the way when sculpting Chestnut; the little red squirrel I made.
There are many ways of felting one piece to another so you may have already found the best way for you. The method I will show you is just one way and was the easiest for my squirrel at the time. 🙂
Please note that the following tutorial will assume you know a little bit about needle felting already. See basics here.
Adding the head
At this point I have felted the head more or less to completion. The body has its shape but no fur yet…
I have sometimes only got as far as the shape of the head when joining it to the body but I quite often find that it’s the head of an animal that gives its unique soulful character (especially once it has eyes).
I often don’t decide on exactly how the body will look until I have the head sorted. Being delighted by the cute nature of the face (as is what happened with Chestnut) often inspires me to continue on with the rest of the body.
1) To join two felted objects together leave enough loose fibre on at least one of the objects where the join will be so that it can be felted into the other.
It is a lot harder and perhaps impossible to join them if the wool is felted too firmly and the fibres cannot mix and bind with the fibres on the other object when you stab with your needle.
As you can see, the neck at the top of Chestnut’s torso has been left loose and soft. The base of the head is soft to medium felted rather than firm to allow plenty of further stabbing..
2) Fluff the fibres up a bit before putting the head into the position you would like it to be.
3) Stab at the wool from a 45 degree angle under the chin of the animal. In effect what you are doing is poking the loose wool from the neck into the head. Insert the needle as deep as it can go and on all sides of the neck. This helps to anchor the head to the body. Remember (particularly at this stage when the head will just fall off the body if you try any other way) to lay your animal on a felting pad/brush and stab away from your fingers!
To join body parts I use a medium width barbed needle (I find these are stronger than the finer ones for this purpose but do try out various ones to see what you are comfortable with and what works best for the wool and size of animal you are felting). If possible use one with many barbs along the length to help bind the fibres and as the needle will be inserted quite deep.
4) Once it feels like the wool fibres have attached so much so that the head no longer topples away, you can try felting at other angles at various depths. Here I laid Chestnut’s head over the edge of the felting pad as it made it easier to get the angle I wanted and also prevented me from squishing her carefully felted nose 🙂
5) Carefully stab a few times from the top of the head to ensure it is firmly secure. NB this is easier if the head has no fur yet but if you have (like I have) you just have to take care not to leave stab marks in the face (as you are using a slightly thicker needle).
…and there we go, head on …looking more squirrel-like although much like a shawn sheep at the moment with lack of fur 🙂
Adding limbs
This is achieved in much the same way as joining the head in that you need to stab deeply in all directions to ensure all the fibres bind to each other.
For Chestnut I started with the hind legs so that it would be easier to see how her forelegs would be positioned once she was sat upright. Note the thigh part of the leg for my squirrel has already been sculpted as part of her body shape which ends up in a sitting pose. So when I refer to adding the hind leg, it is in fact the section below her thigh bone.
1) Needle felt each leg onto the body by stabbing the wool at the fluffed up end of the leg into the body.
For Chestnut I had formed her feet using wool wrapped and felted over wire (see my tutorial on tiny feet and toes here) so I had to take extra care not to break my needle by hitting the wire when stabbing.
2) Continue at all angles for both legs until firmly and securely in position.
Once in place I added more wool round the joins as fur and then decided to felt some of Chestnut’s back-fur too.Aw she is looking very happy and mischievous already!
3) Then do the same for the forelegs.
As the shoulder part needs to be attached along the side of the torso it is not sufficient to merely stab from the outer side at the shoulder blade to keep the limb in place.
To felt at an angle under the ‘armpit’ and also to ensure the leg cannot pull away at the join, stuff some extra(fluffed up) wool into the join and stab it securely into place (not too deep to push the lighter coloured wool through to the other side of the shoulder).
Tip: To get the correct positioning and symmetry when adding the second foreleg(as quite often you will want to play around with this until you get it right) you may find it easier to stab the second leg into place only a tiny bit at first; enough to hold the leg in place but not so much that you can’t alter the position if you need to. You can then step away to view your animal from a distance, then adjust until happy with it.
….then secure into place.
Once all limbs are joined onto your animal you can then felt over the joins with fur. You wouldn’t even know your animal started out as separate appendages.
Felting is relaxing and fun especially when shared!!
Last week I travelled back to where I grew up; Grantham in South Lincolnshire, to spend a week with my family and catch up with old friends.
I had a relaxing time away from my office job, walked the quaint streets of Stamford and visited the home of the Bakewell pudding in the Peak District. And… you may have guessed – (as I am quite addicted to my felting)- that I also took some of my wools with me to get on with my latest creation.
I also had the opportunity to spend one of my days showing my mum some basic needle felting techniques. Felting is not just for times alone just you, the wool and needles and your imagination but is so much fun to do with others – especially for friendship craft days, and in my case family time! for me and my mum, together sharing quality time. 🙂
Haha, my dad peered in from time to time and watched and enjoyed the artistic flair (claiming I got it all from him). They are both artistic! I think we all can be in so many different ways!
My week was sooooo relaxing and quiet away from the hustle and bustle of the city and work. Home cooked food and love and hugs and then some felting (of course)- all I could wish for in a holiday.
So I wanted to show you some pictures of my mum’s very first landscape piece. My mum is a painter and loves going to her art class each week and produces some beautiful water colour paintings. She loves using colour and really appreciates nature just like me which is illustrated in her work!
So here we go, she needed no help from me after I showed her a few basic hints. I think it is really great. My mum used soft luxurious merino wool from World of wool.
I have named it ‘Beside quiet waters’ as it reminds me of David’s Psalm 23 in the bible and really sums up my week with them. Thanks mum for our time together!
Mum then painted the sky onto her canvas and stuck the felted piece onto it…. beautiful!!
Of course on leaving to come back to London I left some wools and some needles with mum.. can’t wait to see what she makes next…
Ever wondered how to get those luscious layers of long fluffy fur on your needle felted animal? more importantly how can you get them to look natural and stay put!?
Whilst making a badger I took some photos of him along the way to show you. It is fairly simple to do but does take quite a long time although once done it does give you a real sense of satisfaction and the fur really does feel soft and fur-like. Of course the end result texture does depend on the type of animal you are felting and the type of wool you wish to use.
If you are new to this amazing art form then before you get started – check out my tutorial ‘what is needle felting’ for basic needle felting techniques.
What wools to choose?
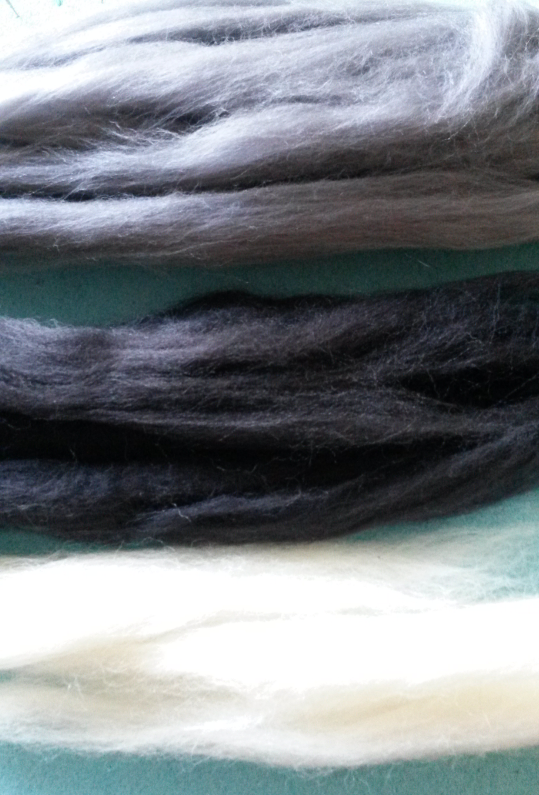
For my needle felted badger I had already made his body shape by sculpting with natural carded wool. I recommend wool batts which come in long thick sheets, making it easy to pull sections off and the wool is really fast to felt with.
Then for the top coat (which I will be demonstrating in this tutorial) I mixed grey and black merino wool tops with a few strands of some natural undyed wool tops for a rich cream colour. I particularly love the merino sheep wool as it comes in a variety of animal colour options and is lovely and soft to touch. Natural wool tops in breeds such as Jacob or corriedale are quick to felt and are a little more fibrous to the look and feel. When using wool tops the fibres all lay in one direction so they are perfect for cutting lengths and adding these to resemble long fur on your needle felted animal. If you would like to you could use other luxurious fibres such as baby alpaca.
small scissors (I just used nail scissors but you could get some really cute stork embroidery ones for your projects – really sharp and useful for trimming long fur)
you can also use a small ordinary sewing needle to fluff up fur at the end.
NB I didn’t want to completely flatten my fur down but allow it to stand out with some volume so only used one needle at a time rather than a multi-needle tool and changed my needle depending on detail and thickness of wool being needled. .
As you can see I have completed my badger except for his back fur and tail at this point. For how to make a badger head please see my tutorial here.
I love the fur on a badger’s back, it is greyish in colour but with flecks of black, brown and cream.
Now you could use carding brushes or dog brushes to blend the colours of wool but I wanted to keep the fibres all going in one direction as much as possible at this point and with block strands of full colour in black / cream / grey so not fully blended.
To achieve this lay lengths of each colour on top of each other and then using your thumb and first finger of each hand at each end of the wool lengths, pull your hands apart pulling the wool away from each other. Lay each layer again on top of each other (fibres all in same direction) and keep going until all the wool is blended as much as you want it to be.
Then take narrow strands of the mixed wool the width of one or two fingers
… and cut these into small pieces, roughly the same length. The length will vary as we felt as some areas will have longer fur than others…
They don’t need to be perfect as no badger will have its own hairdresser with a perfect hair cut. 🙂
I will now demonstrate what you will do with each piece..
Take a piece and slightly pull in the centre in a bow-like shape
To layer the fur we need to felt from the back end of the animal layer over layer until reaching the head… so place the first piece at the very bottom of the badger’s rump.
Felt using your barbed needle along the centre parting of the wool piece in various directions, the depth should go down to the first few barbs but the aim is to felt shallow but in many directions for the wool to stay put.
You can also felted slightly below the centre line onto the bottom half of the piece to ensure it is in place.
Now carefully pull down the top section
… and ensure there are no stray edges by encouraging the wool in from both sides..
Now felt along the top folded edge until it is firmly in place.
Felting along the centre and then on the top edge in this way helps the wool to stay in place. Give a tiny tug to check it doesn’t easily pull out. NB a really good tug will likely pull fur out hence why these cute little animals are not meant to be toys to be pulled around…they should take cuddles and some handling though so ensure you felt well.
Again ensure you felt in many directions and then continue on to the next piece…layering the wool to create a fur look..
When moving up to the next layer, position the wool just above the last layer – you don’t want gaps in between of core wool showing so don’t leave too big a gap…
Don’t worry about the fur being too long or tufts sticking out, as you can give the end of the fur a trim as you go (time to use your hairdressing skills :-))
By the way this doesn’t need too much skill and I am definitely no hairdresser, just trim in various directions for a more natural fluffy look.
Any bits you trim off can be used for other felting projects or even for any areas you wish to fill in later at the edges so don’t waste them just put aside in a neat pile for later..
Optional; For the back end of the badger I wanted this to be extra fluffy with the fur standing up slightly on end so to achieve this, run fingers through the strands of wool to fluff up and stab the wool all over between the strands, not to felt down but to fluff up…(
As you can see we have a way to go but we are on our way !!
Aw look at him waiting so patiently to be finished 🙂
You may find it easier to turn his body as you go – work with whatever position you find comfortable and whatever means less squishing of his cute little nose into the felting mat..
As you reach the main length of his body you may now decide to cut the lengths of wool a bit longer
For a more realistic look vary the colours so that you sometimes get more black or cream in the strand you felt…mix it up a bit..
Keep going…
Almost there… take a breather – have a hot chocolate !!
Specifically for the badger- when reaching the neck line, overlay some strands of black wool at the base of the ears …
Then finish off with some more of the cream at the base of his head..
You can use a normal sewing needle now if you wish to carefully fluff up the fur where it may have flattened slightly..
And there you have a gorgeous badger! fully furred waiting to be cuddled and fit to be loved!!
I added his tail after this which also had several layers of wool as fur…
Here he is all completed !! so playful !!
Long Animal Fur video!
Find it easier to learn by watching how it is done?
My ‘Long animal fur’ video tutorial is NOW AVAILABLE on my YouTube channel in 4 parts.
<<<Click the donkey picture to start watching part 1
You’ll learn even more techniques for adding long fur (as demonstrated on this adorable miniature donkey).
Did you find this tutorial helpful? What would you like to learn about next? Please leave comments. Why not post a photo of your own creations?
Don’t ever miss out on my latest tutorials! Insert your email address and click the ‘Follow’ button on the right hand panel to receive notifications of when the next post is up..:-)
My good friend Emma recently turned 40 and she absolutely loves guinea pigs so it was very easy to decide what I should make her as a surprise present for her party..
So here he is … a cute bundle of guinea pig fluff!
As usual I took a few pictures along the way to show you how I made him. With some time, some love, some wool and a barbed needle you too can make a felted guinea pig just like him!
If you haven’t tried needle felting before and would like to know what it is all about and see some basics first, feel free to jump to my ‘what is needle felting’ page first before trying the guinea pig..
Or if you don’t have the time but would love me to make one for you or as a present for a loved one, let me know what colour, fur length etc by sending me a bespoke order at my Etsy shop.
So, to get started you will need:
Foam pad or felting brush base (so not to stab your knees and to provide a firm base to work on)
Felting needles of various sizes; wider for initial shaping and finer for detail later on
A needle holder; this is optional but for making basic shapes it saves time to use 2 or 3 needles at the same time. I use the 3 needle holder pen by Clover.
Wool to felt with; I used natural corriedale wool to make the guinea pig’s core as I find it felts well and ends up nice and firm. I then used merino wool as the top coat as it’s soft and comes in some lovely animal fur colours. I buy my wools at a very good price from World of Wool.
Small scissors
Carding/dog brushes to blend wool (optional)
I hope the pictures will explain what I did at each phase so I haven’t gone into too much description for each picture. Feel free to ask me any questions if you are unsure of how to do anything.
Start with a basic egg shape by rolling tightly a nice length of the corriedale wool and then felting it into shape with medium firmness. This will become the torso.
.
Felt more at one end and use hands to carefully sculpt one end slightly narrower (to become the head end)
Roll two equal sized pieces of wool
Fold and felt them into doughnut shapes
Then felt them well onto the sides of the torso at the bottom end to become hind legs
Make sure they look even both sides
Add and felt over some small tufts of wool to make the edges softer where the limbs join where needed
… especially around the rump
Then turn over and do the same underneath for an even well blended finish.
Take two more pieces of wool but this time
…fold to form two triangles
Felt onto the sides of the chest end and mould to form fore legs
Again check the legs are equal or you can position one slightly in front of the other to provide a more natural pose.
Put the body to one side and roll another piece of wool and form a smaller egg shape. Felt medium firm again and then sculpt to make into a head shape. Score a nose and mouth using two needles at one time
The shape is fairly similar to a rabbit head shape…add any wool where needed to accentuate the jaw line and cheeks
Now attach the head firmly to the body. I felted a good piece of loosely felted wool to the bottom of the head first so when attaching there were lots of fibres to help attach it and this helped to form a neck.
You now have a guinea pig base!!
Now comes the fun (but tedious at times) of adding some wool colour in layers to give him his character.. I mixed some wool together to get the colours I liked, one part corriedale wool and two parts light chocolate brown merino wool. I used two dog brushes to blend the wool (so much cheaper than carding brushes and they work just the same!).
Start from the tail end (although guinea pigs don’t have tails)and work towards the head. Felt some wool in the same direction but some in other directions and with different lengths too to get a more natural look!
When you reach his head add two small doughnut shapes of coral coloured wool for his ears and felt them in well to fix to his head. I decided to give him a cream coloured face with cream tuft on top of his head but you choose whatever colour you fancy. For the head start at the very top with the fur layers and work down towards the chin.
Add more detail to the nose with the brown and a tiny bit of black for his mouth opening. To make him look like he has rummaged around in the hay felt a tiny fleck of brown under the cream fur on his muzzle . For any layers that are too long or for shaping the fur on the face, used nail scissors to carefully trim the wool.
(I went back and added a strip of the cream across his middle taking care to pull back the layers of brown already felted..)
Here you can see his eyes; brown overlaid with black and a few tiny white dots to give the illusion of light reflection.
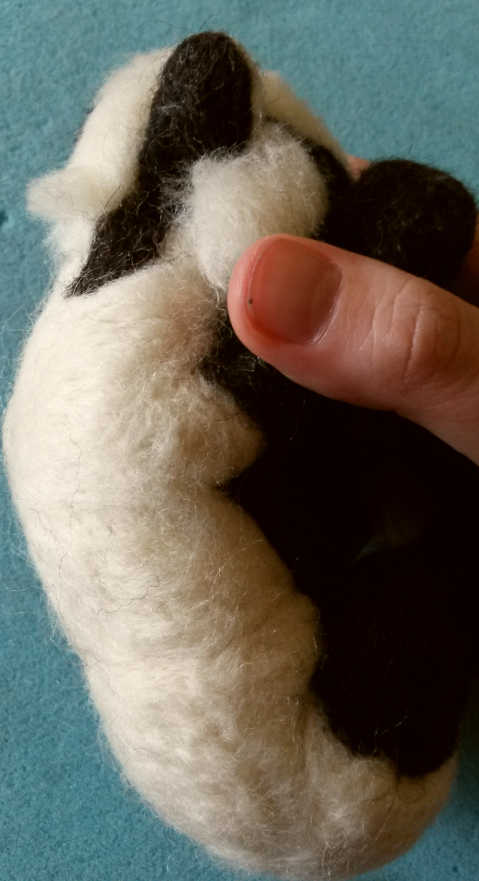
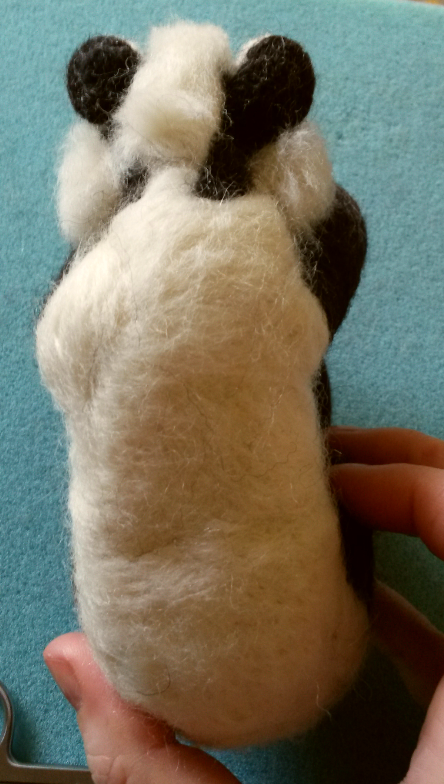
You could leave him with no feet but I decided to give him some. Remember guinea pigs have 4 toes on each foot at the front and 3 at the back!
To achieve this use short lengths of pipe cleaners for his toes and wrap the coral coloured wool over each toe binding the pieces together at one end. Then wrap several layers of the wool over the end to form the ball of the foot. Wind more wool over the length of each foot and felt tightly to ensure all fibres are secure.. then felt them to the legs!!
Go over the entire surface of your guinea pig with a normal sewing needle if needed to liven up any flattened areas of fur!
Squeeeeeeeeeee!!
I hope you enjoyed the tutorial!! it was fun to make him and my friend Emma almost cried when she saw him at her party! 🙂
Watch out for more tutorials and creations and follow my blog to receive emails of when new posts are up so you don’t miss out.
Today I just want to share some photos with you to give you a taster of the various stages that went in to needle felting my latest bunny. I haven’t photographed everything but stopped at various times along the journey to take a shot. Please also see here for more detail of how I made his ears. It doesn’t matter too much about what order you add each limb or ears or facial features. It is fun to experiment with different ways of doing things. You will soon find out what works best for you.
I have found though that whenever you add the eyes your creation immediately gains personality and you also get a tiny break from all the time consuming needle action. I love doing the eyes and ears best.
Basic ball to start for bunny head. Core corriedale wool.
Adding cheeks and face shape
Added torso.
Additional layer in mink coloured merino wool to form base fur.
Shoulders and thighs firmly felted
Blue and grey merino wool mixed then shallow felted to become bunny fur.
Leaving his tummy in mink.
Preparing feet
Cute bunny paw detail
Feet firmly attached
More Wool added to give shape and smooth contours
Nose and mouth coming to life
Comparing with my original bunny to check size and proportions, angle of feet etc
Forming ears. See more about making ears in a tutorial here.
Ears fixed
Eyes alert
Can’t resist a cuddle
Front paws and holding a carrot.
My sister in law popped by, bunny made her smile 🙂
Adventure for bunny in the garden for nature’s backdrop!
To see more pictures of this cute bunny and to order one as a gift just like him for someone you love, please visit my Etsy shop.
To follow my blog and receive email updates about latest fit to be loved creations and tutorials, simply enter your email address on the top right panel of my ‘find out more’ page.
Please rate Fit to be Loved on Trustpilot. Your feedback is very much appreciated :-)
Need to contact me?
07793 350882
fittobeloved@mail.com
Links Disclaimer:
My site includes links for where to source needle felting tools and materials. These are my personal recommendations and from my favourite suppliers who I trust and who have excellent reviews. Some are affiliate links so I may receive a small commission at no extra cost to you. This supports my website and enables me to continue to provide valuable content and for that I am so very grateful to you – Thank you!!